
Have you ever wished for extra storage without taking up floor space? Building a shelf inside your wall is a smart way to add room for your books, decorations, or essentials while keeping your space neat and stylish.
It might sound tricky, but with the right steps, you can create a built-in shelf that looks custom-made just for your home. You’ll discover simple, clear instructions that guide you through the process, even if you’re new to DIY projects.
Ready to transform your wall and boost your space? Let’s get started!
Choosing The Right Wall
Choosing the right wall is key to building a sturdy shelf inside a wall. The wall must support the shelf’s weight safely. It also needs to have space for the shelf cavity without damaging wiring or plumbing. Proper wall selection helps avoid costly repairs and ensures the shelf lasts long.
Identifying Load-bearing Walls
Load-bearing walls carry the house’s weight from the roof and upper floors. Cutting into these walls can weaken your home’s structure. Check your house plans or ask a professional to find load-bearing walls. Avoid building shelves in these walls unless you add extra support.
Locating Studs And Wiring
Studs are vertical wooden or metal beams inside walls. Shelves need to attach to studs for strength. Use a stud finder to locate them. Also, check for wiring and pipes to avoid drilling into them. Mark the safe spots before cutting the wall.
Selecting Suitable Wall Types
Drywall and plaster walls are common for indoor shelves. These walls are easy to cut but need studs for support. Brick or concrete walls are strong but harder to modify. Choose a wall type that matches your tools and skill level. Plan for extra anchors if the wall is not wooden.

Credit: www.create-enjoy.com
Gathering Materials And Tools
Building a shelf inside a wall requires careful preparation. Gathering the right materials and tools is the first step. Without proper equipment, the project can become difficult and unsafe. Having everything ready helps the work go smoothly and saves time.
Essential Tools Checklist
- Stud finder to locate wall studs
- Measuring tape for accurate dimensions
- Level to keep the shelf straight
- Power drill with drill bits
- Jigsaw or drywall saw for cutting
- Screwdriver set for fastening screws
- Hammer for nails and adjustments
- Utility knife for trimming drywall
- Pencil for marking measurements
- Clamps to hold pieces in place
Recommended Materials
- Wood boards for the shelf surface
- Wood screws or drywall anchors
- Drywall to patch the wall after cutting
- Wood glue for added strength
- Sandpaper to smooth edges
- Primer and paint for finishing
- Metal brackets or shelf supports
- Stud framing lumber for support
Safety Equipment
- Safety goggles to protect your eyes
- Work gloves to guard your hands
- Dust mask to avoid inhaling dust
- Ear protection when using power tools
- First aid kit nearby for emergencies
Planning The Shelf Design
Carefully measure the wall space to ensure the shelf fits perfectly. Choose sturdy materials that support the shelf’s weight and match your room’s style. Plan the shelf depth and height for easy access and balanced look.
Planning the shelf design is a crucial step. It sets the foundation for a successful project. A well-thought-out design ensures both style and functionality.Measuring Wall Space
Start by measuring the wall space. Use a tape measure for accuracy. Record the height, width, and depth. This helps in visualizing the shelf’s location. Consider obstacles like electrical outlets or pipes. Note them down to avoid issues later.Determining Shelf Size And Depth
Decide on the shelf size based on your measurements. Ensure it fits within the available space. Consider what items you’ll store. This determines the necessary depth. Too shallow, and items may fall. Too deep, and you lose space efficiency.Designing For Style And Function
Blend style with function for a perfect design. Choose materials that match your room’s decor. Wood offers a classic look. Metal gives a modern touch. Think about shelf height. Lower shelves are ideal for heavy items. Higher ones suit decorative pieces.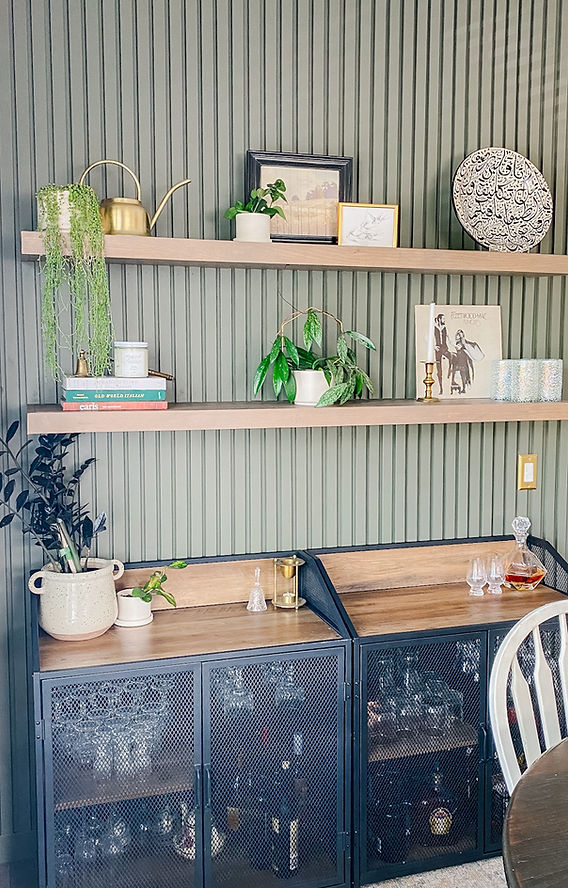
Credit: www.baileyathome.ca
Preparing The Wall
Preparing the wall is a crucial step before building a shelf inside it. This phase ensures that your work area is safe, accurate, and ready for the installation. Skipping or rushing through preparation can lead to mistakes, wasted materials, or even damage to your home.
Marking Cut Lines
Start by measuring the space where the shelf will fit. Use a pencil to draw clear, straight lines that outline the exact size of your shelf. Double-check these measurements to avoid cutting too large or too small an opening.
Using a level helps keep your lines straight and your shelf even. Have you ever cut drywall only to realize the opening was crooked? Accurate marking saves you from that frustration.
Protecting Surrounding Areas
Protect your floors and nearby furniture with drop cloths or old sheets. Drywall dust can spread everywhere, so covering surfaces keeps cleanup easier. Tape plastic sheets over vents and doorways to prevent dust from traveling to other rooms.
Wear safety goggles and a dust mask to protect your eyes and lungs. Protecting yourself is just as important as protecting your home.
Cutting The Drywall
Use a drywall saw or a utility knife to carefully cut along your marked lines. Start with a shallow cut to score the drywall, then deepen it gradually to avoid cracking or damaging the surrounding wall. Take your time—rushing can cause uneven edges.
After cutting, remove the drywall piece gently. If you encounter any resistance, check for wires or pipes before proceeding. Have you ever cut into a hidden wire? It’s a costly mistake you want to avoid.
Framing The Shelf Cavity
Framing the shelf cavity is a crucial part of building a shelf inside a wall. This step creates the structure that will hold your shelf securely and ensures everything fits perfectly within the wall space. Taking your time here will save you from frustrating adjustments later.
Installing Support Braces
Start by adding support braces inside the wall cavity. These braces act like the backbone of your shelf, holding the weight and keeping the shelf steady.
Use sturdy wood pieces such as 2x4s or 1x4s, cut to fit snugly between the studs. Nail or screw them in place horizontally where your shelf will sit.
Think about the weight your shelf will carry. Heavy items need more robust and closely spaced braces to prevent sagging.
Securing The Frame
Once the braces are in place, secure the frame firmly to the wall studs. Use long screws for a strong hold, driving them through the braces into the studs behind.
This step prevents any wobbling or movement once the shelf is installed. Loose framing can cause the shelf to tilt or even collapse over time.
Double-check each connection by giving the frame a gentle shake. If it moves, add extra screws or nails to tighten everything up.
Ensuring Level And Stability
Check that your frame is perfectly level before moving on. Use a spirit level on the braces and adjust if needed by adding shims or tightening screws.
Stability is just as important as levelness. Make sure the frame doesn’t flex or shift under pressure.
Ask yourself: Will this frame support the shelf and its contents safely? If you hesitate, reinforce the frame until you’re confident it’s rock solid.

Credit: www.youtube.com
Installing The Shelf
Installing a shelf inside a wall requires precision and the right approach to ensure it is sturdy and blends seamlessly with your space. The process involves selecting the best materials, securely attaching the shelf, and adding finishing touches to enhance both function and style. Let’s break down these key steps so you can create a hidden storage spot that lasts.
Choosing Shelf Materials
Your choice of materials affects durability and appearance. Solid wood offers strength and a classic look, while plywood is budget-friendly and easy to cut to size. For a modern touch, consider metal brackets paired with glass or acrylic shelves.
Think about the shelf’s purpose: will it hold heavy books or light decor? This helps you decide thickness and material type. Have you checked if your wall material supports your chosen shelf type?
Attaching The Shelf
Secure attachment is crucial for safety and longevity. Use a stud finder to locate the wall studs for the best support. If studs aren’t available where you want the shelf, opt for heavy-duty wall anchors or toggle bolts.
Align the shelf brackets carefully and use a level to keep everything straight. Pre-drill holes to prevent wood splitting and screw the brackets firmly into place. I once overlooked this step and ended up with a wobbly shelf that needed redoing.
Finishing Touches
Finishing your shelf enhances both its look and protection. Sand edges smooth to avoid splinters and apply paint or stain that matches your room’s decor. Don’t forget a clear sealant to guard against moisture and wear.
Consider adding LED strip lights under the shelf for a stylish glow. What small detail could you add to make your shelf uniquely yours?
Painting And Sealing
Painting and sealing your shelf inside the wall is the final touch that not only enhances its appearance but also protects it from damage. This step ensures your shelf remains durable and visually appealing over time. Paying attention to the details during this phase can make a big difference in the overall quality of your project.
Preparing Surfaces
Start by sanding the shelf surface smoothly to remove any rough spots or splinters. Dust off all debris thoroughly to avoid imperfections in the finish. If you’re painting over raw wood, apply a primer to help the paint stick better and last longer.
Applying Paint Or Stain
Choose paint or stain based on the look you want. Paint offers solid color and coverage, while stain enhances the natural wood grain. Apply thin, even coats using a brush or roller, allowing each layer to dry completely before adding the next.
Adding Protective Coatings
Seal your shelf with a clear protective coat like polyurethane or varnish to guard against scratches and moisture. This step is crucial if your shelf will hold heavy or frequently used items. Apply multiple thin layers, sanding lightly between coats for a smooth finish.
Maximizing Shelf Use
Maximizing the use of your built-in wall shelf goes beyond just placing items on it. It’s about creating a space that serves your needs, looks great, and stays functional over time. How you organize, decorate, and maintain your shelf can make a big difference in its usefulness and appeal.
Organizing Items Efficiently
Think about the purpose of your shelf before arranging anything. Group similar items together—books with books, kitchen spices with spices, or tools with tools. This makes finding what you need faster and keeps your shelf looking tidy.
Use vertical space smartly by stacking items or adding small baskets to separate loose objects. Don’t overcrowd; leaving some breathing room makes everything easier to access and visually balanced. Have you considered labeling containers or shelves? It can save time and reduce clutter.
Decorative Ideas
Your wall shelf can be more than storage—it can be a focal point in your room. Add a few decorative touches like small plants, framed photos, or unique collectibles to personalize the space. Mixing function with aesthetics keeps the shelf interesting without overwhelming it.
Try alternating the height and size of objects for a dynamic look. Use colors that complement your room’s palette to create harmony. Remember, less can be more—too many decorations might hide the practical use of your shelf.
Maintenance Tips
Regular upkeep keeps your shelf looking fresh and functional. Dust it often to prevent buildup, especially if you have delicate items or electronics stored there. Check for any signs of wear or damage, like loose screws or sagging boards, and fix them promptly.
Rearrange items occasionally to avoid dust settling in hard-to-reach spots and to refresh the look. Do you find that your shelf starts to feel cluttered over time? Taking a few minutes to declutter every few weeks can keep it useful and visually appealing.
Frequently Asked Questions
What Tools Are Needed To Build A Shelf Inside A Wall?
You need a stud finder, level, drill, screws, drywall saw, measuring tape, and wood for the shelf. These tools help ensure accuracy and safety when building a shelf inside a wall.
How Do You Find The Best Spot Inside The Wall For A Shelf?
Use a stud finder to locate studs and avoid wiring or plumbing. Choose a space between studs for stability and enough depth to fit your shelf.
What Materials Are Best For Building A Shelf Inside A Wall?
Use sturdy wood like plywood or MDF for the shelf. Drywall anchors and screws secure the shelf frame. Choose paint or finish matching your wall for a seamless look.
How Much Weight Can An Inside Wall Shelf Hold?
Weight capacity depends on stud spacing, shelf material, and mounting hardware. Properly built shelves can hold 20-50 pounds. Always use strong supports and avoid overloading.
Conclusion
Building a shelf inside a wall adds space without taking room. It keeps your area neat and organized. Follow each step carefully to avoid mistakes. Use the right tools and materials for safety. Take your time and measure twice before cutting.
Enjoy the satisfaction of your new built-in shelf. This simple project can improve your home’s look. Try it yourself and see how easy it can be.


