
Are you looking to add style and extra storage to your kitchen without taking up counter space? Floating shelves are a simple, modern solution that can transform your kitchen instantly.
Imagine having a place to display your favorite dishes, spices, or cookbooks, all within easy reach. In this guide, you’ll learn exactly how to build floating shelves that fit your kitchen’s look and your needs. By the end, you’ll have the confidence to create shelves that are both strong and stunning.
Ready to upgrade your kitchen? Let’s get started!

Credit: www.youtube.com
Choosing Materials
Choosing the right materials is key to building sturdy and stylish floating shelves. The materials affect the shelf’s durability, look, and weight capacity. Selecting quality wood, reliable hardware, and proper finishing supplies ensures your shelves last long and fit your kitchen’s style.
Types Of Wood
Wood choice impacts both strength and appearance of your shelves. Solid hardwoods like oak, maple, or walnut offer great durability. Pine and cedar are softer but easier to cut and shape. Plywood is budget-friendly and resists warping well. Consider the wood grain and color to match your kitchen decor.
Hardware Essentials
Strong hardware keeps floating shelves secure and safe. Look for heavy-duty wall anchors and brackets designed for floating shelves. Steel or metal brackets provide excellent support. Use screws that fit your wall type—drywall, masonry, or studs. Proper hardware prevents shelves from sagging or falling.
Finishing Supplies
Finishing supplies protect wood and enhance its beauty. Sandpaper smooths rough edges and surfaces before finishing. Choose paint or wood stain to add color and protect the wood. Clear sealants or polyurethane provide a durable, water-resistant layer. Finishing makes shelves easier to clean and maintain.

Credit: www.youtube.com
Tools Needed
Before you start building floating shelves in your kitchen, gathering the right tools is essential. The right equipment makes the process smoother and safer, helping you achieve a professional look. Let’s break down what you’ll need into three categories: basic tools, power tools, and safety gear.
Basic Tools
Basic tools are the foundation for any DIY project, including floating shelves. These are items you might already have around your home.
- Measuring Tape:Accuracy is key in shelf placement. A reliable tape measure ensures your shelves line up perfectly.
- Level:A small bubble level helps you avoid shelves that tilt or look crooked.
- Pencil:Mark where you’ll drill and mount the shelves for precise installation.
- Stud Finder:It locates the wall studs, which support the weight of your shelves and their contents.
- Screwdriver:Handy for tightening screws manually if needed.
Power Tools
Power tools speed up the work and often improve the quality of your build. If you don’t own some, borrowing or renting is a good option.
- Drill:Essential for making holes and driving screws into the wall or shelf brackets.
- Stud Finder with Wire Detection:Some advanced models prevent accidental drilling into electrical wires, adding extra safety.
- Jigsaw or Circular Saw:Useful if you need to cut your shelf boards to size yourself.
- Sander or Sandpaper:Smooth edges and surfaces make your shelves look polished and prevent splinters.
Safety Gear
Safety should never be an afterthought. Protect yourself with the right gear to avoid injuries during your project.
- Safety Glasses:Protect your eyes from dust and wood chips.
- Ear Protection:Power tools can be loud, so earplugs or earmuffs help protect your hearing.
- Dust Mask:Keeps you from inhaling sawdust, especially when cutting or sanding wood.
- Work Gloves:Protect your hands from splinters and sharp tools.
Have you ever started a project only to realize you’re missing a key tool? Taking a moment to prepare your toolset saves time and frustration. What tools do you already have, and which will you need to pick up before starting?
Planning Shelf Design
Planning shelf design is the first step to successful floating shelves in your kitchen. Thoughtful design helps the shelves fit well and look great. This phase focuses on space, size, and style. Each factor affects how practical and attractive the shelves will be.
Measuring Space
Measure the wall area where shelves will go. Note width, height, and depth available. Check for obstacles like outlets, switches, or cabinets. Use a tape measure for precise numbers. Write down all measurements clearly. Accurate measuring avoids mistakes and wasted materials.
Deciding Shelf Size
Choose shelf dimensions based on the space and what you plan to store. Longer shelves hold more but need strong support. Depth depends on items placed, usually 8 to 12 inches. Height between shelves should allow easy access and enough room for items. Balance size with kitchen layout for a neat look.
Selecting Style
Pick a style that matches your kitchen decor. Options include natural wood, painted finishes, or metal brackets hidden inside. Floating shelves appear clean and modern. Consider thickness and edge shape for the shelf boards. Simple lines suit modern kitchens. Rustic styles work well with natural wood and visible grain.

Credit: www.create-enjoy.com
Preparing The Wood
Select smooth, sturdy wood free from cracks or knots for best results. Sand all surfaces evenly to ensure a clean, polished finish before assembly.
Preparing the wood is a crucial step in building floating shelves. Quality preparation ensures the shelves are sturdy and visually appealing. This process involves cutting, sanding, and finishing the wood.Cutting To Size
Start by measuring your kitchen space. Precision is key here. Mark the wood using a pencil and ruler. Use a circular saw to cut the wood. Ensure each piece is the correct length. Double-check measurements before cutting. A wrong cut can ruin the wood. Use a clamp to hold the wood steady. This prevents shifting during cutting.Sanding Surfaces
Sanding smooths rough edges. It prepares the surface for finishing. Use medium-grit sandpaper to start. Sand along the grain of the wood. This prevents scratches. Move to fine-grit sandpaper for a smooth finish. Wipe the wood with a damp cloth. This removes dust and particles. Ensure all surfaces feel smooth to the touch.Applying Finish
Choose a finish that matches your kitchen style. Stains enhance the wood’s natural look. Paint offers a more vibrant color. Use a brush or a cloth to apply the finish. Apply evenly in thin layers. Allow each layer to dry fully. Sand lightly between coats for a smooth finish. This step protects the wood from moisture and wear. Your shelves will look polished and professional.Installing Brackets
Installing brackets is a crucial part of building floating shelves in your kitchen. These brackets will hold the weight of your shelves and everything you place on them, so precision and strength matter. Getting this right ensures your shelves stay sturdy and safe over time.
Locating Studs
Start by finding the studs in your kitchen wall. Studs provide the necessary support for your brackets to hold heavy kitchen items.
Use a stud finder or gently tap the wall to listen for a solid sound indicating a stud. Mark the edges of each stud to know exactly where to drill.
Have you ever hung something heavy that fell because it wasn’t secured to a stud? Avoid that disappointment by double-checking your stud locations.
Marking Drill Points
Once you locate the studs, measure and mark where each bracket will go. Make sure the marks are level to keep your shelves straight.
Use a pencil to mark drill points on the studs, matching the bracket holes. Check the distance between brackets to evenly distribute the weight.
Taking time to mark carefully saves you from crooked shelves and extra holes in your wall.
Mounting Brackets
Now it’s time to drill pilot holes on your marked points to prevent the wood from splitting. Choose drill bits that match your screws for a snug fit.
Hold the brackets in place and drive screws into the pilot holes, securing the brackets tightly to the studs. Use a level to confirm the brackets are perfectly horizontal.
Imagine the relief of seeing your shelf hold your favorite cookbooks or spice jars without any wobble—proper bracket mounting makes that possible.
Mounting The Shelves
Mounting floating shelves in your kitchen needs care and precision. Proper mounting ensures the shelves hold weight and look neat. Follow these simple steps to mount your shelves securely and evenly.
Aligning Shelves
Start by marking the wall where the shelves will go. Use a level to make sure marks are straight. Measure the distance between brackets to match shelf size. Check that all marks are at the same height. This avoids crooked shelves that look unprofessional.
Securing Shelves
Drill holes at your marked spots carefully. Insert wall anchors if you do not hit studs. Attach brackets tightly with screws to hold weight. Slide the shelf onto the brackets, making sure it fits snugly. Tighten any screws that keep the shelf stable.
Checking Stability
Press down gently on the shelf to test strength. Look for any movement or wobbling. If the shelf moves, tighten screws or add supports. Place some items to check balance and support. A stable shelf keeps your kitchen safe and organized.
Decorating And Maintenance
Decorating and maintaining your floating shelves in the kitchen is key to keeping them both functional and beautiful. Proper styling not only enhances the space but also reflects your personality. Regular care helps your shelves last longer, saving you time and money on repairs.
Styling Tips
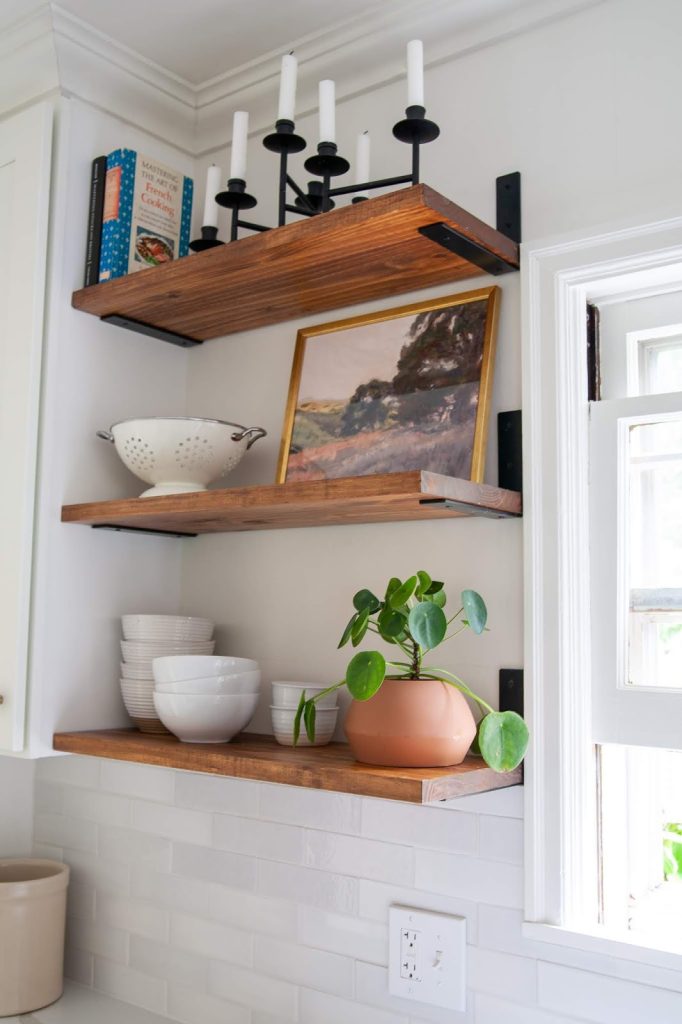
Think about what you want to display on your shelves. Mix practical items like spice jars with decorative pieces such as small plants or cookbooks to create balance. Use baskets or boxes to keep clutter hidden and maintain a clean look.
Try grouping items in odd numbers, like three or five, for a natural and appealing arrangement. Don’t overcrowd the shelves; leave some empty space to let each item stand out. Changing the display seasonally can refresh your kitchen’s vibe without extra cost.
Cleaning Advice
Dust your shelves weekly using a soft cloth or microfiber duster to prevent build-up. For wooden shelves, a damp cloth with a mild soap solution works well, but avoid soaking the wood. Dry thoroughly to prevent moisture damage.
Check for grease or food splatters near cooking areas and wipe them promptly. Avoid harsh chemicals that can strip the finish or cause discoloration. Have you noticed how a quick clean brightens up the entire kitchen?
Repairing Damage
Small scratches can be fixed with a wood touch-up marker or crayon that matches your shelf color. For loose shelves, tightening screws or brackets usually solves the problem. If the damage is more severe, like cracks or warping, replacing the affected shelf section might be necessary.
Keep an eye on weight limits to avoid overloading, which causes strain and potential damage. Have you ever experienced a shelf sagging? Addressing it early prevents bigger repairs later. Regular checks ensure your floating shelves stay safe and sturdy.
Frequently Asked Questions
How Do I Start Building Floating Shelves In My Kitchen?
Begin by measuring your wall space and choosing sturdy brackets. Select wood that matches your kitchen decor. Drill pilot holes and secure brackets firmly before placing the shelf.
What Materials Are Best For Kitchen Floating Shelves?
Use solid wood like oak, maple, or pine for durability. Metal brackets offer strong support. Choose moisture-resistant finishes to protect shelves in kitchen humidity.
How Much Weight Can Floating Kitchen Shelves Hold?
Weight depends on bracket strength and wall anchors. Properly installed shelves can hold 20-50 pounds. Always check manufacturer recommendations for safety.
Can I Install Floating Shelves Without Studs?
Yes, use heavy-duty wall anchors or toggle bolts. Anchors must support the shelf’s weight plus items. Avoid overloading shelves without stud support.
Conclusion
Building floating shelves in your kitchen adds style and space. You only need basic tools and clear steps. Measure carefully and choose strong wall anchors. Take your time to ensure shelves hold weight safely. Enjoy organizing spices, dishes, or decor on your new shelves.
This simple project improves your kitchen’s look and function. Try it yourself and see the difference. Small changes can make a big impact. Floating shelves bring both beauty and utility to any kitchen space.


