
Are you looking to add more storage or style to your space without spending a fortune? Making shelves out of wood is easier than you think, and the results can transform any room.
Imagine having shelves that fit perfectly, match your decor, and give you the satisfaction of creating something with your own hands. In this guide, you’ll discover simple steps and expert tips that make building wooden shelves a fun and rewarding project.
Ready to turn plain walls into practical, beautiful storage? Let’s get started!
Choosing The Right Wood
Choosing the right wood for your shelves is more important than you might think. The wood you pick affects not only the look of your shelves but also how long they last and how much weight they can hold. Taking time to understand your options can save you from future headaches and ensure your shelves fit perfectly with your space and needs.
Types Of Wood For Shelves
There are many types of wood you can use, each with its own benefits. Pine is soft and easy to work with, making it great for beginners or lightweight shelves.
Oak and maple are hardwoods that offer strength and durability. They hold up well under heavy loads and resist dents and scratches, which is perfect if you want shelves that last.
Don’t overlook plywood—it’s affordable, stable, and can be finished to look like real wood. However, make sure to choose a high-quality plywood with a smooth veneer for the best appearance.
Wood Quality And Durability
Not all wood is created equal, even within the same type. Look for wood that is free of knots, cracks, and warping to avoid weak spots in your shelves.
Consider the moisture content too. Wood that’s too wet can warp or shrink after installation. Ideally, buy wood that has been kiln-dried for stability.
Ask yourself: will your shelves hold heavy books or decorative items? If yes, opt for denser hardwoods that can handle more weight without bending.
Where To Buy Wood
You can find wood for shelves at local lumberyards, home improvement stores, or specialty woodworking shops. Lumberyards often provide better quality wood and more options.
Buying from a local source lets you inspect the wood closely before purchasing. You can spot defects and select the best pieces yourself.
Online stores offer convenience and variety but be prepared for possible shipping damage or delays. If you go this route, check return policies and read customer reviews carefully.
Gathering Tools And Materials
Before you start building your wooden shelves, gathering the right tools and materials is crucial. Having everything ready not only makes the process smoother but also helps you avoid frustrating interruptions. Think about what you already have and what you might need to buy or borrow.
Essential Tools
Basic woodworking tools will be your best friends throughout this project. Make sure you have a reliable saw—either a hand saw or a power saw—to cut your wood pieces accurately. A drill with various drill bits is essential for making holes and driving screws securely.
Other must-haves include a measuring tape, a carpenter’s square for perfect right angles, and sandpaper or a sanding block to smooth rough edges. You might also find a level handy to ensure your shelves hang straight on the wall. Do you have all these tools, or will you need to make a quick trip to the hardware store?
Additional Supplies
Besides tools, you’ll need quality wood that suits your shelf design—pine, oak, or plywood are common choices. Don’t forget screws, wood glue, and wall anchors if you plan to mount the shelves on drywall. Paint, stain, or sealant will protect the wood and add your personal touch.
Think about the size and weight capacity of your shelves. Choosing the right thickness and type of wood can make a big difference. Have you considered how much weight your shelves will need to hold?
Safety Gear
Working with wood involves sharp tools and dust, so safety gear is non-negotiable. Always wear safety goggles to protect your eyes from flying debris during cutting or drilling. A dust mask helps prevent inhaling sawdust, which can irritate your lungs.
Gloves provide a better grip and shield your hands from splinters, but make sure they don’t interfere with your control over tools. Have you checked your safety gear before starting? It’s easy to overlook, but safety is key to enjoying the project without accidents.
Planning Your Shelf Design
Creating wooden shelves is a rewarding DIY project. The first step is planning your shelf design. This process ensures your shelves fit perfectly and meet your needs. Consider the space and size before cutting any wood. A good plan sets the foundation for success.
Measuring Space
Measure the area where you want the shelves. Use a tape measure for accuracy. Note down the width, height, and depth. This will help you understand the dimensions you have to work with. Ensure there’s enough room for your items and the shelves themselves. Keep a little extra space for easy access.
Deciding Shelf Size
Decide how big you want each shelf to be. Consider what you plan to store. Heavier items need thicker, stronger wood. Smaller items can fit on narrower shelves. Think about how many shelves you need. More shelves mean more storage space.
Sketching Your Design
Draw a simple sketch of your shelf design. Use graph paper for straight lines. Include measurements in your sketch. This will guide you during construction. A visual plan helps prevent mistakes. Adjust your design before cutting wood if needed.
Cutting The Wood
Cutting the wood is a critical step in making shelves that fit perfectly and look professional. Precision here saves time and prevents frustration later. It’s about preparing your pieces to align exactly with your vision.
Marking Measurements
Start by measuring twice and marking once. Use a pencil and a straight edge to draw clear, straight lines where you plan to cut. Double-check your measurements against your shelf design to avoid mistakes.
Try using a combination square for marking right angles. This tool helps ensure your cuts will be straight and your shelves won’t wobble. Have you noticed how a small misalignment can throw off the entire project?
Safe Cutting Techniques
Safety should never be an afterthought when cutting wood. Always wear safety goggles and ear protection to guard against sawdust and noise. Secure your wood firmly with clamps to prevent slipping.
Use a sharp blade on your saw for cleaner cuts and less effort. Keep your hands clear of the cutting path and move the saw steadily without forcing it. How confident do you feel handling power tools? Practice on scrap wood if you’re unsure.
Sanding Edges
After cutting, rough edges can ruin the look and feel of your shelves. Sand each edge with medium-grit sandpaper to smooth out splinters and uneven surfaces. Follow up with fine-grit sandpaper for a polished finish.
Take your time with sanding—it makes a huge difference in the final product’s quality. Do you want your shelves to be safe to touch and visually appealing? Smooth edges are the key.
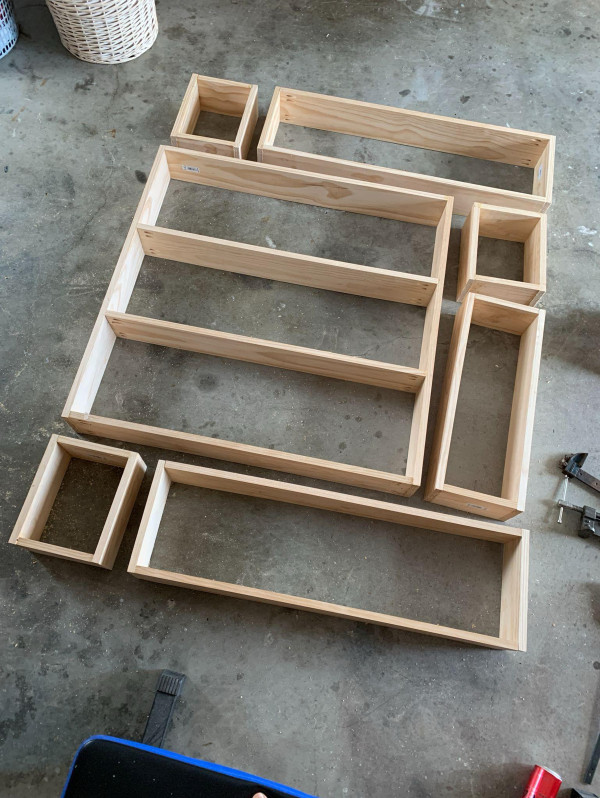
Assembling The Shelves
Assembling wooden shelves requires careful attention to detail. The process involves connecting wood pieces, securing them firmly, and ensuring stability. Proper assembly ensures shelves hold weight and last long.
Start by aligning the wood pieces correctly. Check each piece for straight edges and smooth surfaces. Preparing the wood well helps in easy assembly and better results.
Joining Wood Pieces
Join wood pieces by placing edges together tightly. Use wood glue for extra strength before fastening. Clamp the pieces to hold them steady while drying. This step creates a solid base for your shelves.
Using Nails And Screws
Choose nails or screws based on shelf size and weight needs. Screws offer stronger hold and are less likely to loosen. Drill pilot holes to prevent wood from splitting. Hammer nails or drive screws carefully for firm joints.
Adding Brackets
Attach brackets under or on the sides of shelves for support. Use metal brackets for durability and load-bearing. Position brackets evenly to balance weight distribution. Secure brackets tightly to the wall and shelf for safety.

Credit: www.youtube.com
Finishing Touches
Finishing touches transform simple wooden shelves into beautiful, lasting pieces. This stage enhances the wood’s look and protects it from damage. Small details can make a big difference in your shelves’ style and durability.
Applying Stain Or Paint
Stain brings out the natural grain and color of the wood. It gives shelves a warm, rich appearance. Paint offers many color options to match any room decor. Choose a brush or roller for smooth, even coats. Apply thin layers and let each dry fully. This prevents drips and uneven spots.
Sealing For Protection
Sealing shields shelves from moisture, dirt, and scratches. Use clear polyurethane or varnish for a tough finish. Water-based sealers dry fast and have low odor. Oil-based sealers give a deeper shine but take longer to dry. Apply two or three coats for strong protection. Lightly sand between coats for a smooth surface.
Decorative Options
Decorate shelves with simple accents for a unique look. Try adding:
- Wood carvings or stencils for patterns
- Metal brackets or corner guards for style and strength
- Decals or wallpaper on the shelf backs
- Contrasting colors on edges for a modern touch
These small details personalize your shelves and make them stand out.
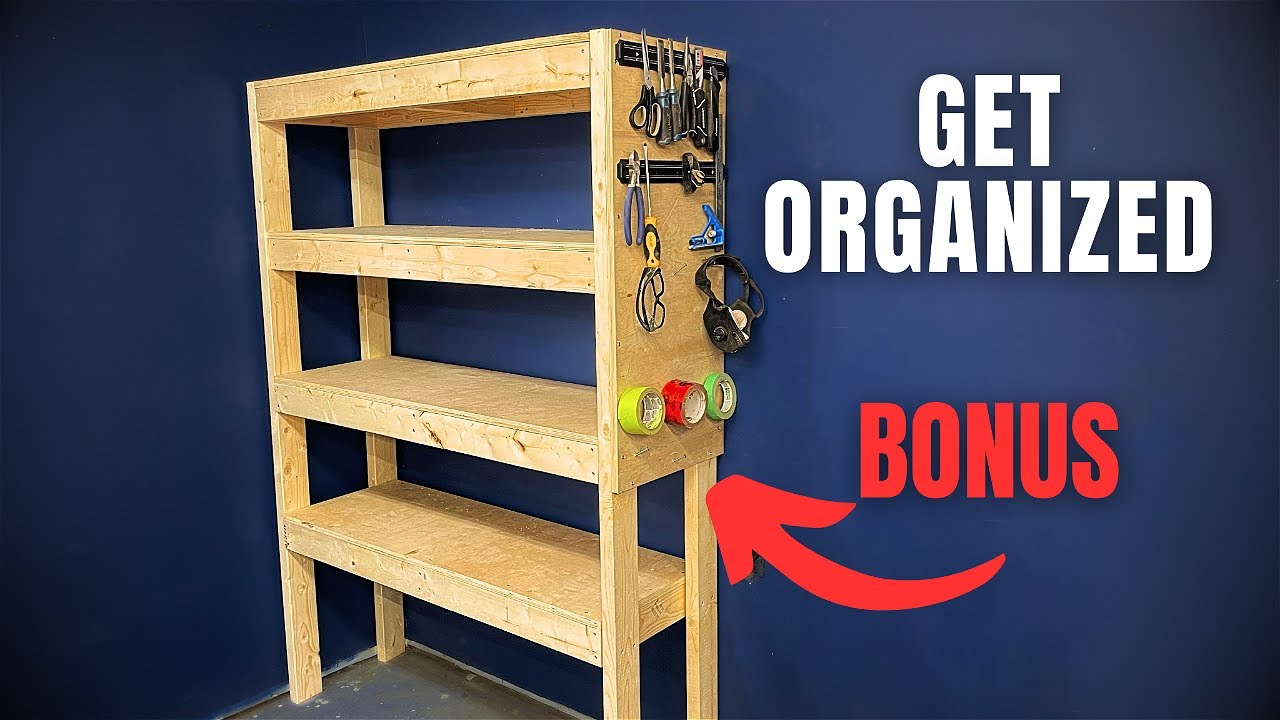
Installing Your Shelves
Installing your wooden shelves properly is crucial to ensure they hold up well and look great. It’s not just about screwing boards into the wall; you need a solid plan to make sure your shelves stay secure and stable. Let’s break down how to get your shelves mounted safely and effectively.
Finding Wall Studs
Start by locating the wall studs behind your drywall. These studs will provide the strongest support for your shelves. Using a stud finder is the easiest way, but tapping the wall and listening for a solid sound can work too.
Mark the stud locations clearly with a pencil. Remember, shelves anchored only into drywall risk falling under heavy weight. Have you ever hung something heavy on a weak spot and regretted it? Avoid that by always attaching your shelves to studs.
Mounting Techniques
Choose the right mounting method based on your shelf design and wall type. Brackets are common and simple to install, but floating shelves require hidden supports.
- For brackets, use screws long enough to penetrate the stud by at least 1.5 inches.
- Floating shelves often need metal rods or cleats inserted into the wall studs.
- Always pre-drill holes to prevent wood from splitting.
Think about the weight your shelves will carry. Are you planning to display heavy books or just lightweight decor? This impacts your choice of mounting hardware.
Checking Stability
Once your shelves are mounted, test their stability before loading them up. Press down gently and wiggle the shelf to detect any movement.
If you notice any wobbling, tighten the screws or add additional brackets. Stability isn’t just about safety; it also keeps your items from falling unexpectedly.
Have you ever had a shelf collapse and lose something valuable? Taking time to check stability saves you from that frustration. Don’t skip this step—it’s the key to a lasting installation.
Credit: www.youtube.com
Maintaining Wooden Shelves
Wooden shelves add charm and functionality to any space, but keeping them looking great requires a bit of care. Proper maintenance not only preserves their beauty but also extends their life. Let’s dive into practical ways you can keep your wooden shelves in top shape.
Cleaning Tips
Dust your shelves regularly using a soft, dry cloth to prevent buildup that can scratch the surface. For deeper cleaning, dampen a cloth slightly with water or a mild wood cleaner, then wipe gently. Avoid soaking the wood, as excess moisture can cause warping or stains.
Consider using a microfiber cloth—it traps dust better and reduces the need for harsh chemicals. Have you noticed how quickly dust settles on your shelves? Setting a weekly cleaning routine can save you time and effort in the long run.
Preventing Damage
Protect your shelves from direct sunlight, which can fade and dry out the wood over time. Use coasters or mats under items to avoid scratches and water rings. Heavy objects should be distributed evenly to prevent sagging or warping.
Think about the environment where your shelves live—high humidity can cause swelling, while extreme dryness might crack the wood. Would adding a dehumidifier or humidifier improve the air balance in your room?
Repairing Minor Issues
Small scratches and dents are common but easy to fix. Use a wax repair stick or wood filler that matches your shelf’s color to fill imperfections. After applying, gently buff the area with a soft cloth to blend the repair.
If you spot loose screws or brackets, tighten them promptly to maintain stability. Have you ever ignored a tiny crack only to find it growing larger? Addressing minor problems quickly keeps your shelves sturdy and looking fresh.

Credit: www.youtube.com
Frequently Asked Questions
What Type Of Wood Is Best For Making Shelves?
Pine, oak, and plywood are popular choices for shelves. Pine is affordable and easy to work with. Oak is strong and durable, ideal for heavy items. Plywood offers stability and resists warping, making it a practical option for shelves.
How Do I Measure For Wooden Shelves Accurately?
Measure the wall space where you want to install shelves. Use a tape measure and mark the length and depth. Account for the shelf thickness and spacing between shelves. Accurate measurements ensure a perfect fit and sturdy installation.
What Tools Are Needed To Make Wooden Shelves?
Basic tools include a saw, drill, level, measuring tape, and screws. Sandpaper and wood glue improve finish and strength. A stud finder helps mount shelves securely. These tools make the process easier and ensure quality shelves.
How Can I Make Wooden Shelves Sturdy And Durable?
Use strong wood like oak or hardwood plywood. Attach shelves to wall studs for support. Use quality brackets and screws designed for weight capacity. Apply wood sealant to protect against moisture and wear, ensuring long-lasting shelves.
Conclusion
Building wooden shelves can be a fun and useful project. You only need basic tools and simple steps to start. Wood shelves add charm and extra storage to any room. Take your time measuring and cutting for the best fit.
Sanding and finishing make the shelves look smooth and neat. Enjoy creating something with your own hands. A little effort brings big rewards in your space. Try making shelves to organize and decorate your home.


