
Are you ready to give your walls a fresh, modern look? Hanging up a floating shelf might seem tricky, but with the right steps, you can do it quickly and confidently.
Imagine having a sleek shelf that holds your favorite books, plants, or decorations—without any bulky brackets showing. In this guide, you’ll learn exactly how to hang a floating shelf so it stays secure and looks amazing. Keep reading, and you’ll discover simple tips that make the whole process easier than you think.
Your perfect shelf is just a few steps away!
Choosing The Right Shelf
Choosing the right floating shelf is key to a successful installation. The shelf should match your room’s style and hold the items you plan to display. Picking the proper material and size affects both look and function. Consider these factors before buying or mounting your shelf.
Material Options
Floating shelves come in various materials. Wood offers a warm, classic look. It suits most rooms and styles.
Metal shelves provide a modern, sleek feel. They often support heavier loads.
Glass shelves create an open, airy appearance. Ideal for small spaces or minimalist designs.
Think about durability and maintenance. Wood may need sealing or refinishing. Metal resists moisture but can scratch. Glass requires careful handling to avoid cracks.
Size And Weight Considerations
Measure your wall space carefully. Choose a shelf size that fits without crowding.
Consider the weight of items you will place on the shelf. Heavy objects need stronger shelves and brackets.
Check the shelf’s weight limit before purchasing. This prevents damage and keeps your items safe.
Remember, wider shelves may need extra support to stay stable. Narrow shelves hold less but are easier to install.

Credit: www.youtube.com
Gathering Tools And Materials
Before you start hanging your floating shelf, gathering the right tools and materials is crucial. Having everything at hand not only saves time but also helps you avoid unnecessary trips to the hardware store. Let’s look at what you need to get the job done efficiently and safely.
Essential Tools
Some tools are absolutely necessary for installing a floating shelf correctly. A reliable drill will make drilling holes and driving screws much easier and faster. You’ll also need a level to ensure your shelf sits perfectly horizontal; a crooked shelf can ruin the look and cause items to slide off.
Don’t forget a stud finder—finding studs behind your wall provides the strongest support for your shelf. A tape measure helps you mark the right spots with precision. Lastly, have a pencil ready to mark where you’ll drill. These tools together make the installation smooth and accurate.
Required Hardware
The hardware depends on the type of wall you’re working with. For drywall, use wall anchors designed to hold the weight of your shelf and its contents. If you’re mounting on studs, wood screws will suffice and offer better support.
Brackets or mounting plates usually come with the floating shelf kit. Check that they fit your shelf size and weight capacity. If not, consider purchasing heavy-duty brackets separately. Make sure to have some extra screws and anchors on hand; it’s better to have more than to run out mid-project.
Preparing The Wall
Clear the wall surface and check for studs using a stud finder. Mark the spots where the shelf brackets will attach. Make sure the wall is clean and smooth for better shelf support.
Preparing the wall is crucial for a secure floating shelf. Start by assessing the wall’s structure. This ensures your shelf stays up and holds weight.Finding Studs
Studs provide the best support for floating shelves. Use a stud finder to locate them. Move the device slowly across the wall. Listen for a beep or watch for a light. It signals the presence of a stud. Mark the stud locations with a pencil. This ensures precise drilling later on.Marking Placement
Determine where you want your shelf to hang. Use a level to ensure it’s straight. Mark the shelf’s top and bottom edges on the wall. These lines guide you during installation. Measure the distance between your stud marks. This helps in aligning the shelf brackets correctly.
Credit: www.youtube.com
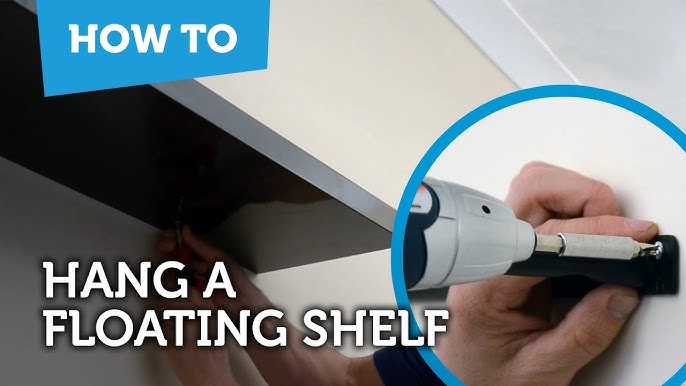
Installing The Brackets
Installing the brackets is a crucial part of hanging a floating shelf securely. It ensures your shelf holds weight and stays level over time. Pay close attention to the placement and fastening of the brackets to avoid any mishaps later.
Drilling Holes
Start by marking where the brackets will go on the wall. Use a level to make sure the marks are perfectly aligned; this keeps your shelf straight. If you’re drilling into drywall, locate the studs with a stud finder to provide a strong anchor point.
Once marked, choose the right drill bit size based on your wall anchors or screws. Drill carefully at the marked spots, keeping the drill steady to avoid enlarging the holes. Have you ever drilled a hole only to realize it was off-center? Taking your time here saves you from that frustration.
Securing Brackets
After drilling, insert wall anchors if you’re not drilling directly into studs. These anchors expand inside the wall and give screws something solid to grip. Next, position the bracket over the holes and screw it tightly into place.
Use a screwdriver or drill with a screwdriver bit to drive the screws in. Check the bracket’s stability by giving it a gentle shake. If it feels loose, tighten the screws further or reassess the anchor’s placement.
Remember, a firmly secured bracket is the backbone of your floating shelf. Skipping this step or rushing through it can lead to a shelf that sags or falls. How confident are you in your wall’s strength to hold your shelf’s weight?
Mounting The Shelf
Mounting your floating shelf securely is key to achieving both style and stability. This process ensures your shelf not only looks great but also holds your items safely. Let’s focus on getting the shelf perfectly aligned and firmly attached to your wall.
Aligning The Shelf
Start by deciding exactly where you want your shelf to sit on the wall. Use a pencil to mark the desired height and horizontal placement. It helps to use a level to make sure your marks are perfectly straight—no one wants a crooked shelf.
Next, hold the shelf bracket or mounting template against the wall at your marks. Double-check the level again before moving forward. Have you ever set something only to realize it was slightly off? Taking this extra moment saves frustration later.
Attaching The Shelf
After aligning, it’s time to secure the shelf bracket to the wall. Use a drill to make pilot holes where you marked, especially if you’re mounting on drywall or studs. This reduces the risk of cracking or splitting your wall.
Choose the right screws and anchors based on your wall type. For drywall, plastic or metal anchors add extra support. For wooden studs, long screws that dig directly into the wood provide the strongest hold.
Once the bracket is firmly attached, slide or screw the shelf onto it as designed. Give the shelf a gentle shake to test its stability. If it feels loose, double-check your screws and anchors—tightening them can make all the difference.
Finishing Touches
After securely hanging your floating shelf, the finishing touches make all the difference in transforming it from a simple installation to a stylish feature. These final steps ensure your shelf looks balanced and complements your space perfectly. Let’s focus on how you can level your shelf and add decorative elements to make it truly stand out.
Leveling The Shelf
Even a slight tilt on your floating shelf can be distracting and cause items to slide off. Use a small spirit level to check the shelf’s alignment after installation. Hold it on top of the shelf and adjust gently until the bubble is perfectly centered.
If you notice the shelf isn’t level, don’t hesitate to loosen the screws slightly and reposition it. Sometimes, tiny adjustments make a huge difference in the overall look. Ask yourself: could a crooked shelf be affecting how your room feels?
Adding Decorative Elements
Now that your shelf is perfectly level, think about what items will bring it to life. Start with a mix of textures and heights—this keeps the display visually interesting. Try placing a small potted plant next to a stack of books or a framed photo.
Consider using odd numbers of items; three or five objects often create a more natural, appealing arrangement. Don’t overload the shelf—leave some empty space to let each piece shine. What personal items do you have that could turn your shelf into a conversation starter?
Troubleshooting Common Issues
Hanging a floating shelf might seem straightforward, but a few common issues can turn your project into a frustrating experience. Troubleshooting these problems quickly helps you avoid unnecessary holes in your wall and ensures your shelf stays secure and looks great. Understanding what causes these hiccups can save time and keep your shelf perfectly functional.
Shelf Not Level
Nothing ruins the look of a floating shelf faster than a noticeable tilt. If your shelf isn’t level, start by checking your measuring tools. Even a small misread on a level can throw off the entire setup.
Try repositioning the shelf bracket slightly until the bubble on your level is centered. If the wall itself is uneven, you might need to use shims behind the shelf to correct the tilt. Have you ever noticed your shelf leaning after a day? That’s often a sign the level wasn’t checked properly during installation.
Loose Mounting
Feeling your shelf wobble or noticing it pull away from the wall? Loose mounting is usually the culprit. This happens when screws aren’t anchored into a stud or when drywall anchors aren’t strong enough for the shelf’s weight.
Use a stud finder to locate solid wall studs before drilling. If studs aren’t in the right spot, opt for heavy-duty wall anchors designed to hold more weight. Tighten screws firmly but avoid over-tightening, which can strip the anchors and cause instability.
Have you ever thought about what you plan to place on your shelf? Adjust your mounting method based on the shelf’s load to prevent future problems.

Credit: shelfology.com
Frequently Asked Questions
How Do You Securely Hang A Floating Shelf?
To securely hang a floating shelf, use wall anchors or studs for support. Measure and level before drilling. Attach the bracket firmly and slide the shelf onto it. This ensures stability and prevents damage.
What Tools Are Needed To Hang A Floating Shelf?
You need a drill, level, measuring tape, pencil, wall anchors, screws, and a screwdriver. These tools help you mount the shelf accurately and securely on the wall.
Can I Hang A Floating Shelf On Drywall?
Yes, you can hang a floating shelf on drywall using proper wall anchors. Anchors provide the necessary support if you can’t find studs behind the drywall.
How Much Weight Can A Floating Shelf Hold?
A floating shelf can typically hold 15 to 30 pounds. Weight capacity depends on the shelf material, mounting hardware, and wall type.
Conclusion
Hanging a floating shelf can brighten any room quickly. Start with the right tools and clear steps. Measure twice, drill carefully, and secure the shelf firmly. Choose a spot that fits your space and style well. A well-hung shelf holds books, plants, or photos with ease.
Keep it level for a neat, polished look. Small efforts bring big rewards in home decor. Enjoy your new shelf and the extra space it adds. Simple projects like this boost both function and charm. Try it yourself and see the difference today.


