
Are you ready to add style and extra storage to your room without drilling into studs? Hanging a floating shelf on drywall might seem tricky, but with the right steps, you can do it safely and securely.
Imagine having a sleek shelf that holds your favorite books, plants, or decor, all while looking like it’s magically attached to the wall. In this guide, you’ll discover simple, clear instructions that anyone can follow—even if you’re new to DIY projects.
Keep reading, and you’ll learn how to make your walls work for you, turning empty space into something useful and beautiful.
Choosing The Right Shelf
Choosing the right floating shelf is key for a neat and safe setup. The shelf must match your room’s style and handle the weight of your items. This choice affects the shelf’s durability and how well it stays on drywall.
Materials And Design Options
Floating shelves come in various materials and designs. Wood is popular for its natural look and strength. Metal shelves offer a modern style and high durability. Glass shelves add elegance but need careful handling.
Designs vary from simple flat boards to shelves with built-in brackets. Choose a design that fits your room’s decor. Keep in mind the shelf’s thickness and shape for stability.
Weight Capacity Considerations
Each shelf has a weight limit. Check the shelf’s maximum load to avoid accidents. Drywall alone can’t support heavy weights well without anchors or studs.
Estimate the total weight of items you plan to place on the shelf. Heavier items need shelves with strong materials and secure mounting options. For light decorations, thin wooden or metal shelves work fine.

Credit: www.youtube.com
Gathering Essential Tools
Gathering the right tools is crucial before hanging a floating shelf on drywall. Proper tools make the process smooth and ensure the shelf stays secure. Missing tools can lead to mistakes or damage to the wall.
Organizing your tools beforehand saves time and reduces frustration. Prepare all items on a work surface. Check each tool for good condition.
Required Hardware
- Floating shelf brackets or mounting plates
- Drywall anchors or toggle bolts
- Wood screws compatible with the shelf brackets
- Wall studs (optional, if you want extra support)
Helpful Tools For Installation
- Power drill with drill bits
- Stud finder to locate wall studs
- Level to keep the shelf straight
- Measuring tape for accurate placement
- Pencil to mark drill points
- Screwdriver, either manual or electric
- Hammer for anchors or nails
Locating Wall Studs
Locating wall studs is essential for hanging a floating shelf on drywall. Studs provide the necessary support to ensure your shelf remains sturdy. Without them, shelves may fall and cause damage. This task might seem daunting, but it’s quite simple.
Using A Stud Finder
A stud finder is the most reliable tool for this job. Choose a basic or electronic model based on your preference. Start by placing it flat against the wall. Slowly move it sideways. The device will signal when it detects a stud. Mark the spot with a pencil. Move the stud finder about 16 inches from the first mark. Repeat the process to find the next stud. Most walls have studs spaced 16 inches apart.
Alternative Methods To Find Studs
If you don’t have a stud finder, try tapping the wall. Tap with your knuckle and listen. A hollow sound means no stud, while a solid sound indicates a stud. You can also look for wall outlets or light switches. These are usually attached to a stud. Measure about 16 inches from these points to locate other studs.
Marking Mounting Points
Marking the mounting points is a key step in hanging a floating shelf on drywall. It sets the foundation for a secure and level installation. Precise marks help avoid mistakes and ensure the shelf fits perfectly on the wall.
Taking time to measure and mark carefully will save effort later. It also protects your wall from unnecessary holes. Let’s explore how to mark the right spots for your shelf.
Measuring Shelf Placement
Start by deciding the shelf’s height and position on the wall. Use a tape measure to find the exact spot. Measure from the floor or a nearby reference point.
Mark the center point lightly with a pencil. This helps align the shelf correctly. Next, measure the shelf width and mark the edges on the wall. These marks show where the shelf will sit horizontally.
Double-check all measurements before marking. Accuracy here prevents uneven or crooked shelves.
Leveling For Accuracy
A level tool ensures the shelf sits straight. Place the level on the wall where the shelf will go. Adjust the marks until the bubble is centered.
Draw a light line connecting the mounting points. This line guides you during installation. Check the level line twice to confirm it’s even.
Using a level makes the shelf look neat and professional. It also helps prevent items from sliding off due to tilt.
Drilling Pilot Holes
Drilling pilot holes is a crucial step when hanging a floating shelf on drywall. These holes guide screws into the wall, making installation easier and more secure. Proper pilot holes prevent wood from splitting and ensure the shelf holds weight safely. Taking time on this step saves effort later.
Choosing Drill Bit Sizes
Select a drill bit slightly smaller than the screw’s diameter. This allows the screw to grip the drywall and anchors firmly. For example, use a 1/8-inch bit for a 8 screw. If using wall anchors, check their instructions for the right hole size. A correct bit size helps avoid loose or damaged holes.
Preventing Drywall Damage
Drill slowly and steady to avoid cracking the drywall surface. Use a level to mark exact drill points before starting. Place painter’s tape over the drilling spot to reduce drywall crumbling. Stop drilling as soon as you reach the wall stud or anchor depth. These steps protect your wall and keep the shelf stable.
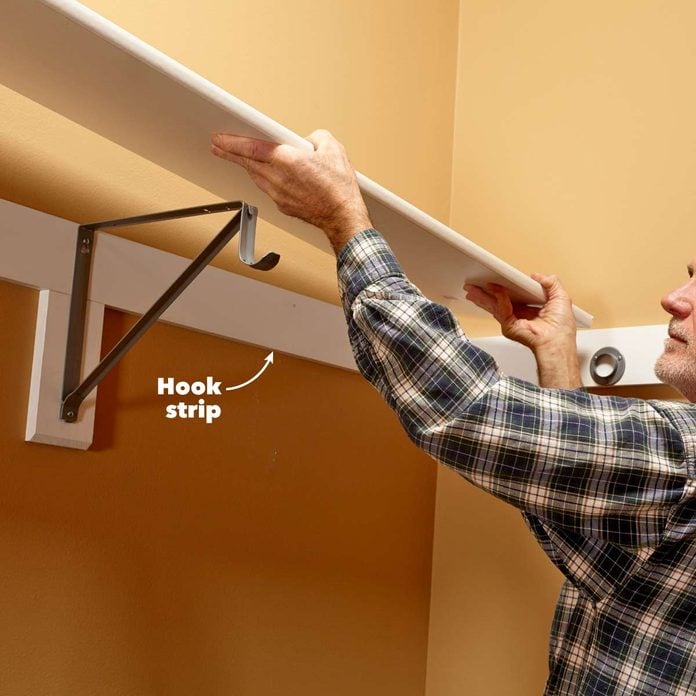
Credit: www.familyhandyman.com
Installing Wall Anchors
Installing wall anchors is a key step when hanging a floating shelf on drywall. Anchors provide the support needed to hold the shelf securely. Without them, screws may loosen or damage the wall over time. Choosing the right anchor and installing it correctly ensures your shelf stays safe and stable.
Types Of Anchors For Drywall
Drywall anchors come in various types, each suited for different weights and wall conditions. Here are the most common ones:
- Plastic expansion anchors:Best for light loads, easy to install, and affordable.
- Self-drilling anchors:Metal or plastic anchors that screw directly into drywall without pre-drilling.
- Toggle bolts:Heavy-duty anchors with wings that open behind the wall for strong support.
- Molly bolts:Metal anchors that expand behind the drywall for medium to heavy loads.
Select an anchor based on the shelf weight and the items you will place on it.
Proper Anchor Installation
Correct installation prevents damage and improves strength. Follow these simple steps:
- Mark the spot for your anchor on the drywall.
- Drill a hole slightly smaller than the anchor size.
- Insert the anchor flush with the wall surface.
- Tighten the screw or bolt slowly to expand the anchor behind the drywall.
- Ensure the anchor is firm and does not spin.
Using a level helps keep the shelf straight. Avoid overtightening to prevent wall damage.
Mounting The Shelf Brackets
Mounting the shelf brackets is the key step to hang a floating shelf securely. Proper bracket placement ensures the shelf stays stable and supports weight evenly. This step requires careful measuring and steady hands. Taking your time helps avoid mistakes and keeps your shelf level and safe.
Aligning Brackets Correctly
Start by marking the wall where the brackets will go. Use a level to make sure the marks are even. Measure the distance between the brackets on the shelf. Transfer these measurements to the wall. Check again with the level to confirm alignment. Proper alignment prevents the shelf from tilting or falling.
Securing With Screws
Choose screws that fit your brackets and wall type. Drill pilot holes on the marked spots to avoid cracking the drywall. Insert wall anchors if no studs are available. Attach the brackets using screws and a screwdriver. Tighten screws firmly but avoid over-tightening. This step keeps the brackets solid and ready to hold the shelf.
Attaching The Shelf
Attaching your floating shelf to drywall is where precision meets practicality. This step is crucial for a secure hold that lasts. Taking time to align and stabilize your shelf properly will save you from future headaches and potential damage.
Positioning The Shelf On Brackets
Start by gently placing the shelf onto the mounted brackets. Make sure the shelf sits flush against the wall with no gaps. This close fit prevents wobbling and ensures the shelf looks clean and seamless.
Check that the shelf is centered on the brackets. If it extends too far on one side, the weight won’t distribute evenly. You want the shelf balanced to handle the items you plan to put on it.
Have you ever noticed a shelf that tilts slightly and wondered why? It’s often because the shelf wasn’t positioned correctly on the support. Take a moment here to adjust and realign before moving on.
Ensuring Stability
Once the shelf is positioned, secure it using screws or fasteners recommended for your bracket type. Tighten them firmly but avoid over-tightening, which can damage the drywall or shelf.
Test stability by gently pressing on different spots of the shelf. If it shifts or feels loose, double-check the screws and bracket alignment. Stability is key to avoid accidents and keep your shelf holding strong.
Consider adding small rubber pads or felt strips between the shelf and brackets if you notice any slight movement. These can absorb vibrations and keep the shelf snug.
Tips For Maintaining Shelf Security
Keeping your floating shelf secure on drywall requires ongoing care. Small efforts prevent damage and keep your shelf steady. Follow simple tips to maintain shelf stability and safety.
Regular Checks And Adjustments
Inspect your shelf often to spot any looseness or wobble. Tighten screws or brackets as needed to keep it firm. Look for cracks in the drywall or shelf brackets. Catching problems early avoids bigger repairs later.
Avoiding Overloading
Do not place heavy items beyond the shelf’s weight limit. Spread out objects evenly to balance the load. Heavy objects near the edges can cause the shelf to pull away. Use the shelf for light to medium items only.

Credit: www.youtube.com
Frequently Asked Questions
How Do You Find Studs For Hanging A Floating Shelf?
Use a stud finder to locate studs behind drywall. Mark the stud positions with a pencil. Anchoring shelves into studs ensures strong support and prevents damage.
What Type Of Anchors Are Best For Drywall Shelves?
Use heavy-duty wall anchors like toggle bolts or molly bolts. These provide secure support for floating shelves on drywall without studs.
How Much Weight Can A Floating Shelf Hold On Drywall?
Weight capacity depends on anchor type and stud presence. Properly anchored shelves can hold 20-50 pounds safely on drywall.
Can I Hang A Floating Shelf Without Studs?
Yes, but use strong drywall anchors like toggle bolts. Avoid heavy items to prevent shelf failure and wall damage.
Conclusion
Hanging a floating shelf on drywall is simple with the right steps. Find studs or use anchors to keep the shelf secure. Measure carefully and use a level for balance. Tighten screws to hold the shelf firmly in place. This method keeps your shelf strong and safe.
Enjoy your new shelf for books, plants, or decor. A well-hung shelf adds style and saves space. Try these tips for a neat and sturdy result. You can do it with confidence and ease.


