
Are you looking to add a personal touch to your living space without spending a fortune? Making your own coffee and end tables is easier than you think, and it’s a rewarding project you’ll be proud of.
Imagine having furniture that perfectly fits your style and needs—crafted by your own hands. In this guide, you’ll discover simple steps, helpful tips, and smart tricks to create beautiful, functional tables that transform your room. Ready to bring your vision to life and impress everyone who visits?
Let’s dive in and get started!
Materials And Tools Needed
Gathering the right materials and tools is key to building sturdy and stylish coffee and end tables. Choosing quality supplies makes your project smoother and ensures the final product lasts. Before you start cutting and assembling, take a moment to check what you need.
Selecting The Right Wood
Wood choice affects both the look and durability of your tables. Hardwoods like oak, maple, and walnut offer strength and a beautiful grain pattern. Softwoods such as pine are easier to work with and cost less, but they may dent more easily.
Think about where your table will live. Will it get heavy use or be more decorative? This helps you decide which wood suits your needs. Also, consider pre-finished wood to save time on sanding and staining.
Essential Tools For The Project
Having the right tools makes building enjoyable and accurate. A circular saw or miter saw helps you make clean, straight cuts quickly. A drill with various bits is necessary for screws and pilot holes.
Don’t forget clamps to hold pieces steady while you assemble. A sander or sanding block smooths rough edges and preps surfaces for finishing. If you want precision, a tape measure and carpenter’s square are must-haves.
Additional Supplies
Besides wood and tools, some extra supplies make a big difference. Wood glue strengthens joints and reduces wobbling. Screws and nails come in handy, but pick the right size to avoid splitting the wood.
Finishing materials like stain, paint, or clear varnish protect your tables and enhance their appearance. Sandpaper in various grits helps achieve a smooth finish. You might also want felt pads to protect your floors from scratches.
Designing Your Tables
Designing your own coffee and end tables lets you create pieces that fit perfectly into your space and reflect your personal style. This step is where creativity meets functionality. Thoughtful design ensures your tables will be both beautiful and practical for everyday use.
Choosing Styles And Dimensions
Start by thinking about the style that matches your room. Do you prefer a modern look with clean lines, or something rustic with natural wood textures? Your choice will guide materials and finishes.
Measure the space where the table will go. A coffee table that’s too large can overwhelm the room, while one that’s too small might not serve its purpose well. Typical coffee tables are around 16-18 inches high and 36-48 inches long, but adjust these to fit your area comfortably.
Sketching Your Plans
Put your ideas on paper before you cut any wood. Sketching helps visualize proportions and details. It also highlights any potential issues early, saving time and frustration later.
Keep your sketches simple—focus on the overall shape, dimensions, and key features. Use a ruler to draw straight lines and note measurements clearly. This will be your roadmap during construction.
Customizing Features
Think about features that make your tables uniquely yours. Maybe you want built-in storage like drawers or shelves, or add a lift-top for extra versatility. These choices make your furniture more functional.
Consider materials and finishes that reflect your lifestyle. If you have kids or pets, durable and easy-to-clean surfaces might be best. Adding metal accents or mixed materials can create a striking contrast and elevate the design.
Preparing The Wood
Start by selecting smooth, clean wood free of knots and cracks. Sand the surface evenly to create a smooth base for finishing. Proper preparation helps the wood look better and last longer.
Preparing the wood for your coffee and end tables is a crucial step that ensures a sturdy and polished final product. This process involves careful attention to detail, setting the foundation for everything that follows. You’ll be amazed at how a little preparation can transform raw wood into a masterpiece.Measuring And Cutting
Accurate measurements are the backbone of a successful woodworking project. Start by measuring twice to avoid mistakes. A simple error here could lead to uneven tables. Use a quality saw for cutting, ensuring each piece matches your dimensions. If you’re unsure, try practicing on scrap wood first. This way, you’ll gain confidence before moving on to the actual pieces.Sanding For Smoothness
Sanding is where your wood starts to shine. Begin with coarse-grit sandpaper to remove any rough edges or splinters. Remember to sand along the grain to avoid scratches. Once the surface feels even, switch to a finer grit for a silky finish. Imagine running your hand across the table—smoothness adds a touch of professionalism to your DIY project.Treating And Priming
Treating the wood protects it from the elements and enhances its natural beauty. Choose a wood treatment based on your table’s intended use—indoors or outdoors. This step helps in preventing warping and adds longevity. After treating, apply a primer if you plan to paint or stain the wood. This creates a uniform base, ensuring the color adheres evenly. Consider how you want your tables to look in your space, and let your creativity guide your choices. By focusing on these preparation steps, you lay the groundwork for a beautiful and durable piece of furniture. What style will you choose to complement your home?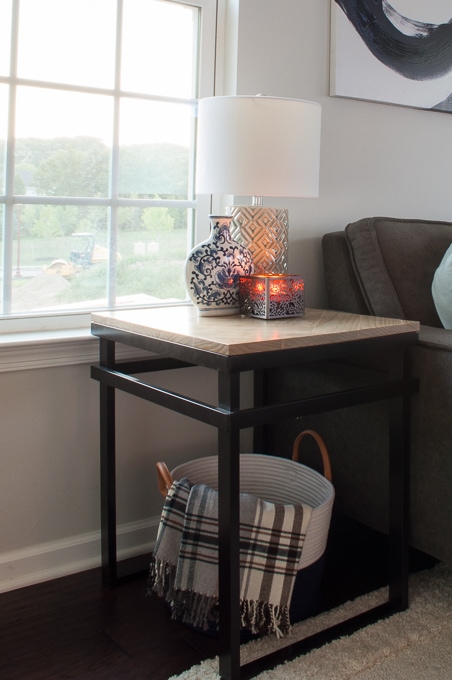
Credit: www.christeneholderhome.com
Assembling The Tables
Assembling your own coffee and end tables is an exciting part of the project. This step brings all the pieces together. Careful assembly ensures your tables are sturdy and stylish. Follow clear steps to create a strong frame and lasting support.
Joining Techniques
Choosing the right joining method makes assembly easier and stronger. Wood glue works well with screws for a tight bond. Pocket holes keep joints hidden and clean. Dowels add extra strength and help align parts perfectly.
Using clamps during glue drying keeps pieces firmly in place. Test fit all parts before final joining to avoid mistakes. Smooth surfaces help glue stick better and join tightly.
Securing The Frame
Start by connecting the table legs to the top frame. Use screws long enough to hold but not split the wood. Drill pilot holes to prevent cracking. Tighten screws evenly on all corners.
Check for square angles using a carpenter’s square. Adjust if needed before final tightening. This keeps the table balanced and stable on any floor.
Adding Support Elements
Support pieces increase the table’s durability and weight capacity. Add cross braces under the tabletop between legs. These braces reduce wobbling during use.
- Install corner blocks inside each leg junction for extra strength.
- Attach a stretcher bar connecting legs lengthwise or widthwise.
- Use metal brackets for additional reinforcement if desired.
Secure all supports firmly and check for any loose parts. A well-supported frame lasts longer and feels solid.
Finishing Touches
Finishing touches transform your coffee and end tables from simple wood pieces into stylish furniture. These final steps protect the wood and add personality. Taking time here ensures your tables look great and last long.
Staining And Painting
Choose a stain or paint that matches your room’s style. Stains bring out the wood’s natural grain. Paint offers a bold or soft color option. Apply thin, even coats for smooth coverage. Let each coat dry fully before adding the next.
Sealing For Durability
Seal the surface to protect against scratches and spills. Use polyurethane, varnish, or wax based on your finish. Apply with a clean brush or cloth. Multiple coats create a stronger barrier. Sand lightly between coats for a smooth feel.
Adding Hardware And Decorations
Add knobs, handles, or decorative metal pieces for extra charm. Choose hardware that fits your table’s style and size. Secure screws tightly but avoid over-tightening. Small decorations like stencils or decals personalize your piece. Keep designs simple for a clean look.

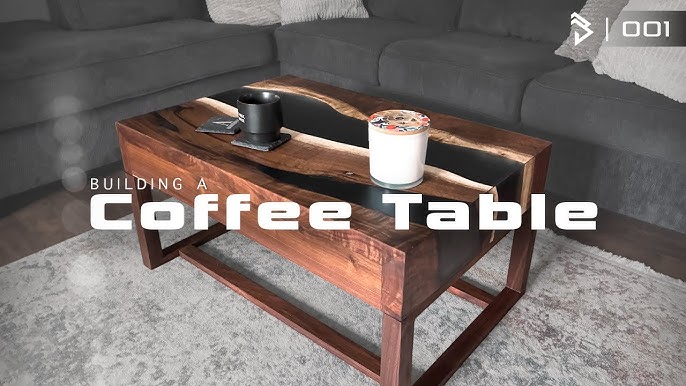
Credit: www.youtube.com
Maintenance Tips
Maintaining your coffee and end tables keeps them beautiful and functional. Simple care routines help prevent damage and wear. Regular attention extends their life and saves money on repairs.
Cleaning And Care
Dust tables regularly with a soft cloth to avoid scratches. Use a damp cloth for sticky spots, then dry immediately. Avoid harsh chemicals that can damage the finish. Place coasters under drinks to prevent rings and stains. Use felt pads under objects to stop scratches.
Repairing Minor Damages
Fix small scratches with a matching wood marker or crayon. For dents, apply a damp cloth and iron gently to raise the wood fibers. Fill small holes with wood filler, then sand lightly after drying. Tighten loose screws or joints to keep tables sturdy. Replace damaged hardware to maintain stability.
Extending Table Lifespan
Keep tables away from direct sunlight to prevent fading. Avoid placing hot items directly on the surface. Rotate table placement to reduce uneven wear. Reapply protective finishes like wax or varnish every year. Store tables indoors during extreme weather if used outside.

Credit: www.spryinterior.com
Frequently Asked Questions
What Materials Do I Need To Make Coffee And End Tables?
You need wood boards, screws, nails, sandpaper, wood glue, paint or stain, and finishing tools. Choose durable wood like pine or oak for sturdy tables. Basic tools include saw, drill, and measuring tape.
How Long Does It Take To Build These Tables?
Building coffee and end tables typically takes 4 to 8 hours. Time depends on skill level, design complexity, and drying times for paint or stain. Planning and preparation can speed up the process.
Can I Customize The Design Of My Tables?
Yes, you can customize size, shape, and finish easily. Add shelves, drawers, or decorative elements to fit your style. Personalizing your tables makes them unique and matches your home décor.
Are These Diy Tables Cost-effective Compared To Buying?
DIY tables usually cost less than store-bought ones. You save money by choosing affordable materials and doing labor yourself. Plus, you gain satisfaction from creating your own furniture.
Conclusion
Making your own coffee and end tables can be fun and rewarding. You control the style, size, and finish to match your space. It saves money and gives a sense of pride. Start with simple tools and clear steps for best results.
Enjoy the process and learn as you go. Handmade furniture adds a unique touch to any room. Give it a try and see how satisfying DIY projects can be.


