
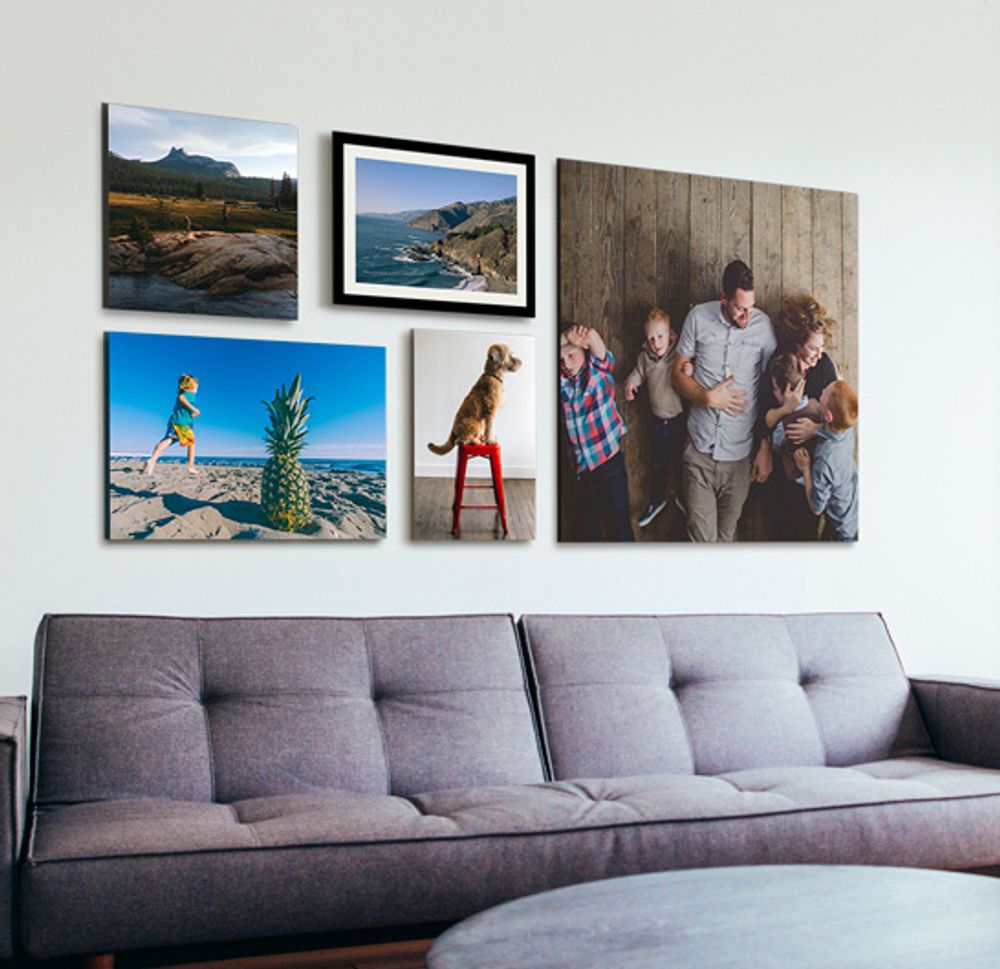
Have you ever taken a photo so stunning that you wish you could hang it on your wall? Printing pictures on canvas can transform your favorite images into captivating pieces of art, adding a personal touch to your home or office decor.
Imagine walking into a room and being greeted by a vibrant canvas of your most cherished memories or breathtaking landscapes. This not only enhances your space but also evokes emotions every time you glance at it. Curious about how you can achieve this?
We’ll guide you through the simple steps to print pictures on canvas, ensuring that your images come to life with vivid colors and impressive detail. Keep reading to discover how you can easily turn your digital photos into tangible art that everyone will admire.
Choosing The Right Photo
Choosing the right photo is essential for a beautiful canvas print. The image you pick will shape the overall look of your artwork. Quality, style, and colors all matter. This section will help you select the best photo for your canvas.
Selecting High-resolution Images
High resolution means clear and sharp details. Low-resolution images look blurry or pixelated on large canvases. Choose photos with at least 300 dpi or high megapixels. Check the image size before printing. Large files usually print better.
Use original photos instead of screenshots or downloads. Originals keep the best quality for printing. Avoid images that are too small or compressed.
Considering Image Composition
Good composition makes your photo interesting and balanced. Focus on the main subject and avoid clutter. Center or rule-of-thirds placement works well. Leave space around the subject to avoid cropping.
Simple backgrounds highlight your subject. Crop or edit the photo for a better fit on the canvas. Think about how the photo will look on a wall.
Picking Suitable Colors And Themes
Colors set the mood for your canvas print. Choose photos with colors that match your room or style. Warm tones bring coziness, while cool tones add calmness. Bright colors attract attention and energy.
The theme should fit your space. Nature, family, or abstract art works well. Make sure the photo’s style matches your décor for a pleasing look.

Credit: www.canvasjet.com
Preparing The Image For Printing
Preparing your image for printing on canvas is a crucial step that determines how your final artwork will look. The quality of your print depends heavily on how well you edit, size, and save your photo. Taking time to optimize these elements can turn a simple picture into a stunning canvas piece.
Editing And Enhancing Photos
Start by cleaning up your image. Remove any unwanted spots or distractions using photo editing tools. Adjust brightness, contrast, and colors to make your picture pop, but avoid over-editing that can make it look unnatural.
Think about the mood you want your canvas to convey. Sharpen details to highlight important parts or soften the background for a dreamy effect. Simple tweaks often make the biggest difference.
Adjusting Dimensions And Resolution
Check the size of your canvas and match your image dimensions accordingly. A small photo stretched too much will appear blurry or pixelated.
Set the resolution to at least 300 DPI (dots per inch) for clear, crisp prints. This ensures your image maintains its quality at larger sizes. Have you ever printed a photo only to see it lose clarity? Proper resolution is the fix.
Choosing The Correct File Format
Save your image in a file format that preserves quality. TIFF and PNG are excellent choices because they don’t compress the image like JPEGs do.
If you must use JPEG, keep the compression low to avoid losing details. Also, check if your printing service has preferred formats to ensure compatibility. What format do you usually save your photos in?
Selecting Canvas Materials
Selecting the right canvas materials plays a crucial role in how your pictures will look once printed. Your choice affects the texture, durability, and overall finish of your artwork. Paying attention to canvas fabric types, thickness, and frame styles can elevate your prints from ordinary to stunning.
Types Of Canvas Fabrics
Not all canvases are created equal. Cotton canvas is popular for its smooth texture and affordability, making it ideal for detailed photos. Linen canvas offers a more luxurious feel with a natural texture, perfect if you want a traditional art look.
Polyester canvas is another option that resists moisture and stretching, which can be useful in humid environments. Think about where you plan to display your canvas and how much texture you want to show through your image.
Canvas Thickness Options
Canvas thickness impacts both durability and appearance. Standard canvases usually range from 0.75 to 1.5 inches thick. Thicker canvases provide a more substantial feel and allow for gallery-style wrapping, which can make your picture pop on the wall.
If you want a sleek, modern look, thinner canvases might suit your style better. Consider how deep the canvas edges will be since this affects framing choices and how your print blends with your space.
Choosing Frame Styles
Frames do more than hold your canvas—they enhance your picture’s presence. Floating frames create a gap between the canvas and frame, adding dimension and focus to your print. Traditional wood frames offer warmth and classic appeal, complementing rustic or vintage décor.
Metal frames bring a contemporary touch and pair well with minimalist interiors. Ask yourself if you want the frame to stand out or let the image be the star. Your frame choice should reflect your personal taste and the room’s vibe where the canvas will hang.

Credit: thestackhouse.com
Printing Methods For Canvas
Printing pictures on canvas requires choosing the right printing method. The print quality affects how your image looks on the canvas. Different techniques offer various benefits. Understanding these methods helps you pick the best one for your project.
Inkjet Vs. Giclée Printing
Inkjet printing uses tiny nozzles to spray ink onto the canvas. It creates sharp and colorful images. Giclée printing is a type of inkjet printing. It uses high-quality inks and printers for fine art prints.
Giclée prints last longer and show more detail. They use pigment-based inks that resist fading. Inkjet prints are more common and affordable. Giclée printing suits professional or gallery-level artwork.
Using A Home Printer
Printing canvas at home can be simple and quick. You need a printer that handles thick materials. Special canvas sheets work with most inkjet printers. These sheets have a coating to hold the ink well.
Home printing is cost-effective for small projects. The print quality depends on your printer and ink. Use high-resolution images for better results. Let the print dry fully before stretching or framing.
Working With Professional Print Services
Professional print services offer expert canvas printing. They use large printers and high-quality materials. These services provide options like different canvas textures and finishes.
They prepare your image for the best print quality. Professionals handle stretching and framing if needed. This option is ideal for large or important prints. It ensures durable and vibrant results every time.
Mounting And Stretching Canvas
Mounting and stretching your canvas is a crucial step in turning your printed picture into a professional-looking piece of art. It not only protects the image but also enhances its visual appeal by giving it a clean, crisp presentation. Getting this right can seem tricky, but with the right tools and techniques, you can achieve a gallery-quality finish right at home.
Tools Needed For Mounting
- Canvas stretcher bars:These wooden frames provide the structure for your canvas to stretch over.
- Staple gun and staples:Essential for securing the canvas tightly to the stretcher bars.
- Canvas pliers:These help you grip and pull the canvas evenly without damaging it.
- Measuring tape or ruler:Accurate measurements ensure the canvas fits perfectly onto the frame.
- Scissors or utility knife:For trimming excess canvas after stretching.
- Hammer:Sometimes needed to tap staples or nails more securely.
Step-by-step Stretching Process
Start by assembling your stretcher bars into a frame. Make sure the corners are square and tight to prevent any warping later on.
Lay your printed canvas face down on a clean surface. Position the frame on top, centering it carefully.
Begin stapling the canvas in the middle of one side, then move to the opposite side, pulling the canvas taut as you go. Repeat this for the remaining sides, always working from the center outwards to avoid wrinkles.
Use canvas pliers to get a firm grip and pull the material evenly. After stapling, check the tension and add more staples at the corners, folding the canvas neatly for a clean edge.
Trim any extra canvas to keep the back tidy and reduce bulk.
Tips For A Smooth Finish
- Keep the canvas tight but not overstretched to avoid distortion of your image.
- Staple every 3-4 inches to maintain even tension across the frame.
- Use a soft cloth to gently smooth the canvas surface after stretching to remove minor creases.
- If you notice any wrinkles, slightly loosen the staples near the problem area and retighten.
- Consider priming the canvas edges with gesso if you plan to paint over or seal the sides.
Have you ever struggled with sagging canvas or uneven edges? These tips can save you time and frustration. Taking your time during stretching makes a big difference in the final look and durability of your canvas print.
Protecting And Finishing Prints
Protecting and finishing canvas prints is key to keeping your artwork vibrant and safe. Proper care extends the life of your canvas and preserves its colors. Applying the right finishes and choosing good framing options make a big difference. Follow simple steps to protect your prints and enjoy them for years.
Applying Protective Coatings
Protective coatings shield your canvas from dust, moisture, and UV light. Use varnishes made for canvas prints. These coatings add a thin, clear layer that guards the surface.
- Choose a matte or glossy finish based on your preference.
- Apply the coating evenly with a soft brush or spray.
- Allow the coating to dry fully before handling the print.
- Reapply every few years to maintain protection.
Coatings prevent fading and keep colors sharp. They also make cleaning easier.
Framing Options And Glass Choices
Frames protect the edges of your canvas and add style. Floating frames are popular because they show the entire edge of the canvas. Box frames offer a modern look and extra protection.
Glass or acrylic can cover your canvas but choose carefully. Glass protects from dust but can cause glare. Acrylic is lighter and less breakable but may scratch easier.
- Use UV-protective glass to reduce fading.
- Matte glass reduces reflections for better viewing.
- Ensure the frame fits the canvas snugly to avoid damage.
Maintaining Canvas Art Over Time
Keep your canvas prints away from direct sunlight and damp places. Dust the surface gently with a soft cloth or brush. Avoid using water or cleaning chemicals on the canvas.
Handle prints by the frame or edges to prevent fingerprints. Store canvases upright to avoid warping. Regular care preserves the beauty of your artwork.

Credit: digital-photography-school.com
Frequently Asked Questions
How Do I Prepare Pictures For Canvas Printing?
To prepare pictures, choose high-resolution images for clear prints. Edit colors and size using photo software. Save in JPEG or PNG format for best results.
What Materials Are Needed To Print Pictures On Canvas?
You’ll need canvas fabric, a printer compatible with canvas, special canvas ink, and a frame or stretcher bars for mounting.
Can I Use A Regular Printer For Canvas Printing?
Regular printers often lack ink and settings for canvas. Use a printer designed for canvas or professional printing services for quality results.
How Long Does Canvas Printing Take?
Canvas printing usually takes a few minutes per print, depending on size and printer speed. Drying time may add extra hours.
Conclusion
Printing pictures on canvas brings photos to life with texture. Choose the right image and canvas size for the best results. Use quality ink and materials to ensure long-lasting prints. Follow simple steps carefully to avoid mistakes. Enjoy turning your favorite pictures into unique wall art.
This process adds a personal touch to your home or gifts. Try it yourself and see how easy and fun it can be. Your memories deserve to be displayed beautifully.


