
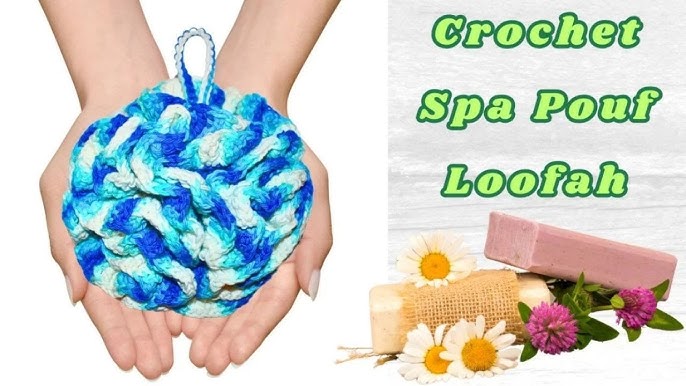
Are you looking for a simple way to upgrade your shower routine? Making your own net bath pouf is easier than you think—and it can save you money while adding a personal touch to your bathroom.
Imagine having a soft, fluffy pouf that exfoliates your skin just right and lasts for months. In this guide, you’ll learn step-by-step how to create your very own net bath pouf using just a few materials. Ready to feel cleaner, smoother, and more refreshed every time you shower?
Keep reading, and you’ll discover how quick and fun this project can be.
Materials Needed
Gathering the right materials is key to crafting a durable and effective net bath pouf. The texture, strength, and flexibility of your materials will directly affect how comfortable and long-lasting your pouf will be. Before you begin, take a moment to focus on what you need to create something both functional and enjoyable to use.
Choosing The Right Netting
The type of netting you select makes a big difference. Look for nylon or polyethylene netting, as these materials are water-resistant and dry quickly. These qualities help prevent mold and keep the pouf fresh.
Pay attention to the mesh size. Medium-sized holes work best—they allow good lather while holding their shape well. Smaller mesh can trap too much water, making the pouf heavy and slow to dry.
If you want a softer feel, consider layering two pieces of netting. This creates extra cushioning, but be careful not to make it too thick. Have you tried using recycled netting from produce bags? It’s a budget-friendly and eco-friendly choice many crafters swear by.
Additional Supplies
- Scissors:Sharp scissors will help you cut the netting cleanly without fraying.
- Strong Thread or Nylon Cord:Choose something durable to hold the pouf together despite repeated use and exposure to water.
- Needle:A large-eye needle makes threading easier, especially if you’re working with thicker cord.
- Optional: Ribbon or Decorative Trim:Adding a ribbon can create a hanging loop or add a splash of color to your pouf.
Think about your crafting space too. Having a flat surface and good lighting can make a big difference in your comfort and precision while working. What’s your go-to tool for making handcraft projects easier? Keeping it handy will speed up your pouf-making process.

Credit: www.amazon.com
Preparing The Netting
Preparing the netting is a crucial part of making a bath pouf. The quality and size of your netting will affect how soft and fluffy your finished pouf feels. Taking the time to get this step right will make the entire process smoother and more enjoyable.
Cutting To Size
Start by choosing a durable, soft netting material—nylon mesh works perfectly. Cut the netting into strips about 6 to 8 inches wide. This width lets you create a pouf that is full but not too bulky.
Keep your cuts straight and even. Uneven strips can make your pouf lopsided and harder to assemble. Use sharp scissors and a ruler or measuring tape for accuracy.
Creating Layers
Once your strips are cut, stack them to build layers. You’ll want to fold or bunch them to create volume. More layers mean a puffier, more luxurious bath pouf.
Think about how thick you want the final pouf. Too few layers, and it won’t hold its shape well. Too many, and it might feel heavy or take longer to dry.
Have you ever noticed how some bath poufs lose their fluff quickly? Layering your netting properly can prevent that by making the pouf more resilient. Try experimenting with different numbers of layers until you find the perfect balance for your style and comfort.
Forming The Pouf Shape
Creating your own net bath pouf is an art that combines simplicity with creativity. The process of forming the pouf shape is where your pouf begins to come to life, transforming from a flat piece of netting into a fluffy, usable bath accessory. This step is crucial as it determines the final look and effectiveness of your pouf. Let’s dive into the techniques that will help you achieve that perfect round shape.
Folding Techniques
Start by laying your net flat on a clean surface. A common approach is to fold the net in an accordion style. This means folding it back and forth in equal sections, much like creating a paper fan.
This technique ensures that the layers are evenly distributed, which is key to forming a uniform pouf. If you prefer a more textured look, try varying the width of your folds. Experiment and see what style you like best.
Gathering The Net
Once your net is neatly folded, it’s time to gather it at the center. Use a sturdy piece of string or a zip tie. Wrap it tightly around the middle of your folded net.
This step is important as it holds the entire structure together. Make sure it’s secure but not too tight to avoid cutting through the net. After securing, pull the edges outward, fluffing them to form a rounded shape.
Do you notice any uneven spots? Adjust the folds and gathers as needed to create a balanced pouf. With patience and a bit of practice, you’ll create a pouf that’s both beautiful and functional.
Have you tried making your own bath pouf before? What folding techniques or tips do you find most effective?

Credit: www.amazon.com
Securing The Pouf
Securing your net bath pouf properly is essential to keep it intact and functional through many uses. A loosely tied pouf can unravel quickly, making your effort go to waste. Focus on strong, neat securing techniques to maintain both the shape and usability of your pouf.
Tying With Ribbon Or String
Use a sturdy ribbon or string to tie the center of your pouf firmly. Wrap the ribbon around several times to create a tight hold. Double knot the ends to prevent slipping, and trim any excess to keep it tidy.
If you want a pop of color, choose a ribbon that contrasts with your netting. This not only secures the pouf but also adds a decorative touch. Have you tried using recycled fabric strips? They work just as well and give your pouf a unique look.
Ensuring Durability
Durability depends on both the material and the way you secure it. After tying, test the pouf by gently pulling on the edges to make sure nothing loosens. If it feels weak, add extra knots or another layer of string for reinforcement.
Consider sealing the knots with a tiny drop of clear-drying glue for extra security. This small step can prevent your pouf from coming undone after multiple uses. How often do you check your bath accessories for wear and tear? Regular maintenance can extend their life significantly.
Adding A Hanging Loop
Adding a hanging loop to your net bath pouf makes it easy to store and dry. A well-made loop keeps the pouf accessible and neat. It also helps the pouf last longer by allowing it to air dry properly.
Selecting The Right Material
Choose a material that is strong and water-resistant. Nylon cord or polyester ribbon works well. Avoid cotton as it can hold water and mildew. The material should be thin but sturdy enough to hold the pouf’s weight.
Pick a color that matches or contrasts nicely with your pouf. This adds a simple design touch. The loop should be about 4 to 6 inches long for easy hanging.
Attaching The Loop
Fold your chosen material into a loop shape. Hold the ends together and place the loop at the top center of the pouf.
- Use a strong thread to sew the ends securely to the pouf’s mesh.
- Make several tight stitches to ensure the loop won’t come loose.
- Trim any extra thread to keep a clean look.
Test the loop by gently pulling it. It should feel secure and hold the pouf’s weight without slipping.
Tips For Soft Lathers
Creating a soft lather with your net bath pouf can make your shower experience feel like a spa moment. The secret isn’t just in the soap you use but also in how you use and care for your pouf. Little changes in technique can transform a rough scrub into a gentle, bubbly cleanse.
Using Soap Effectively
Start by wetting your pouf thoroughly. This helps the soap spread evenly and creates a rich foam faster.
Apply a small amount of soap directly onto the pouf rather than your skin. This method helps the soap lather more and lasts longer.
- Choose liquid soaps or shower gels designed for lathering.
- Avoid bar soaps that can clog the mesh and reduce foam.
- Gently squeeze the pouf as you rub it in circular motions to build up bubbles.
Have you noticed how some soaps work better with your pouf than others? Experiment with different types to find the perfect match for your skin.
Maintaining The Pouf
Your pouf’s softness depends heavily on how you care for it after each use. Rinse it well to remove all soap residues. Leftover soap can harden the mesh and reduce softness over time.
Hang your pouf in a dry, airy place. Avoid stuffing it into a damp corner where mold or bacteria can grow.
- Regularly wash your pouf in warm water with a bit of vinegar or baking soda to keep it fresh.
- Replace your pouf every 3-4 weeks to maintain hygiene and softness.
Think about how often you replace your bath accessories. Is your pouf still feeling soft, or is it time to refresh your routine?
Cleaning And Care
Keeping your net bath pouf clean is key to its long life and hygiene. Regular care stops bacteria and mold from growing. Simple cleaning habits make your pouf fresh and soft every time you use it.
Proper cleaning also keeps the net material strong and prevents it from tearing. Follow easy steps to wash and dry your pouf safely. Store it right to avoid damage and bad smells.
Washing Instructions
- Rinse the pouf with warm water after each use to remove soap.
- Hand wash with mild soap or gentle detergent weekly.
- Use soft water to avoid roughing the mesh material.
- Gently squeeze the pouf, do not wring or twist it.
- For deep cleaning, soak in a vinegar-water mix for 10 minutes.
- Rinse thoroughly to remove all soap and vinegar.
Drying And Storage
- Shake off excess water after washing.
- Hang the pouf in a well-ventilated area to air dry.
- Avoid direct sunlight to prevent fading and weakening of fibers.
- Do not use a dryer, as heat can damage the net.
- Store in a dry place to stop mold and mildew growth.
- Keep it away from tight spaces to maintain its shape.

Credit: www.amazon.com
Frequently Asked Questions
What Materials Are Needed To Make A Net Bath Pouf?
You need nylon netting, scissors, a ribbon or elastic band, and a needle with thread. These basic supplies help you create a durable bath pouf easily at home.
How Long Does It Take To Make A Net Bath Pouf?
Making a net bath pouf usually takes about 15 to 30 minutes. The time depends on your crafting skill and the complexity of the design you choose.
Can I Customize The Size Of My Bath Pouf?
Yes, you can customize your bath pouf’s size by adjusting the length of the netting. Larger pieces create bigger poufs, while smaller cuts make compact ones.
Is A Diy Net Bath Pouf Better Than Store-bought?
A DIY bath pouf is often softer, eco-friendly, and customizable. It also saves money and allows you to choose preferred materials for sensitive skin.
Conclusion
Making a net bath pouf is easy and fun. You only need a few materials and simple steps. This pouf helps you clean your skin gently and saves money. You can try different colors and sizes to suit your style.
Handmade poufs also make nice gifts for friends and family. Enjoy your bath time with this soft, useful pouf. Give it a try today and feel the difference!


