
Are you ready to transform your space with a simple, beautiful touch? Arranging butterfly stickers on your wall can instantly brighten any room and bring a sense of magic to your home.
But how do you make sure they look just right, creating a stunning effect rather than a messy scatter? In this guide, you’ll discover easy and creative ways to place your butterfly stickers that will catch every eye and make your walls come alive.
Keep reading, and you’ll learn tricks that make decorating fun and stress-free. Your perfect butterfly display is just a few steps away!
Choosing The Right Butterfly Stickers
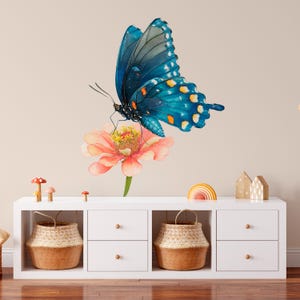
Choosing the right butterfly stickers is a key step to making your wall look stunning and personalized. The stickers you pick can completely change the mood of your space. Think about what kind of feel you want—playful, elegant, or vibrant—and let that guide your choice.
Materials And Finishes
Butterfly stickers come in various materials like vinyl, paper, and fabric. Vinyl stickers are durable and easy to clean, perfect if you want them to last long on your walls.
Consider finishes too. Matte stickers reduce glare and look subtle, while glossy finishes catch light and add a shiny effect. Have you thought about whether you want your butterflies to pop or blend softly with your wall?
Size And Color Options
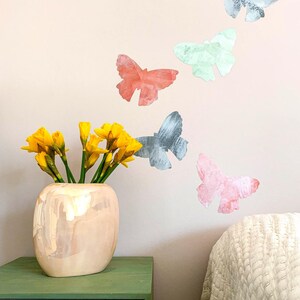
Size matters. Large butterflies create a bold statement but can overwhelm small rooms. Smaller ones offer more flexibility for arranging patterns or clusters.
Colors can set the tone. Bright colors energize a room, while pastels bring calmness. Mixing different sizes and colors can add depth and interest, but sticking to a color palette keeps things harmonious.
Theme And Style Matching
Match your butterfly stickers with your room’s existing style. If your decor is modern, choose sleek, minimal designs. For a vintage look, opt for delicate, detailed butterflies.
Think about the theme too. Are you decorating a child’s room, a cozy reading nook, or a chic living room? Your stickers should complement the vibe you want, not clash with it.
Credit: www.etsy.com
Preparing Your Wall Space
Preparing your wall space is a crucial step before placing butterfly stickers. The right preparation helps your stickers stick better and look stunning. It also ensures that your design lasts without peeling or fading too soon.
Cleaning And Smoothing Surface
Start by cleaning your wall thoroughly. Use a mild soap solution and a soft cloth to remove dust, dirt, and grease. Avoid harsh chemicals that might damage the paint or wall texture.
After cleaning, check for any bumps or rough spots. Sand down uneven areas gently with fine-grit sandpaper to create a smooth surface. This step makes a big difference in how well the stickers adhere and how neat they look.
Selecting The Best Wall Area
Look around your room and choose a wall area that draws attention naturally. It could be above a bed, near a window, or a blank space that needs a splash of color. Avoid walls with heavy textures or wallpaper, as stickers may not stick properly there.
Think about how your butterfly arrangement will interact with existing decor. Will it complement or clash with furniture and wall colors? Picking the right spot means your butterflies will feel like part of the room, not just an afterthought.
Lighting Considerations
Good lighting can bring your butterfly stickers to life. Natural light highlights their colors beautifully during the day. Position your design where it can catch sunlight without being exposed to direct, harsh rays that might fade the stickers.
If your wall area is dim, consider adding soft artificial lighting. A nearby lamp or wall light can create interesting shadows and enhance the 3D effect of your butterflies. How does your current lighting affect the mood you want to create with this decoration?
Creative Arrangement Patterns
Creative arrangement patterns bring life to your butterfly sticker display. They turn simple decals into eye-catching wall art. Each pattern style creates a different mood and visual flow. Choose a pattern that fits your room’s vibe and your personality. Explore various ways to group and place your butterflies for stunning effects.
Clustered Groups
Clustered groups gather butterflies close together in small bunches. This style mimics nature, where butterflies rest in groups. Place stickers tight to form clusters of different sizes. Use clusters to highlight a corner or a specific wall area. It creates a lively and cozy look.
Flying Trails
Flying trails show butterflies in motion across the wall. Arrange stickers in a flowing line or curve. The trail can start small and grow larger, like butterflies taking off. This pattern adds movement and direction to the space. It works well near windows or doors, suggesting flight paths.
Symmetrical Layouts
Symmetrical layouts balance butterflies evenly on both sides. Create mirror images or simple patterns with equal spacing. This style offers a neat and calm appearance. Use symmetrical layouts in formal rooms or places needing order. It helps make the room feel harmonious and peaceful.
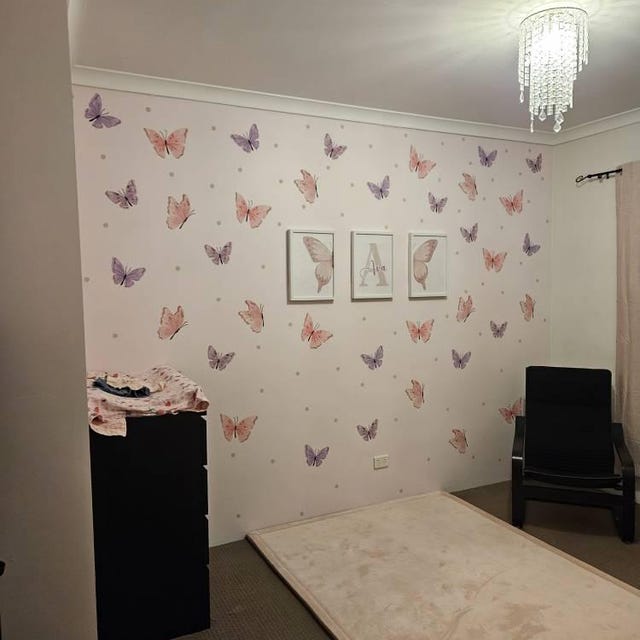
Random Scattered Look
Random scattered looks place butterflies freely without strict order. Stickers appear naturally spread, like butterflies landing randomly. This design feels playful and light. Scatter butterflies across large walls or ceilings for a whimsical effect. It suits casual spaces and adds a touch of surprise.

Credit: www.ebay.ca
Combining Stickers With Other Decor
Combining butterfly stickers with other decor elements can transform a simple wall into a captivating focal point. The key is to balance the stickers with complementary designs and objects that enhance their beauty without overwhelming the space. Let’s look at how you can creatively mix butterfly stickers with wall paint, art, and even plants to create a unique atmosphere in your room.
Incorporating Wall Paint Designs
Use wall paint to create a backdrop that highlights your butterfly stickers. Consider painting soft gradients or subtle patterns like clouds or leaves to give your butterflies a natural setting. You might paint a branch or vine, then place the stickers as if the butterflies are landing or flying around it.
Try using contrasting colors for the paint and stickers to make the butterflies pop. If your stickers are colorful, a neutral or pastel wall color can work well. On the other hand, a bold wall color with lighter or white butterfly stickers can create a striking effect.
Pairing With Wall Art And Frames
Butterfly stickers can beautifully complement framed art or photos. Arrange the stickers so they seem to flutter around the frames, adding movement and life to the wall. You can place smaller butterflies near the corners of frames or larger ones flying between them.
Think about the theme of your wall art—botanical prints or nature photography pairs perfectly with butterfly stickers. Mixing different frame sizes and shapes also creates a dynamic display that draws the eye across the entire wall.
Using Shelves And Plants
Add shelves with small potted plants near your butterfly stickers to bring a three-dimensional effect. The greenery enhances the natural feel and gives the butterflies a realistic environment. You can even place a few stickers on the wall behind the shelves to make it look like butterflies are visiting the plants.
Floating shelves work great because they don’t take up floor space but provide a place to display decor that complements your stickers. Choose plants with delicate leaves or flowers that echo the lightness of butterflies for a cohesive look.
Tips For Applying And Repositioning
Applying and repositioning butterfly stickers on your wall requires care and patience. Proper techniques help the stickers look smooth and neat. They also make sure you can move stickers without damage. Follow these tips to create a beautiful butterfly display.
Peeling And Sticking Techniques
Start by peeling the sticker slowly from the backing paper. Hold the sticker by its edges to avoid stretching or tearing. Place the sticker gently on the wall surface. Use light pressure to position it before pressing firmly. This helps you adjust the sticker easily if needed.
Avoiding Air Bubbles
Air bubbles ruin a smooth look and cause stickers to peel. Use a flat tool like a credit card or a soft cloth. Press from the center outwards to push air out. Work slowly to avoid creating new bubbles. Small bubbles can be popped with a pin and flattened carefully.
Removing And Reapplying Safely
Remove stickers by peeling them off slowly from one corner. Pull gently to prevent tearing or wall damage. Place the sticker on a clean surface if you want to reuse it. Clean the wall area before reapplying to help the sticker stick well. Avoid using sticky tape as it can harm the sticker.
Credit: www.etsy.com
Maintaining Your Butterfly Wall Decor
Arrange butterfly stickers in groups or patterns to create a lively wall display. Space them evenly for a neat look and press firmly to avoid peeling. Changing their positions occasionally keeps the decor fresh and interesting.
Maintaining your butterfly wall decor is crucial for keeping it vibrant. With regular care, these artistic stickers can stay fresh and appealing. This section will guide you through cleaning, touching up, and seasonal updates. Follow these steps to ensure your wall decor remains beautiful.Cleaning Without Damage
Dust can dull your butterfly stickers. Use a soft cloth to gently wipe them. Avoid using water or cleaning sprays. They can cause the stickers to peel. A dry cloth is your best tool. Clean each butterfly carefully. This will keep colors bright and vivid.Touching Up And Replacing
Sometimes, stickers may lose adhesion. Press them back firmly to the wall. If they fall, replace them with new ones. Keep extra stickers on hand for easy replacement. This ensures your wall design stays intact. Regularly check for signs of wear.Seasonal Refresh Ideas
Change your butterfly arrangement with the seasons. Use warm colors for summer. Switch to cool tones for winter. This keeps your decor fresh and interesting. Consider adding new patterns or shapes. Seasonally refreshing your decor adds a new vibe to your space.Frequently Asked Questions
How Do I Start Arranging Butterfly Stickers On My Wall?
Begin by selecting a clean, smooth wall surface. Plan your design by laying stickers on the floor. Arrange them in clusters or patterns before peeling and sticking them on the wall.
What Patterns Suit Butterfly Sticker Wall Arrangements?
Popular patterns include scattered butterflies, flying formations, or symmetrical clusters. Choose a pattern that complements your room’s style and size. This enhances visual appeal and creates a dynamic look.
Can I Mix Different Butterfly Sticker Sizes Effectively?
Yes, mixing sizes adds depth and interest. Place larger stickers as focal points and smaller ones around them. This creates a natural, lively butterfly effect on your wall.
How To Ensure Butterfly Stickers Stick Well On Walls?
Clean the wall thoroughly to remove dust and grease. Use stickers designed for wall application. Press firmly and smooth out air bubbles for a secure, long-lasting hold.
Conclusion
Arranging butterfly stickers on your wall can brighten any room. Start with a simple plan for placement and spacing. Use different sizes and colors for a lively look. Place them near windows or light sources for extra charm. Take your time to adjust until it feels right.
This small change adds beauty and joy to your space. Enjoy the fresh, cheerful vibe your butterflies bring.


