

Are you ready to transform your coffee table and end table into stunning pieces that catch every eye? Staining your wooden tables is one of the easiest and most effective ways to breathe new life into your furniture.
Whether your tables are old and worn or just need a fresh look, staining can highlight the natural beauty of the wood and give your space a warm, inviting feel. In this guide, you’ll discover simple steps and expert tips to stain your tables like a pro—no experience needed.
Keep reading, and you’ll soon have tables that look custom-made just for your home.

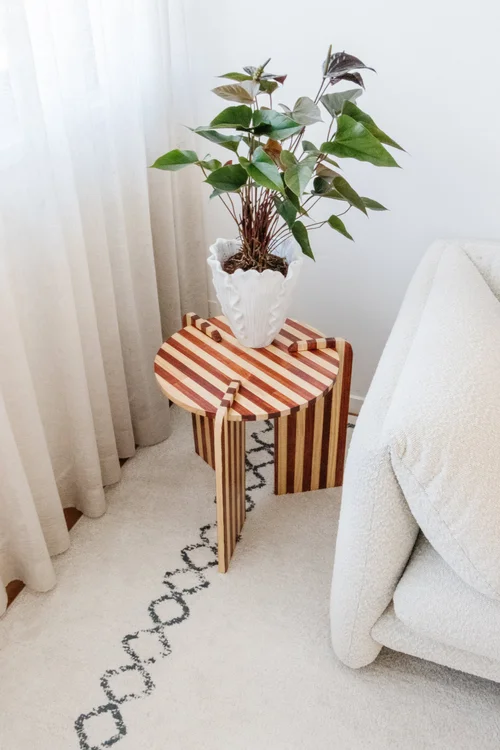
Credit: everbloomingoriginals.com
Choosing The Right Stain
Choosing the right stain is crucial for transforming your coffee table and end table into stunning focal points. The stain you select impacts the wood’s natural beauty and sets the tone for the entire room. You want a finish that enhances the grain and matches your style perfectly.
Types Of Wood Stains
Wood stains come in several varieties, each offering different effects and ease of use. Oil-based stains penetrate deeply, highlighting the wood grain with rich, long-lasting color. Water-based stains dry quickly and have less odor, making them ideal for indoor projects.
You might also find gel stains, which sit on top of the wood and provide an even color, great for uneven or softer woods. Choosing the right type depends on how much control you want over the final look and how much prep work you’re willing to do.
Matching Stain To Wood
Not all stains work well with every wood type. For example, oak absorbs stain differently than pine or maple, often resulting in darker or uneven tones. Testing your stain on a scrap piece or hidden area is the best way to avoid surprises.
Think about the wood’s natural color too. If your table has a warm hue, a stain that’s too dark might overpower it, while a lighter stain can brighten the piece. Have you ever chosen a stain only to find it changed the wood in unexpected ways? That’s why matching is key.
Considering Room Decor
Your table’s stain should harmonize with your room’s style and colors. A rustic, farmhouse look might call for a warm, matte stain, while a modern space could benefit from a cooler, sleek finish. Consider how the stain complements your existing furniture and walls.
Ask yourself: do you want your table to stand out or blend in? Choosing a stain that fits your room’s vibe helps maintain balance and makes your space feel intentional. Sometimes, a subtle stain can make a stronger statement than a bold one.

Credit: www.youtube.com
Preparing The Tables
Preparing your coffee table and end table is crucial before staining. This step ensures the stain goes on smoothly and looks great. Proper preparation helps the wood absorb the stain evenly. It also extends the life of your finish. Take your time with these tasks for the best results.
Cleaning And Sanding
Start by cleaning the tables to remove dust and dirt. Use a mild soap and water solution. Wipe the surface with a damp cloth and let it dry. Sand the tables next to smooth the wood surface. Use medium-grit sandpaper first, then fine-grit for a soft finish. Always sand in the direction of the wood grain. This prevents scratches and creates a smooth base for staining.
Repairing Imperfections
Check the tables for dents, scratches, or holes. Fill small holes and cracks with wood filler. Choose a filler that matches the wood color. Apply it with a putty knife and let it dry completely. Sand the filled areas smooth to blend with the wood. Repairing imperfections gives a neat, even look to your tables.
Removing Old Finish
Remove any old paint or varnish before staining. Use a chemical stripper or sand the finish away. Chemical strippers work well on thick or multiple layers. Follow safety instructions and work in a well-ventilated area. Sand lightly after stripping to remove residue. A clean, bare wood surface helps the stain soak in better.
Gathering Supplies
Gather all materials like sandpaper, stain, brushes, and cloth before starting. Having everything ready makes the staining process smooth and easy. Choose the right stain color to match your furniture style.
Gathering the right supplies is key to staining your coffee and end tables. Having all your tools ready will make the process smooth and enjoyable. Let’s dive into the essentials you need.Essential Tools
- Sandpaper: Start with coarse and finish with fine grit.
- Stain: Pick a color that suits your décor.
- Drop Cloth: Protect your floors from stains.
- Stirring Stick: Mix the stain for an even color.
- Paint Tray: Use it to hold your stain.
Safety Gear
- Gloves: Keep your hands clean and safe.
- Mask: Avoid inhaling fumes from the stain.
- Goggles: Protect your eyes from splashes.
Choosing Brushes And Cloths
Brushes and cloths are crucial for a smooth finish. Use a natural-bristle brush for oil-based stains. It provides an even coat. For water-based stains, synthetic brushes work best. They don’t absorb the stain.
Cloths are useful for wiping excess stain. Lint-free cloths ensure a clean finish. Old cotton T-shirts work well too.
Credit: www.smorhome.com
Applying The Stain
Applying the stain to your coffee table or end table is where your project truly begins to take shape. The way you apply the stain affects not only the color but also the texture and durability of the finish. Taking a thoughtful approach here will save you from common pitfalls like blotchy spots or uneven tones.
Test Stain On Scrap Wood
Before touching your actual furniture, grab a piece of scrap wood or an inconspicuous area of the table. This lets you see how the stain interacts with the wood grain and what the final color will look like.
Try applying the stain with the same tool you plan to use—whether a brush, rag, or sponge. This trial run helps you adjust your technique or choose a different shade if needed. Have you ever been surprised by how different a stain looks on raw wood compared to the can?
Techniques For Even Application
Start by dipping your applicator lightly into the stain. Avoid soaking it too much to prevent drips and puddles. Apply in the direction of the wood grain using long, smooth strokes.
Work in small sections to maintain a wet edge, which prevents lap marks. If you notice spots drying faster, lightly go over them again before the stain sets. Patience here pays off with a consistent finish.
Managing Drying Times
Drying time is crucial and varies depending on the stain type and environmental conditions. Check the label for manufacturer recommendations but also trust your sense of touch—if it feels tacky, it needs more time.
Avoid rushing into a second coat or handling the surface too soon. Good airflow and moderate temperatures speed drying, but too much heat or humidity can cause problems. How might you adjust your workspace to create ideal drying conditions?
Finishing Touches
Finishing touches are what truly bring your stained coffee table and end table to life. They protect your hard work and enhance the wood’s natural beauty. Taking time to apply the right finish and care for it properly ensures your furniture lasts and continues to impress.
Applying Sealant Or Varnish
After the stain dries completely, adding a sealant or varnish is essential. This layer shields the wood from spills, scratches, and daily wear. Choose between polyurethane, lacquer, or water-based finishes depending on the look and durability you want.
Use a clean brush or foam applicator to spread the finish evenly. Avoid over-brushing, which can cause bubbles or streaks. If you want a smoother surface, lightly sand between coats with fine-grit sandpaper and wipe away dust before applying the next coat.
Buffing And Polishing
Once the sealant has cured, buffing the surface adds a subtle shine and smooth feel. Use a soft cloth or buffing pad to gently rub the surface in circular motions. This step enhances the finish without damaging it.
Polishing is a great way to revive older tables too. Have you ever noticed how a quick buff can make a dull surface look almost new? It’s a small effort that delivers a big impact.
Maintaining The Finish
Maintaining your table’s finish is key to keeping it beautiful over time. Clean spills immediately with a damp cloth and avoid harsh chemicals that can strip the finish. Regular dusting and using coasters or placemats help prevent damage.
Consider applying a furniture wax or polish every few months to add a protective layer. How often do you check your furniture for minor scratches or wear? Catching issues early lets you touch them up before they become bigger problems.
Common Mistakes To Avoid
Staining a coffee table or end table can transform its look. Yet, certain mistakes can spoil the finish and waste your effort. Avoiding these common errors helps achieve a smooth, even, and beautiful stain.
Understanding what to skip makes the process easier and more rewarding. Here are some frequent mistakes to watch out for.
Over-sanding
Sanding too much can damage the wood surface. It may create uneven spots and remove too much wood grain. This leads to blotchy stain absorption and a rough finish.
Sand gently with fine-grit sandpaper. Follow the wood grain direction carefully. Stop sanding as soon as the surface feels smooth.
Uneven Stain Coverage
Uneven stain makes your table look patchy and unprofessional. Applying too much stain in one area or not spreading it well causes dark and light spots.
Use a clean cloth or brush to spread the stain evenly. Work in small sections and wipe off extra stain quickly. Let each coat dry fully before adding another.
Ignoring Safety Precautions
Stain and sanding dust contain harmful chemicals and particles. Not wearing gloves, masks, or working in a ventilated space risks your health.
Always protect your skin and lungs. Use gloves and a dust mask. Work outdoors or near open windows to keep air fresh.
Frequently Asked Questions
How Do I Prepare A Coffee Table For Staining?
Start by cleaning the table thoroughly. Sand the surface using fine-grit sandpaper. Remove dust with a tack cloth. This ensures smooth, even stain absorption and a professional finish.
What Type Of Stain Works Best On End Tables?
Oil-based stains are ideal for durability and rich color. Water-based stains dry faster and have low odor. Choose based on your desired finish and drying time.
How Long Should I Wait Between Stain Coats?
Wait 4 to 6 hours between coats. This allows the stain to penetrate and dry properly. Follow the manufacturer’s instructions for best results.
Can I Use A Brush Or Cloth To Apply Stain?
Both methods work well. Brushes cover large areas quickly. Cloths offer better control for even application and wiping excess stain. Choose based on your comfort and project size.
Conclusion
Staining your coffee and end tables gives them a fresh, new look. Take your time and follow each step carefully. Choose the right stain color for your room’s style. Always prepare the wood surface well before staining. Let the stain dry fully to get the best finish.
Clean your brushes and workspace after finishing. Enjoy the warm, rich color that enhances your furniture. A little effort brings big changes to your living space. Try this project to make your home feel cozier and more inviting.


