
Are you looking to add a personal touch to your walls without spending a fortune? Making wall stickers at home is easier than you think, and it gives you complete control over the design and style.
Imagine creating unique decorations that perfectly match your space and personality. In this guide, you’ll discover simple steps to craft your own wall stickers using materials you probably already have. Ready to transform your walls and impress everyone who sees them?
Keep reading, because your creative makeover starts right here.

Credit: www.amazon.in
Materials Needed
Gathering the right materials is the first crucial step to making wall stickers at home. The quality of your supplies directly affects the final look and durability of your stickers. Getting these basics right saves you time and frustration down the line.
Choosing The Right Sticker Paper
Not all sticker papers are created equal. You want to pick a paper that suits your printer type—inkjet or laser—to avoid smudging or fading.
Matte sticker paper works well if you want a subtle finish, while glossy paper adds a shiny, eye-catching effect. For walls, vinyl sticker paper is the best choice because it’s waterproof and long-lasting.
Have you ever printed on regular paper only to find it peeling off quickly? That’s why investing in quality sticker paper matters.
Essential Tools And Supplies
- Printer:A color printer that matches your sticker paper type.
- Cutting tools:Scissors or a craft knife for precise edges.
- Laminating sheets (optional):Protect your stickers from scratches and moisture.
- Squeegee or credit card:To smooth out air bubbles when applying the sticker.
- Design software or apps:For creating or editing your sticker designs.
Having these tools ready makes the process smoother and lets you focus on creativity.
Optional Decorative Elements
Want to add a personal touch to your stickers? Consider glitter pens, metallic markers, or paint pens to highlight details after printing.
You can also use textured papers or add cut-out shapes layered over your stickers for a 3D effect. These extras make your wall art truly unique.
What small detail could make your sticker stand out on your wall?
Design Ideas
Designing wall stickers at home is a fun way to add personality to any space. You can create unique pieces that match your style and mood. Choosing the right design makes your wall stickers stand out and feel special. Simple ideas often have the biggest impact.
Simple Shapes And Patterns
Basic shapes like circles, triangles, and squares work well for wall stickers. These shapes can form interesting patterns or repeat to fill a space. Stripes, dots, and zigzags bring energy to plain walls. Use bold colors or soft pastels to suit your room’s look. Simple designs are easy to cut and apply, perfect for beginners.
Personalized Text And Quotes
Adding words makes your wall stickers meaningful. Choose favorite quotes, names, or short phrases. Use clear fonts that are easy to read from a distance. You can mix fonts to highlight important words. Text stickers inspire and motivate. They also add a personal touch to your home or office.
Using Digital Designs
Digital tools help create detailed and precise designs. Use free or paid software to draw or edit images. Download templates or make your own from scratch. Print your design on sticker paper for a professional look. Digital designs allow endless creativity, from cartoons to elegant art. This method suits those who want sharp, clean wall stickers.
Creating Your Design
Choose a simple design that fits your space and style. Trace or draw it on adhesive paper, then cut carefully along the lines. Peel and stick your custom wall sticker to a clean, smooth surface for a fresh look.
Creating your own wall sticker design can be a fun and rewarding experience. With a bit of creativity, you can personalize your space like never before. Start by brainstorming ideas that inspire you. Consider themes, colors, and shapes that match your room’s decor.Hand Drawing Techniques
Grab a sketchpad and pencil. Begin by drawing simple shapes and patterns. Keep your strokes light and gentle. Focus on creating bold outlines for clarity. Use tracing paper to refine your designs. This helps in achieving clean lines. Experiment with different styles.Using Graphic Software
Graphic software offers endless possibilities. Programs like Adobe Illustrator are great for beginners. Start by selecting the right canvas size. Use basic tools to create shapes and lines. Explore color palettes to match your theme. Save your work frequently to avoid losing progress.Preparing Files For Printing
Once your design is ready, ensure it’s print-friendly. Check the resolution; it should be high enough for clarity. Convert your file to a compatible format like PDF or PNG. Adjust the color settings for accurate printing. Label your files clearly for easy identification.
Credit: www.designcafe.com
Printing And Cutting
Printing and cutting your wall stickers at home can be both fun and rewarding. Getting these steps right ensures your designs look professional and stick perfectly. Pay attention to details like printer settings and cutting techniques to avoid frustrating mistakes and wasted materials.
Printer Settings For Best Results
Choose the highest print quality available on your printer to capture every detail of your design. Use photo or glossy paper settings even if you’re printing on sticker paper; this helps achieve vibrant colors. Always select the correct paper type in the settings to avoid smudging or ink bleeding.
Try printing a small test page first to see how your colors come out. Are the edges sharp enough, or do you see any smudges? Adjust the ink density if your printer software allows it to get cleaner prints.
Manual Vs. Machine Cutting
Cutting your stickers by hand can be satisfying but requires a steady hand and patience. Scissors or craft knives work well for simple shapes, but they can struggle with intricate designs. If you want detailed or multiple stickers, a cutting machine like a Cricut or Silhouette saves time and improves precision.
Consider your budget and how often you plan to make stickers. Do you want the fun of cutting manually, or do you prefer the efficiency of machines? Machines also allow you to cut exactly on the printed lines, reducing waste.
Tips For Precise Edges
- Use a sharp blade or scissors to avoid ragged edges.
- Cut slowly and follow the lines closely for clean shapes.
- If using a cutting machine, calibrate the blade depth to prevent cutting through the backing paper.
- Place a ruler or straight edge as a guide when cutting straight lines.
Have you ever peeled a sticker only to find the edges lifting or tearing? This usually happens when cuts are uneven or incomplete. Taking your time and double-checking your cuts ensures your stickers stick neatly and last longer on your walls.
Applying Wall Stickers
Applying wall stickers at home is a simple process that can refresh any room. The key is to prepare the surface well and place the sticker carefully. This ensures a smooth, lasting finish without damage.
Cleaning And Preparing Surfaces
Start with a clean wall. Dust, dirt, and grease can stop stickers from sticking well. Use a mild soap and water solution to wipe the area. Let it dry completely before applying the sticker.
Smooth surfaces work best. Rough or textured walls may cause the sticker to peel. Remove any old paint chips or loose material. Check that the wall is dry and free from moisture.
Correct Placement Techniques
Plan the sticker’s position before peeling off the backing. Use a pencil to mark light guidelines on the wall. Peel the sticker slowly, exposing a small part at a time.
Press the exposed part gently onto the wall. Gradually smooth the rest down, moving from the center outwards. Use a ruler or a flat tool to help keep it straight.
Avoiding Air Bubbles
Air bubbles ruin the look and cause peeling. Smooth the sticker firmly with a credit card or a squeegee. Move from the center toward the edges to push out trapped air.
For stubborn bubbles, gently lift the sticker and reapply. Use a pin to prick tiny bubbles and smooth them out. Patience here keeps the sticker flat and neat.
Maintaining And Removing Stickers
Maintaining and removing wall stickers properly can extend their life and keep your walls looking fresh. Handling stickers with care helps avoid damage to both the sticker and the paint underneath. Knowing the right cleaning and removal techniques saves you time and frustration.
Cleaning Without Damage
Use a soft, damp cloth to gently wipe your stickers. Avoid harsh chemicals or abrasive sponges that can peel or fade the design. A mild soap diluted in water works well to remove dust or fingerprints without harming the adhesive.
Test cleaning solutions on a small, hidden part of the sticker first. This helps you make sure it won’t cause any discoloration. Cleaning regularly keeps your stickers vibrant and prevents dirt buildup.
Safe Removal Methods
Peel stickers off slowly, starting from one corner. If you feel resistance, warm the sticker with a hairdryer for about 30 seconds to soften the adhesive. This makes removal easier and reduces the chance of tearing or leaving residue behind.
If any sticky residue remains, use a little rubbing alcohol on a cotton ball to wipe it away gently. Be careful not to rub too hard or use strong solvents that can damage paint. Have you ever struggled with stubborn sticker glue? This approach usually solves that problem without stress.
Reusing And Repurposing Ideas
Don’t throw away stickers that come off in good condition. You can place them on smooth surfaces like glass jars, laptops, or notebooks. This gives your stickers a second life and adds a personal touch to everyday items.
Consider cutting larger stickers into smaller shapes to create new designs or patterns. This is a fun way to refresh your decor without buying new stickers. What creative ways can you think of to reuse your wall stickers?
Creative Variations
Adding creative variations to your wall stickers can transform a simple DIY project into a personalized art piece that truly stands out. Playing with textures, lighting effects, and themes lets you customize stickers to fit your space and mood perfectly. How will you make your stickers reflect your style or the vibe of your room?
Textured And Layered Stickers
Textured stickers bring depth and interest to flat walls. You can use materials like felt, foam sheets, or textured paper to create layers. Cut shapes of different sizes and stack them to add a 3D effect that invites touch and interaction.
Try combining smooth vinyl with rougher fabrics or even adding small embellishments like beads or buttons. This approach turns your walls into tactile experiences rather than just visual decorations. Have you thought about how texture changes the way you feel in a room?
Glow-in-the-dark Options
Glow-in-the-dark stickers add a fun and surprising element, especially for bedrooms or creative spaces. Use glow-in-the-dark paint or adhesive sheets to make stars, moon shapes, or quirky designs that come alive when the lights go out.
This is a simple way to make your stickers interactive and useful, providing a gentle night light or a cool effect for parties. Have you ever noticed how subtle lighting can change the entire atmosphere of a room?
Seasonal And Themed Designs
Creating stickers for holidays or special occasions keeps your décor fresh and exciting. Think pumpkins for Halloween, snowflakes for winter, or flowers for spring. You can even design stickers for birthdays or celebrations to personalize your space temporarily.
This method lets you reuse your wall art by swapping out themes, saving money and effort on new decorations. What seasonal themes could brighten your home and bring a smile every time you see them?

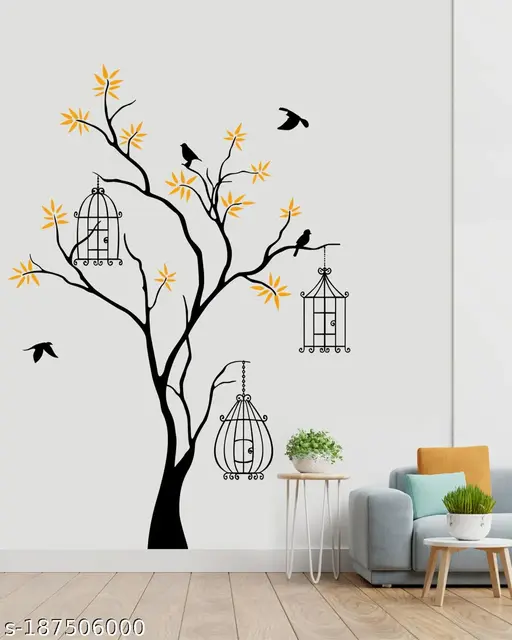
Credit: www.meesho.com
Frequently Asked Questions
How Can I Make Wall Stickers At Home Easily?
You can make wall stickers by printing your design on adhesive vinyl. Cut the design carefully, then peel and stick it on the wall. Use transfer tape for precise application. This method is simple, cost-effective, and allows customization of stickers.
What Materials Do I Need For Diy Wall Stickers?
You need adhesive vinyl sheets, a printer, scissors or a cutting machine, transfer tape, and a squeegee. These materials help you create durable and professional-looking wall stickers at home.
Can I Use Regular Paper For Wall Stickers?
Regular paper is not ideal because it lacks adhesive and durability. Use adhesive vinyl or sticker paper instead. These materials stick well and last longer on walls without damage.
How Do I Apply Homemade Wall Stickers Without Bubbles?
Use transfer tape to apply stickers smoothly. Start from one edge and press gently using a squeegee. Slowly peel off the backing while smoothing out air bubbles with your hand or squeegee.
Conclusion
Making wall stickers at home is simple and fun. You just need a few materials and some creativity. Try different shapes, colors, and sizes to fit your style. It saves money and lets you personalize any room. Enjoy the process and see how your space changes.
Start small, practice, and improve your skills step by step. Home-made stickers add a special touch to your walls. Why buy when you can create? Give it a try today!


