
Are you ready to give your walls a fresh, exciting look without the hassle of paint or wallpaper? Wall to wall stickers are the perfect way to transform any space quickly and easily.
But how do you make sure they stick perfectly, stay smooth, and look amazing? In this guide, you’ll discover simple, step-by-step tips to help you apply wall to wall stickers like a pro. Keep reading to unlock the secrets that will make your walls stand out and keep you proud of your new decor for a long time.
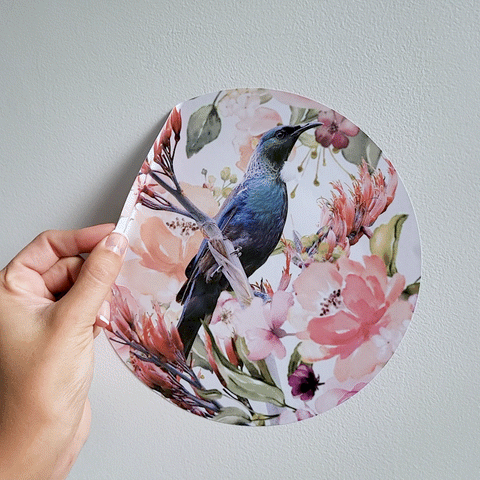
Choosing The Right Wall Stickers
Choosing the right wall stickers is key to making sure they look great and last long on your walls. The type of sticker you pick affects how easy it is to apply and remove, as well as how well it sticks to your surface. Taking time to select the perfect material, design, and size can save you frustration and ensure your walls stay beautiful.
Material Types
Wall stickers come in various materials like vinyl, fabric, and paper. Vinyl stickers are durable, waterproof, and easy to clean, making them ideal for kitchens or bathrooms. Fabric stickers offer a textured look and are easier to reposition but may not last as long in humid areas.
Think about where you want to place the sticker. A vinyl sticker on a smooth painted wall will stick better than paper stickers, which might peel quickly. Have you noticed how some stickers leave marks? Choosing high-quality materials can prevent that problem.
Design And Size Considerations
Your room’s size and style should guide your sticker design choice. Large, bold designs work well in big spaces and create a statement, while smaller, subtle stickers fit cozy areas or add delicate accents. Consider the color contrast too—stickers that blend with your wall color might go unnoticed, while those that pop can energize the space.
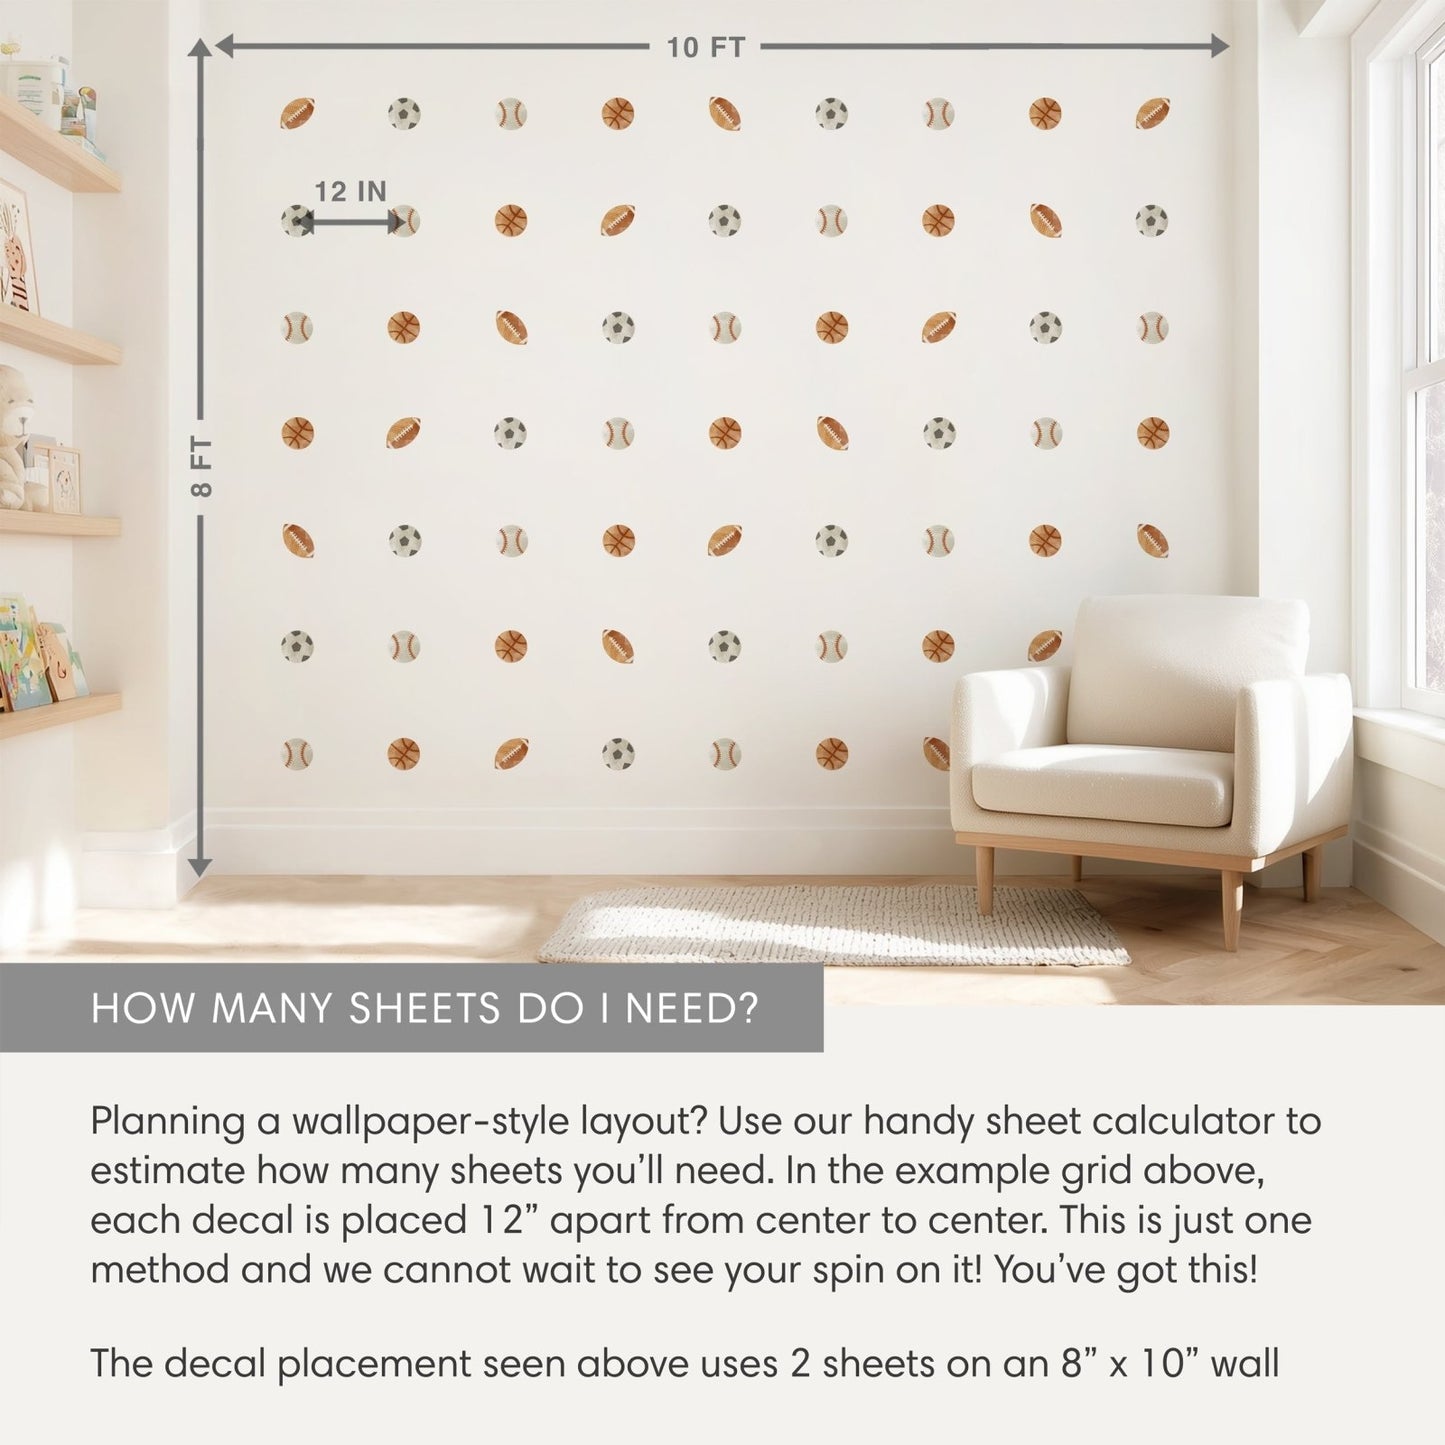
Measure your wall space before buying. It’s tempting to pick a huge sticker, but too large might overwhelm the room. Have you ever bought something that looked perfect online but felt too big or small in your space? Avoid that by planning carefully.
Surface Compatibility
Not all wall surfaces are sticker-friendly. Smooth, clean walls offer the best adhesion. Textured or rough surfaces like brick or stucco can make stickers peel or bubble. Painted walls with a flat finish might absorb adhesive, causing stickers to lift sooner.
Before applying, test a small sticker piece on your wall. Does it stick firmly? Does it come off without damage? This quick check can save you from ruining your walls or wasting stickers. What kind of wall do you have at home? Knowing this helps you pick the right product for a perfect fit.
Preparing Your Wall
Preparing your wall properly is key for the wall stickers to stick well and last long. A clean, dry, and smooth surface helps the adhesive bond strongly. Taking time to prepare the wall prevents bubbles, peeling, and uneven sticking. Follow these simple steps to get your wall ready.
Cleaning The Surface
Remove dust, dirt, and grease from the wall. Use a mild detergent mixed with water and a soft cloth or sponge. Wipe the wall gently to avoid damage. Avoid harsh cleaners that can leave residue. Let the wall air dry completely before the next step.
Ensuring Dryness And Smoothness
Check that the wall is fully dry to keep stickers from lifting. Touch the surface to confirm no moisture remains. Fill small holes or cracks with spackle or filler. Sand the patched areas smooth once dry. A smooth surface helps stickers lay flat and look great.
Removing Old Residue
Scrape off peeling paint, wallpaper glue, or tape residue. Use a plastic scraper or soft brush to avoid wall damage. Clean sticky spots with rubbing alcohol or warm soapy water. Rinse and dry the wall thoroughly. Removing residue ensures the sticker’s adhesive sticks well.
Gathering Necessary Tools
Gather all tools before starting, such as a measuring tape, a level, and a squeegee. These help ensure the sticker is placed straight and smooth without bubbles. Preparing the surface cleaner is also important for better sticking.
Gathering the right tools before starting your wall sticker project ensures a smooth and enjoyable process. Think of it as setting the stage for a successful transformation of your space. Just as a chef wouldn’t start cooking without the right ingredients, having the necessary tools at your fingertips can make all the difference.Common Tools Needed
Before diving into any wall sticker project, ensure you have these basic tools:- Measuring Tape:Essential for determining the exact placement and ensuring your stickers are evenly spaced.
- Level:Helps keep your stickers aligned perfectly straight, avoiding any skewed looks.
- Clean Cloth:Use this to wipe down walls beforehand, removing any dust or grime that might prevent the stickers from sticking properly.
- Squeegee or Credit Card:Handy for smoothing out any air bubbles and ensuring a snug fit to the wall surface.
Optional Accessories For Precision
While the basics are sufficient for most projects, certain accessories can enhance precision, especially for complex designs:- Painter’s Tape:Great for marking out areas without leaving any residue, ensuring precision before the final stick.
- Pencil:Lightly mark where each sticker will go, providing a visual guide.
- Craft Knife:Useful for trimming stickers to fit around corners or edges seamlessly.
Credit: mejmej.com
Applying The Wall Stickers
Applying wall stickers can transform any room quickly. The key is careful preparation and steady hands. This guide will help you place your stickers perfectly. Follow simple steps to avoid wrinkles and air bubbles. A neat finish makes your walls look amazing.
Positioning And Measuring
Start by choosing the exact spot for your sticker. Measure the area using a tape measure or ruler. Mark light pencil points to guide placement. Check if the sticker fits well on the wall. Take a step back to see the overall look. Adjust marks if needed before sticking.
Peeling And Sticking Techniques
Peel the backing paper slowly from one edge. Avoid touching the sticky side too much. Hold the sticker by the edges to keep it clean. Align the top edge with your pencil marks. Press the sticker gently onto the wall. Work from the top down for smooth placement.
Smoothing Out Air Bubbles
Use a soft cloth or a squeegee to smooth the sticker. Start from the center and push air outwards. Work slowly to avoid tearing or stretching. Small bubbles can be popped with a pin. Press again to flatten the sticker firmly on the wall.
Post-application Tips
After applying wall to wall stickers, proper care ensures they last long and look good. These post-application tips help keep stickers firmly in place and protect them from damage. Follow simple steps to maintain their appearance and durability.
Securing Edges And Corners
Edges and corners are the most vulnerable parts of stickers. Press them gently but firmly with your fingers or a soft cloth. Use a roller or a flat tool to smooth out air bubbles and improve adhesion. Check these areas regularly and press down any lifting edges quickly.
Avoiding Moisture And Damage
Moisture can weaken the adhesive and cause stickers to peel. Keep stickers away from water sources like sinks and showers. Avoid cleaning with harsh chemicals or scrubbing the stickers. Protect them from direct sunlight to prevent fading and cracking. Handle stickers carefully to avoid scratches or tears.
Maintenance And Cleaning
Dust and dirt can build up on stickers over time. Use a soft, dry cloth to wipe the surface gently. For tougher dirt, dampen the cloth slightly with water only. Avoid using abrasive materials or strong cleaning products. Regular, gentle cleaning keeps stickers vibrant and fresh for longer.

Credit: www.amazon.ca

Credit: www.walmart.com
Frequently Asked Questions
How Do You Prepare The Wall Before Applying Stickers?
Clean the wall thoroughly with a damp cloth. Remove dust, dirt, and grease for better adhesion. Ensure the wall is dry before sticking the sticker.
Can Wall Stickers Be Applied On Textured Surfaces?
Wall stickers work best on smooth, flat surfaces. Textured walls may cause poor adhesion and peeling. For best results, choose smooth walls for application.
How Long Do Wall Stickers Typically Last?
Wall stickers last between 3 to 5 years if applied properly. Avoid moisture and excessive sunlight to extend their lifespan. Regular cleaning helps maintain their appearance.
Can Wall Stickers Be Removed Without Damaging Walls?
Yes, most wall stickers peel off easily without damage. Gently peel from one corner and slowly remove. Use warm water or adhesive remover if residue remains.
Conclusion
Sticking wall to wall stickers is simple with these steps. Clean the surface well and dry it fully. Peel the backing slowly and place the sticker carefully. Smooth out air bubbles using a flat tool or your hand. Take your time to avoid wrinkles or misplacement.
These tips help your stickers look neat and last long. Enjoy decorating your space with easy, fun wall stickers.


