
Are you ready to transform your space with a stylish plug in pendant light but not sure where to start? Hanging one might seem tricky, but with the right steps, you can do it yourself quickly and safely.
Imagine adding a warm, inviting glow to your room without the hassle of complicated wiring. In this guide, you’ll discover simple, clear instructions that make the process easy—no electrician needed. Keep reading, and by the end, you’ll have the confidence to brighten up your home exactly the way you want.

Credit: www.nospacelikehome.uk
Choosing The Right Pendant Light
Choosing the right pendant light sets the foundation for a successful and stylish installation. It’s more than just picking a pretty fixture; it’s about matching your space, your needs, and the practical aspects of hanging a plug-in pendant light. You want a light that complements your room while being easy to install and use.
Types Of Pendant Lights
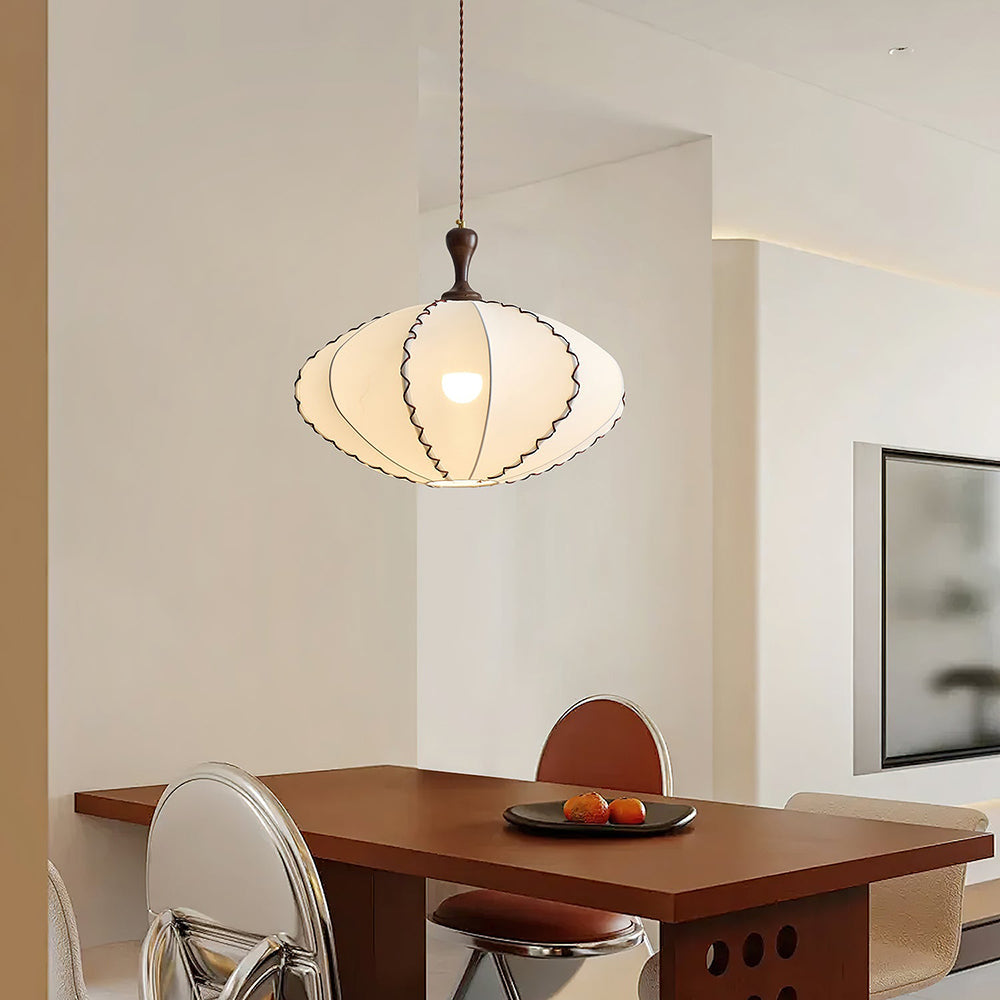
Pendant lights come in a variety of shapes and sizes, each suited for different spaces and purposes. You’ll find globe pendants, drum pendants, industrial-style metal shades, and even cluster pendants that feature multiple lights hanging together.
Think about where you want to hang the light. Is it over a kitchen island, a reading nook, or a hallway? The shape and size of the pendant will influence the amount of light and the visual impact it creates.
Selecting The Proper Plug
Not all plug-in pendants use the same type of plug. Some come with standard two-prong plugs, while others have three-prong grounding plugs for safety. Make sure the plug matches your outlet type to avoid any installation headaches.
Consider whether you want a straight plug or a right-angle plug, especially if space around your outlet is tight. Also, check the cord length; too short and you may need an extension, too long and it might look messy.
Matching Style And Function
Your pendant light should fit the style of your room and meet your lighting needs. For example, a sleek metal pendant works well in a modern kitchen, while a fabric drum shade might be better for a cozy living room.
Ask yourself: Do you want ambient light, task lighting, or a statement piece? Choosing a pendant that balances style and function will make your space both beautiful and practical.
Credit: docos.us
Gathering Tools And Materials
Hanging a plug-in pendant light requires careful preparation. Gathering the right tools and materials makes the job easier and safer. This section guides you through everything needed before starting the installation.
Essential Tools List
Having the correct tools saves time and prevents mistakes. Prepare these tools before you begin:
- Screwdriver (flathead and Phillips)
- Wire strippers
- Drill with drill bits
- Measuring tape
- Voltage tester
- Level
- Wire nuts or connectors
- Step ladder
Safety Equipment
Safety comes first when working with electrical fixtures. Use these items to protect yourself:
- Insulated gloves
- Safety goggles
- Dust mask (if drilling into ceilings)
- Non-slip shoes
Preparing The Workspace
Clear the area around the installation spot. Remove furniture or objects that block access. Place a drop cloth to catch debris. Ensure good lighting for better visibility. Turn off power to the circuit at the breaker box. Double-check power is off using a voltage tester. Keep all tools and materials within reach.
Preparing The Pendant Light
Ensure the pendant light is unplugged before starting. Check all parts and tools are ready for easy installation. Double-check the cord length fits your space comfortably.
Preparing the Pendant Light Getting your pendant light ready is an essential first step. It ensures a smooth installation and a safe setup. Proper preparation minimizes potential issues. Follow these steps to prepare your pendant light effectively.Inspecting The Light Fixture
Begin by checking the light fixture. Look for any visible damage. Ensure all parts are intact. Verify that the shade is secure. Confirm the wires are not frayed. A thorough inspection ensures safety and functionality.Attaching The Plug Components
Next, attach the plug components. Gather the necessary tools and materials. You may need a screwdriver and pliers. Follow the manufacturer’s instructions carefully. Connect the wires to the plug. Ensure connections are tight and secure. This step is crucial for proper operation.Checking Electrical Compatibility
Finally, check the electrical compatibility. Ensure the plug matches your outlet type. Verify the voltage requirements. Compare them with your home’s electrical system. This prevents potential electrical hazards. Confirm that all components are compatible. Safe installation starts with these checks.Wiring The Plug To The Pendant Light
Wiring the plug to your pendant light is a crucial step that ensures safe and reliable power flow. Handling wires might feel intimidating, but with careful attention and the right tools, you can achieve a secure connection. Let’s break down the wiring process into clear, manageable parts so you can confidently complete this task.
Stripping And Connecting Wires
Start by stripping about half an inch of insulation from the ends of each wire using a wire stripper or a sharp utility knife. Be careful not to nick the metal wire inside, as this can weaken the connection. Once stripped, twist the exposed copper strands tightly to prepare them for connection.
Match the wires from the pendant light to the plug wires by color: usually, black or brown for live, white or blue for neutral, and green or bare for ground. If your wires don’t follow this color scheme, check the manufacturer’s instructions or use a voltage tester to identify them safely.
Securing Wire Connections
Twist the matching wires together clockwise, then secure each connection with a wire nut or connector. A good connection feels firm and doesn’t pull apart easily. You can wrap the connection with electrical tape for extra security and insulation.
Make sure no bare wire is exposed beyond the wire nut, as this could cause shorts or shocks. If you have a plug with screw terminals, loop the wire around the screw clockwise and tighten firmly. Loose connections are a common cause of flickering lights or plugs that heat up, so double-check your work.
Testing Electrical Connections
Before plugging in your pendant light, test the wiring with a multimeter or voltage tester to confirm everything is connected properly. Check for continuity and ensure there are no shorts between wires. If you detect any issues, re-inspect your connections for loose wires or mistakes.
Once tests are clear, plug in the pendant light and switch it on. Does the light turn on steadily without flickering? If yes, you’ve done a great job wiring the plug. If not, unplug immediately and reassess your connections—sometimes a small error makes a big difference in safety and function.
Installing The Pendant Light
Installing the pendant light is where your project starts to take shape. This step involves securely attaching the fixture, setting the perfect height, and making sure the cord stays neat and safe. Getting these details right will not only ensure safety but also enhance the overall look of your space.
Mounting The Light Fixture
Begin by turning off the power at the circuit breaker to keep things safe. Attach the mounting bracket to the ceiling electrical box using the screws provided. Make sure the bracket is firmly in place, as it will support the entire weight of the pendant light.
Next, connect the wires: typically, black to black (live), white to white (neutral), and green or copper to ground. Use wire nuts to secure these connections, then tuck the wires neatly into the box before fixing the light fixture onto the bracket. Does your light feel sturdy when you gently tug it? If not, double-check your connections.
Adjusting Height And Position
Finding the right height for your pendant light can change the mood of your room. Most pendant lights come with adjustable cords or rods—use these to set the pendant at eye level or slightly above your table or work surface. Consider the size of the room and the fixture; a light too low can block views, while one too high might lose its impact.
Try sitting under the light or walking around the room to see how it feels. You might want to adjust the length a few times before settling. Remember, the goal is to balance functionality with style.
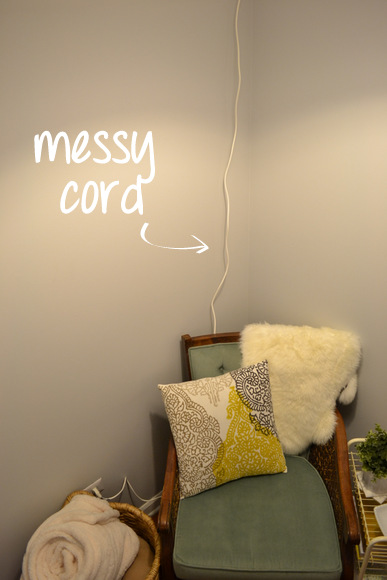
Securing The Pendant Cord
Loose cords can look messy and pose a hazard. Use cord grips or clips to fasten the cord to the ceiling or nearby surfaces, keeping it taut and tidy. This also prevents the cord from swinging or pulling on the fixture itself.
If your pendant light has excess cord length, coil it neatly and secure it with a twist tie or zip tie inside the canopy. This prevents strain on the electrical connections and keeps your installation clean. Have you checked if the cord feels secure enough to avoid accidental yanks?
Safety Tips And Troubleshooting
Installing a plug-in pendant light adds style and function to any room, but safety should always be your top priority. Understanding how to avoid mistakes and handle electrical issues can save you from costly repairs or accidents. Let’s walk through some essential safety tips and troubleshooting advice to keep your lighting project smooth and secure.
Avoiding Common Mistakes
Many people rush through hanging a pendant light and overlook simple steps that lead to problems later. Always double-check that your plug and socket match the voltage and wattage requirements of your fixture.
Don’t pull the cord forcefully or twist it too much—this can damage the wiring inside. Make sure the pendant light is securely mounted so it doesn’t wobble or fall, which could cause injuries or electrical shorts.
Have you ever installed something only to find it hanging crooked? Use a level during installation to keep your pendant straight. This small step improves both safety and aesthetics.
Handling Electrical Issues
If your pendant light doesn’t turn on, first check if the plug is fully inserted into the outlet. Sometimes the issue is as simple as a loose connection.
If the light flickers or sparks, unplug it immediately. This is a sign of faulty wiring or a damaged plug, and continuing to use it could be dangerous.
Always use a voltage tester before touching any wires to ensure the power is off. If you’re unsure about electrical work, don’t hesitate to call a professional. Would you risk your safety or save a few bucks?
Maintenance And Care
Keep your pendant light clean by wiping the cord and fixture with a dry cloth regularly. Dust buildup can affect performance and cause overheating.
Check the plug and cord for any signs of wear, like cracks or frays. Replace damaged parts immediately to avoid electrical hazards.
Consider unplugging your pendant light during storms or when you leave your home for long periods. This simple habit can protect your fixture from power surges and prolong its lifespan.

Credit: www.amazon.ca
Frequently Asked Questions
How Do I Hang A Plug In Pendant Light Safely?
Turn off power at the breaker before starting. Use a voltage tester to confirm no power. Securely mount the fixture bracket to the ceiling. Follow the manufacturer’s wiring instructions carefully. Ensure all wire connections are tight and insulated.
What Tools Do I Need To Hang A Pendant Light?
You will need a screwdriver, wire strippers, voltage tester, drill, and a ladder. Additionally, have wire nuts and electrical tape for safe wiring. These tools help ensure proper installation and electrical safety during the hanging process.
Can I Install A Pendant Light Without An Electrician?
Yes, if you have basic electrical knowledge and follow safety steps. Always turn off power and double-check connections. If unsure, consult a professional to avoid hazards. Proper installation ensures safe and effective lighting.
How High Should A Plug In Pendant Light Hang?
Typically, pendant lights should hang 28 to 34 inches above a table or countertop. For general room lighting, 7 feet from the floor is ideal. Adjust the height based on room size and purpose for balanced illumination.
Conclusion
Hanging a plug-in pendant light is easier than it seems. Follow each step carefully and take your time. Double-check connections for safety. Choose a spot that fits your room’s style. Adjust the cord length to your liking. With simple tools and clear instructions, you can brighten any space quickly.
Enjoy the new look and cozy feel your pendant light brings. Small changes can make a big difference in your home. Keep these tips in mind for a smooth installation.


