
Are you ready to transform your entryway with a stylish and functional piece of furniture? The Convenience Concepts 3 Tier Display Entryway Table is perfect for adding extra storage and a touch of charm to your space.
But before you can enjoy its beauty and practicality, you need to assemble it correctly. Don’t worry—this guide will walk you through every step in a simple, clear way. By the time you’re done, your entryway will look organized and inviting, and you’ll feel proud of putting it together yourself.
Keep reading to discover how easy it can be!

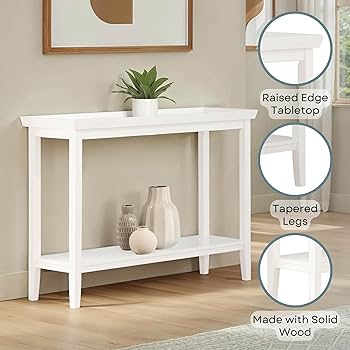
Credit: www.walmart.com
Tools Needed
Gathering the right tools is key to a smooth assembly of the Convenience Concepts 3 Tier Display Entryway Table. Having everything ready saves time and reduces frustration. These tools are common and easy to find.
Using the correct tools ensures all parts fit well and the table stands strong. A few basic hand tools usually do the job. Keep them close by before you start.
Phillips Head Screwdriver
This screwdriver fits the screws included with the table. It helps tighten screws securely without stripping them. A medium size is usually best for this project.
Rubber Mallet
A rubber mallet gently taps pieces into place without damaging the wood or metal. It avoids marks and dents. This tool is perfect for snug fits.
Allen Wrench (hex Key)
The assembly kit often includes an Allen wrench. It is essential for tightening hex bolts and screws. Keep it handy to avoid searching during assembly.
Measuring Tape
Use a measuring tape to confirm proper alignment and spacing. This tool helps keep the table balanced and straight. Double-check measurements for accuracy.
Soft Cloth
A soft cloth cleans dust or dirt off parts before assembly. It also protects surfaces from scratches while working. Use it to wipe down pieces as needed.
Unpacking The Parts
Unpacking the parts carefully is the first step in assembling the Convenience Concepts 3 Tier Display Entryway Table. Take your time to open the box and lay out all components on a flat surface. This will help you see everything clearly before starting the assembly.
Check each part against the instruction manual’s list to make sure nothing is missing. Sorting the pieces by type and size makes the process smoother and faster. Keep small hardware items in a container to avoid losing them.
Identifying The Main Components
- Three wooden shelves
- Four metal legs
- Supporting brackets and screws
- Assembly tools (usually included)
Inspecting For Damage
Look closely at each piece for cracks or dents. Check the metal parts for bends or rust. Report any damage to the seller immediately for a replacement.
Organizing Hardware And Tools
- Screws and bolts sorted by size
- Allen wrench or screwdriver included
- Extra hardware pieces separated
Preparing Your Workspace
Choose a clean, spacious area with good lighting. Lay down a soft cloth or cardboard to protect the table parts. Keep the instruction manual handy for easy reference.
Identifying Components
Begin by sorting all parts and hardware on a clean surface. Check the instruction manual to identify each component clearly. Make sure no pieces are missing before starting assembly.
Assembling the Convenience Concepts 3 Tier Display Entryway Table can be a rewarding task, especially when you start by identifying each component. Knowing what pieces you have is crucial to a smooth assembly process. It eliminates confusion and ensures you don’t have any missing parts before you start putting things together.Unpacking The Box
Carefully remove all parts from the box. Lay them out on a flat surface. This will help you have a clear view of all components and make it easy to identify each piece.Checking The Manual
Refer to the assembly manual included in the package. It usually contains a parts list and images for easy identification. Make sure to match each component with the illustrations provided.Organizing The Parts
Sort the components by type and size. Group similar items together, such as screws, shelves, and legs. This organization helps you find what you need quickly during assembly.Identifying Key Components
Look for the main shelves and table legs first. These are usually the largest pieces and form the structure of your table. Recognizing these parts helps you understand the overall design and assembly process.Spotting The Hardware
Locate all screws, bolts, and tools. They are often in a separate bag. Double-check that you have the correct amount of each item as listed in the manual.Ensuring Completeness
Before you begin assembly, verify that you have all the components listed. Missing parts can cause frustration and delays. If something is missing, contact customer support immediately. By taking the time to identify and organize each component, you set yourself up for a stress-free assembly. Have you ever started a project only to find you didn’t have all the parts? This simple step can prevent that headache. Get ready to transform your entryway with your new table!Assembling The Frame
Assembling the frame of your Convenience Concepts 3 Tier Display Entryway Table is a crucial part of the build. It sets the foundation for stability and durability, so taking your time here will pay off. Let’s focus on the key tasks: attaching the legs and securing the crossbars, which hold everything together firmly.
Attaching The Legs
Start by identifying the four legs and their matching slots on the table frame. Make sure each leg is oriented correctly—this will save you from having to redo the work later.
Use the provided screws and a screwdriver to attach each leg tightly. I found that hand-tightening the screws first helps align the legs perfectly before fully securing them with a drill or screwdriver. Have you noticed how a slight misalignment here can cause wobbling later? Take a moment to double-check alignment before moving on.
Securing The Crossbars
The crossbars are what keep the legs from shifting and the table sturdy. Locate the crossbars and their attachment points on the legs.
Attach each crossbar using the screws and ensure they sit flush against the legs. Tighten the screws firmly, but avoid over-tightening to prevent damage to the metal frame. I recommend tightening screws in a diagonal pattern to distribute pressure evenly. Does your table feel solid when you gently shake it? If not, revisit these connections and tighten as needed.
Installing The Shelves
Installing the shelves on the Convenience Concepts 3 Tier Display Entryway Table is simple and straightforward. This process creates the sturdy base and elegant look of the table. Follow these clear instructions to place each shelf securely and evenly.
Positioning The Bottom Shelf
Start by locating the bottom shelf and the four metal legs. Lay the legs on a flat surface. Place the bottom shelf between the legs at the lowest level. Align the pre-drilled holes on the shelf with the holes on the legs.
Use the provided screws and a screwdriver to secure the shelf. Tighten each screw gently but firmly. Make sure the shelf is level and stable before moving on. This shelf supports the entire structure, so correct placement is key.
Adding The Middle And Top Shelves
Next, position the middle shelf at the middle height of the legs. Align its holes with the legs. Secure it with screws, tightening evenly on all sides. Check the shelf’s stability before adding the top shelf.
Finally, place the top shelf on the legs. Align holes and fasten screws carefully. Ensure all screws are tight and shelves do not wobble. The table is now ready to use with its three solid shelves.
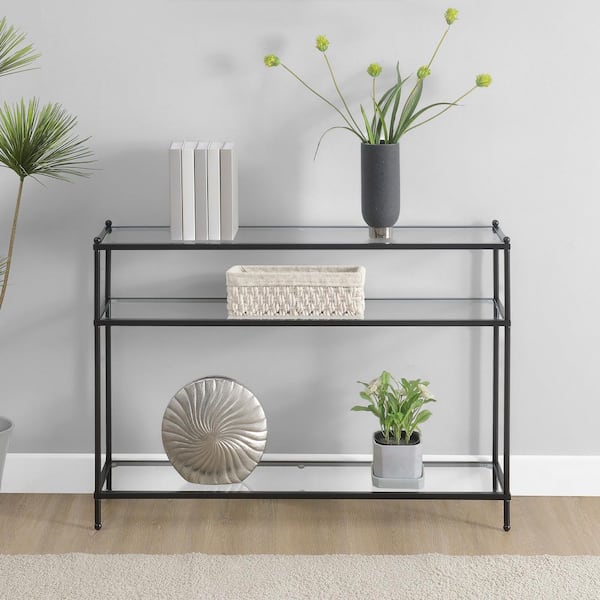
Credit: www.homedepot.com
Fastening Hardware
Fastening hardware is the backbone of assembling your Convenience Concepts 3 Tier Display Entryway Table. Without the right screws, bolts, and connectors, your table won’t be stable or safe. Paying attention to these small parts can save you from wobbly shelves and frustrating re-assembly.
Think about the last time you rushed through a furniture project. Did you notice how the wrong screw made the whole piece shaky? I learned that having the correct fastening hardware ready before you start speeds up the process and gives your table strength.
Identifying The Hardware Components
Your kit includes various screws, bolts, and often small washers or nuts. Take a moment to lay them all out and match each to the instruction manual. This helps you avoid mixing up similar-looking pieces.
- Screws:Usually used to attach shelves to the frame.
- Bolt and Nut Sets:Provide strong connections, especially for the legs.
- Washers:Distribute pressure and protect wood surfaces from damage.
Have you ever tried to force a screw into the wrong hole? It can strip the hole or bend the hardware, reducing stability. Confirming the parts beforehand prevents these headaches.
Tools Needed For Fastening
Most fastening hardware can be tightened with a simple screwdriver or Allen wrench, often included in the package. Using the correct tool ensures you don’t damage the screw heads or bolts.
- Phillips-head screwdriver
- Flat-head screwdriver (sometimes needed for washers or clips)
- Allen wrench (usually provided)
Are you using a power drill to speed things up? Be careful—too much torque can strip screws or crack wood. Take your time with hand tools for a better fit and finish.
Tips For Secure Fastening
Start by loosely attaching all screws and bolts before tightening them fully. This lets you adjust the alignment of the shelves and legs without forcing parts into place.
Once everything is aligned, tighten the hardware evenly and gradually. Over-tightening can damage the wood, while under-tightening leads to wobble.
- Check each connection twice.
- Use washers to prevent screws from sinking into wood.
- Don’t skip any hardware pieces—even small ones improve stability.
Have you noticed how even a tiny loose screw can make a big difference? Take the extra minute to secure every piece firmly, and your table will stay steady for years.
Final Adjustments
Final adjustments are crucial to ensure your Convenience Concepts 3 Tier Display Entryway Table stands strong and looks perfect. This stage is where you check every detail, making sure the table feels solid and secure. Taking a few extra minutes here can save you from future wobbling or loose parts.
Checking Stability
Once your table is assembled, gently shake it to test its stability. Does it rock or feel uneven? If yes, identify which leg or section causes the imbalance.
Sometimes, small floor irregularities affect stability. You might need to slightly adjust the feet or reposition the table for a better fit. A stable table not only looks better but also keeps your items safe.
Tightening Screws
Go over every screw and bolt on your table with a screwdriver or Allen wrench. Even if you think they are tight, giving each one a final twist can prevent future loosening.
Loose screws might cause the shelves to sag or the entire table to wobble over time. Pay close attention to screws connecting the legs and shelves—they bear most of the weight.
Have you ever had furniture fall apart because of a single loose screw? Taking the time to tighten everything now can keep your table sturdy for years.
Maintenance Tips
Keeping your Convenience Concepts 3 Tier Display Entryway Table looking great requires some simple maintenance. A little care goes a long way in preserving its finish and stability. You’ll enjoy its functionality and style for years if you stay on top of a few easy tasks.
Cleaning Without Damage
Use a soft, dry cloth to wipe down the table regularly. Avoid harsh chemicals or abrasive cleaners that can strip the finish or scratch the surface. If you need a deeper clean, dampen the cloth slightly with water and dry immediately.
Have you noticed how dust can settle quickly in entryways? Regular dusting prevents buildup and keeps the wood looking fresh.
Protecting The Surface
Place coasters or mats under items like keys, plants, or drinks to avoid stains and water rings. Even small spills should be wiped up immediately to prevent damage. Think about how often you place things down—adding protective layers can save you headaches later.
Tightening Hardware Periodically
Check screws and bolts every few months to keep the table sturdy. Over time, vibrations from daily use can loosen fittings, which may cause wobbling or instability. Grab a screwdriver and tighten any loose parts to maintain safety.
Avoiding Excessive Weight
The table is designed to hold everyday items, but overloading it can strain joints and shelves. Ask yourself if each item really needs to be displayed here or if it should be stored elsewhere. Keeping weight balanced and reasonable helps avoid damage.
Handling Scratches And Chips
If you spot minor scratches, use a matching wood touch-up pen or a wax stick to conceal them. These small fixes can refresh the look without needing professional repairs. What’s your go-to fix for small furniture nicks?

Credit: www.walmart.com
Frequently Asked Questions
How Long Does It Take To Assemble The 3 Tier Display Table?
Assembly usually takes 30 to 45 minutes with basic tools. Following the instructions carefully speeds up the process. Having a second person helps with larger parts.
What Tools Are Needed For Assembly?
You typically need a Phillips screwdriver and an Allen wrench. Most convenience concepts tables include the necessary Allen wrench. Having a small hammer can help with fittings.
Are All Parts Included In The Package?
Yes, all necessary parts and hardware come with the table. Check the parts list before starting assembly to ensure nothing is missing. Contact customer service if any parts are absent.
Can This Table Hold Heavy Items Safely?
The table supports moderate weight, ideal for decor and light storage. Avoid placing extremely heavy items to maintain stability and longevity. The three-tier design distributes weight evenly.
Conclusion
Assembling the Convenience Concepts 3 Tier Display Entryway Table is simple and quick. Follow each step carefully, and you will have a sturdy table ready to use. This table adds extra storage and style to your entryway. Take your time, use the right tools, and enjoy the process.
Soon, you will have a neat, organized space. This guide helps you build the table with ease and confidence. Now, your entryway looks tidy and welcoming.


