
Are you ready to transform your living space with stylish, handmade furniture? Learning how to make coffee and end tables is easier than you think—and it gives you full control over the design, size, and finish.
Imagine having a unique table that perfectly fits your room and matches your style. In this guide, you’ll discover simple steps to create beautiful tables that impress your guests and add warmth to your home. Keep reading, and by the end, you’ll be ready to build pieces that not only look great but also give you a real sense of accomplishment.

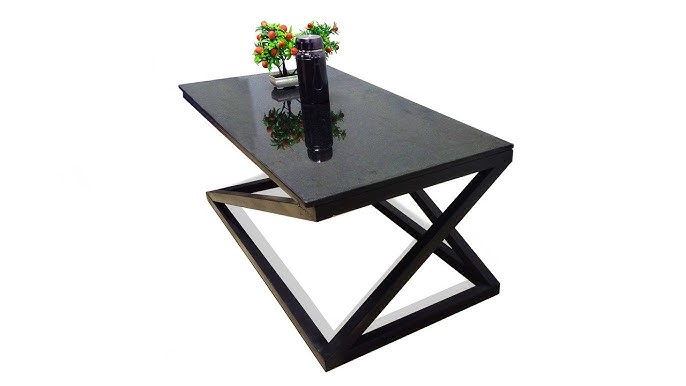
Credit: www.reddit.com
Choosing The Right Materials
Choosing the right materials is key to crafting coffee and end tables that last and look great. The materials you pick affect not just the durability but also the style and feel of your finished pieces. Think about where the tables will go, how they will be used, and what kind of look fits your space.
Types Of Wood For Durability And Style
Wood is a popular choice for coffee and end tables because it combines strength and beauty. Hardwoods like oak, maple, and walnut offer excellent durability. They resist scratches and dents, which keeps your tables looking new for years.
Softwoods such as pine are easier to work with and budget-friendly but may show wear faster. If you want a rustic or farmhouse look, pine can be a great fit. Remember, the finish you apply can also protect the wood and enhance its natural grain.
Alternative Materials To Consider
Wood isn’t your only option. Metals like steel or aluminum give a modern, industrial vibe and are very sturdy. Glass tops paired with metal or wood bases add a sleek, airy feel but need careful handling to avoid chips or cracks.
Don’t overlook materials like MDF or plywood for budget-friendly builds. These can be finished with veneers or paint to mimic more expensive woods. Ask yourself: do you want a natural look or something more contemporary?
Tools And Supplies Needed
Before you start, gather the right tools to make the process smooth. Essential items include a saw (circular or miter), measuring tape, clamps, sanding block or electric sander, and wood glue. If you plan on finishing the tables yourself, you’ll also need brushes, stains, and sealants.
Having the right hardware like screws, nails, and brackets is crucial for strong joints. Do you have a dedicated workspace? Organizing your tools and materials ahead can save frustration and help you focus on building beautiful tables.
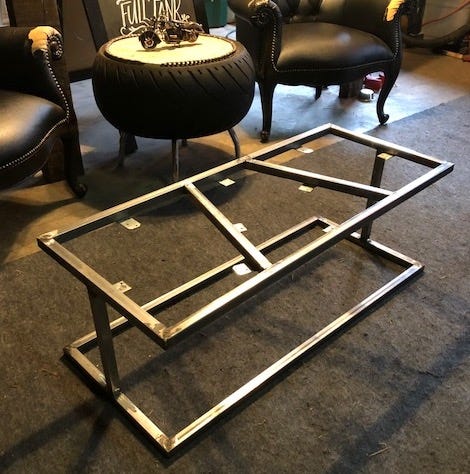
Credit: medium.com
Planning Your Design
Planning your design is a crucial step in making coffee and end tables that fit perfectly in your home. It helps you avoid costly mistakes and ensures your finished piece looks intentional and stylish. Taking time to plan also makes the building process smoother and more enjoyable.
Measuring Your Space
Start by measuring the area where you want to place your table. Knowing the exact dimensions helps you create a table that fits well without overcrowding the room.
Don’t forget to consider the height, width, and depth. For example, a coffee table should generally be about the same height as the sofa cushions. Take note of any nearby furniture to ensure enough walking space around the table.
Selecting Styles That Match Your Decor
Think about the style of your existing furniture. Do you prefer modern, rustic, or traditional looks? Your table should complement your room’s overall vibe.
Look at materials and colors you already have. If your living room has warm wood tones, a matching wood table will create harmony. Alternatively, mixing materials like metal legs with a wooden top can add visual interest without clashing.
Sketching Your Table Layout
Put your ideas on paper before cutting any wood. Sketching helps you visualize the table’s shape and size and can reveal design flaws early on.
Use simple tools like graph paper or a digital app to draw your table. Label measurements clearly and experiment with different leg styles or tabletop shapes. This step saves time and materials by guiding your build with a clear plan.
Step-by-step Building Process
Begin by gathering all necessary materials and tools for your coffee and end tables. Follow clear instructions to cut, assemble, and finish each piece carefully. Focus on precise measurements and smooth surfaces for a polished look.
Embarking on the journey to create your own coffee and end tables can be incredibly rewarding. Not only do you get to craft a piece tailored to your style, but you also gain a valuable skill along the way. Let’s dive into the step-by-step building process to transform simple wood pieces into functional art for your living space.Cutting And Preparing Wood Pieces
Begin by selecting the right type of wood for your project, considering both the aesthetic and durability you desire. Maple, oak, and walnut are excellent choices for sturdy and visually appealing tables. Once you’ve chosen your wood, measure and mark the dimensions for each piece. Accurate measurements are crucial to ensure a perfect fit when assembling the table. Use a saw to cut the wood to size, focusing on clean, straight cuts. Sand the edges and surfaces to smooth out any rough spots, creating a polished look and a safe touch.Assembling The Table Frame
Start by constructing the base of your table, which provides the necessary support and stability. Assemble the legs and aprons, securing them with wood glue and screws for added strength. Check the alignment of each piece as you attach them. A square frame ensures that your table will stand evenly and look professional. Consider how the height of your table will work in your space. Will it complement your seating arrangement? Make necessary adjustments before proceeding.Adding The Tabletop And Finishing Touches
Once the frame is sturdy, it’s time to add the tabletop. Align it carefully with the frame and secure it using screws or brackets from underneath to maintain a seamless look. Now, think about the finish. A natural stain can enhance the wood’s grain, while paint offers endless customization options. Choose a finish that reflects your personal style and complements your existing decor. Finally, protect your creation with a clear sealant to preserve its beauty and durability over time. Step back and admire your handiwork. How does it feel to have built something from scratch?Finishing Techniques
Finishing techniques give your coffee and end tables a polished look. They protect the wood and highlight its natural beauty. Proper finishing extends the life of your furniture and makes it easier to clean.
Sanding For Smooth Surfaces
Sanding removes rough spots and prepares the wood for finishing. Start with coarse sandpaper to smooth out uneven areas. Move to finer grits for a soft, smooth finish. Always sand along the wood grain to avoid scratches. Use a sanding block or electric sander for even pressure. Wipe away dust with a damp cloth before the next step.
Choosing Paints And Stains
Paints add color and can hide imperfections. Choose water-based paints for easy cleanup and low odor. Stains soak into the wood to enhance its grain. Pick stains that match your room’s decor and the wood type. Test paint or stain on a scrap piece to see the final look. Apply thin coats for even coverage and let each dry fully.
Applying Protective Coatings
Protective coatings shield your tables from spills and scratches. Use polyurethane or varnish for strong, durable protection. Apply with a brush or cloth in thin layers. Allow each coat to dry and lightly sand between coats. Avoid thick layers to prevent bubbles and drips. Finish with a final coat to seal and shine your project.
Creative Customizations
Creative customizations allow you to turn ordinary coffee and end tables into pieces that truly reflect your style and meet your needs. Adding your personal touch not only enhances the aesthetics but also improves the functionality of these essential living room staples. Have you ever thought about how a simple adjustment can make your table both beautiful and practical?
Incorporating Storage Options
Adding storage to your coffee or end table can make a big difference in keeping your living space tidy. Consider drawers, shelves, or even hidden compartments for stashing magazines, remote controls, or coasters.
Using baskets or storage bins underneath the table adds a rustic charm while offering extra space. I once added a small drawer to my coffee table, and it became my go-to spot for clutter-free living room essentials.
Adding Decorative Elements
Small decorative touches can transform your table from plain to stunning. Think about adding carved details, stenciled patterns, or painted accents that match your room’s theme.
Try using decorative knobs or legs for an unexpected twist. Adding a glass top over a painted surface can protect your design and give a sleek finish that lasts.
Using Mixed Materials For Unique Looks
Combining different materials can give your table a one-of-a-kind appearance. Mixing wood with metal, glass, or even concrete creates a striking contrast that catches the eye.
Imagine a wooden tabletop with metal hairpin legs or a concrete base paired with a smooth wooden surface. These combinations not only look modern but also add durability and texture to your furniture.
Maintaining Your Tables
Maintaining your coffee and end tables ensures they remain both functional and beautiful for years. Regular care can prevent small issues from turning into costly repairs. How often do you really think about the condition of your tables beyond just wiping them down?
Cleaning And Care Tips
Start by dusting your tables weekly with a soft, dry cloth to avoid scratches from debris. For sticky spots, use a damp cloth with mild soap, then dry immediately to prevent water damage.
Avoid harsh chemicals or abrasive cleaners; they can strip finishes and dull the surface. Using coasters and placemats can protect your tables from heat and moisture, saving you time on deep cleaning later.
Repairing Minor Damages
Small scratches or dents happen, but you can fix many at home. For light scratches, rubbing a walnut or applying a matching wood stain marker can blend imperfections effectively.
If you spot a loose joint or wobbly leg, tightening screws or adding wood glue can stabilize your table quickly. Have you ever ignored a minor wobble only to regret it when the table finally gives way?
Extending The Lifespan Of Your Tables
Place your tables away from direct sunlight to prevent fading and warping. Rotate items on the surface regularly to avoid uneven wear or discoloration.
Consider applying a fresh coat of varnish or sealant every couple of years for added protection. Investing a little time in maintenance now can save you from costly replacements later.

Credit: danslelakehouse.com
Frequently Asked Questions
How Do I Choose Wood For Coffee And End Tables?
Select hardwood like oak or maple for durability. Softwoods like pine are budget-friendly but less durable. Consider grain, color, and finish for style.
What Basic Tools Are Needed To Make Tables?
Essential tools include a saw, drill, sander, measuring tape, and clamps. These help cut, assemble, and finish your coffee and end tables.
How Long Does It Take To Build A Coffee Table?
Building a coffee table typically takes 4 to 8 hours. Time depends on design complexity and your woodworking skill level.
Can I Customize Table Size To Fit My Space?
Yes, you can adjust dimensions to suit your room. Measure your space carefully to ensure the table fits perfectly.
Conclusion
Making coffee and end tables is fun and rewarding. Start with simple tools and clear steps. Choose wood that fits your style and space. Take your time and enjoy each step. Your handmade tables will add charm to any room.
Small projects like these boost your skills and confidence. Try customizing with paint or stains for a unique look. Crafting furniture brings a sense of pride and joy. Keep practicing, and you’ll create even better pieces soon. Simple projects can turn into great hobbies.


