

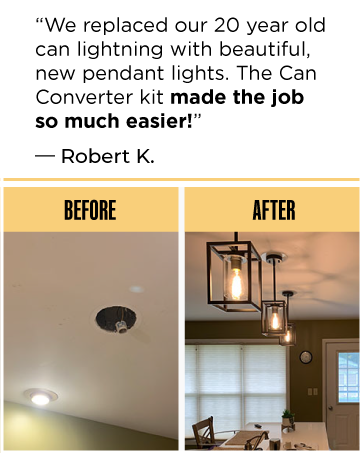
Are you tired of plain recessed lights and ready to add style and personality to your space? Replacing a recessed light with a pendant light can transform the look and feel of any room instantly.
But you might be wondering, “Is it complicated? Can I do it myself? ” The good news is—you can! This guide will walk you through simple, clear steps to make the switch safely and confidently. By the end, you’ll know exactly how to upgrade your lighting and give your home a fresh, modern touch.
Keep reading, and let’s brighten up your space together!
Tools And Materials Needed
Replacing a recessed light with a pendant light requires specific tools and materials. Having everything ready makes the process smooth and safe. This section covers the essential items for your lighting project. It helps you prepare well before starting the work.
Basic Tools Checklist
- Screwdriver set (flathead and Phillips)
- Wire stripper and cutter
- Voltage tester
- Drill with bits
- Measuring tape
- Wire nuts
- Electrical tape
- Ladder or step stool
- Stud finder (optional)
Choosing The Right Pendant Light
Select a pendant light that fits your room size and style. Check the weight to ensure your ceiling can support it. Verify the light’s voltage matches your home wiring. Look for adjustable hanging length for flexibility. Consider the bulb type and brightness for your needs.
Safety Gear
- Insulated gloves to prevent electric shocks
- Safety glasses to protect your eyes
- Dust mask for debris protection
- Non-slip shoes for steady footing
Preparing The Workspace
Preparing your workspace is essential before you replace a recessed light with a pendant fixture. A well-organized and safe area not only makes the job easier but also helps you avoid accidents. Taking the time to get everything ready ensures you can focus on the installation without interruptions.
Turning Off Power
Safety starts with cutting off the electricity to the light fixture. Locate your home’s circuit breaker panel and switch off the breaker that controls the recessed light. Don’t rely on just turning off the wall switch; power can still flow to the wires.
If you’re unsure which breaker to switch off, turn off the main breaker to be completely safe. This step might seem obvious, but I once skipped it and got a nasty shock—trust me, it’s not worth the risk.
Clearing The Area
Clear the space beneath the recessed light to avoid any accidents or damage. Remove furniture, rugs, or decorations that might get in the way or get dirty. You want plenty of room to move and set down tools safely.
Lay down a drop cloth or old sheet to catch dust and debris. This small preparation saves you from a frustrating cleanup later and protects your floors from scratches or stains.
Testing For Live Wires
Even after turning off the power, wires can still hold a charge. Use a non-contact voltage tester to check the wires before touching them. This tool is simple to use and gives you peace of mind.
If your tester indicates live wires, double-check the breaker or main power switch. Never guess—testing ensures your safety and prevents electrical hazards during the swap.
Removing The Recessed Light
Turn off the power before removing the recessed light to stay safe. Carefully detach the fixture and disconnect the wiring to prepare for the new pendant light installation.
Transforming your space by swapping out recessed lights for pendant lighting can add character and style to any room. Before you can enjoy the new ambiance, you’ll need to remove the existing recessed light. This process is simpler than you might think, and with a few tools and a little patience, you can do it yourself. Let’s walk through the key steps to get your project started.Detaching The Trim
Begin by turning off the power to the recessed light at the circuit breaker. Safety first! Once the power is off, gently pry off the trim using a flathead screwdriver. The trim is usually held in place by spring clips or screws. You might feel a bit of resistance, but that’s normal. Just ensure you’re not using excessive force that could damage the ceiling. Detaching the trim exposes the inner workings of the light, setting the stage for the next step.Disconnecting The Wiring
Now, you’ll need to disconnect the wiring. Carefully pull the recessed light fixture down from the ceiling to access the wiring connections. You’ll typically see wire nuts connecting the fixture to the house wiring. Unscrew the wire nuts and separate the wires. It’s a good idea to take a photo of the wiring setup before disconnection. This visual reference can be a lifesaver when connecting your new pendant light.Removing The Housing
With the wiring disconnected, it’s time to remove the recessed light housing. Depending on your fixture, it might be secured with clips or screws. Use a screwdriver or your hands to release these fasteners. Once the housing is free, carefully remove it from the ceiling. Your ceiling is now ready for the pendant light installation. Doesn’t it feel empowering to tackle such a home improvement task? Imagine the compliments you’ll receive on your new pendant lights!
Credit: www.amazon.com
Installing The Pendant Light Mount
Installing the pendant light mount is a crucial part of replacing a recessed light. It ensures that your new fixture is safely and securely held in place. Taking your time here will make the rest of the installation smooth and keep your pendant looking great for years.
Attaching The New Bracket
Start by removing the old recessed light bracket from the ceiling box. Your new pendant light will come with a mounting bracket designed to fit standard ceiling boxes. Align this bracket with the screw holes in the box, then use a screwdriver to fasten it tightly.
Make sure the bracket is flush with the ceiling surface. Loose brackets can cause the fixture to wobble, which not only looks bad but can also be unsafe.
Adjusting The Ceiling Box
Not all ceiling boxes are ready for pendant lights right away. Some recessed light boxes are shallow and may need to be adjusted or replaced. Check if your box can support the weight and length of the new fixture.
If the box is too deep or too far recessed, you might need an extension or a new box that sits flush with the ceiling. This step is often overlooked but essential for a secure and neat finish.
Securing The Fixture Support
Once the bracket and box are ready, it’s time to attach the fixture support. This usually involves connecting the fixture’s mounting plate to the bracket with screws. Tighten these screws firmly to hold the pendant in place.
Double-check that the support can hold the weight without moving. If your pendant is heavy, consider adding extra support or consulting a professional. Your safety and the durability of the installation depend on this.
Wiring The Pendant Light
Wiring the pendant light is an essential step in replacing recessed lighting. Proper wiring ensures the fixture works safely and efficiently. Pay close attention to wire types and connections. Double-check every connection to avoid electrical hazards. Use the right tools and materials for a secure setup.
Matching Wire Connections
Identify the wires in the ceiling and the pendant light. Typically, black or red wires carry power, white wires are neutral, and green or bare wires are ground. Connect matching colors together carefully. Avoid mixing wires as it can cause short circuits or damage.
Using Wire Nuts Safely
Twist wires together firmly before securing with a wire nut. Choose the correct size wire nut for the wire gauge. Ensure no copper is exposed outside the nut. Tug gently on wires to check for a tight connection. Use electrical tape around the wire nut for extra safety if needed.
Grounding The Fixture
Grounding protects against electrical shocks. Connect the green or bare copper wire from the fixture to the grounding wire in the ceiling. Secure the connection with a wire nut. Attach the ground wire to the metal electrical box if it is grounded. Confirm all grounding connections are tight and secure.

Credit: www.xhlux.com
Hanging And Adjusting The Pendant
Hanging and adjusting the pendant is a key part of replacing recessed lighting. It shapes the look and feel of the room. Proper height and secure fitting ensure safety and style. Follow clear steps to hang the pendant correctly and adjust its position for the best effect.
Setting The Length
Begin by deciding how low the pendant should hang. Measure from the ceiling to the desired height. Common heights range from 28 to 34 inches above a table or countertop. Adjust the cord or chain length by loosening the fixture’s set screws. Pull the cord to the right length, then tighten the screws firmly. Check the length by holding the pendant in place before final fixing.
Securing The Canopy
The canopy covers the electrical box and secures the fixture. Slide the canopy up the cord to the ceiling. Align it with the mounting bracket on the electrical box. Use the provided screws to fasten the canopy tightly. Ensure no wires are pinched or exposed. The canopy should sit flush against the ceiling for a clean look.
Final Positioning Tips
- Check the pendant is straight and not tilted.
- Use a level to confirm perfect alignment.
- Adjust the cord length if the light is too high or low.
- Test the light switch to ensure proper electrical connection.
- Make small tweaks for balance and symmetry in the room.
Testing And Troubleshooting
Testing and troubleshooting are essential after replacing a recessed light with a pendant. This step ensures safety and confirms the new fixture works correctly. It helps identify any wiring or installation problems early. Follow these simple checks to avoid future issues and enjoy your new lighting.
Restoring Power
Turn the circuit breaker back on to restore power to the fixture. Use a voltage tester to confirm electricity reaches the wires. Make sure the switch controlling the light is in the “on” position. Avoid touching any exposed wires during this process.
Checking Light Operation
Flip the light switch to test the new pendant light. Observe if the bulb lights up immediately and stays steady. Check the fixture for any flickering or dimming. Ensure the pendant is hanging securely and the bulb fits well. Confirm the light matches the room’s brightness needs.
Fixing Common Issues
If the light does not turn on, check the bulb first. Replace it with a new, compatible bulb if needed. Tighten any loose wire connections using a screwdriver. Inspect the switch and breaker for faults or trips. Look for damaged wires or connectors and replace them safely. Reset the breaker if it has tripped during installation.
Credit: www.amazon.com
Safety Tips And Precautions
Replacing recessed lights with pendant fixtures can instantly transform your space, but safety must come first. Handling electrical components involves risks that you shouldn’t overlook. Taking the right precautions protects you, your home, and your investment.
Avoiding Electrical Hazards
Before you start, turn off the power at the circuit breaker to eliminate any chance of electric shock. Use a voltage tester to double-check that no current is flowing through the wires. Never assume the power is off just because the switch is in the off position.
Wear insulated gloves and use tools with rubber handles to reduce the risk of injury. Keep your work area dry—water and electricity don’t mix. These small steps can save you from serious accidents.
When To Call A Professional
If your home has outdated wiring or the electrical box looks complicated, it’s wise to call a licensed electrician. Complex wiring or unclear grounding might cause future problems if not handled correctly. Have you ever thought about the cost of a repair compared to the risk of a DIY mistake?
Even if you’re confident with basic electrical work, an expert can ensure your new pendant light is installed safely and up to code. Sometimes, trusting a professional means peace of mind and long-term safety.
Maintaining Your New Fixture
Once your pendant light is installed, regular maintenance helps keep it safe and functional. Check the fixture for loose wires or parts every few months. A simple inspection can prevent electrical shorts or falling hazards.
Clean your pendant carefully, avoiding harsh chemicals near electrical components. If you notice flickering or buzzing, turn off the power and inspect the wiring or bulb immediately. Staying proactive keeps your lighting safe and bright for years.
Frequently Asked Questions
How Do I Remove A Recessed Light Fixture Safely?
Turn off power at the breaker first. Remove the trim and bulb. Unscrew the housing from the ceiling. Carefully disconnect the wiring before removing the fixture.
Can I Install A Pendant Light In Place Of Recessed Lighting?
Yes, you can. Ensure the ceiling box supports the pendant weight. Adjust wiring and mount the pendant securely. Follow electrical codes for safety.
What Tools Are Needed To Replace Recessed Lights With Pendants?
You will need a screwdriver, wire stripper, voltage tester, drill, and possibly pliers. These tools help safely remove and install new fixtures.
How Do I Adjust Ceiling Height For Pendant Light Installation?
Measure the ceiling height and desired pendant drop. Use adjustable rods or chains to set the right length. Ensure the pendant doesn’t hang too low.
Conclusion
Replacing recessed lights with pendant lights adds style and warmth to any room. The process is simple if you follow the right steps carefully. Always turn off the power before starting work to stay safe. Choose a pendant that matches your space and lighting needs.
Taking time to plan ensures a smooth and satisfying result. Enjoy the new look and cozy atmosphere your pendant light creates. Brighten your home with this easy, smart lighting update.


