
Looking for a simple way to add style and comfort to your space? Making a pouf from a rug is a fun, affordable project that anyone can tackle.
Imagine turning an old or unused rug into a cozy spot to rest your feet or extra seating for guests. In this guide, you’ll discover easy steps to transform your rug into a unique pouf that matches your home’s vibe perfectly.
Ready to create something both practical and eye-catching? Keep reading, and you’ll be surprised at how simple and rewarding this DIY project can be.
Credit: diyjoy.com
Choosing The Right Rug
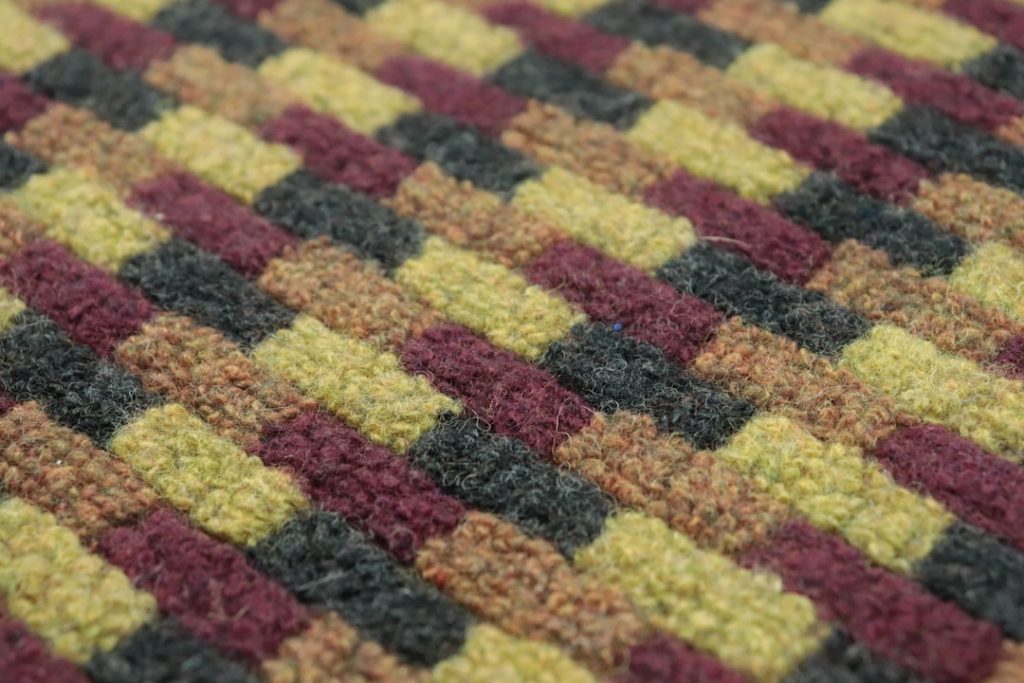
Choosing the right rug is key to making a pouf that is both beautiful and durable. The rug sets the tone for your project and affects how comfortable and long-lasting the pouf will be. Focus on material, size, shape, color, and pattern to find the perfect rug.
Material Matters
Select a rug material that can handle daily use and pressure. Thick fabrics like wool or heavy cotton work well. These materials resist wear and stay soft for sitting. Avoid thin or delicate rugs that can tear easily.
Look for rugs that are easy to clean. Natural fibers like jute or hemp add texture but may be rough. Synthetic blends often offer durability and stain resistance.
Size And Shape Tips
Pick a rug large enough to form the pouf’s body with some extra fabric. Square or rectangular rugs are easier to shape into poufs. Round rugs can create unique pouf designs but may need more skill.
Consider the final pouf size you want. A bigger rug means a larger pouf. Measure carefully and plan your cuts before starting.
Color And Pattern Ideas
Choose colors that match your room’s style and your personal taste. Neutral colors work well for any space. Bright or bold colors add a fun pop.
Patterns can hide stains and wear better than solid colors. Geometric or floral patterns add interest. Stripes or simple designs make a modern look.
Gathering Your Supplies
Before you dive into making your pouf from a rug, gathering the right supplies is crucial. Having everything ready keeps your project smooth and enjoyable. Plus, it saves you from frustrating interruptions when you realize you’re missing a tool or material halfway through.
Tools You’ll Need
- Scissors:Sharp and sturdy scissors are essential for cutting through the rug material cleanly.
- Measuring Tape:Accurate measurements help you shape the pouf perfectly. Don’t guess—measure twice, cut once.
- Sewing Needle and Thread:A heavy-duty needle paired with strong thread will hold your pouf together securely. If you own a sewing machine, that works even better.
- Fabric Chalk or Marker:Mark your cutting lines clearly on the rug to avoid mistakes.
- Staple Gun (optional):This can speed up assembling the pieces, especially if you’re working with thick or tough rugs.
Additional Materials
- Rug:Choose a rug that’s durable but flexible enough to sew. Think about colors and texture that match your room.
- Stuffing:You’ll need something soft and bulky for the inside. Old pillows, foam pieces, or even fabric scraps work well.
- Non-slip Pad:Placing this under your pouf prevents it from sliding on smooth floors.
- Zip Tie or Strong String:These help keep the stuffing tight and the shape intact.
Have you checked your stash at home? Sometimes, what you need is already lying around. I once used an old yoga mat as stuffing—it gave the pouf extra firmness and saved me a trip to the store. What creative materials can you repurpose?
Preparing The Rug
Choose a clean, sturdy rug for making a pouf. Lay it flat and trim any loose threads to prepare for sewing. Ensure the rug is the right size for your desired pouf shape.
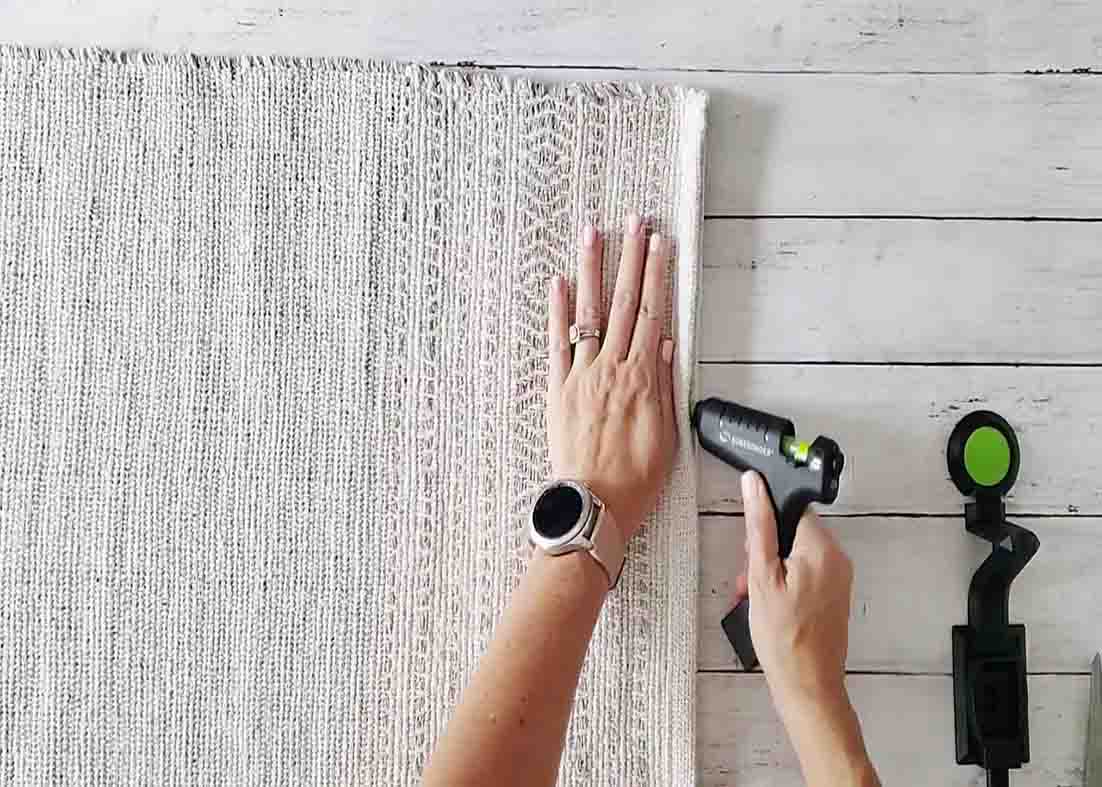
Before you can transform an old rug into a stunning pouf, you need to prepare the rug properly. This step is crucial as it sets the foundation for the rest of your project. Preparing the rug involves cutting, shaping, and securing its edges to ensure it looks polished and lasts long. Let’s dive into the details of this process.Cutting And Shaping
Start by spreading the rug flat on a clean surface. Determine the size of the pouf you want and mark the dimensions on the rug with a fabric marker. Use sharp scissors or a utility knife to cut along the lines. Ensure the cuts are straight and clean to make stitching easier later. A personal tip: If you’re unsure about the size, cut a little larger than needed. You can always trim more later, but adding extra fabric is impossible once it’s removed.Securing Edges
The edges of your cut rug can unravel if not secured properly. Use a zigzag stitch on a sewing machine to strengthen the edges. This will prevent fraying and give your pouf a neat appearance. If you don’t have a sewing machine, you can use fabric glue or apply a no-sew adhesive tape along the edges. This step not only enhances durability but also adds a professional touch to your DIY project. Have you considered how these small details can make a big difference in your project’s outcome? Taking the time to secure the edges properly will ensure that your pouf remains a statement piece in your home for years to come.Filling The Pouf
Filling the pouf is a key part of this DIY project. The right filling gives the pouf its shape and comfort. It also affects how long your pouf will last. Choosing good filling and stuffing it well makes a big difference.
Best Filling Options
- Old clothes or fabric scraps: Soft and budget-friendly.
- Foam pieces: Provide firm support and last longer.
- Polyester fiberfill: Lightweight and fluffy for a plush feel.
- Recycled plastic pellets: Add weight and stability.
- Bean bag beads: Make the pouf flexible and comfortable.
Select filling based on how firm or soft you want your pouf.
How To Stuff Evenly
Start by placing small amounts of filling inside the pouf. Spread it out evenly across the base. Avoid stuffing one side too much.
Press and shape the pouf as you fill it. Add filling gradually and check the shape often. Use your hands to smooth lumps and bumps.
Fill all corners and edges well. This keeps the pouf balanced and comfortable to sit on. Finish by tightening the cover securely.
Sewing And Assembling
Sewing and assembling your pouf from a rug requires patience and care. This step brings all parts together securely. Proper stitching ensures the pouf holds shape and lasts long. Choose the sewing method that fits your tools and skill level. Both hand sewing and machine sewing work well for this project.
Hand Sewing Techniques
Hand sewing allows control over every stitch. It is ideal for thick or textured rugs. Use a strong needle and heavy-duty thread. A curved upholstery needle works best for thick fabric.
- Start by threading the needle with double thread for strength.
- Use a whip stitch or running stitch to join edges.
- Keep stitches close and even to prevent gaps.
- Secure the thread with tight knots at the start and end.
- Take breaks to avoid hand fatigue and maintain neat stitches.
Hand sewing offers flexibility to sew hard-to-reach corners. It is slower but perfect for detailed work.
Using A Sewing Machine
A sewing machine speeds up the process and makes strong seams. Use a heavy-duty machine that can handle thick layers. Select a thick needle designed for upholstery or denim.
- Set the stitch length to medium or long for durability.
- Use strong polyester or nylon thread for strength.
- Pin the rug pieces firmly before sewing to avoid shifting.
- Sew slowly over thick areas to prevent needle breakage.
- Backstitch at the start and end of each seam to lock stitches.
Machine sewing creates uniform stitches and saves time. It is best for larger poufs or multiple projects.
Credit: diyjoy.com
Finishing Touches
Finishing touches give your pouf a polished and unique look. They make your project stand out and match your style. Small details can change the whole feel of the piece. Focus on both style and strength to get the best results.
Adding Decorative Elements
Decorative elements add charm and personality to your pouf. Use buttons, tassels, or fabric paint to create patterns. Sewing on patches or embroidery can add a handmade touch. Choose colors and shapes that fit your room’s theme. Keep decorations secure so they do not come loose over time.
Ensuring Durability
Durability makes your pouf last longer and stay safe to use. Reinforce seams with extra stitches or fabric glue. Use strong thread and double stitch areas that get heavy use. Add a non-slip base by attaching a rubber mat or fabric strips. Check all parts for loose threads or weak spots before use.
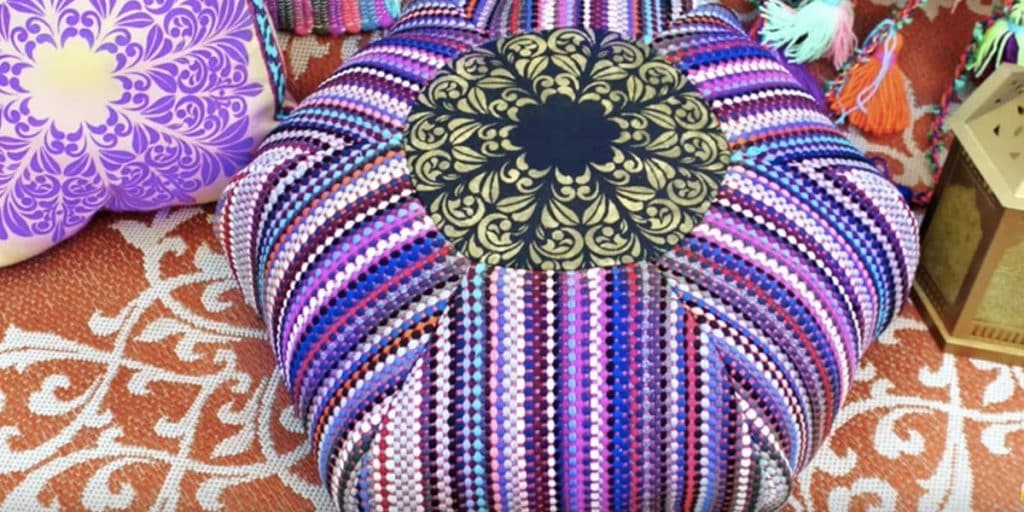
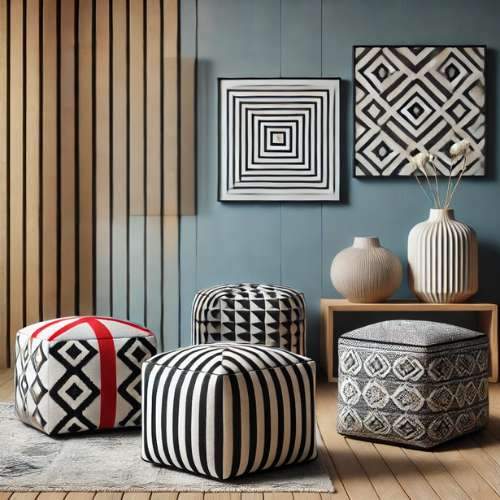
Styling Your Pouf
Styling your pouf adds charm and function to your space. It transforms a simple DIY piece into a cozy, stylish accent. Careful styling helps your pouf fit seamlessly into any room. Use it to create warmth, comfort, and a touch of personality.
Placement Ideas
Place your pouf near a sofa or armchair. It serves as extra seating or a footrest. Position it beside a low table to hold books or trays. In a bedroom, use it at the foot of the bed for a soft landing spot. Fill empty corners with your pouf to add color and texture. Group several poufs for a casual, inviting vibe. Keep walkways clear by placing the pouf where it won’t block paths.
Mixing With Existing Decor
Match your pouf’s colors with cushions or rugs. Contrast neutral tones with a bright pouf for a pop of color. Combine textures like leather, wool, or cotton for visual interest. Balance patterned poufs with solid furniture pieces. Layer with throws or small pillows for extra comfort. Use the pouf to introduce new patterns without overwhelming the room. Keep the scale in mind; a large pouf suits spacious areas better than small rooms.
Care And Maintenance
Keeping your pouf looking fresh and sturdy takes some care, but it’s simpler than you might think. Regular attention helps your pouf last longer and stay comfortable. How often do you check on your home accessories to keep them in top shape?
Cleaning Tips
Start by vacuuming your pouf gently to remove dust and dirt. Use a brush attachment to avoid damaging the fabric. If you spot spills, blot the area immediately with a clean cloth—don’t rub, as this can push the stain deeper.
For deeper cleaning, use a mild detergent mixed with water. Test the solution on a small hidden area first to ensure it won’t discolor the rug material. Spot clean with a soft cloth and let it air dry completely before using your pouf again.
Handling Wear And Tear
Wear and tear are natural, especially if your pouf gets lots of use. Rotate it regularly to distribute pressure evenly and prevent certain areas from wearing out faster. This simple habit can extend its life significantly.
If you notice loose threads or minor tears, don’t ignore them. A quick stitch or patch can stop damage from spreading. Have you ever left a small rip unattended, only to regret it when it got worse?
Credit: www.reasonstoskipthehousework.com
Frequently Asked Questions
What Materials Are Needed To Make A Pouf From A Rug?
To make a pouf from a rug, you need a rug, needle, strong thread, stuffing like foam or old clothes, scissors, and a zipper or buttons. These materials help create a sturdy, comfortable pouf that looks stylish and lasts long.
How Do I Choose The Right Rug For A Pouf?
Choose a thick, durable rug with vibrant patterns or neutral tones. Avoid thin rugs, as they won’t hold stuffing well. The rug’s texture and color should match your room decor for a cohesive look.
Can I Make A Pouf Without Sewing Skills?
Yes, you can make a no-sew pouf using fabric glue or safety pins. However, sewing ensures durability and a neater finish. Beginners can start with simple stitches to improve their skills.
How Much Stuffing Is Needed For A Pouf?
Fill the pouf firmly but not overstuffed to maintain shape and comfort. Use foam, old clothes, or cushions as stuffing. Proper stuffing ensures the pouf is both comfortable and supportive.
Conclusion
Making a pouf from a rug is simple and fun. It gives new life to old rugs and saves money. You only need basic tools and a little patience. The result is a cozy, stylish piece for any room. Try this easy project to add comfort and charm to your home.
Enjoy creating something unique with your own hands!


