

Have you ever looked at a beautiful chandelier and wondered how you could make one yourself? Creating a chandelier might seem complicated, but with the right steps, you can design a stunning piece that lights up your space and reflects your style.
Imagine the pride you’ll feel when your handmade chandelier becomes the centerpiece of your room. Keep reading, and you’ll discover simple, clear instructions that make the process easy and enjoyable. Your perfect chandelier is closer than you think.
Materials Needed
Creating a chandelier requires gathering the right materials first. The quality and type of materials affect the chandelier’s look and durability. Planning your materials carefully helps avoid delays and extra costs. Below are key categories to focus on when preparing your supplies.
Essential Tools
- Wire cutters for trimming electrical wires
- Pliers to bend and twist metal parts
- Screwdrivers for assembling components
- Drill for making holes in the frame
- Measuring tape to ensure accurate sizing
- Wire stripper to prepare electrical wires
- Level to keep the chandelier balanced
Choosing The Right Components
- Metal frame or base for structure
- Light bulbs suitable for chandelier sockets
- Electrical wiring rated for home lighting
- Crystal or glass pieces for decoration
- Chains or rods for hanging support
- Connectors and hooks for assembly
- Decorative elements matching your style
Safety Equipment
- Insulated gloves to prevent electric shock
- Safety goggles to protect eyes from debris
- Dust mask when cutting or drilling materials
- Non-slip shoes to avoid falls
- Fire extinguisher nearby during electrical work
Design Planning
Design planning is the foundation of making a chandelier that fits your space and style perfectly. This phase requires careful thought about how your chandelier will look and function. Taking time here saves you from costly mistakes and ensures your finished piece is both beautiful and practical.
Selecting A Style
Choosing the right style sets the tone for your chandelier. Do you prefer modern minimalism, vintage charm, or something bold and artistic? Think about the room where the chandelier will hang and the existing decor. This makes it easier to pick materials and shapes that blend well.
Remember, the style affects the mood of your space. A sleek metal design creates a cool, contemporary vibe, while crystal drops add elegance and sparkle. Ask yourself: What feeling do I want this light to evoke every time I enter the room?
Determining Size And Shape
Size matters more than you might expect. Too large, and the chandelier overwhelms the room; too small, and it looks lost. Measure your ceiling height and room dimensions to find a balance.
Consider the shape as well—round, linear, tiered, or abstract forms all change how light spreads. You might want a wide, flat design for a large dining table or a vertical piece for a tall foyer. How will the shape complement the other furniture and fixtures?
Sketching Your Idea
Putting your vision on paper helps clarify details and spot potential problems. Start with simple outlines, then add details like bulb placement and wiring paths. Sketching also allows you to experiment with variations without wasting materials.
Use graph paper or a digital tool to keep proportions accurate. Don’t worry about artistic skill; rough sketches work fine as long as they communicate your concept clearly. Have you tried sketching ideas before building something? It often reveals new possibilities you hadn’t considered.
Preparing The Frame
Begin by selecting a sturdy base for your chandelier frame. Measure and cut materials carefully to ensure balance and strength. Secure all parts tightly to create a solid foundation for your design.
Preparing the frame of your chandelier is a crucial step that sets the foundation for the entire project. It’s the backbone that supports the intricate design and ensures your chandelier is both functional and safe. This phase involves crafting a sturdy base, securely attaching support wires, and guaranteeing stability to showcase your creativity.Building The Base Structure
To start, choose materials that suit your style and the chandelier’s intended location. Many DIY enthusiasts opt for metal, wood, or PVC for their durability and versatility. Measure carefully and cut your chosen material into the desired shape, whether a classic circle or a modern geometric design. Consider using a wooden hoop as a simple base. It’s easy to work with and allows for creativity in decoration. Drill small holes evenly around the base to accommodate the support wires later.Attaching Support Wires
Support wires are essential for holding the chandelier’s weight. Use strong, flexible wire to ensure safety and longevity. Thread each wire through the holes you drilled, securing them tightly with knots or clamps. Ensure the wires are evenly spaced and of equal length for balance. You can adjust the wire lengths to create different levels or tiers, adding depth and dimension. This is where your personal touch can shine—consider varying the heights for a dynamic look.Ensuring Stability
Stability is key to a successful chandelier. Check that all connections are secure and the frame is balanced. Test its stability by gently applying pressure or hanging weights similar to the expected load. Would you trust your chandelier to hold up in a gentle breeze or under its own weight? Reinforce weak points with additional wire or fasteners if necessary. A stable frame will prevent wobbling and ensure your chandelier hangs perfectly. Taking the time to prepare a strong and stable frame will set the stage for a stunning chandelier. With the right materials, careful measurements, and secure attachments, you can craft a piece that not only illuminates but also captivates.
Credit: www.youtube.com
Wiring The Chandelier
Wiring the chandelier is a crucial step that ensures your fixture not only looks stunning but also works safely and efficiently. This part might seem technical, but understanding the basics will give you confidence and control over the entire process. Let’s break down the essential tasks that will help you wire your chandelier correctly.
Understanding Electrical Basics
Before handling any wires, you need to grasp a few simple electrical concepts. Know the difference between live (hot), neutral, and ground wires. Live wires carry electricity, neutral wires complete the circuit, and ground wires protect you from electrical faults.
Always turn off the power at the breaker box before you start working. Use a voltage tester to confirm no current is flowing. This precaution keeps you safe and prevents damage to your chandelier.
Installing Light Sockets
Light sockets hold your bulbs and connect to the wiring. Choose sockets that fit your chandelier style and bulb type. Attach the sockets to the chandelier arms securely, ensuring they don’t wobble or loosen over time.
Each socket will have two terminals—one for the live wire and one for the neutral wire. Connect the wires carefully, matching colors: usually black or red for live, white for neutral. Tighten screws firmly but avoid damaging the wires.
Securing And Connecting Wires
After sockets are installed, it’s time to connect all wires inside the chandelier. Twist the corresponding wires together and use wire nuts to secure connections. This prevents loose wires that could cause shorts or flickering lights.
Arrange the wires neatly inside the chandelier’s canopy to avoid pinching or stretching. Attach the ground wire to the metal frame or grounding screw. Finally, double-check every connection before mounting the chandelier to your ceiling.
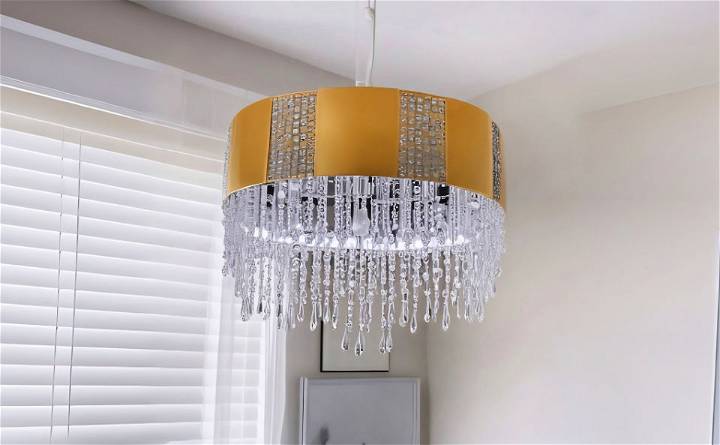
Adding Decorative Elements
Adding decorative elements to your chandelier is where creativity meets craftsmanship. These elements transform a simple frame into a dazzling centerpiece that reflects your style and enhances the room’s ambiance. The key lies in selecting the right pieces and attaching them carefully to achieve both beauty and stability.
Choosing Crystals Or Ornaments
Your choice between crystals and ornaments sets the tone for your chandelier’s overall look. Crystals offer a classic sparkle and refract light beautifully, while ornaments can add color, texture, or a thematic touch.
Think about the style of your space—do you want something modern and sleek or vintage and ornate? Consider materials like glass, acrylic, or metal, and don’t forget the size and shape of each piece. Small, clear crystals can create a delicate shimmer, whereas larger, colored ornaments make a bold statement.
Attaching Decorative Pieces
Attaching your chosen decorations requires patience and precision. Use strong, lightweight wire or small hooks to secure each piece without damaging it. Avoid bulky fasteners that can distract from the design.
Work systematically, starting from the top and moving downward to maintain balance. If you’ve used crystals, try to hang them so they catch the light from different angles. Remember, every piece should feel secure enough to stay put but flexible enough to move slightly, adding dynamic sparkle.
Balancing Aesthetics And Weight
Balancing the look with the chandelier’s weight is crucial for safety and longevity. Heavy decorations placed unevenly can strain the frame or ceiling mount, risking damage.
Distribute weight evenly by alternating heavier pieces with lighter ones around the frame. Ask yourself: Does the chandelier feel stable when you gently shake it? If not, adjust the placement or swap out heavier elements for lighter alternatives.
Keeping this balance will ensure your chandelier is not only beautiful but also safe and durable for years to come.
Finishing Touches
Finishing touches bring your chandelier to life. This stage ensures the fixture looks great and works safely. Small details make a big difference in the final result.
Painting Or Coating
Choose a paint or coating that suits your chandelier’s style. Use spray paint for even coverage on metal or wood. Protect the surface with a clear sealant to prevent rust or damage. Let each layer dry fully before adding the next one.
Double-checking Connections
Inspect every wire and connection carefully. Tighten screws and make sure wires are secure. Loose connections can cause flickering or safety hazards. Use electrical tape or connectors to cover exposed wires. Safety is key before powering the light.
Testing The Light
Turn on the chandelier to check all bulbs light up. Watch for flickering or dim spots. Test any dimmer switches or special features you added. Make sure the fixture hangs straight and stable. Adjust if needed for the perfect glow.
Installation Tips
Installing a chandelier requires care and attention to detail. Proper installation keeps the fixture secure and safe. It also helps the chandelier shine beautifully and last longer. Follow these tips to install your chandelier correctly.
Mounting The Chandelier Safely
Choose a strong ceiling box rated for chandeliers. Use a sturdy mounting bracket to support the weight. Ensure all screws and bolts are tight. Avoid hanging the chandelier from drywall alone. Check that the fixture hangs level and steady. Use a ladder that is stable and tall enough.
Wiring To Ceiling Power
Turn off the power at the circuit breaker. Match the chandelier wires with ceiling wires by color. Connect the black (hot) wires together using wire nuts. Join the white (neutral) wires in the same way. Attach the ground wire to the metal box or grounding screw. Use electrical tape to secure wire nuts. Carefully tuck wires into the ceiling box before mounting.
Maintaining Your Fixture
Turn off the power before cleaning or changing bulbs. Dust the chandelier regularly with a soft cloth. Use a mild cleaner and a damp cloth for tougher dirt. Check for loose parts or damaged wiring. Replace bulbs with the correct wattage and type. Inspect the fixture yearly for safety and shine.
Credit: www.diycraftsy.com

Credit: makezine.com
Frequently Asked Questions
How Do You Start Making A Chandelier?
Start by selecting a design and gathering materials like a frame, bulbs, and wiring. Sketch your plan clearly.
What Materials Are Needed To Make A Chandelier?
You need a frame, light bulbs, wiring, sockets, and decorative elements like crystals or beads.
How Do You Safely Wire A Chandelier?
Turn off power, use proper wiring techniques, connect wires securely, and test connections before installation.
Can I Customize My Chandelier Design?
Yes, customize by choosing unique frames, colors, bulbs, and decorative features to match your style.
Conclusion
Making a chandelier can be a fun and rewarding project. You need patience, creativity, and the right materials. Step by step, you build something unique for your home. Each part has its role to make light shine bright. Enjoy the process, and don’t rush.
Your handmade chandelier will add charm to any room. Try it yourself and see how satisfying it feels. Simple tools and ideas can create beautiful results. Keep practicing, and your skills will grow over time.


