

Are you ready to add a stylish touch to your space with a pendant light? Hanging a pendant light from your ceiling might seem tricky, but it’s easier than you think.
Imagine the warm glow filling your room, creating the perfect atmosphere for relaxing or entertaining. In this guide, you’ll discover simple, step-by-step instructions to help you install your pendant light safely and beautifully. By the end, you’ll feel confident and proud of your new lighting setup.
Let’s get started and transform your room together!

Credit: 100things2do.ca
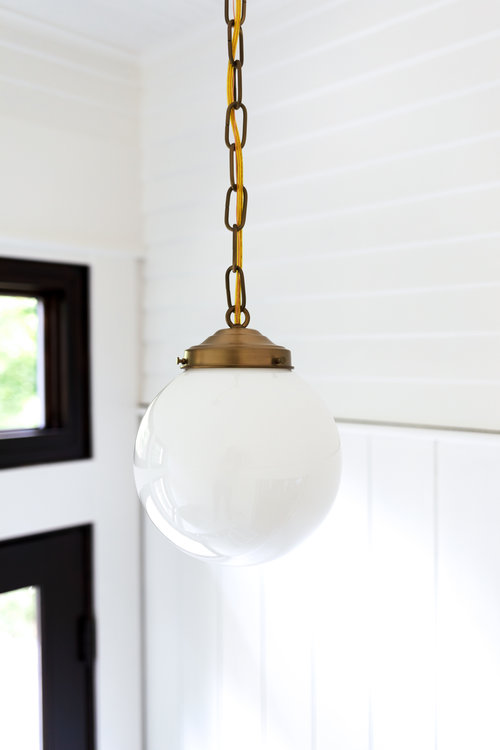
Choose The Right Pendant Light
Choosing the right pendant light is essential for both function and style. The perfect pendant creates the right mood and fits the space well. It must match the room’s size and décor while providing enough light. Safety and ease of installation also matter.
Consider Room Size And Style
Room size affects the pendant light size. A large room needs a bigger or multiple pendants. Small rooms suit smaller, simpler designs. Match the pendant style to the room’s décor. Modern rooms look great with sleek, minimal lights. Traditional rooms pair well with classic or vintage styles.
Select Suitable Bulb Type
Choose bulbs that fit the pendant and lighting needs. LED bulbs save energy and last longer. Soft white bulbs create warm, cozy light. Bright white bulbs help with tasks and focus. Check the pendant’s maximum wattage to avoid overheating.
Check Weight And Mounting Options
Heavy pendants need strong ceiling support. Confirm the ceiling can hold the light’s weight. Some pendants come with mounting hardware included. Others need separate brackets or anchors. Choose a mounting style that fits your ceiling type. A secure installation prevents accidents and damage.
.jpg)
Credit: www.jimselectrical.com.au
Gather Necessary Tools And Materials
Before you start hanging your pendant light, gathering all the necessary tools and materials is crucial. Having everything ready saves time and prevents frustration. It also ensures you can work safely and efficiently, avoiding trips back and forth to the hardware store.
List Of Tools Needed
- Drill:Essential for making holes in the ceiling or mounting surface.
- Screwdriver:Both flathead and Phillips types may be needed to secure screws and fixtures.
- Wire Strippers:To remove insulation from electrical wires cleanly and safely.
- Voltage Tester:To confirm the power is off before touching any wiring.
- Measuring Tape:Helps ensure your pendant hangs at the perfect height.
- Wire Nuts:For safely connecting wires together.
- Electrical Tape:Adds extra security to wire connections.
- Ladder or Step Stool:Needed to reach the ceiling comfortably and safely.
Gathering these tools beforehand means you won’t have to stop midway because something’s missing. Have you ever started a project only to realize you forgot a key tool? It’s frustrating and can even lead to mistakes.
Safety Equipment
- Safety Glasses:Protect your eyes from dust and debris when drilling or cutting wires.
- Work Gloves:Protect your hands from sharp edges and electrical components.
- Non-slip Shoes:Keep your footing secure while using a ladder.
- Mask:Useful if you’re drilling into old ceilings that might have dust or insulation.
Safety should never be an afterthought. You might think a quick job doesn’t require protection, but accidents happen in seconds. Wearing the right safety gear keeps you focused and confident throughout the installation.
Prepare The Ceiling Area
Preparing the ceiling area is essential before hanging a pendant light. It ensures safety and smooth installation. Taking the right steps prevents accidents and helps the light fit perfectly. Focus on making the space ready by working carefully and methodically.
Turn Off Power Supply
Safety starts with cutting the power to the room. Find the circuit breaker and switch off the power to the light fixture. Use a voltage tester to confirm no electricity flows to the wires. This step avoids electric shock during installation.
Remove Existing Fixture
Take down any old light fixture attached to the ceiling. Unscrew the fixture carefully and lower it. Disconnect the wires by loosening the wire nuts. Keep screws and parts in a safe place in case you need them later.
Inspect Electrical Box
Check the electrical box for damage or wear. The box should be securely fastened to a ceiling joist or beam. It must support the weight of the new pendant light. Replace the box if it looks cracked, loose, or too small.
Install The Mounting Bracket
Installing the mounting bracket is crucial for a pendant light. It ensures the light hangs securely. A well-placed bracket prevents accidents and enhances the room’s look.
Attach Bracket To Electrical Box
First, turn off the power at the circuit breaker. Safety comes first. Locate the electrical box on the ceiling. Use a screwdriver to remove the old fixture, if present. Align the new mounting bracket with the electrical box. Ensure it fits perfectly over the box.
Use screws to secure the bracket. Tighten them firmly. This step is essential for stability. The bracket should not wobble. Confirm it is flush against the ceiling. This ensures a neat look.
Ensure Secure Fit
Check the bracket’s stability by giving it a gentle push. It should not move. A secure fit prevents the light from falling. Use a level to check alignment. Adjust if necessary. A balanced bracket ensures even light distribution.
Double-check all screws. They should be tight but not overtightened. Over-tightening can damage the bracket. If the bracket feels loose, re-tighten the screws. Secure attachments are key to safety.
Wire The Pendant Light
Wiring the pendant light is a crucial part of installation. It ensures your light works safely and efficiently. Proper wiring prevents electrical problems and keeps your home safe. Take time to connect all wires carefully. Follow safety guidelines and turn off the power before starting.
Connect Wires Correctly
Match the wires by color for the best connection. Usually, black or red is the live wire. White is neutral, and green or bare copper is ground. Attach each wire from the light to the matching wire in the ceiling. Secure connections tightly to avoid loose wires.
Use Wire Nuts And Electrical Tape
Cover each wire connection with a wire nut. Twist the wire nut until it feels tight. Wrap electrical tape around the wire nut and wires. This adds extra safety and keeps wires from touching metal parts. Wire nuts and tape protect against electrical shorts and shocks.
Double Check Connections
Inspect each wire connection carefully. Give a gentle tug to make sure wires do not come loose. Check that no bare wire is exposed outside the wire nut. Confirm that the ground wire is firmly attached. Double checking helps prevent future electrical hazards.
Attach Pendant To Ceiling
Attaching the pendant light to the ceiling is a key step in your project. It ensures the fixture stays in place and looks great. Take time to do this carefully. Follow the instructions that come with your light for the best results.
Secure Pendant To Bracket
First, connect the pendant light to the mounting bracket. This bracket holds the light firmly. Use the screws provided to fasten the light to the bracket. Make sure the screws are tight but do not overtighten. This keeps the pendant stable and safe.
Adjust Pendant Height
Next, set the pendant light to the right height. Most pendants have an adjustable cord or chain. Shorten or lengthen the cord until the light hangs at your preferred height. Check that the cord is secure after adjusting. This step helps create the perfect lighting effect for your space.
Test And Finalize Installation
After hanging your pendant light, testing and finalizing the installation ensures everything works safely and looks perfect. This step confirms the light functions correctly and the fixture stays secure. Taking time here prevents future issues and keeps your space bright and stylish.
Restore Power And Test Light
Turn the power back on at the circuit breaker. Use the light switch to turn on the pendant light. Watch for any flickering or dimming. A steady glow means the wiring is correct. If the light does not turn on, double-check connections. Ensure the bulb is screwed in tightly and is not faulty. This quick test ensures safety and function.
Make Final Adjustments
Adjust the pendant height if needed. Use the cord or chain to raise or lower the light. Check if the fixture hangs straight and centered. Tighten any loose screws or mounting hardware. Clean the light and shade to remove fingerprints or dust. These small tweaks improve the overall look and safety.
Safety Tips And Troubleshooting
Hanging a pendant light can transform your space, but safety should always come first. Understanding common issues and knowing when to seek professional help can save you from costly mistakes and potential hazards.
Common Issues And Solutions
One frequent problem is loose wiring connections. If your light flickers or doesn’t turn on, check if the wires are tightly connected. Always switch off the power before inspecting to avoid shocks.
Another issue is a pendant that hangs unevenly. This usually happens when the mounting bracket isn’t level or the chain length isn’t adjusted properly. Use a level tool and adjust the chain or cord until the fixture hangs straight.
Sometimes, the ceiling box might not support the weight of the pendant. If you notice the fixture pulling away or the ceiling feels soft, reinforce the box or use a support brace designed for heavy lights. This prevents accidents and damage over time.
When To Call A Professional
If you find exposed wires or suspect faulty electrical connections, it’s safer to call an electrician. Working with electricity can be risky without proper knowledge, and a small mistake can lead to serious injury or fire.
Complex installations involving high ceilings, unusual fixtures, or outdated wiring also require expert help. Professionals have the right tools and experience to handle these challenges quickly and safely.
Have you ever started a DIY project and realized halfway through that it was more complicated than it seemed? Knowing your limits isn’t a sign of failure—it’s smart decision-making that protects you and your home.
Credit: www.thegritandpolish.com
Frequently Asked Questions
How Do I Safely Hang A Pendant Light From The Ceiling?
Turn off power before starting. Use a sturdy ceiling box. Secure the mounting bracket tightly. Connect wires correctly. Attach the pendant light firmly to avoid falls.
What Tools Are Needed To Install A Pendant Light?
You need a screwdriver, wire stripper, voltage tester, drill, and ladder. These tools help ensure safe and accurate installation.
Can I Install A Pendant Light Without Professional Help?
Yes, if you follow safety rules and understand wiring basics. Always turn off power and test wires before installation.
How Do I Adjust The Height Of A Pendant Light?
Most pendant lights have adjustable cords or rods. Shorten or lengthen the cord before securing it to the ceiling.
Conclusion
Hanging a pendant light can change your room’s look fast. Follow the steps carefully for a safe setup. Use the right tools and check all connections. Take your time to avoid mistakes or accidents. A well-hung light adds style and brightens space.
You will enjoy the new feel it brings. Try different heights to find the best look. Now, you can brighten your room with confidence.


