
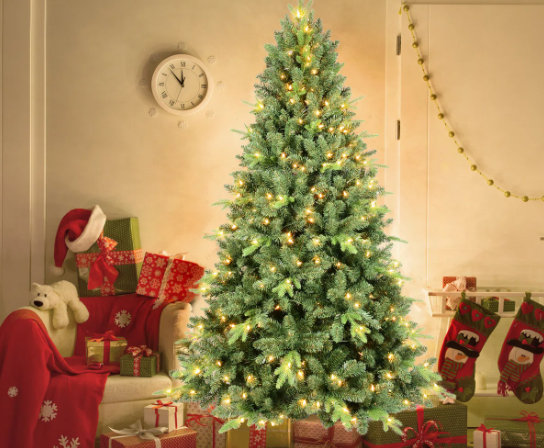
Lighting up your Christmas tree can transform your home into a warm, magical space that brings joy to everyone. But if you’ve ever struggled with tangled lights or uneven lighting, you know it’s not always easy to get that perfect glow.
In this guide, you’ll discover simple, effective steps to put lights on your Christmas tree like a pro. Whether it’s your first time or you want to improve your technique, you’ll learn how to make your tree shine brighter and last longer.
Keep reading, and get ready to light up your holiday season with confidence!
Choosing The Right Lights
Choosing the right lights for your Christmas tree sets the mood and style of your holiday decor. The right lights brighten your tree beautifully and safely. Picking suitable lights can make decorating easier and more enjoyable.
Types Of Christmas Lights
Christmas lights come in many styles. Each type has unique benefits for your tree.
- Incandescent lights:Classic warm glow, but use more power.
- LED lights:Bright, cool to touch, and last longer.
- Fairy lights:Tiny bulbs, perfect for delicate decorating.
- Net lights:Easy to drape for quick coverage.
- Color-changing lights:Create fun, dynamic displays.
Selecting Light Length And Quantity
Measure your tree’s height and width before buying lights. Use this guide:
| Tree Height | Recommended Lights |
|---|---|
| 4 to 6 feet | 300 to 600 lights |
| 7 to 8 feet | 600 to 1,000 lights |
| 9 to 10 feet | 1,000 to 1,500 lights |
More lights create a fuller look but avoid overcrowding. Check light strand length for easy wrapping.
Energy-efficient Options
Energy-saving lights reduce electricity bills and last longer. LED lights use up to 80% less power than incandescent.
- Cooler bulbs reduce fire risks.
- Long-lasting bulbs mean less replacement.
- Some models have timers to save energy automatically.
Choose lights with energy-efficient labels for safety and savings.
Preparing The Tree
Preparing the Christmas tree properly sets the stage for beautiful lights. A steady and full tree makes the lights shine better. Checking the electrical setup ensures safety and smooth decorating.
Setting Up The Tree Stably
Place the tree stand on a flat surface. Tighten all screws or clamps to hold the tree firmly. Test the tree by gently shaking it. Adjust the stand until the tree stays upright without wobbling.
Fluffing Branches For Fullness
Separate each branch tip carefully. Spread out needles to cover gaps and create a fuller look. Turn the tree slowly, fluffing branches evenly all around. This helps lights sit nicely and glow through the branches.
Checking Electrical Outlets
Locate an outlet close to the tree. Test the outlet with a small device to ensure it works. Avoid overloading the outlet with too many plugs. Consider using a surge protector for safety and reliability.
Testing The Lights
Test the lights before placing them on the tree to ensure they work properly. Check each bulb and replace any that are broken or missing. This saves time and prevents safety issues during decorating.
Putting lights on a Christmas tree brings joy and warmth to the holiday season. Before decorating, test your lights to ensure they shine bright. This step prevents unwanted surprises and keeps your tree glowing all season. Follow these simple steps to ensure your lights are ready for the tree.Inspecting Bulbs And Wires
Check each bulb for cracks or discoloration. Replace any damaged bulbs to prevent outages. Examine the wires for wear or fraying. Safe wires prevent electrical issues. A quick check can save time later.Ensuring All Lights Work
Plug in each string of lights. Make sure every bulb lights up. If a string doesn’t work, try replacing a single bulb. Often, one faulty bulb can cause the whole string to go dark. Ensure your lights illuminate fully before adding them to your tree.
Credit: www.youtube.com
Planning The Lighting Pattern
Planning the lighting pattern on your Christmas tree sets the foundation for a stunning display. How you arrange the lights affects the tree’s overall glow and the festive atmosphere in your room. Taking a moment to decide your approach can save you time and frustration while making your tree look professional and magical.
Top-down Vs. Bottom-up Approach
Choosing where to start hanging your lights changes the flow of your decorating process. Starting from the top means you can wrap the tree evenly as you move downward, making sure the tip is brightly lit and the lights spread out naturally.
On the other hand, beginning at the bottom gives you better control over hiding the light cords near the base and ensures the lower branches don’t get overcrowded with bulbs. Some people find it easier to work upward because it lets them test how the lights look as they go.
Think about your tree’s shape and where you tend to stand most often. Would starting at the top or bottom help you fill gaps more efficiently? Your choice impacts how balanced and bright the tree will appear.
Wrapping Branches Vs. Weaving Lights
Deciding how to position the lights on the branches affects the depth and texture of your tree’s illumination. Wrapping lights around each branch creates a dense, sparkling effect that highlights the tree’s natural shape.
Weaving the lights in and out through the branches produces a softer glow, giving the tree a more subtle, layered look. This technique can be easier if you want to add other decorations without the lights overpowering them.
Think about the vibe you want. Are you aiming for bright and bold or gentle and cozy? Your lighting pattern can help you craft the mood that fits your holiday spirit perfectly.
Putting On The Lights
Putting on the lights is where your Christmas tree really starts to come alive. It’s more than just wrapping strings around branches—it’s about creating a balanced, glowing masterpiece. Taking a thoughtful approach here can save you from frustration and make your tree look stunning.
Starting At The Base
Begin by plugging in your lights and placing the end with the plug at the base of the tree. This makes it easier to hide the cords and keeps your setup tidy. Starting low also prevents the lights from running out before you reach the top.
Think about the power source location. If your outlet is behind the tree, positioning the plug at the back near the base keeps everything neat and reduces visible wires.
Evenly Spacing The Lights
Spread the lights evenly to avoid bright spots and dark patches. Wrap the lights around each major branch, pushing some bulbs deeper inside to add depth and others closer to the tips for sparkle.
Ask yourself if the light looks balanced from all angles. If you notice dim areas, adjust by adding extra loops or shifting strands slightly. This way, your tree shines consistently no matter where you’re standing.
Securing Lights To Branches
Don’t just drape the lights—secure them gently to the branches. Twist the wire lightly around thicker branches to keep strands stable and prevent slipping. Avoid pulling too tight to protect both the lights and your tree.
Using green floral wire or small clips can help hold lights in place without being obvious. This little trick keeps your tree looking polished and stops you from having to redo the lights after a slight bump.
Final Touches
After wrapping your Christmas tree with lights, the final touches make a big difference in how your tree looks and feels. These last steps help to create a seamless, magical glow that draws everyone’s eyes. Paying attention to details like hiding cords, adjusting light placement, and ensuring safety can elevate your tree from good to stunning.
Hiding Cords And Plugs
Nobody wants to see tangled cords spoiling the festive vibe. Tuck cords behind sturdy branches or wrap them around the trunk to keep them out of sight. Use green twist ties or clips designed for Christmas lights to secure cords neatly without damaging your tree.
Think about where the plug will sit. Position it near an outlet to avoid stretching cords across walkways or carpets. This not only keeps things tidy but also reduces tripping hazards.
Adjusting Light Placement For Glow
Step back and look at your tree from different angles. Are there any dark spots? Lights should be spread evenly, not just on the surface but nestled deeper into the branches.
Push some bulbs further inside the tree to create depth. This layering effect gives your tree a warm, glowing core that looks more natural and inviting. Don’t hesitate to move a few strands around until you’re happy with the balance.
Safety Tips For Outdoor And Indoor Trees
Safety is often overlooked but crucial, especially with lights. For indoor trees, use lights labeled for indoor use only and avoid overloading electrical outlets. Keep cords away from pets and children to prevent accidents.
Outdoor trees face weather challenges. Use lights rated for outdoor use and ensure all connections are waterproof. Elevate plugs off the ground to avoid water contact, and unplug lights when you’re not home or before going to bed.
Have you checked your lights for damaged wires or broken bulbs before plugging them in? Taking this simple step can save you from a potential fire hazard or power outage during the holidays.
Maintaining The Lights Throughout The Season
Maintaining your Christmas tree lights throughout the season ensures your tree stays bright and festive from the first night to the last. Lights can flicker or go out unexpectedly, but regular care can prevent many issues. Staying attentive to the condition of your lights will save you from last-minute frustrations and keep your holiday spirit glowing.
Regular Checks For Faulty Bulbs
Check your lights every few days to spot any bulbs that have gone out. A single faulty bulb can cause a whole section of your lights to stop working. Replace burnt-out bulbs promptly to keep the entire string shining.
Use a bulb tester or swap bulbs from working sections to identify the dead ones quickly. Don’t ignore flickering lights; they often signal loose connections or weakening bulbs. Keeping a small repair kit handy with spare bulbs and fuses can make fixes quick and easy.
Proper Storage Tips After Use
How you store your lights after the holidays matters as much as how you put them up. Avoid tangles and broken wires by wrapping lights around a sturdy piece of cardboard or a dedicated spool. This simple step prevents damage and saves time next year.
Store your lights in a cool, dry place away from heavy boxes or anything that could crush the cords. Using clear plastic bins helps you spot your lights easily without digging through clutter. Have you ever found your lights unusable due to poor storage? Taking a little extra care now will keep your lights ready for many seasons to come.

Credit: www.marksandspencer.com

Credit: www.youtube.com
Frequently Asked Questions
How Do I Start Putting Lights On A Christmas Tree?
Begin by testing your lights for any issues. Start at the tree’s base, near the power source. Wrap the lights around branches evenly, moving upward in a spiral for balanced coverage.
What Type Of Lights Work Best On Christmas Trees?
LED string lights are ideal due to low heat and energy efficiency. They last longer and come in various colors and styles. Choose lights with appropriate length and bulb size for your tree.
How Many Light Strands Do I Need For A Tree?
Use about 100 lights per foot of tree height for a bright effect. Larger trees may require more strands for full coverage. Adjust based on your preferred brightness and light density.
Should I Plug Multiple Light Strands Together?
Only connect strands as per manufacturer instructions, usually up to three. Overloading can cause electrical hazards. Use an outdoor-rated extension cord and a power strip with a surge protector.
Conclusion
Putting lights on your Christmas tree can bring joy and warmth to your home. Start with a clear plan to make the process easy and fun. Use different light strands to add depth and sparkle. Always test your lights before hanging them.
Take your time wrapping lights evenly around branches for the best look. Remember safety by checking for any damaged wires. Enjoy the bright and festive glow you create. Your tree will shine beautifully all season long. Simple steps lead to a magical holiday feel.


