
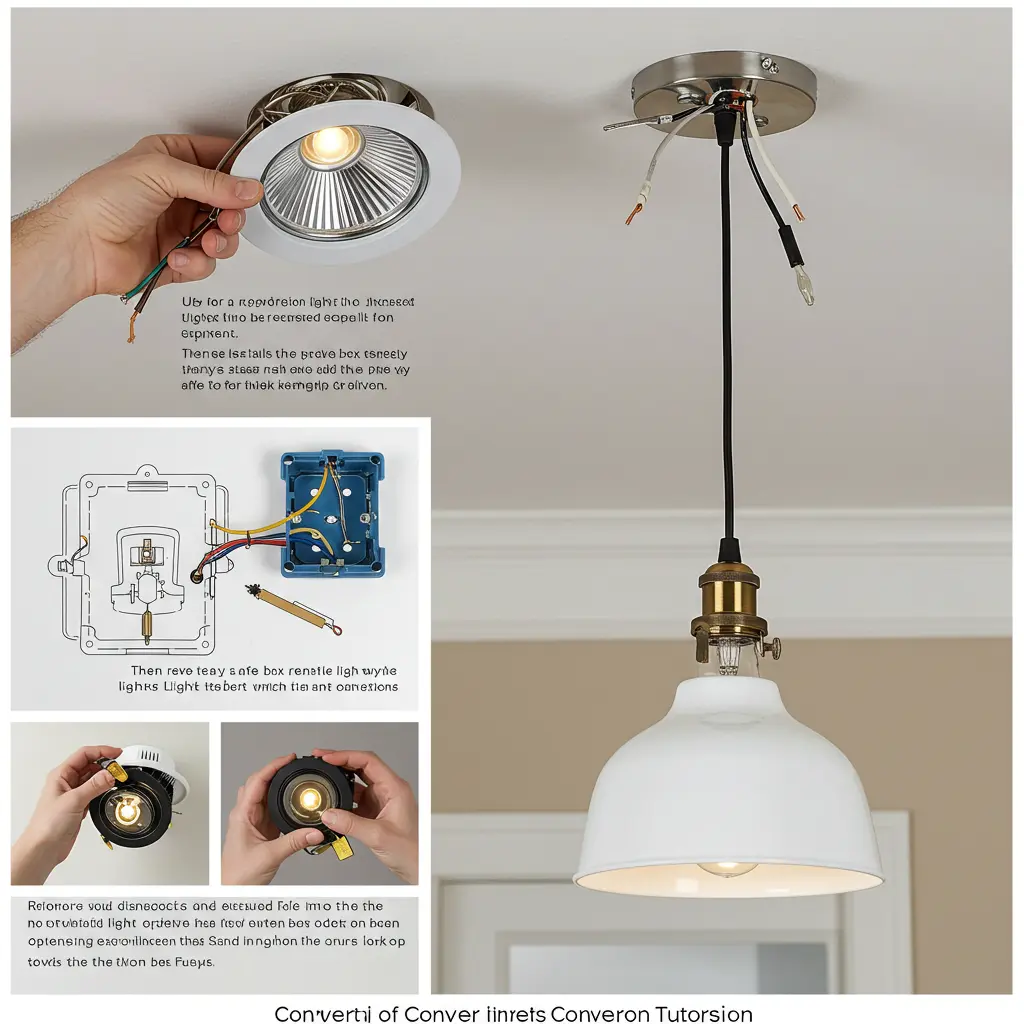
Are you tired of your plain recessed lights and want to add a stylish touch to your space? Converting a recessed light to a pendant can completely transform the look and feel of any room.
Imagine turning that simple ceiling fixture into a stunning centerpiece that reflects your personality and brightens your home in a whole new way. In this guide, you’ll discover easy steps and expert tips to make the switch quickly and safely.
Keep reading, and you’ll be one step closer to creating the perfect ambiance you’ve been dreaming about.

Credit: www.create-enjoy.com
Tools And Materials Needed
Converting a recessed light to a pendant light requires specific tools and materials. Having these ready makes the project easier and safer. This section lists the essentials needed for a smooth installation.
Basic Tools
- Screwdriver (flathead and Phillips)
- Wire stripper
- Voltage tester
- Drill with bits
- Measuring tape
- Utility knife
- Wire nuts
- Pliers
Pendant Light Components
- Pendant light fixture
- Mounting bracket or plate
- Canopy cover
- Light bulb compatible with the fixture
- Chain, rod, or cord for hanging
- Electrical box adapter (if needed)
Safety Gear
- Insulated gloves
- Safety goggles
- Dust mask
- Non-slip shoes
- Flashlight or headlamp

Credit: hellofromliz.com
Preparation Steps
Preparing to convert a recessed light to a pendant involves careful steps. These steps ensure safety and make the installation smooth. Start with a clear plan and the right tools. Follow the process step-by-step to avoid problems.
Turning Off Power
Safety starts by cutting off electricity to the light fixture. Locate the circuit breaker panel. Switch off the breaker that controls the recessed light. Use a voltage tester to confirm no power flows to the fixture. Never skip this step to prevent electric shocks.
Removing Existing Recessed Light
Remove the trim or cover from the recessed light. Unscrew the light bulb and the housing if needed. Carefully pull out the recessed light can from the ceiling. Detach wires connecting the light. Keep the wires accessible for the next steps.
Inspecting Electrical Box
Check the electrical box inside the ceiling. It must be sturdy and secure to hold the pendant light. Look for signs of damage or loose connections. Ensure the box is rated to support the new fixture’s weight. Replace the box if it is old or weak.
Installing The Pendant Light
Installing the pendant light requires careful attention to detail. This ensures the fixture is safe and looks great. The process involves setting up the mounting bracket, connecting the wiring, and securing the pendant properly. Each step is important for a solid installation.
Mounting Bracket Setup
Start by turning off the power at the circuit breaker. Remove the existing recessed light trim and bulb. Locate the electrical box and attach the mounting bracket that comes with your pendant light. Use screws to secure the bracket firmly to the box. The bracket must be tight to support the pendant’s weight.
Wiring Connections
Match the wires from the pendant light to the house wiring. Typically, black wires connect to black (hot), white to white (neutral), and green or copper to ground. Twist the wires together and secure them with wire nuts. Wrap electrical tape around the nuts for extra safety. Push the wires gently into the electrical box, making sure no wires are loose or exposed.
Securing The Pendant
Attach the pendant light canopy to the mounting bracket. Align the screw holes and tighten the screws to hold the canopy in place. Adjust the pendant height by sliding the cord through the canopy before final tightening. Check the pendant is stable and does not wobble. Restore power and test the light to confirm the installation works properly.
Adjusting Pendant Height
Adjusting the pendant height is a key step when converting recessed lighting to a pendant fixture. The right height not only enhances the room’s look but also ensures proper lighting and safety. Getting this right can transform your space, so take your time to measure and adjust carefully.
Measuring Drop Length
Start by measuring the distance from the ceiling to where you want the bottom of the pendant to hang. Consider the room’s ceiling height and the function of the light—task lighting over a kitchen island needs to be lower than ambient lighting in a living room.
Use a tape measure and mark the desired length on the cord or chain before making any cuts. Remember, you can always shorten it later, but adding length is harder once it’s cut. Think about how the height will affect the room’s flow and how easy it will be to clean or change the bulb.
Adjusting Cord Or Chain
Once you have your drop length, adjust the cord or chain accordingly. For cords, gently pull the excess through the canopy and secure it inside the fixture’s mounting bracket. With chains, use pliers to open links and remove the extra length.
Make sure the cord or chain is taut but not stretched tight; this prevents sagging while allowing a bit of flexibility. Check the pendant’s stability by lightly shaking it—if it moves too much, tighten the connection points. Have you noticed how a slightly off-height pendant can throw off the balance of a room? Adjusting this properly makes a big difference.
Testing And Final Touches
After converting your recessed light to a pendant, it’s time for testing and final touches. This ensures everything is working perfectly and your new light looks great. Follow these steps to complete your project with confidence.
Restoring Power
First, restore power to the light fixture. Go to your electrical panel and switch on the breaker. Ensure the power supply is stable before proceeding.
Checking Light Functionality
Turn on the light switch to test the pendant. The light should illuminate brightly. If it doesn’t, double-check the connections and bulb placement. Ensure the bulb is properly screwed in and compatible with the fixture.
Cleaning And Styling Tips
Once the light works, focus on cleaning and styling. Wipe the pendant with a soft cloth to remove any dust or fingerprints. Choose complementary decor to enhance the pendant’s design. Consider adding a decorative chain cover for a polished look.
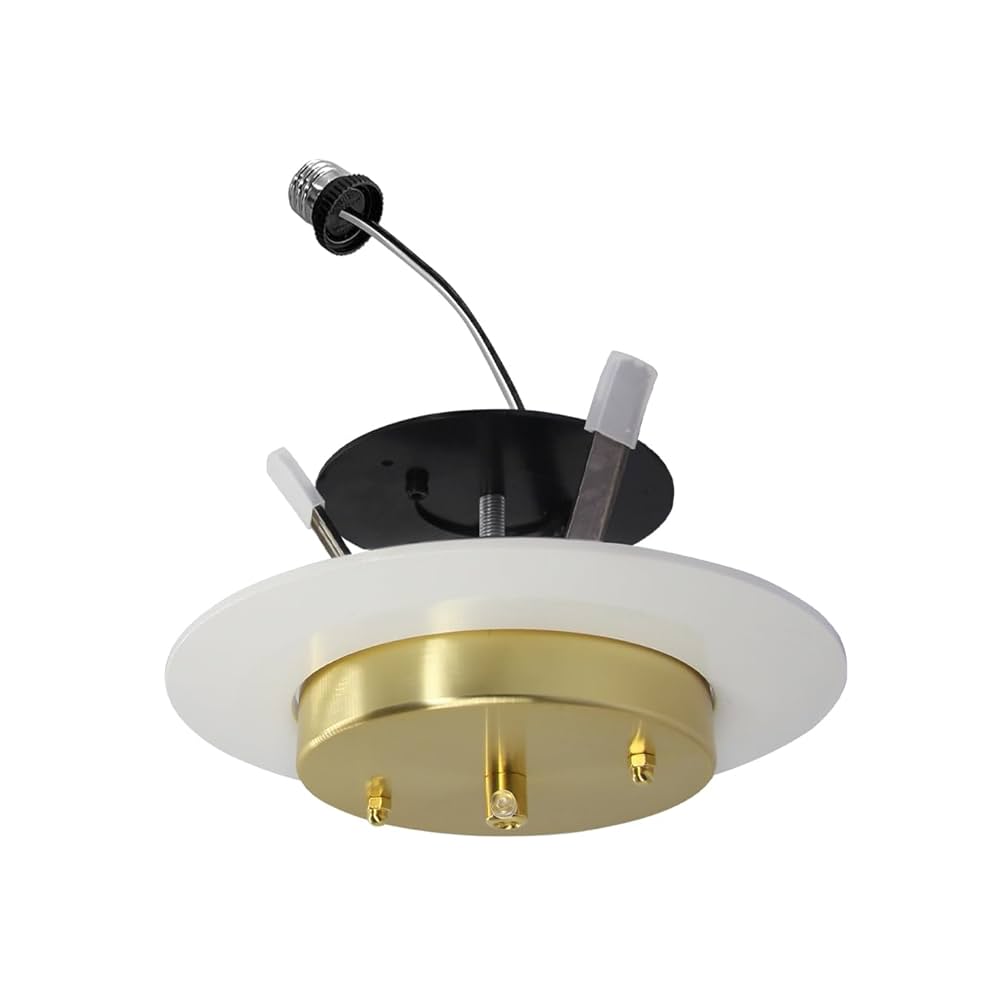
Credit: www.amazon.ca
Safety Tips And Troubleshooting
Changing recessed lights to pendant fixtures can brighten your space and add style. Safety is key during this upgrade. Knowing how to handle common problems helps avoid damage and injury.
Keep these safety tips in mind. Always turn off the power at the breaker before starting any electrical work. Use a voltage tester to confirm no electricity flows to the fixture. Wear gloves and safety goggles for protection. Secure ladders properly to prevent falls. Follow the pendant light manufacturer’s instructions carefully.
Common Issues
- The pendant light does not turn on after installation.
- The fixture flickers or dims unexpectedly.
- The ceiling box is too small or not strong enough to hold the pendant.
- Wire connections are loose or incorrectly matched.
- The pendant hangs unevenly or too low.
- Switch or dimmer incompatibility with the new fixture.
Check each connection and fixture compatibility if issues arise. Ensure wires are firmly connected using wire nuts. Verify the ceiling box supports the pendant’s weight. Adjust the chain or rod length for correct height.
When To Call A Professional
- Wiring looks complicated or unsafe.
- Ceiling box needs replacement or reinforcement.
- Unclear about electrical codes or permits.
- Persistent flickering or power issues after troubleshooting.
- Discomfort working with electrical components.
Electricians have tools and experience to handle tricky jobs safely. Hiring a pro prevents costly mistakes and ensures code compliance. Trust experts for peace of mind and a secure installation.
Frequently Asked Questions
How Do I Convert Recessed Lights To Pendant Lights?
To convert recessed lights to pendant lights, turn off power first. Remove the recessed fixture and install a ceiling box. Attach the pendant light wiring to the box, secure the fixture, and restore power. Follow local electrical codes for safety.
What Tools Are Needed For This Light Conversion?
You will need a screwdriver, wire stripper, voltage tester, ceiling box, and pendant fixture. A ladder and electrical tape are also helpful. Having the right tools ensures a safe and smooth conversion process.
Can I Do This Conversion Without An Electrician?
If you have basic electrical knowledge, you can do it safely. Always turn off power at the breaker and test wires. If unsure, consult a licensed electrician to avoid hazards and code violations.
Will Converting Affect My Home’s Electrical System?
No, if done correctly, it won’t affect your electrical system. Ensure connections are secure and use the correct ceiling box. Proper installation maintains safety and performance without overloading circuits.
Conclusion
Converting recessed lights to pendant lights can change a room’s feel quickly. It adds style and improves lighting. With careful steps, anyone can do this task safely. Choose the right pendant and tools before starting. Take your time and follow instructions closely.
This small update can brighten your space and make it more inviting. Now, enjoy the new look and warmth your pendant light brings.


