
Are you tired of the plain look your recessed lights give your room? Imagine swapping them out for stylish pendant lights that add personality and warmth to your space.
Changing recessed lights to pendant lights is easier than you might think—and it can completely transform the feel of your home. In this guide, you’ll discover simple steps to make this upgrade yourself, saving money and creating a look you’ll love.
Ready to brighten up your space with a fresh, modern touch? Let’s get started!
Tools And Materials Needed
Changing a recessed light to a pendant light requires specific tools and materials. Having the right items makes the process smoother and safer. Prepare everything before starting the installation. This section lists all essentials for a successful change.
Essential Tools
- Voltage tester – to ensure power is off
- Wire strippers – for removing wire insulation
- Screwdrivers – both flathead and Phillips
- Pliers – for gripping and twisting wires
- Drill with bits – to make new holes if needed
- Wire nuts – for securing electrical connections
- Measuring tape – to measure drop length
- Step ladder – to reach the ceiling safely
- Utility knife – for cutting drywall or insulation
Required Materials
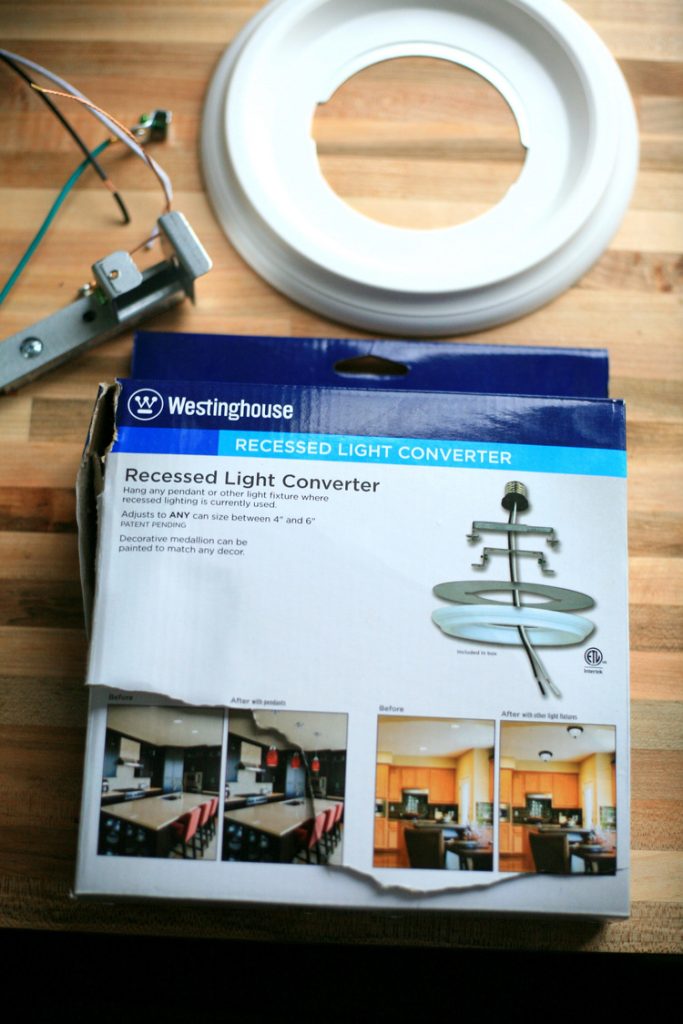
- Pendant light fixture – choose style and size
- Electrical box – to support the pendant light
- Mounting bracket – to attach fixture securely
- Electrical cable – suitable gauge for fixture power
- Wire connectors – to join wires safely
- Ceiling medallion (optional) – for decorative finish
- Light bulbs – compatible with the new fixture
- Electrical tape – for extra insulation on connections
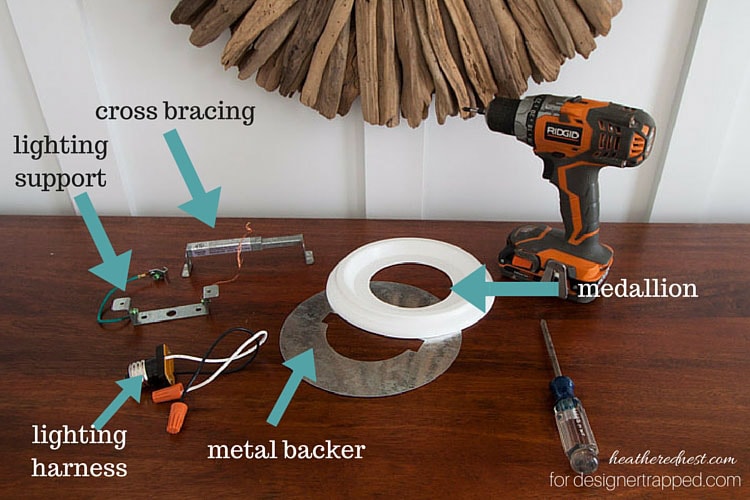
Credit: designertrapped.com
Safety Precautions
Changing a recessed light to a pendant fixture involves working with electricity. Safety is the top priority. Taking proper precautions helps prevent accidents and injuries. Preparing yourself and the workspace ensures a smooth and safe process.
Power Shutoff
Always turn off the power at the circuit breaker. Do not rely on just the light switch. Use a voltage tester to confirm the power is off. This step protects you from electric shocks. Double-checking is better than risking injury.
Protective Gear
Wear safety glasses to protect your eyes from dust and debris. Use insulated gloves to avoid electric shocks. A dust mask helps if insulation or old materials are disturbed. Proper gear keeps you safe throughout the job.
Removing The Recessed Light
Begin by turning off the power to the recessed light. Carefully remove the trim and bulb, then disconnect the wiring to take out the fixture safely.
Removing the recessed light is the first crucial step in transforming your space with a new pendant light. This process requires a bit of patience and precision, but the results are worth the effort. You’ll need to access the fixture, detach the light, and ensure everything is safely prepared for the new installation.Accessing The Fixture
First, you’ll need to turn off the power to the recessed light at the circuit breaker. Safety should always be your priority. Then, grab a sturdy ladder to safely reach the fixture. Make sure you have enough light to see what you’re doing. Sometimes, a simple headlamp can be a game-changer. Once you have the right setup, remove the bulb and the trim from the recessed light. This often involves a gentle twist or pull, but be sure to consult your fixture’s manual if you’re unsure. Have you ever noticed how even the smallest change in lighting can dramatically alter the mood of a room?Detaching The Light
With the trim and bulb out of the way, it’s time to detach the fixture. Look for clips or screws that hold the recessed light housing in place. Using a screwdriver, carefully remove these fasteners. Ever wondered why some rooms feel instantly cozy while others don’t? The lighting fixture plays a key role. Lower the housing gently, making sure the wires are still intact. This is where a helping hand can be invaluable. If you’re working alone, be extra cautious not to let the fixture hang by the wires. Have you thought about how a pendant light might not just brighten up a room, but also create a focal point that sparks conversation? By following these steps, you’re well on your way to transforming your space with a new pendant light.
Credit: hellofromliz.com
Preparing The Electrical Box
Preparing the electrical box is a crucial step before changing recessed lights to pendant lights. Proper preparation ensures safety and supports the new fixture’s weight and wiring needs. It involves inspecting the existing wiring and installing the right type of box if needed. This process helps prevent electrical issues and ensures a secure fit for your pendant light.
Checking Wiring
Turn off the power at the circuit breaker to avoid shocks. Remove the recessed light trim and bulb to access the wiring. Check if the wires are intact and properly connected. Look for any signs of damage, like frayed wires or loose connections. Use a voltage tester to confirm no electricity flows. Make sure the wiring matches the pendant light’s requirements. Note the wire colors: black or red for hot, white for neutral, and green or bare for ground.
Installing A Junction Box
Recessed lights may not have a junction box suitable for pendant lights. Install a new electrical box designed to hold the weight of the pendant fixture. Choose a box rated for ceiling or fan support. Turn off the power before cutting the ceiling hole. Use a drywall saw to create an opening for the box. Secure the box to a ceiling joist or use a brace bar for support. Pull the wiring through the box and prepare it for the new fixture connection. This step ensures the pendant hangs safely and the wiring stays protected.
Installing The Pendant Light
Installing the pendant light is a key part of changing recessed lighting. This step transforms the ceiling and adds style to your room. Follow clear instructions to attach the new fixture safely and correctly.
Mounting The Bracket
Start by turning off the power at the circuit breaker. Remove the recessed light trim carefully. Locate the electrical box and align the mounting bracket with it. Use screws to secure the bracket tightly to the box. Make sure the bracket sits flat against the ceiling.
Connecting Wires
Identify the wires coming from the ceiling: usually black, white, and green or bare copper. Match the wires from the pendant light to the ceiling wires by color. Twist the ends of the matching wires together clockwise. Use wire nuts to cover the twisted connections. Wrap electrical tape around the wire nuts for extra security. Push the wires gently into the electrical box.
Securing The Pendant
Attach the pendant’s canopy to the mounting bracket. Align the screw holes and tighten the screws evenly. Adjust the pendant height by shortening or lengthening the cord before final tightening. Check that the pendant hangs straight and is stable. Restore power and test the light to ensure it works properly.

Credit: hellofromliz.com
Adjusting Pendant Height
Adjusting the height of your new pendant light is crucial for both style and function. The right height helps the light shine where you need it most. It also enhances the room’s look and feel. This section explains how to measure and modify the pendant’s drop length.
Measuring Drop Length
Start by deciding where the pendant light will hang. Measure from the ceiling to the spot where the light should end. This spot depends on the room and furniture below.
- For dining areas, keep the bottom 28 to 34 inches above the table.
- In kitchens, 30 to 36 inches above the counter works well.
- In open spaces, leave at least 7 feet from the floor.
Use a tape measure for accuracy. Mark the desired length on the pendant cord or chain.
Modifying Cord Length
Adjust the cord to match the measured drop length. Most pendants have adjustable cords or chains. Follow these tips:
- Turn off the power before handling the fixture.
- Loosen the canopy cover to access the cord.
- Cut excess cord if needed, leaving some extra for wiring.
- Secure the cord inside the canopy with the strain relief.
- Reattach the canopy and tighten screws firmly.
Test the pendant height by holding it in place before final installation. This step ensures the light hangs at the perfect length.
Testing The Installation
Testing the installation after changing recessed lights to pendant lights is crucial to ensure everything works safely and as expected. This stage helps you catch wiring issues or faulty fixtures before finalizing the setup. Let’s look at how to safely restore power and verify your new pendant light’s functionality.
Restoring Power
Before restoring power, double-check all wire connections are secure and insulated. Loose connections can cause flickering or even electrical hazards.
Go to your circuit breaker and switch the power back on. Be cautious and stand clear of the fixture as you do this.
If you’re unsure, use a voltage tester to confirm the circuit is live only after switching on the breaker. This small step prevents surprises and keeps you safe.
Verifying Functionality
Once power is restored, test the pendant light by turning the switch on. Does the light illuminate immediately and steadily?
If the light flickers or fails to turn on, check the bulb first. Sometimes the issue is as simple as a loose or incompatible bulb.
Look out for any unusual sounds or smells, which can indicate wiring problems. If something feels off, turn off the power and re-inspect your connections.
Does your pendant light hang at the right height and angle? Adjust it now before finalizing the installation to get the perfect ambiance.
Common Issues And Fixes
Changing recessed lights to pendant fixtures can bring a fresh look to any room. Yet, some common issues may arise during or after installation. Identifying these problems early helps keep your lighting safe and effective. Simple fixes often solve most concerns quickly.
Loose Connections
Loose wiring is a frequent issue with pendant light installs. Connections may loosen over time or during installation. This can cause the light to flicker or fail to turn on. Check all wire nuts and terminals to ensure they are tight. Turn off power before inspecting. Secure wires by twisting them firmly together and covering with wire nuts. Use electrical tape for extra hold if needed.
Flickering Light
Flickering can be caused by several factors. Loose connections often cause intermittent flicker. A bulb not fully screwed in may also flicker. Check the bulb’s fit and replace if old or damaged. Dimmer switches sometimes do not work well with certain pendant bulbs. Ensure the bulb type matches the dimmer’s requirements. Replace incompatible bulbs or switches to stop flickering.
Frequently Asked Questions
How Do I Convert Recessed Lights To Pendant Lights?
To convert recessed lights to pendant lights, turn off power, remove the recessed fixture, install a ceiling box, and mount the pendant light. Ensure proper wiring and support for the pendant fixture for safety and functionality.
What Tools Are Needed To Change Recessed Lights To Pendant?
You will need a voltage tester, screwdriver, wire strippers, ceiling box, electrical tape, and the pendant light fixture. These tools help safely remove recessed lights and install pendant lighting properly.
Can I Replace Recessed Lights With Pendant Lights Myself?
Yes, if you understand basic electrical work and follow safety protocols. Otherwise, hiring a licensed electrician is recommended to avoid hazards and ensure compliance with electrical codes.
Will Changing Recessed To Pendant Lights Affect Room Lighting?
Yes, pendant lights provide focused lighting and can create ambiance, unlike recessed lights which offer broad, even illumination. Choose pendant size and bulb wattage accordingly.
Conclusion
Changing recessed lights to pendant lights can update your room’s look easily. Choose the right pendant that fits your space and style. Turn off power before starting any electrical work for safety. Follow step-by-step instructions carefully to avoid mistakes. Take your time and be patient during installation.
This small change can make a big difference in lighting and mood. Enjoy your new pendant lights and the fresh feel they bring. Keep these tips in mind for a smooth, successful update.


