
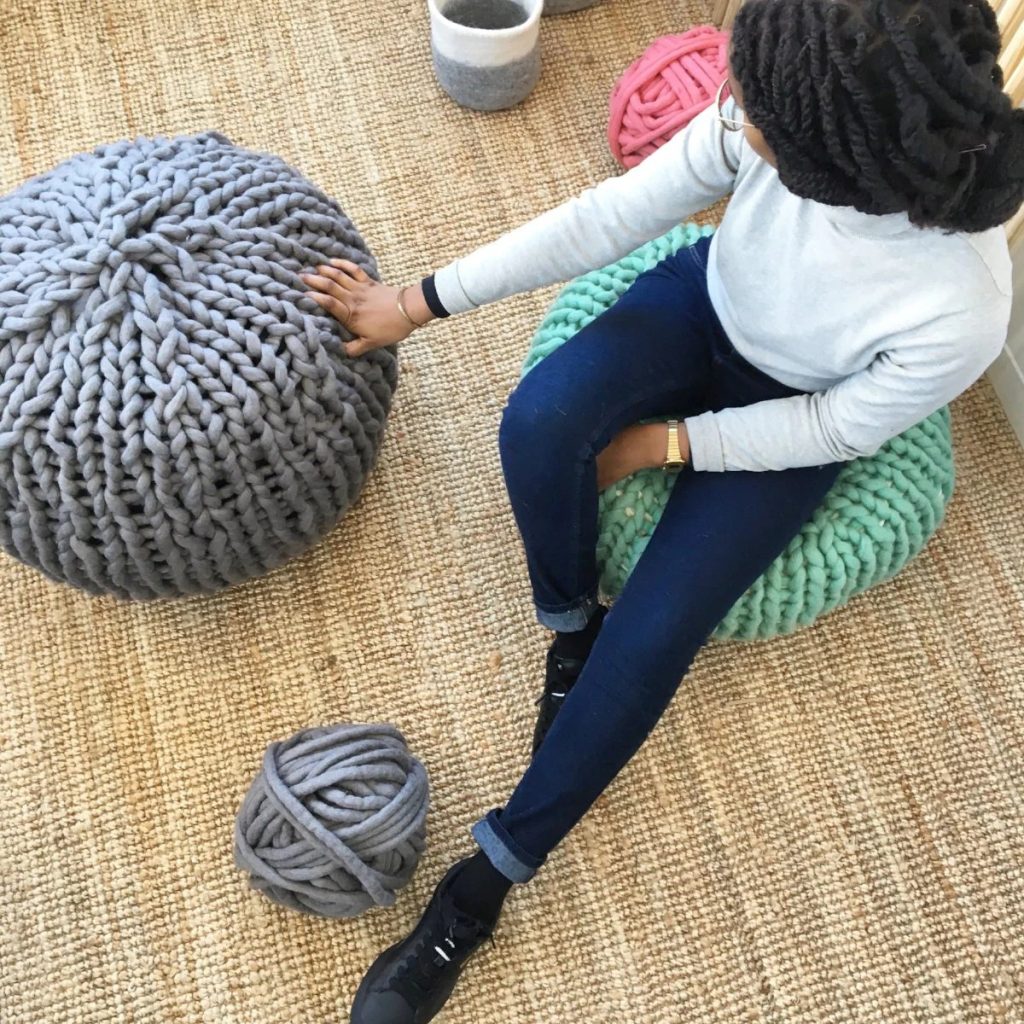
Looking to add a cozy, stylish touch to your living space? A knitted rope pouf is the perfect DIY project for you.
Not only is it practical and comfortable, but it also brings a unique, handmade charm to any room. Imagine sinking your feet into a soft, sturdy pouf that you made yourself—sounds satisfying, right? In this guide, you’ll discover simple steps to create your own knitted rope pouf, even if you’re new to knitting.
Ready to transform your home with a fun and rewarding craft? Keep reading, and let’s get started!
Materials Needed
Gathering the right materials is key to making a beautiful knitted rope pouf. Choosing quality supplies ensures your pouf looks great and lasts long. Here’s what you need to prepare before starting your project.
Choosing The Right Yarn
Pick thick, chunky yarn for a cozy and sturdy pouf. Cotton or wool yarn works best for softness and durability. Avoid thin yarns; they won’t hold the shape well. Look for yarn that feels comfortable to touch and easy to knit.
Selecting The Rope
Use a strong, flexible rope to form the pouf’s base. Natural fibers like jute or cotton rope are durable and eco-friendly. The rope should be thick enough to support weight but easy to twist and knit. Measure the rope length based on your pouf size plan.
Essential Tools
- Large knitting needles or a knitting loom for chunky yarn
- Scissors to cut yarn and rope
- Measuring tape for accuracy
- Needle with a large eye for weaving ends
- Stitch markers to keep track of progress
Credit: diyjoy.com
Preparing Your Workspace
Preparing your workspace helps make the knitting process smooth and enjoyable. A neat and comfortable area reduces distractions and keeps your materials close. It also saves time and improves focus.
Setting Up A Comfortable Area
Choose a quiet spot with good lighting. Natural light is best to see stitches clearly. Use a comfortable chair that supports your back. A table or flat surface nearby helps hold your tools. Keep your workspace free from clutter to avoid stress.
Organizing Materials
Gather all materials before starting your project. Arrange your yarn, knitting needles, and stuffing in one place. Use small containers or baskets to separate items. Keep scissors, measuring tape, and stitch markers within reach. This setup helps prevent losing tools and keeps you focused.
Basic Knitting Techniques
Basic knitting techniques involve creating loops of yarn with needles to form fabric. Learning simple stitches helps make a sturdy rope for the pouf. Practice knitting evenly to ensure the rope is strong and smooth.
Learning basic knitting techniques is an empowering journey, especially when you’re crafting something as cozy and stylish as a knitted rope pouf. Whether you’re a beginner or brushing up on your skills, mastering these foundational techniques will set you on the path to success. They are the building blocks of your project, ensuring each stitch contributes to the perfect pouf.Casting On
Casting on is your starting point. It’s like laying the foundation of a house—vital for stability. Use a simple long-tail cast-on method for a firm edge. Begin by measuring a tail about three times the width of your project. Create a slip knot and place it on your needle. Use your thumb and index finger to loop the yarn around the needle, forming your initial stitches.Knitting Stitches
Knitting stitches bring your project to life. The most common are the knit and purl stitches. These form the basis of many patterns, including the versatile garter stitch. To knit, insert your needle from front to back, wrap the yarn, and draw it through. For a purl stitch, the needle goes from back to front. Practice these until they feel second nature—your pouf will thank you!Binding Off
Binding off is the grand finale of your knitting adventure. It secures your stitches, ensuring your hard work doesn’t unravel. Knit the first two stitches, then lift the first stitch over the second and off the needle. Continue this until you have one stitch left, cut the yarn, and pull it through. This step gives your pouf a polished, professional finish. Engaging with these techniques can be meditative, almost like a rhythmic dance. Ever found yourself lost in the flow, feeling the yarn glide through your fingers? That’s the magic of knitting. Have you tried adding your personal flair to these steps? Your pouf is not just a piece of decor—it’s a reflection of your creativity and patience.Creating The Pouf Shape
Shaping a knitted rope pouf is the key to its charm and comfort. The form must be sturdy yet soft to hold its shape. Working step-by-step helps make the pouf look neat and professional.
The process starts with a strong base, which supports the entire pouf. Then, the sides grow upward, creating height and volume. Finally, closing the top finishes the pouf with a smooth, tidy look.
Starting The Base
Create a flat circle using a tight stitch pattern. This circle forms the bottom of the pouf. Make sure the base is wide enough for stability. Use thick yarn or rope for a firm foundation. Keep the stitches even to avoid lumps. The base sets the shape and size for the whole pouf.
Building The Sides
Work upwards from the base in a round spiral. Use looser stitches to add softness but keep strength. The sides should be tall enough to create a comfortable seat. Keep the rope or yarn snug to prevent gaps. Check the shape often to keep it even and smooth. This section gives the pouf its height and volume.
Closing The Top
Bring the sides together by gradually decreasing stitches. This step shapes the top into a neat dome. Pull the last stitches tight to close the pouf securely. Make sure the top is firm but not too hard. Finish with a strong knot or weave to lock the shape. A well-closed top completes the pouf’s look and durability.
Assembling The Rope Elements
Assembling the rope elements is a key part of making your knitted rope pouf. This step brings together the knit sections and the rope, shaping the pouf’s structure. Careful assembly ensures the pouf is strong and looks neat.
Focus on attaching the rope securely to the knit base. Then, finish by securing the rope ends to prevent unraveling. These actions give your pouf a polished and durable finish.
Attaching Rope To Knit
Start by aligning the rope with the edge of the knitted piece. Use a strong needle and thick thread or yarn. Stitch the rope carefully through the knit loops and around the rope’s outer edge.
Make tight, even stitches for a clean look. Keep the rope flat against the knit surface. This helps maintain the pouf’s shape and firmness. Check the connection regularly as you go.
Securing The Ends
Once the rope is attached, tuck the rope ends inside the pouf’s body. Use extra stitches to hold the ends firmly in place. Tie small knots to lock the thread securely.
Trim any excess rope or thread neatly. This prevents fraying or loosening over time. A well-secured end ensures your pouf stays intact with regular use.

Credit: www3.designindaba.com
Filling And Finishing Touches
The filling and finishing touches bring your knitted rope pouf to life. These steps ensure the pouf is comfortable, sturdy, and looks great. Proper filling gives the right shape and support. Finishing touches make the pouf neat and ready to use.
Choosing The Right Filling
Select filling that holds shape and feels soft. Polyester fiberfill is light and fluffy. It keeps the pouf soft but firm. Foam pieces add more support and durability. Old cushions or pillows work well for eco-friendly filling.
- Polyester fiberfill: soft, lightweight, easy to shape
- Foam chunks: sturdy, supportive, durable
- Recycled cushions: budget-friendly, environmentally safe
Fill the pouf slowly to avoid lumps. Push the filling deep inside for even comfort. Stop filling when the pouf feels firm but squeezable.
Final Adjustments
Close the pouf opening carefully to keep filling inside. Use a strong needle and matching yarn to sew the ends. Make tight stitches to prevent gaps. Smooth out the pouf’s surface with gentle pressing.
Check the shape and add filling if needed. Adjust tightness to your liking. The pouf should be stable enough to sit on but soft to touch.
Styling Your Pouf
Styling your knitted rope pouf is where your creativity truly shines. It’s not just about having a cozy seat; it’s about making a statement piece that reflects your personality and complements your space. Small styling choices can transform your pouf from a simple accessory to the centerpiece of any room.
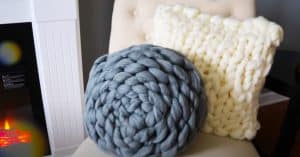
Color And Pattern Ideas
Choosing the right colors and patterns can completely change the vibe your pouf gives off. Consider bold colors like deep navy or vibrant mustard to add a pop of energy to a neutral room. Soft pastels like blush pink or mint green work well if you want a calm, inviting look.
If you enjoy patterns, think about stripes or geometric shapes knitted into the rope. These can create texture and visual interest without overwhelming the space. Don’t shy away from mixing two complementary colors in your knitting to make your pouf more dynamic.
Placement Tips
Where you place your pouf can either highlight its beauty or let it fade into the background. Near a reading nook, it acts as a comfy footrest and adds a cozy touch. In a living room, position it where guests can easily move it around for extra seating.
Try placing your pouf next to a low coffee table or beside a floor lamp. This setup invites relaxation and makes the pouf functional. Have you thought about using it in unexpected spots like a bedroom corner or an entryway? Sometimes, these less obvious placements make your pouf stand out the most.

Credit: www.youtube.com
Troubleshooting Common Issues
Troubleshooting is part of the fun and challenge when making your knitted rope pouf. Small mistakes can affect the final look, but they’re fixable with a little patience and attention. Let’s look at two common issues you might face and how to handle them effectively.
Fixing Loose Stitches
Loose stitches can make your pouf look uneven and less sturdy. If you notice slack in your stitches, gently tug the yarn to tighten them up without distorting the shape. Sometimes, slipping the stitch off the needle and re-knitting it more snugly can solve the problem.
Try to keep an even tension while knitting to avoid loose stitches from the start. If you’re struggling with tension, take breaks and relax your hands—it’s surprising how much that helps.
Handling Uneven Shapes
Uneven shapes are common, especially when stuffing the pouf or joining knitted sections. Check if the stuffing is distributed evenly; lumps or empty spots can distort the pouf’s form. Adding or redistributing stuffing little by little will help your pouf regain a smooth, round shape.
When your knitted rope pouf looks misshapen, ask yourself: Is the knitting consistent throughout? Uneven tension or varying stitch sizes can cause bumps. Reassessing your stitch tension and adjusting as you go will keep your pouf balanced and neat.
Frequently Asked Questions
What Materials Are Needed To Make A Knitted Rope Pouf?
You need thick rope, knitting needles, stuffing, and scissors. Choose durable rope for a sturdy pouf. Use soft stuffing for comfort. These materials ensure a cozy and long-lasting knitted rope pouf.
How Long Does It Take To Knit A Rope Pouf?
Knitting a rope pouf typically takes 4 to 6 hours. Time varies based on knitting skill and rope thickness. Beginners might take longer, while experienced crafters finish faster. Patience is key for a neat finish.
Can Beginners Easily Make A Knitted Rope Pouf?
Yes, beginners can make a knitted rope pouf with practice. Follow step-by-step instructions and use thick rope for easier handling. Start with simple stitches and take breaks. This project is great for learning basic knitting skills.
How Do You Stuff A Knitted Rope Pouf Properly?
Stuff the pouf evenly with soft filling to maintain shape. Use small amounts at a time for better control. Avoid overstuffing to keep the pouf comfortable and flexible. Proper stuffing enhances the pouf’s durability and appearance.
Conclusion
Creating a knitted rope pouf adds charm to any room. It brings comfort and style in one piece. You only need a few materials to start. The steps are simple and fun to follow. Making your own pouf saves money and feels rewarding.
Try different colors or sizes for variety. Enjoy your cozy, handmade addition at home. Keep practicing to improve your knitting skills. This project suits beginners and experienced crafters alike. Happy knitting and relaxing on your new pouf!


