
Decorating your Christmas tree with lights can bring a magical glow to your home and create a warm, festive atmosphere. But if you’re unsure where to start or want to make sure your tree shines perfectly, this guide is for you.
You’ll learn simple, step-by-step tips to put lights on your Christmas tree like a pro. By the end, your tree will be the sparkling centerpiece of your holiday celebrations. Ready to make your tree glow with joy? Let’s get started!

Credit: www.blog.bronners.com
Choosing The Right Lights
Choosing the right lights for your Christmas tree can change the entire holiday vibe. The perfect set of lights brings warmth, sparkle, and a festive spirit to your home. But with so many options available, how do you pick the best ones for your tree?
Types Of Christmas Lights
Christmas lights come in various styles, each offering a unique look and feel. You’ll find:
- Mini string lights:Small bulbs that create a classic twinkle effect.
- Bulb string lights:Larger bulbs that stand out and add bold color.
- Net lights:Pre-arranged in a grid, perfect for quick and even coverage.
- Icicle lights:Hang down like frozen drops, great for adding texture.
Which type fits your style? Think about the size of your tree and the look you want to achieve.
Color Options
Color choice impacts the mood you create around your tree. You can go traditional with warm white or mix it up with vibrant multi-color lights. Some prefer soft pastels or even themed colors like red and green for a more coordinated feel.
Have you considered how your room’s decor complements your light colors? Matching or contrasting your lights with your surroundings can make a huge difference.
Led Vs. Incandescent
LED lights are energy-efficient and last longer, saving you money over time. They also stay cooler, reducing fire risks. Incandescent lights, meanwhile, offer a warmer glow but use more electricity and can get hot.
Think about your priorities: Do you want bright, long-lasting lights or a traditional warm feel? Your choice affects both safety and energy use.
Safety Considerations
Safety should never be an afterthought when decorating with lights. Check for lights that are labeled for indoor use and look for certifications like UL or ETL. Inspect your lights for damaged wires or broken bulbs before use.
Have you thought about using timers to avoid leaving lights on all night? This simple step prevents overheating and saves energy, making your holiday safer and smarter.
Preparing The Tree
Preparing your Christmas tree properly sets the stage for a beautifully lit and decorated holiday centerpiece. Taking the time to select the right tree, fluff its branches, and position it well can make the lighting process much easier and more enjoyable. Let’s break down these key steps so you can create a festive atmosphere that shines bright all season long.
Selecting The Tree
Choosing your tree is more than just picking the tallest or fullest one. Think about the space where it will stand—measure the height and width to ensure a perfect fit. Consider the type of tree, too; firs tend to hold needles longer, while pines offer softer branches that might affect how lights hang.
Have you ever struggled with a tree that dropped needles too quickly? Picking a fresh tree with vibrant green needles and a sturdy trunk helps your lights stay put and your tree last throughout the holidays.
Fluffing The Branches
Once you bring your tree home, the next step is to fluff its branches. Pull each branch apart gently to fill any gaps and give your tree a fuller look. This simple step creates more surface area to wrap your lights evenly and prevents dark spots.
Don’t rush this part—take your time shaping the tree. It’s like giving your tree a makeover before the lights go on, making sure every angle shines.
Positioning The Tree
Where you place your tree affects both its appearance and safety. Position it near an outlet to avoid using long extension cords, which can be a tripping hazard. Also, keep it away from heat sources like radiators or fireplaces to prevent drying out.
Ask yourself: Does the tree catch natural light during the day? Will it be visible from different rooms? Thoughtful placement maximizes the tree’s impact and keeps your home safe as you enjoy the glow of your lights.
Planning Your Lighting Design
Planning your lighting design is a vital step in creating a dazzling Christmas tree display. It’s not just about adding lights; it’s about crafting a magical ambiance that resonates with joy and celebration. By carefully planning, you ensure that your tree becomes the sparkling centerpiece of your holiday décor.
Lighting Patterns
Think about how you want your lights to flow on the tree. Some people prefer the classic spiral pattern, which involves wrapping the lights around the tree in a continuous circle. Others might opt for a vertical pattern, draping the lights from top to bottom in straight lines.
Consider what you find visually appealing. Do you want a more structured look or something a bit more whimsical? The pattern you choose will affect the overall impression of your tree.
Measuring Light Length
Before you start, make sure you have enough lights to cover your entire tree. A good rule of thumb is to have about 100 lights for every foot of tree height. This ensures a well-lit tree without overwhelming it.
Measure your tree and calculate the length of lights needed. It’s better to have a little extra than to run short. Having a few extra strands on hand can save you a last-minute trip to the store.
Creating A Color Scheme
Choosing the right color scheme can make or break your tree’s aesthetic. Do you want a traditional look with warm white lights or something more vibrant with a mix of colors? Your choice should reflect your personal style and the overall theme of your holiday décor.
Think about how the lights will complement other decorations on the tree. A cohesive color scheme ties everything together, creating a harmonious look. Don’t be afraid to experiment with different combinations until you find what feels just right.
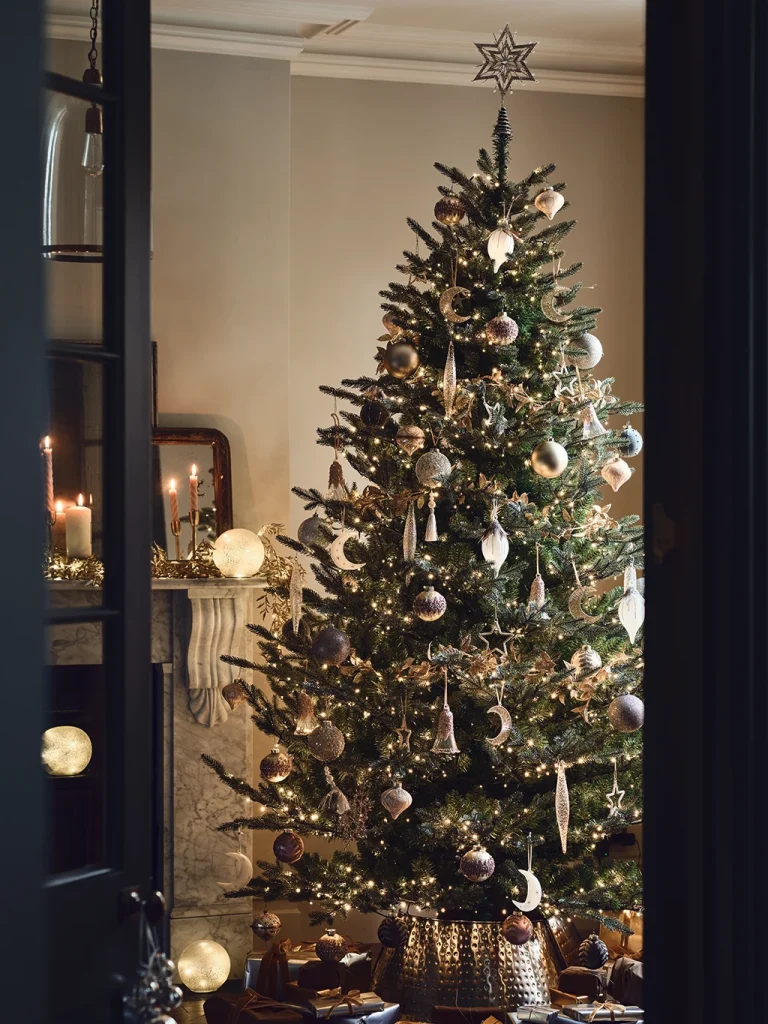
By taking the time to plan your lighting design, you ensure that your Christmas tree becomes a stunning focal point. What lighting pattern will you choose this year?
Credit: www.wayfair.com
Step-by-step Lighting Process
Putting lights on a Christmas tree can turn it into a beautiful holiday centerpiece. Following a simple process makes the task easier and faster. This guide breaks down the lighting process into clear steps. Each step helps create an even glow that highlights the tree’s shape and colors.
Testing The Lights
Start by plugging in the lights to check if they all work. Replace any bulbs that are burnt out or missing. This saves time and avoids dark spots on your tree. Use lights that have no frayed wires or damage to stay safe.
Starting From The Base
Begin wrapping the lights at the bottom of the tree near the plug. This hides the cord and keeps it close to an outlet. Wrap the lights around the trunk for a strong base layer. This helps the lights spread evenly as you move up.
Wrapping Branches
Wrap the lights around each branch, moving from the trunk outward. This creates depth and makes the tree look fuller. Keep the spacing even between bulbs for a balanced shine. Tuck lights slightly into the branches for a natural glow.
Securing The Lights
Use small clips or twist ties to hold lights in place. This prevents slipping or tangling as the tree moves. Secure lights near the trunk and on sturdy branches. Avoid using tape that may damage the tree or lights.
Enhancing The Glow
Enhancing the glow of your Christmas tree lights transforms your holiday décor from ordinary to magical. The way you arrange and control your lights can create a cozy ambiance or a dazzling display that captivates everyone in the room. It’s about balancing brightness, color, and layering to make your tree truly shine.
Using Multiple Light Layers
Adding more than one layer of lights creates depth and a richer glow on your tree. Start by wrapping a base layer of white or warm lights close to the trunk to illuminate the branches from within. Then, add a second layer of colored or twinkling lights near the tips of the branches for a sparkling effect.
This technique mimics natural light and shadow, making your tree look fuller and more dynamic. Have you ever noticed how a single light string can look flat compared to a multi-layered setup? Try mixing strands with different densities to see how your tree’s glow changes.
Incorporating Different Light Types
Mixing light types like LED, incandescent, and fairy lights adds texture and interest. LEDs offer energy efficiency and bright colors, while incandescent bulbs give a warm, nostalgic glow. Fairy lights are perfect for delicate accents and filling small spaces.
Use larger bulbs for the main glow and smaller ones to highlight ornaments or garlands. You might even combine steady lights with lights that twinkle or change colors to create movement and excitement. What if you experimented with soft white lights on one side and vibrant colors on the other? It could surprise your guests in a delightful way.
Adjusting Brightness And Timers
Controlling how bright your tree lights are can set the mood instantly. Most modern light strands come with dimmers or remote controls—use these to avoid overpowering the room. Lower brightness levels make the room feel cozy, while brighter settings energize the space.
Timers are also a game changer. Set your lights to turn on at dusk and off when you go to bed without lifting a finger. This not only saves energy but also ensures your tree glows at the perfect times. Have you tried waking up to your tree’s gentle glow? It’s a small joy that starts the day right.

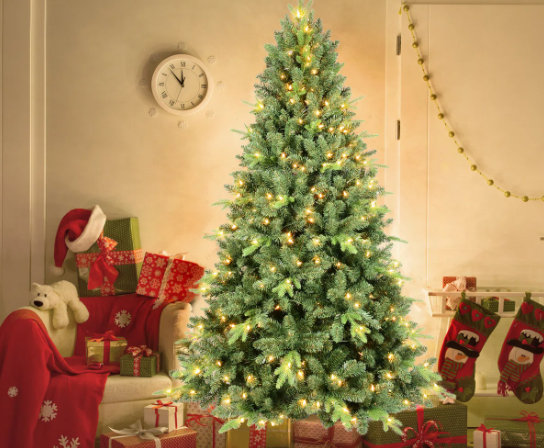
Credit: www.youtube.com
Maintenance And Safety Tips
Proper maintenance and safety keep your Christmas tree lights shining bright. Careful checks prevent hazards and ensure long-lasting use. Follow simple tips to protect your home and enjoy festive lights safely.
Checking For Damage
Inspect lights before use. Look for broken bulbs, frayed wires, or cracked sockets. Replace any damaged strands immediately. Use a soft cloth to clean dust and dirt. Avoid using lights with exposed wires to reduce fire risk.
Avoiding Overloading Circuits
Do not connect too many light strands in one socket. Check the maximum number of strands allowed on the package. Use power strips with surge protectors for extra safety. Turn off lights when not in use to prevent overheating.
Storing Lights Properly
Remove lights carefully after the holiday season. Wrap them around a spool or cardboard to avoid tangles. Store in a cool, dry place away from moisture. Keep lights in a labeled box for easy access next year.
Frequently Asked Questions
How Many Lights Do I Need For A Christmas Tree?
Use 100 lights per foot of tree height as a general rule. Adjust based on light size and tree fullness for best results.
What Is The Best Way To Wrap Christmas Tree Lights?
Start at the tree base and wrap lights evenly around branches. Work upward in a spiral, spacing lights for balanced coverage.
Should I Test Christmas Lights Before Putting Them On?
Yes, test lights to ensure all bulbs work. Replace faulty bulbs to avoid dark spots on the tree.
Can I Use Led Lights On A Real Christmas Tree?
Yes, LED lights are safe and energy-efficient for real trees. They emit less heat and last longer than traditional bulbs.
Conclusion
Putting lights on your Christmas tree brings warmth and joy to your home. Start with a clear plan and use safe, quality lights. Wrap the lights evenly around the branches for a bright, festive look. Take your time and enjoy the process.
A beautifully lit tree makes holiday moments special and memorable. Now, you are ready to create a sparkling centerpiece for your holiday celebrations. Happy decorating!


