
Lighting up your tree with string lights can transform your space instantly. Whether it’s for a cozy evening or a festive celebration, knowing how to string lights on the tree the right way makes all the difference.
You don’t want tangled wires or uneven lighting to spoil the look. In this guide, you’ll discover simple, effective tips to wrap your tree beautifully and safely. Ready to make your tree glow like never before? Keep reading, and you’ll learn how to create a stunning display that draws everyone’s attention.

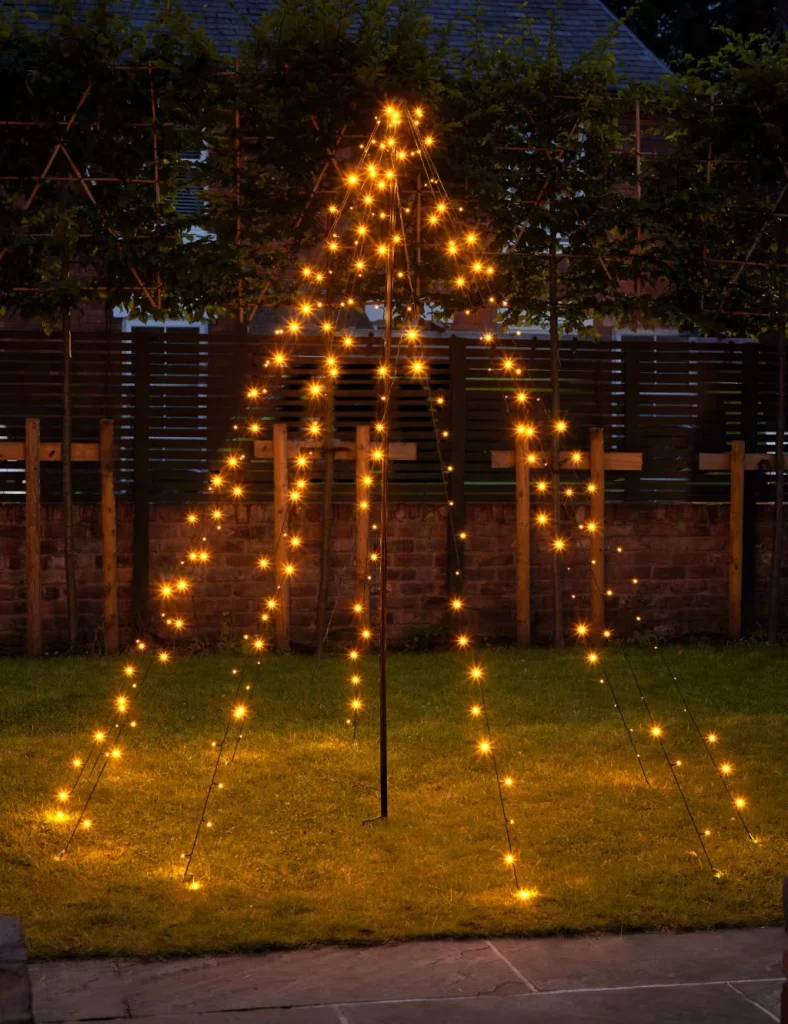
Credit: mkillumination.co.uk
Choosing The Right Lights
Choosing the right lights for your tree can make all the difference in creating a magical atmosphere. The variety of options available might feel overwhelming, but focusing on the type, length, brightness, and energy use can help you make the best choice. Think about the mood you want to set and how much effort you want to spend on installation and maintenance.
Types Of String Lights
String lights come in different styles, each offering a unique look. Classic incandescent bulbs give a warm glow but use more energy. LED lights are brighter, cooler to the touch, and last longer, making them a popular choice.
Other options include fairy lights, which are tiny and delicate, perfect for a subtle sparkle, and globe lights that add a bold, modern touch. If you want something different, consider color-changing lights or those with special effects like twinkling.
Considering Light Length And Brightness
Measure your tree before picking the string length. Too short, and you’ll struggle to cover it; too long, and you’ll have excess that’s hard to hide. A good rule is to have about 100 lights per vertical foot of tree for a full look.
Brightness matters too—think about where your tree will be placed. If it’s in a dim room, brighter lights might be better. For outdoor trees, brighter and weather-resistant lights ensure visibility and durability.
Energy Efficiency Options
Energy-efficient lights save money and reduce hassle. LED lights consume up to 80% less energy than traditional bulbs and last much longer. They also stay cool, which lowers the risk of fire.
Consider solar-powered string lights if your tree is outside and near sunlight. This option cuts down on electricity use entirely. Smart lights that you can control with an app help you schedule when lights turn on and off, maximizing efficiency without sacrificing convenience.
Preparing Your Tree
Preparing your tree is the first step to creating a beautiful light display. Proper preparation helps lights look even and last longer. It also makes the decorating process easier and safer. Follow these simple steps to get your tree ready for stringing lights.
Selecting The Tree Location
Choose a spot with a power outlet nearby. Make sure the area is dry and free of strong wind. Place the tree where it can be seen and enjoyed. Avoid spots near heat sources or where pets can reach the lights.
Trimming And Cleaning The Tree
Remove dead or damaged branches first. This helps lights fit better and look neat. Clean the tree by wiping dust or dirt from branches. Dust can reduce the light shine and cause bulbs to burn out.
Gathering Necessary Tools
Prepare all tools before starting to save time. You will need:
- String lights with enough length
- Extension cords if needed
- A ladder or step stool for tall trees
- Light clips or hooks to secure wires
- Gloves to protect your hands
- A timer to control light hours
Basic Stringing Techniques
Stringing lights on a tree can transform a space into a magical scene. Mastering basic techniques ensures your tree glows beautifully. Here are essential methods to help you string lights effectively.
Wrapping Branches Safely
First, check the lights for any damage. Broken bulbs can be unsafe. Begin at the base of the tree. Wrap lights around each branch gently. Avoid pulling too tight. This can damage both the lights and the tree. Use a ladder for tall trees. Safety first.
Spacing Lights Evenly
Even spacing creates a uniform glow. Start by dividing the tree into sections. Work on one section at a time. Use a consistent distance between loops. This keeps the lights evenly spaced. Step back often. Check your progress from a distance.
Securing Lights Without Damage
Use clips or twist ties to secure lights. Avoid using nails or staples. These can harm the tree and lights. Clips are reusable and tree-friendly. Ensure the clips hold the lights firmly. This prevents slipping and maintains the design.
Credit: www.hgtv.com
Creative Lighting Patterns
Creative lighting patterns bring life and charm to your tree. They turn ordinary lights into a stunning display. Different patterns create unique effects. You can highlight the tree’s shape and add depth. Let’s explore some popular ways to string lights creatively.
Spiral Wrapping Method
Start at the tree’s top and wrap the lights downward in a spiral. Keep the spacing even for a neat look. This method highlights the tree’s natural shape. The spiral pattern creates a flowing, elegant effect. It works well with both small and large trees.
Zigzag And Vertical Lines
For a bold look, try zigzag or vertical lines. Zigzag the lights horizontally around the tree. This creates dynamic movement and visual interest. Vertical lines run lights straight from top to bottom. They emphasize height and give a modern feel. Combine both for a mixed pattern.
Layering Lights For Depth
Layering adds depth and dimension to your tree lights. Start by wrapping lights close to the trunk. Then add more lights on outer branches. Use different light sizes or colors in layers. This technique makes the tree look fuller and richer. Layering works well with any pattern you choose.
Safety Tips For Outdoor Lighting
Outdoor lighting adds magic to any tree, but safety must come first. Poorly installed lights can cause shocks, fires, or damage. Follow these safety tips to enjoy your lights without risk. Simple checks and the right tools keep your display safe and bright.
Using Weatherproof Lights
Choose lights made for outdoor use. Weatherproof lights resist rain, snow, and wind. Their insulation stops water from reaching wires. Look for labels that say “outdoor” or “weather-resistant.” Regular indoor lights can short-circuit outside. Using proper lights lowers the risk of fire and electrical problems.
Checking Electrical Connections
Inspect all plugs and cords before use. Look for cracks, frays, or exposed wires. Replace any damaged parts immediately. Make sure plugs fit tightly into sockets. Loose connections can spark fires or cause outages. Keep connections off the ground to avoid water contact.
Avoiding Overloading Circuits
Do not plug too many lights into one outlet. Overloading causes overheating and power failures. Check the wattage limits on your extension cords and outlets. Use multiple outlets or a power strip with a circuit breaker. Spread out the load to keep circuits safe and stable.

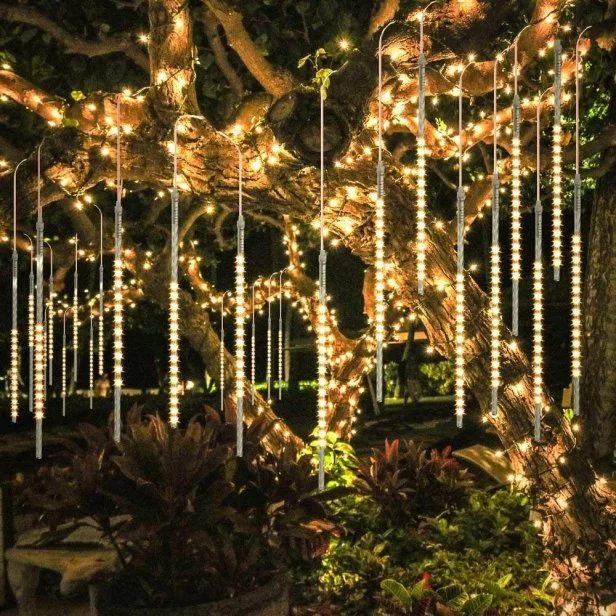
Credit: www.walmart.com
Maintenance And Storage
Taking care of your string lights after the holiday season is just as important as putting them up. Proper maintenance and storage extend the life of your lights and save you the hassle of untangling or replacing them next year. You want your lights to shine brightly without any issues, so giving them some attention now will pay off later.
Inspecting Lights Before Storage
Before packing your lights away, check each bulb and wire carefully. Look for broken bulbs, frayed wires, or any signs of wear that could cause problems later.
Testing your lights by plugging them in helps identify sections that don’t work. Catching these early lets you fix or replace parts before they get worse.
Properly Coiling And Storing Strings
Wrap your lights loosely around a spool or a piece of cardboard to avoid tangles and damage. Tight coils can stress the wires and cause breakage.
- Use twist ties or Velcro straps to keep coils secure.
- Store lights in a cool, dry place away from direct sunlight.
- Label storage containers clearly so you know which set is inside.
Have you noticed how much easier it is to decorate next season when your lights are neatly stored?
Replacing Damaged Bulbs
It’s tempting to ignore a few burnt-out bulbs, but replacing them keeps your entire string bright and safe. Many light sets include spare bulbs and a tool to make replacement simple.
Match the replacement bulb exactly to avoid electrical issues. If you don’t have spares, check with the manufacturer or local hardware stores.
Imagine the frustration of untangling lights only to find half don’t light up—replacing bulbs now prevents that headache.
Frequently Asked Questions
How Many Lights Do I Need For A Tree?
Use 100 lights for every 1-2 feet of tree height. Adjust based on your desired brightness. More lights create a fuller, festive look. Measure your tree before purchasing lights for the best fit.
Should I Use Led Or Incandescent Lights?
LED lights are energy-efficient, last longer, and stay cooler. Incandescent lights offer a traditional warm glow but consume more power. For safety and cost, LED lights are generally the better choice.
What Is The Best Way To Wrap Lights On A Tree?
Start at the tree base, wrapping lights evenly around branches. Move upward in a spiral motion for full coverage. Secure lights loosely to avoid damage and allow easy removal.
How To Test Lights Before Stringing Them?
Plug in your lights before decorating to check for burnt-out bulbs. Replace any faulty bulbs or strings. Testing saves time and prevents uneven lighting on your tree.
Conclusion
Stringing lights on a tree brings warmth and joy to any space. Start with a clear plan and use sturdy lights made for outdoor use. Wrap lights evenly to create a balanced look. Check each strand before hanging to avoid dark spots.
Take your time and enjoy the process. Bright lights make the tree stand out at night. Simple steps lead to a beautiful result. Your tree will shine brightly and welcome everyone warmly.


