
Are you ready to give your room a stylish upgrade with a pendant light? Hanging a pendant light with a cord might seem tricky, but it’s easier than you think.
With the right steps, you can transform your space quickly and safely. In this guide, you’ll learn exactly how to hang your pendant light so it looks perfect and works just right. Keep reading—you’re just moments away from lighting up your home like a pro!
Choose The Right Pendant Light
Choosing the right pendant light sets the foundation for a successful installation and a beautiful room upgrade. It’s not just about picking a pretty fixture; it’s about matching the light to your space, needs, and style. Taking time to select the ideal pendant light will save you hassle and enhance your room’s atmosphere.
Consider Room Size And Style
Your pendant light should complement the size of your room. Large rooms call for bigger or multiple pendants to balance the space, while small rooms work best with compact, subtle designs.
Think about your room’s style too. A sleek, modern pendant might look out of place in a rustic kitchen. Matching the light’s design with your décor creates harmony and highlights your personal taste.
Select Appropriate Cord Length
Measure the distance from your ceiling to where you want the light to hang. Too short, and the pendant will feel cramped; too long, and it might get in the way.
Adjustable cords offer flexibility if you’re unsure. Remember, the ideal height depends on the room’s purpose—over dining tables, lower is better; in hallways, a higher placement works well.
Check Weight And Installation Requirements
Not all ceilings can support heavy fixtures. Check the pendant light’s weight and make sure your ceiling can handle it safely.
Look at the installation instructions carefully. Some lights need special mounting brackets or electrical work. Knowing this upfront helps avoid surprises and ensures a smooth installation.

Credit: ledsone.co.uk
Gather Necessary Tools
Before you start hanging your pendant light with a cord, gathering all the necessary tools is essential. Having everything ready saves time and prevents frustrating interruptions. It also keeps you safe and ensures a smoother installation process.
List Of Essential Tools
Here’s what you will need to hang your pendant light correctly:
- Voltage Tester:To check if the power is off before you begin.
- Wire Strippers:For removing insulation from the wires safely and cleanly.
- Screwdriver Set:Both flathead and Phillips, to handle different screws.
- Drill:Useful if you need to make new holes for mounting.
- Measuring Tape:To measure the exact length for hanging your light at the perfect height.
- Wire Nuts/Connectors:For securing wire connections safely.
- Electrical Tape:To add an extra layer of security on wire joints.
- Ladder or Step Stool:To reach the ceiling comfortably and safely.
Having these tools ready means you’re prepared for every step, avoiding last-minute runs to the store.
Safety Equipment
Safety should never be an afterthought when working with electrical fixtures. Wearing safety gear protects you from accidental shocks and injuries.
- Insulated Gloves:They reduce the risk of electrical shock while handling wires.
- Safety Glasses:Protect your eyes from dust, debris, or accidental sparks.
- Non-slip Shoes:Provide stable footing, especially when standing on ladders or stools.
Think about the last time you worked without gloves or glasses—didn’t a small slip or spark feel unnerving? Taking these precautions ensures you stay safe throughout the process.
Prepare The Installation Area
Clear the area around the ceiling where the pendant light will hang. Turn off power at the breaker to keep the space safe during installation. Gather all tools and materials needed before starting.
Preparing the installation area is a crucial step in hanging a pendant light with a cord. A well-prepared area ensures safety and efficiency. Follow these steps to ready your space for a smooth installation process.Turn Off Power
First, ensure safety by switching off the power. Go to your main electrical panel. Find the circuit breaker for the room. Flip it to the off position. This prevents electric shocks during installation. Use a voltage tester to confirm the power is off. Double-checking is vital for safety.Clear The Workspace
A tidy workspace makes installation easier. Remove any furniture or items below the work area. This provides a clean space to move around. Lay down a drop cloth to catch debris. Gather all necessary tools and materials nearby. Having everything ready saves time and reduces stress.Locate Ceiling Joist Or Support
Finding a ceiling joist is essential for secure installation. Use a stud finder to detect joists in the ceiling. Mark the location with a pencil. This ensures the pendant light is anchored well. If a joist is not available, use a ceiling support bracket. This provides the needed stability for your light fixture.
Credit: www.amazon.com
Install The Mounting Bracket
Installing the mounting bracket is a crucial step when hanging a pendant light with a cord. This bracket holds the entire fixture securely in place, ensuring safety and stability. Taking your time here prevents future headaches like wobbling or falling lights.
Mark Drill Points
Start by holding the mounting bracket up to the ceiling where you want the pendant light to hang. Use a pencil to mark the screw holes clearly. Double-check the alignment so the light will hang straight and centered.
Imagine how awkward it would be if your beautiful pendant ended up crooked. Accurate markings save you from that frustration. Grab a level if you want to be extra precise—it’s a small step that pays off big.
Drill Holes And Insert Anchors
Use a drill bit suitable for your ceiling material to make holes where you marked. If you’re drilling into drywall or plaster, don’t skip the anchors—they provide extra grip for the screws. Push the anchors into the holes until they sit flush with the surface.
Without anchors, screws can loosen over time, causing your pendant to sag or even fall. Think about the weight your light fixture carries and choose heavy-duty anchors if needed. Safety isn’t optional here.
Attach The Bracket Securely
Now, align the mounting bracket with the drilled holes and screw it in tightly. Use a screwdriver or drill to ensure screws go in straight and firm. Wiggle the bracket gently after installation to make sure it won’t shift.
Once the bracket is solid, you’re ready for the next steps in hanging your pendant light. A secure bracket is your foundation for a professional-looking and safe installation. Have you ever ignored this step and regretted it later?
Connect The Electrical Wires
Connecting the electrical wires is a crucial part of hanging your pendant light with a cord. This step ensures your light functions safely and efficiently. Understanding how to correctly join the wires can save you time and prevent electrical hazards.
Identify Wire Types
Start by examining the wires from your pendant light and the ceiling. Typically, you will find three types: the live (hot) wire, the neutral wire, and the ground wire.
The live wire is usually black or red, carrying electricity to the light. The neutral wire, often white, completes the electrical circuit. The ground wire is either green or bare copper, providing safety by preventing electrical shocks.
Can you spot these wires in your setup? Knowing their colors and roles is essential before you connect anything.
Match And Secure Wires
Once you identify the wires, align each pendant wire with the corresponding ceiling wire. Black (live) to black, white (neutral) to white, and green or bare copper (ground) to ground.
Never mix these wires; improper connections can cause short circuits or electrical fires. Hold the wires together firmly to prepare for securing them.
Think about how steady your grip is—loose connections can lead to flickering lights or worse.
Use Wire Nuts And Tape
Twist the matched wires together tightly, then screw on a wire nut to secure the connection. Wire nuts come in different sizes, so pick one that fits snugly over the wires.
After securing with wire nuts, wrap the connections with electrical tape. This adds an extra layer of safety by preventing the nuts from loosening over time.
Have you checked that the wires don’t slip out when you tug gently? A solid connection is key to lasting performance.
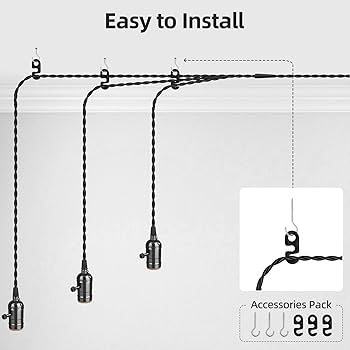
Hang The Pendant Light
Hanging a pendant light with a cord might seem tricky, but it’s quite manageable once you know the key steps. The process involves adjusting the cord length, securing it properly, and attaching the fixture so it sits perfectly. Each of these steps ensures your light not only looks great but is safe and functional.
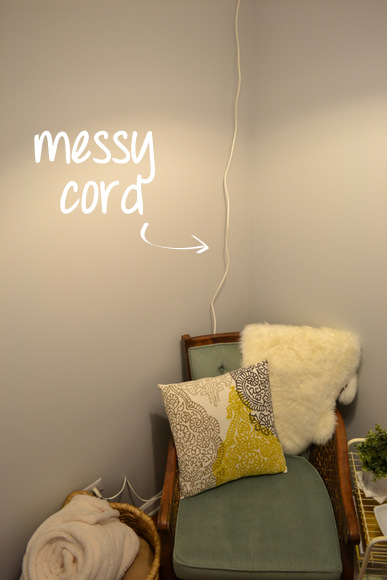
Adjust Cord Length
Start by deciding how low you want your pendant light to hang. Measure the distance from the ceiling to where you want the light to sit, keeping in mind the room’s purpose. For example, over a dining table, the bottom of the light should be about 30 to 36 inches above the surface.
Once you have the length, adjust the cord accordingly. Many cords come with an adjustable feature or a way to trim excess wire. Make sure to leave a little extra length inside the ceiling box for wiring connections.
Secure The Cord To The Bracket
Next, attach the cord to the mounting bracket to prevent it from slipping. Most brackets have a built-in clamp or a cord grip designed for this purpose. Tighten it firmly but avoid over-tightening, which could damage the cord.
If your bracket doesn’t have a cord grip, use a cable tie or cord clamp to keep the wire stable. This step is crucial for safety and ensures the pendant light stays at the right height without sagging.
Attach The Light Fixture
Finally, connect the light fixture to the bracket. First, connect the wiring inside the ceiling box—usually matching colors (black to black, white to white, and green or bare copper for ground). Use wire nuts to secure the connections.
Once wired, carefully tuck the wires into the ceiling box and attach the fixture base to the bracket with screws. Test the light switch before fully tightening everything to ensure proper connection. This approach saves you from repeating the process if something isn’t right.
Test The Light Fixture
Testing your pendant light fixture after installation is crucial. It ensures everything is connected correctly and working safely. Skipping this step can leave you with a non-functional light or, worse, a potential hazard.
Restore Power
Before you test the light, turn the power back on at your circuit breaker or fuse box. Double-check that the switch controlling the pendant light is also in the “on” position. If you’re unsure which breaker controls the light, flip them one by one and observe any changes.
Have you ever flipped the wrong breaker and left the whole house dark? Restoring power carefully helps you avoid that awkward moment and keeps things safe.
Check For Proper Function
Once the power is back, turn on the pendant light switch. Watch closely to see if the bulb lights up immediately and stays steady. If the light flickers, dims, or doesn’t turn on at all, there could be an issue with wiring or the bulb itself.
Try swapping the bulb with a known working one first. Sometimes, the simplest fix is the right one.
Troubleshoot Common Issues
If your pendant light doesn’t work, start troubleshooting step by step. Check these common problems:
- Loose wire connections inside the fixture or junction box
- Faulty bulb or incorrect wattage bulb
- Tripped circuit breaker or blown fuse
- Faulty wall switch
Use a voltage tester to confirm power is reaching the fixture. If you find loose wires, make sure to turn off the power before tightening them. Sometimes, the smallest loose wire can stop the entire fixture from working.
Have you faced a stubborn light fixture that just refused to turn on? Often, patience and careful checking reveal the problem faster than you expect.
Tips For Maintenance And Safety
Keeping your pendant light in top shape is key to both its look and your safety. Regular attention helps prevent issues before they start and keeps your space bright and inviting. Let’s look at some simple maintenance and safety tips you can easily follow.
Regular Cleaning
Dust and dirt can dull the shine of your pendant light and even affect its performance. Use a soft, dry cloth to wipe the cord and the shade every couple of weeks. For stubborn spots, slightly dampen the cloth but avoid getting water near the electrical parts.
Cleaning also helps you spot any wear or damage early. Have you noticed how a quick wipe can make your whole room feel fresher? That’s the power of a clean light fixture.
Inspect Wiring Periodically
Safety starts with checking your pendant light’s wiring. Every few months, look closely at the cord for any cracks, fraying, or exposed wires. If you see anything unusual, stop using the light and consult an electrician right away.
Even if the cord looks fine, gently tug it to make sure connections are secure. Loose wiring can cause flickering or worse, electrical hazards. Would you want to risk a fire over a quick inspection?
Replace Bulbs Safely
Changing a bulb seems simple, but doing it safely matters. Always turn off the power before swapping bulbs to avoid shocks. Use a sturdy step stool if your pendant light is high up, and handle bulbs with a cloth or gloves to protect your skin and keep oils off the glass.
Choosing the right bulb wattage is important too—check your fixture’s limits to prevent overheating. Have you ever had a bulb burn out too fast? It might be a sign you need a better fit for your light.
Credit: thediyplaybook.com
Frequently Asked Questions
How Do I Safely Hang A Pendant Light With A Cord?
Turn off power before installation. Use a sturdy ceiling hook or bracket. Securely fasten the cord and adjust length. Always follow manufacturer instructions and local electrical codes for safety.
What Tools Are Needed To Hang A Pendant Light Cord?
You will need a drill, screwdriver, measuring tape, wire strippers, ceiling hook or bracket, and a voltage tester. Having these tools ensures a smooth and safe installation process.
Can I Adjust The Length Of A Pendant Light Cord?
Yes, most pendant lights allow cord length adjustment. Simply loosen the canopy, pull the cord to desired length, and tighten again. This helps customize light height to your space.
How Do I Connect The Pendant Light Wires Correctly?
Match the black (live), white (neutral), and green or bare (ground) wires. Use wire nuts to secure connections. Double-check connections before restoring power to avoid hazards.
Conclusion
Hanging a pendant light with a cord is simple and rewarding. Take your time and follow the steps carefully. Safety matters—always turn off power first. Adjust the cord length to fit your space perfectly. A well-hung light adds style and warmth to any room.
Enjoy the new look and brightness it brings. With practice, this task feels easier every time. Ready to brighten your home?


