
Are you ready to transform your space by swapping out those plain recessed lights for stylish pendant fixtures? Changing your lighting can completely update the look and feel of any room, but you might be wondering where to start or if it’s too complicated.
Don’t worry—this guide will walk you through each step, making the process simple and doable. By the end, you’ll know exactly how to replace your recessed lights with beautiful pendant lights that add personality and charm to your home. Keep reading to discover how easy it can be to brighten up your space with the perfect lighting upgrade.
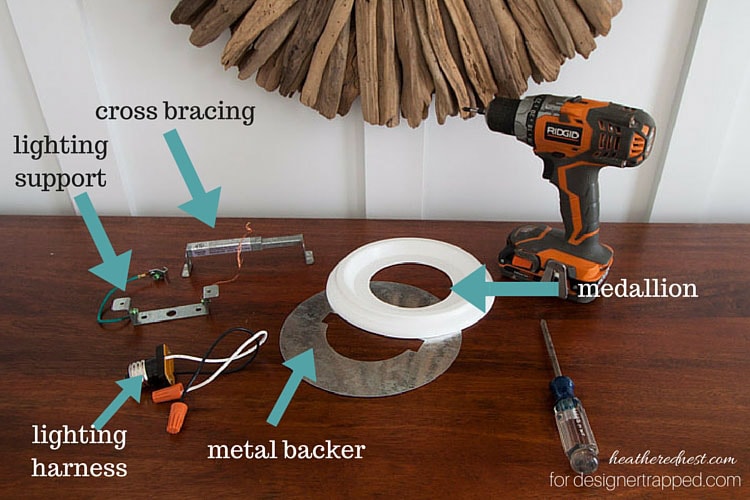
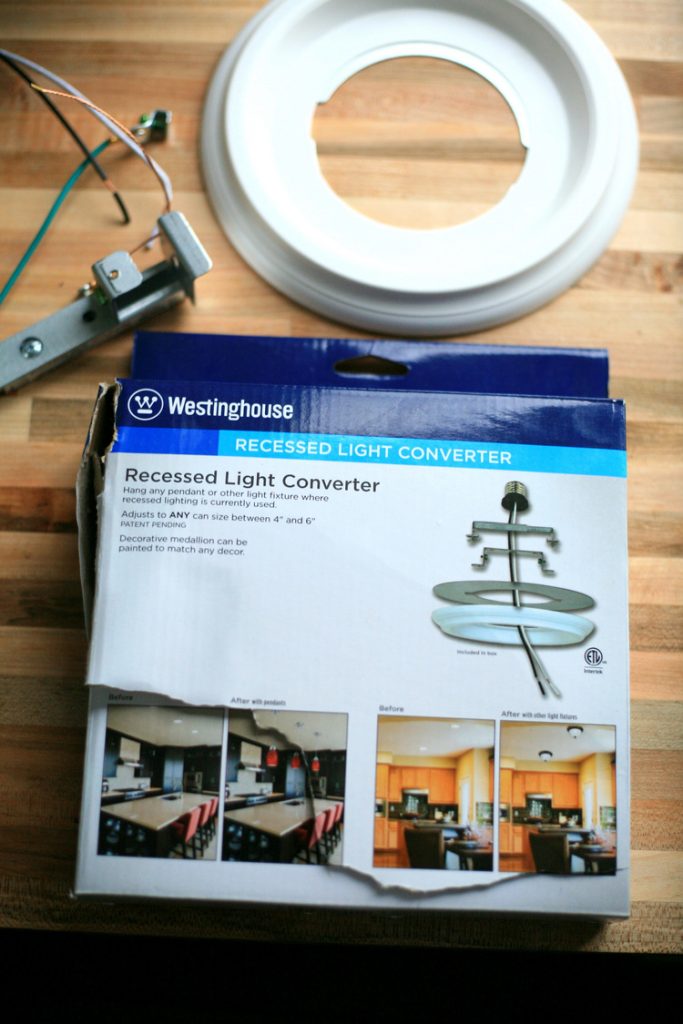
Credit: designertrapped.com
Tools And Materials Needed
Replacing a recessed light with a pendant light requires specific tools and materials. Having the right items ready makes the process smoother and safer. This section covers everything needed to complete the task effectively.
Essential Tools
- Screwdriver set (flathead and Phillips)
- Wire strippers
- Voltage tester
- Drill with bits
- Measuring tape
- Wire nuts
- Electrical tape
- Wire cutters
- Ladder or step stool
Selecting The Right Pendant Light
- Choose a pendant that fits the room size
- Check the weight to ensure ceiling support
- Match the style with your decor
- Verify the light’s voltage and wattage
- Consider adjustable height options
Safety Gear
- Insulated gloves for electrical work
- Safety glasses to protect eyes
- Dust mask to avoid inhaling debris
- Non-slip shoes for stable footing
Preparing The Workspace
Preparing the workspace is a crucial part of replacing recessed lights with pendants. A clean, safe, and organized area helps the job go smoothly. It also reduces risks and saves time. Follow these steps to get your space ready before starting the installation.
Turning Off Power
Safety comes first. Switch off the power to the light fixture at the circuit breaker. Double-check by flipping the light switch to confirm the power is off. Use a voltage tester on the wires to be sure no electricity flows. This step prevents shocks and injuries during work.
Clearing The Area
Remove furniture and other objects from under the light fixture. Clear the floor to create space for tools and parts. Cover the floor with a drop cloth to catch debris. This keeps your workspace tidy and protects your belongings from dust and damage.
Gathering Supplies
Collect all the materials needed for the replacement. Common supplies include:
- Pendant light fixture
- Screwdrivers
- Wire strippers
- Voltage tester
- Wire nuts
- Electrical tape
- Wire connectors
- Step ladder
Having everything ready avoids interruptions and makes the process faster.
Removing The Recessed Light
Begin by turning off the power to the recessed light at the breaker. Carefully remove the trim and bulb, then disconnect the wiring before taking out the housing.
Removing recessed lighting can feel daunting. Yet, it’s simpler than imagined. Switching to pendant lights changes your room’s look. Start by ensuring safety. Turn off the power at the breaker box. Now, you’re ready to remove the recessed light.Detaching Trim And Bulb
First, detach the trim from the ceiling. Most trims are held by springs or clips. Gently pull down to release. Next, remove the bulb. Twist it counterclockwise. Place it somewhere safe for later use.Disconnecting Wiring
With the trim and bulb removed, access the wiring. Unscrew the screws holding the fixture. Carefully pull the light down. You’ll see wires connected with wire nuts. Remove the nuts and disconnect the wires.Removing Housing
Finally, remove the housing of the recessed light. Some housings have clips inside the ceiling. Others are attached with screws. Use a screwdriver to remove them. Gently pull the housing down. Ensure no wires are left connected. Now, the space is ready for a new pendant light.Modifying The Ceiling Opening
Modifying the ceiling opening is a crucial part of replacing recessed lighting with a pendant fixture. The existing hole often won’t fit the new pendant’s mounting bracket or canopy, so adjustments are necessary. Taking your time with this step ensures a secure fit and a polished final look.
Measuring And Marking
Start by measuring the diameter of your pendant’s mounting plate. Use a tape measure or ruler to get precise dimensions. Mark the center of the existing recessed light hole, then outline the new opening size on the ceiling with a pencil.
Double-check your measurements before cutting. Remember, it’s easier to enlarge a hole than to fix one that’s too big. Think about how the pendant will hang and whether the new opening aligns with your desired placement.
Cutting For Pendant Mount
Use a drywall saw or a keyhole saw to carefully cut along your marked lines. Cut slowly to avoid damaging surrounding drywall or ceiling texture. If you’re nervous, practice on a scrap piece of drywall first to get a feel for the tool.
Wear safety goggles and a dust mask to protect yourself from debris. After cutting, smooth the edges with sandpaper or a rasp. This helps the pendant mount sit flush and prevents rough edges from causing damage later.
Fixing Structural Issues
Sometimes, the existing ceiling joists or framing interfere with your new opening. If you find nails, screws, or wood blocking the cutout, you’ll need to make adjustments.
Adding a mounting bracket or a wood block between joists can provide extra support for the heavier pendant. Secure these firmly with screws to prevent any wobble. Have you considered how the weight of your new fixture might affect the ceiling structure?
Don’t hesitate to consult a professional if you encounter complex framing issues. A solid base is key to keeping your pendant safely in place and looking great.
Installing The Pendant Fixture
Installing the pendant fixture is a key step in replacing recessed lights. This process ensures the new light hangs securely and functions properly. Proper installation creates a stylish and safe lighting option. Follow these detailed instructions for a smooth setup.
Mounting Bracket Setup
Start by attaching the mounting bracket to the electrical box. Align the bracket holes with the box screws. Tighten the screws firmly but avoid over-tightening. The bracket must be stable to hold the pendant weight. Check that the bracket sits flat against the ceiling.
Wiring The Pendant
Turn off the power at the circuit breaker before handling wires. Match the pendant wires with the ceiling wires by color: black to black, white to white, and green or copper to ground. Use wire connectors to secure each connection. Wrap the connectors with electrical tape for extra safety. Carefully tuck the wires into the electrical box.
Securing The Fixture
Lift the pendant fixture close to the ceiling. Attach it to the mounting bracket using the screws provided. Ensure the fixture is level and tightened securely. Adjust the pendant length if needed before final tightening. Double-check the stability to prevent wobbling or falling.
Testing And Finishing Touches
After installing your new pendant light, testing and finishing touches ensure everything works perfectly. This stage confirms safety and functionality before you enjoy the new lighting. Small adjustments here make a big difference in appearance and performance.
Restoring Power
Turn the circuit breaker back on carefully. Watch for any sparks or unusual smells. Use a voltage tester to check that power flows to the light fixture. Safety first—never touch wires without power.
Checking Light Function
Switch on the pendant light. Confirm the bulb lights up without flickering. Test the dimmer switch if installed. Check for any buzzing sounds or flickers, which may indicate wiring issues. Make sure the light covers are secure and clean.
Adjusting Height And Position
Set the pendant height to match your room’s style. Use a ladder or step stool for better reach. Adjust the fixture so it hangs evenly and straight. Avoid placing it too low or too high. Aim for balance between aesthetics and functionality.
Tips For A Professional Look
Achieving a professional look when replacing recessed lights with pendant fixtures requires more than just swapping bulbs. Paying attention to details like cable management, fixture choice, and preserving your ceiling’s condition can make a big difference. These tips will help your new lighting setup look polished and intentional, not like a quick DIY fix.
Cable Management
Loose or visible cables can ruin the sleek look you want from pendant lighting. Make sure to secure cables neatly using cable clips or conduits that match your ceiling color. Running cables through the ceiling void or inside decorative covers keeps everything tidy.
Have you noticed how a single dangling wire can distract from a beautiful light fixture? Keeping cables organized not only looks better but also reduces safety risks. If you’re unsure about hiding cables, consider consulting an electrician to avoid damage and ensure code compliance.
Choosing Complementary Fixtures
Choosing a pendant light that matches your room’s style is key for cohesion. Think about the size, shape, and material of the fixture in relation to your existing decor. For example, a modern glass pendant pairs well with minimalist interiors, while a rustic metal fixture suits farmhouse styles.
Don’t forget to consider the scale of the pendant compared to the space. A large pendant in a small room can overwhelm, while a tiny pendant in a spacious area may look lost. Ask yourself: does this fixture enhance the room or compete with other elements?
Maintaining Ceiling Integrity
Replacing recessed lights means cutting into your ceiling, so protecting its integrity is crucial. Use proper tools to avoid damaging drywall or plaster and patch any gaps carefully with matching materials. A clean, smooth finish around the new fixture prevents future cracks and peeling paint.
Have you ever seen a ceiling with uneven or cracked patches around lights? It instantly signals a rushed job. Taking the time to repair and paint the area will make your pendant installation look seamless and professional.

Credit: hellofromliz.com
Common Mistakes To Avoid
Replacing recessed lights with pendant fixtures can refresh any room’s look. The process seems simple but often trips up many DIYers. Avoiding common mistakes ensures a smooth and safe installation. Below are key errors to watch for during your project.
Ignoring Electrical Codes
Electrical codes exist to keep homes safe. Skipping these rules can cause hazards or fail inspections. Always check local codes before starting. Use fixtures and wiring that meet code requirements. This step protects your home and family.
Using Incorrect Tools
Using the wrong tools slows down work and risks damage. For wiring, use insulated pliers and wire strippers. A voltage tester helps confirm power is off. A proper screwdriver fits screws well to avoid stripping. Having the right tools makes the job easier and safer.
Overlooking Safety Precautions
Safety is crucial when working with electricity. Turn off power at the breaker before touching wires. Wear gloves to protect hands. Use a sturdy ladder for reaching ceiling fixtures. Never rush; careful steps prevent accidents and injuries.

Credit: hellofromliz.com
Frequently Asked Questions
How Do I Remove Recessed Lighting Safely?
Turn off power at the circuit breaker first. Remove the trim and bulb. Unscrew the housing from the ceiling. Carefully disconnect the wiring using wire nuts. Always use a voltage tester to ensure no electricity flows before handling wires.
Can I Use Existing Wiring For Pendant Lights?
Yes, you can use existing wiring if it’s in good condition. Ensure the wiring matches the pendant light’s voltage and amperage requirements. If unsure, consult a licensed electrician to verify safety and compatibility with your new fixture.
What Tools Are Needed To Replace Recessed Light With Pendant?
You’ll need a voltage tester, screwdriver, wire strippers, wire nuts, and possibly a drywall saw. A ladder and electrical tape are also handy. These tools help you safely remove the old fixture and install the pendant light securely.
How Do I Choose The Right Pendant Light Size?
Consider ceiling height and room size. For standard 8-foot ceilings, pendant lights should hang 28-34 inches above surfaces. Choose fixtures proportional to the room dimensions for balanced lighting and aesthetic appeal. Measure carefully before purchasing.
Conclusion
Replacing recessed lights with pendants can change a room’s look. It brings style and better light focus. The process is simple if you follow the steps carefully. Always turn off power before starting any work. Choose a pendant that fits your space and taste.
Take your time and enjoy the new lighting effect. This small change can make a big difference in your home. Feel proud of your DIY project. Bright rooms feel welcoming and cozy. Give your space a fresh, modern touch today.


