
Are you ready to add a stylish touch to your space without complicated wiring? Hanging a plug-in pendant light is easier than you think.
With just a few simple steps, you can transform your room’s look and create the perfect ambiance. In this guide, you’ll discover exactly how to hang a plug-in pendant light safely and quickly—even if you’re not a DIY expert. Keep reading, and you’ll be enjoying your new lighting in no time.
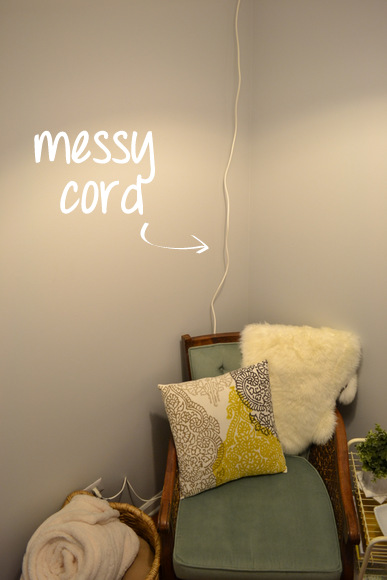
Credit: docos.us
Choosing The Right Pendant Light
Choosing the right pendant light is key to enhancing your room’s look. The perfect pendant adds style and the right brightness. Consider the type, size, and the room’s use. These factors help you pick a light that fits well and feels right.
Types Of Plug-in Pendant Lights
Plug-in pendant lights come in many shapes and styles. Some have a simple bulb with a cord. Others feature glass or metal shades. There are single pendants and multi-light fixtures. Choose one that matches your decor and lighting needs.
Selecting The Ideal Size And Style
The size of your pendant light affects the room’s balance. Small lights work well over tables or in corners. Large pendants suit open spaces or high ceilings. Style matters too—modern, vintage, or rustic all create different moods. Pick a style that blends with your room’s theme.
Considering The Room’s Purpose And Layout
Think about what the room is used for. Bright lights work well in kitchens and work areas. Softer lights fit living rooms and bedrooms. The layout matters too. Make sure the pendant hangs where it won’t block views or movement. Aim for a light that supports the room’s function and feel.
Gathering Necessary Tools And Materials
Before you start hanging your plug-in pendant light, gathering the right tools and materials is crucial. Having everything ready not only speeds up the process but also prevents frustration mid-installation. Think about the last time you had to pause a project because you were missing a simple tool—frustrating, right?
Essential Tools For Installation
Make sure you have these tools on hand before you begin:
- Screwdriver set– both flathead and Phillips for various screws
- Drill with appropriate bits– to create holes for mounting brackets
- Wire strippers– to prepare electrical wires safely
- Measuring tape– to position the light precisely
- Level– to ensure your pendant hangs straight and looks professional
- Stud finder– to locate ceiling joists for secure mounting
Having these tools ready will make your installation smooth and efficient.
Safety Equipment To Use
Working with electrical fixtures means safety should be your top priority. Always use insulated gloves to protect against accidental shocks. Don’t forget safety goggles to shield your eyes from dust or debris, especially when drilling.
Turn off power at the circuit breaker before touching any wires. Would you rather take a shortcut or avoid a dangerous accident? The answer is clear.
Checking The Electrical Components
Before hanging the pendant, inspect the plug, cord, and socket carefully. Look for any visible damage like frayed wires or cracks. A faulty cord could cause shorts or fire hazards, so don’t ignore any issues.
Test the plug in a working outlet to confirm it supplies power correctly. If the pendant light has a dimmer or switch, check those as well. Ensuring these components are in good condition saves you from surprises once the light is installed.
Preparing The Installation Area
Preparing the installation area is a key step before hanging your plug in pendant light. This stage sets the foundation for a smooth and safe installation. Taking time here helps you avoid common mistakes and ensures your new light fixture looks and works perfectly.
Measuring And Marking The Spot
Start by deciding exactly where you want your pendant light to hang. Use a tape measure to find the right height and position, considering both aesthetics and functionality. Mark the spot clearly with a pencil to guide your installation.
Think about how the light will interact with your space. Will it hang too low over a dining table or block a window? Small adjustments now save you from awkward fixes later.
Checking For Power Sources
Identify the nearest power outlet to plug in your pendant light. If you can’t find a suitable outlet, you may need an extension cord or professional help to install one. Always turn off power at the breaker before working near electrical sources to avoid accidents.
Ask yourself: Is the power source easily accessible for the plug? If not, consider relocating the fixture or using a longer cord to keep things safe and tidy.
Clearing The Workspace
Clear the area where you’ll be working to avoid any accidents or damage. Remove furniture, rugs, or decorations that might get in your way. A clean workspace helps you focus and makes the installation process quicker and less stressful.
Have you ever started a project only to be slowed down by clutter? Clearing your space first can make a big difference in how smoothly things go.
Step-by-step Hanging Process
Begin by choosing the right spot and turning off the power. Attach the mounting bracket securely, then connect the wires carefully. Finally, hang the pendant light, adjust the height, and test the connection.
Installing a plug-in pendant light can bring a unique charm to any room, offering both style and functionality. The process may seem daunting at first, but breaking it down into manageable steps can make it not only achievable but also enjoyable. Let’s dive into the step-by-step hanging process, ensuring your new light fixture is perfectly placed and securely installed.Mounting The Hook Or Bracket
Begin by selecting a suitable spot on the ceiling where you want your pendant light to hang. The location should be close to a power outlet for easy access to plug in the cord. Use a pencil to mark the spot and ensure it’s directly above where you want the light to hang. Drill a hole for the hook or bracket that will support the weight of the pendant light. Securely fasten the hook or bracket, ensuring it can hold the fixture safely.Connecting The Plug-in Cord
Once the hook or bracket is in place, it’s time to connect the plug-in cord. Unwind the cord fully to avoid tangling and ensure it reaches the power outlet comfortably. Thread the cord through the hook or bracket, allowing it to dangle freely. Plug the cord into the nearest outlet and ensure it’s not stretched or strained.Securing The Pendant Light
With the cord connected, the next step is to attach the pendant light to the hook or bracket. This usually involves hanging the fixture from the hook, ensuring it sits securely and evenly. Make sure the pendant light is stable and does not sway excessively. Check that all connections are tight and the fixture is well-balanced.Adjusting Height And Position
Now that the pendant light is secured, you can adjust its height and position. Consider the room’s layout and how the light will be used. Adjust the length of the cord to set the perfect height, whether it’s for task lighting or ambiance. Fine-tune the position by gently swinging the light to your desired angle, ensuring it complements the room’s aesthetics. Does the new position illuminate your space effectively? Take a moment to admire your work and the transformation it brings to your room. By following these steps, hanging a plug-in pendant light becomes a simple and rewarding task.Safety Tips And Best Practices
Hanging a plug-in pendant light not only adds style to your space but also requires careful attention to safety. Ignoring basic precautions can lead to electrical hazards or unstable fixtures. Keeping these safety tips and best practices in mind will ensure your light looks great and works safely for years.
Avoiding Electrical Hazards
Before you start, always turn off the power at the circuit breaker to prevent shocks. Use a voltage tester to double-check the wires you plan to connect. Never assume a wire is safe just because the switch is off.
Choose a pendant light with proper insulation and UL certification to reduce fire risks. Avoid overloading the outlet by checking the light’s wattage against your outlet’s capacity. Do you know how much load your circuit can handle?
Ensuring Stable Installation
Secure the mounting bracket firmly into a ceiling joist or use appropriate anchors if you can’t find one. A loose fixture can swing or fall, causing damage or injury.
Make sure the pendant light’s weight is supported by the bracket and not just the cord. Test the stability by gently tugging the fixture after installation. If it moves, reinforce the support.
Regular Maintenance Checks
Schedule quick inspections every few months to ensure all parts remain tight and the cord is intact. Look for frayed wires or discoloration around the plug or socket.
Replace bulbs with the recommended wattage and type to avoid overheating. Have you noticed any flickering or unusual smells? These signs should prompt immediate attention.

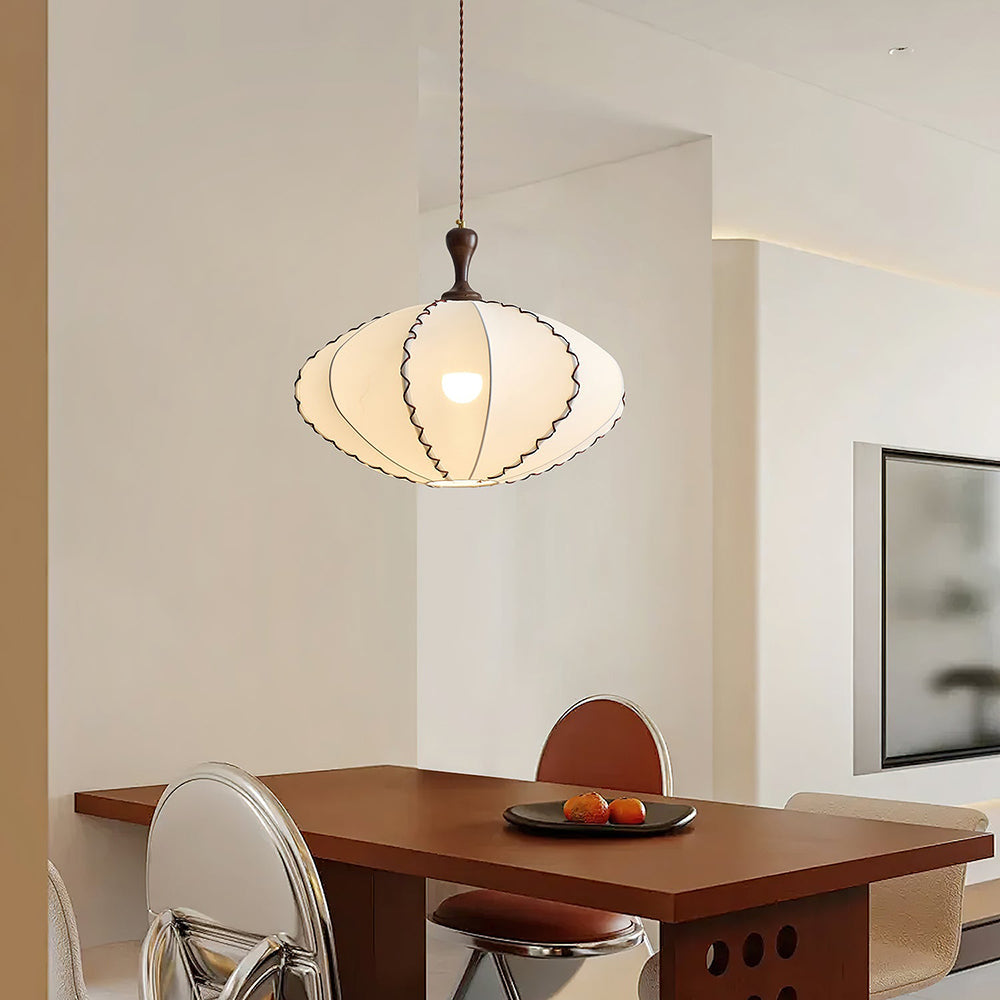
Credit: www.nospacelikehome.uk
Troubleshooting Common Issues
Hanging a plug in pendant light can brighten up any room, but sometimes issues pop up that can be frustrating. Troubleshooting these common problems quickly saves you time and keeps your light shining perfectly. Let’s look at simple fixes you can try yourself before calling in an expert.
Fixing Flickering Lights
Flickering lights often signal a loose bulb or a faulty connection. First, make sure the bulb is screwed in tightly but not too tight to avoid damage. If the flicker continues, check if the bulb is compatible with your fixture’s voltage.
Sometimes the problem is the plug or socket itself. Try unplugging and re-plugging the pendant light to ensure a secure fit. If flickering persists, test the pendant light on a different outlet to rule out electrical issues in the wall socket.
Dealing With Loose Connections
Loose connections can cause intermittent lighting or no light at all. Carefully inspect the plug and wiring for any visible signs of looseness or wear. You might feel a slight wiggle or see exposed wires, which is a red flag.
Turn off the power before tightening any screws or connectors inside the plug or fixture. If you’re not comfortable handling wiring, it’s safer to contact a professional. Remember, a solid connection is key to both safety and proper function.
Replacing Bulbs Safely
Replacing bulbs in a pendant light can be tricky if you don’t take the right precautions. Always unplug the light before removing the old bulb to avoid electric shock. Use a cloth or gloves to handle the bulb if it’s hot or fragile.
Choose the correct bulb type and wattage recommended for your pendant light. Using a bulb that’s too powerful can cause overheating or damage. Have a stable ladder or step stool ready if your pendant hangs high, and never rush the process.
Enhancing Your Lighting Setup
Enhancing your lighting setup goes beyond just hanging a plug in pendant light. It’s about creating the right mood and functionality in your space. Small adjustments can make a big difference in how your room feels and works.
Adding Dimmers And Switches
Adding dimmers gives you control over the brightness. You can easily adjust the light to fit different times of day or activities. Installing a dimmer switch is usually straightforward and can transform your pendant light into a versatile feature.
Think about how often you need softer light for relaxing versus bright light for tasks. A dimmer lets you customize your lighting without changing bulbs. This flexibility improves comfort and energy efficiency.
Using Multiple Pendants For Effect
Hanging multiple pendant lights creates a striking visual impact. Grouping pendants at different heights or in a row can add depth and style to your room. This setup works well over kitchen islands, dining tables, or entryways.
Try using pendants with different shapes or colors to add personality. Multiple lights also spread illumination evenly, reducing shadows. Have you considered how layering lights changes the atmosphere?
Pairing With Other Lighting Sources
Combining pendant lights with other light sources balances your room’s lighting. Use floor lamps, wall sconces, or recessed lighting to complement your pendants. This mix helps prevent harsh contrasts and creates a welcoming environment.
Each type of light serves a purpose: pendants for focus, sconces for ambient glow, and lamps for reading. This layered approach keeps your space functional and cozy. What other lighting options do you have that could work well together?

Credit: www.amazon.com
Frequently Asked Questions
How Do I Install A Plug In Pendant Light Safely?
Turn off the power before installation. Use a voltage tester to confirm no electricity flows. Follow the manufacturer’s instructions carefully. Securely mount the pendant light and plug it into a grounded outlet. Avoid overloading the circuit for safety.
What Tools Do I Need To Hang A Pendant Light?
You need a drill, screwdriver, wire stripper, voltage tester, and mounting hardware. Also, have a ladder and electrical tape ready. These tools help ensure a secure and safe installation process.
Can I Hang A Pendant Light Without Professional Help?
Yes, if you follow safety guidelines and the instructions carefully. Turn off power and use proper tools. However, consult an electrician if unsure about wiring or mounting for safety.
How Do I Choose The Right Height For Pendant Lights?
Hang pendant lights 28 to 34 inches above kitchen counters or tables. Adjust height based on ceiling height and room size. Proper height improves lighting and aesthetics.
Conclusion
Hanging a plug-in pendant light is simple with the right steps. Choose a good spot and secure the hook tightly. Plug in the light and adjust the cord length as needed. Always check the light works safely before use. This small project can brighten any room quickly.
Enjoy the new look and feel of your space. Keep safety in mind, and your pendant light will shine well.


