
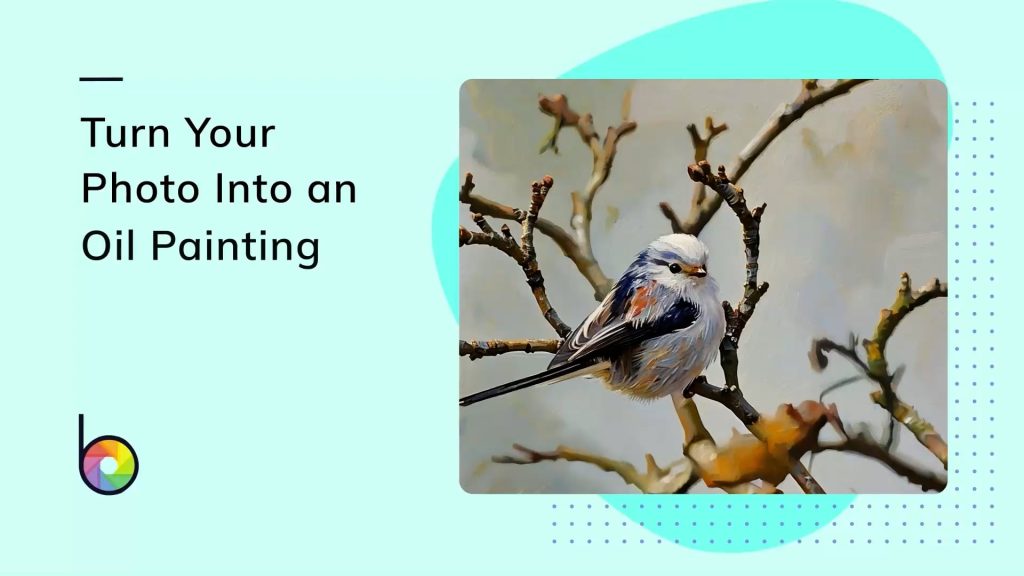
Have you ever looked at a photo and wished it could become a stunning piece of art on your wall? Turning your favorite picture into a canvas print is easier than you think—and it can transform any room instantly.
Imagine seeing your special moments come to life with vibrant colors and textures that a regular photo just can’t match. You’ll discover simple steps to make your photo into a beautiful canvas. By the end, you’ll know exactly how to create a unique, eye-catching display that makes your memories unforgettable.
Ready to bring your photos off the screen and onto your walls? Let’s dive in!
Choosing The Right Photo
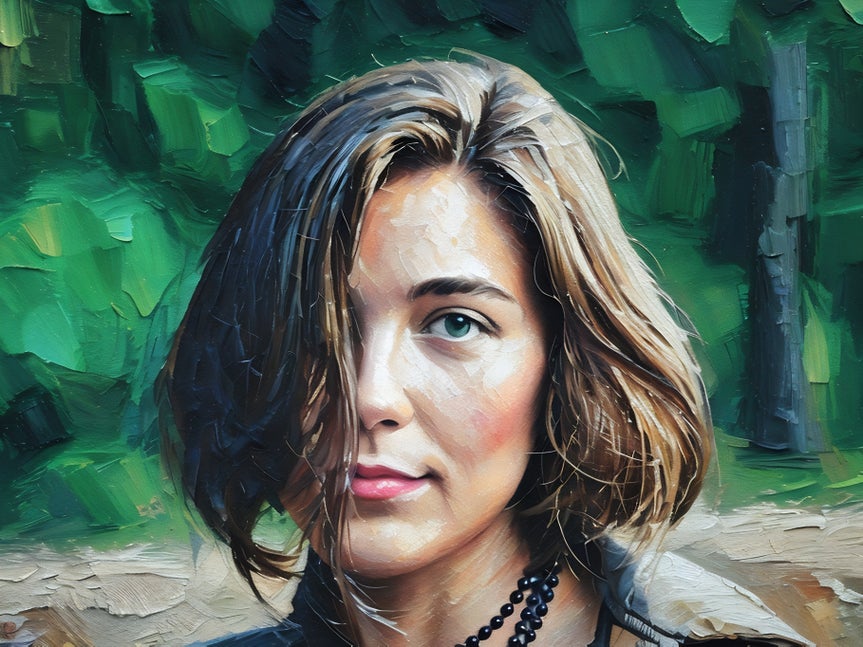
Choosing a clear and high-quality photo ensures the best canvas print result. Bright colors and simple backgrounds help the image stand out. Select a photo with strong focus and good lighting for a lasting display.
Choosing the Right Photo Transforming a photo into a canvas is like crafting a piece of art that can adorn your walls and capture cherished memories. But how do you ensure that your canvas print turns out as beautifully as you envision? It all starts with choosing the right photo. The photo you select will significantly impact the final look and feel of your canvas. Let’s explore some key factors to consider.Photo Resolution And Quality
High resolution is crucial when it comes to printing photos on canvas. A photo that looks great on your phone might not have enough pixels for a large canvas. Make sure your photo is at least 300 DPI (dots per inch). This ensures crispness and clarity. If you’re unsure, check your camera settings before snapping that shot. Always aim for the highest resolution available.Subject And Composition Tips
Think about what the photo represents. Is it a family portrait, a breathtaking landscape, or an abstract scene? Consider the rule of thirds. This composition technique enhances the balance and interest of your photo. Remember, the subject should be clear and engaging. Avoid cluttered backgrounds that might distract from the focal point.Color And Contrast Considerations
Colors play a vital role in setting the mood of your canvas. Bright, vibrant colors can bring energy, while soft pastels offer a calm feel. Pay attention to contrast. A photo with good contrast will have a range of tones from dark to light, adding depth. Before printing, experiment with editing tools to enhance colors and contrast. But don’t overdo it—natural looks often work best. Choosing the right photo doesn’t have to be daunting. With these tips, you can create a stunning canvas that tells your story beautifully. What memories will you choose to showcase on your walls?Selecting Canvas Size And Style
Choosing the right canvas size and style can completely change how your photo looks on the wall. It’s not just about picking what fits the space but also what matches your taste and the mood you want to create. Think about where you’ll hang the canvas and how much attention you want it to draw.
Standard Sizes Vs Custom Options
Standard canvas sizes like 16×20 inches or 24×36 inches are popular because they fit most spaces and are usually more affordable. These sizes are great if you want a quick and easy option without much fuss.
Custom sizes let you tailor the canvas to your exact needs. Maybe you want a panoramic view of a landscape or a very small piece for a cozy corner. Custom options give you freedom but expect a bit more cost and longer wait times.
Ask yourself: Do you want your canvas to be a centerpiece or a subtle accent? This can help decide if standard or custom sizing fits better.
Framed Vs Gallery Wrap
A framed canvas has a visible border that can add a classic or polished look. It works well if you want to match your photo with existing decor or add a splash of color with the frame itself.
Gallery wrap means the photo continues around the edges of the canvas with no frame, giving a modern, clean look. This style makes your image feel like it’s floating on the wall and often looks great in minimalist rooms.
Consider if you want the edges of your photo to be part of the display or if you prefer a defined frame. Which style better suits your room’s vibe?
Matte Or Glossy Finish
A matte finish reduces glare and reflections, making it easier to see your photo from any angle. It’s perfect for rooms with lots of natural light or where you want a soft, understated look.
Glossy finishes enhance colors and make details pop, but they can reflect light and show fingerprints. This finish works well for vibrant photos and darker rooms.
Think about the lighting in your space and how you want your photo to interact with it. Would you rather prioritize color brightness or viewing comfort?
Preparing The Photo For Printing
Preparing your photo for printing is a key step to create a beautiful canvas. The quality of the final product depends on how well you edit and format the image. Taking time to adjust the photo ensures clear and vibrant results. It also helps the image fit perfectly on the canvas size you choose.
Editing Tools And Techniques
Use simple editing tools to improve brightness, contrast, and color balance. Basic software like Photoshop or free apps like GIMP work well. Focus on fixing any shadows, highlights, or color spots. Avoid heavy filters that change the original look too much. Keep the photo natural and sharp for the best print.
Cropping And Aspect Ratio
Crop the photo to remove unwanted parts and focus on the main subject. Match the aspect ratio to the canvas size to avoid stretching or cutting important details. Common ratios are 4:3, 3:2, or square. Use the crop tool to select the right frame. Preview how the image fits before finalizing.
File Formats And Settings
Save the photo in a high-quality format like TIFF or PNG for printing. JPEG files work but use the highest quality setting to avoid blur. Set the resolution to at least 300 dots per inch (DPI) for clear details. Make sure the color mode is RGB or CMYK based on printer needs. Double-check file size and clarity before sending it to print.
Credit: www.befunky.com
Printing Methods For Canvas
Choosing the right printing method is key to turning a photo into a beautiful canvas. The print quality affects colors, details, and how long the canvas lasts. There are several ways to print on canvas, from professional services to home options. Each method has pros and cons to consider before making your choice.
Professional Printing Services
Professional printers use advanced machines for high-quality results. They print directly on canvas with special inks for sharp images. These services offer color correction and proofing to ensure accuracy. The print usually comes stretched or rolled, ready to display or frame. This method suits important photos or gifts that need lasting quality.
At-home Printing Options
Home printers can also print on canvas sheets designed for inkjet machines. These sheets fit standard printers and produce good results for small projects. The quality depends on your printer’s resolution and ink type. After printing, you must stretch the canvas yourself or find a local framer. This option saves money but may need more effort and skill.
Ink Types And Longevity
- Pigment Inks:Last longer and resist fading under sunlight.
- Dye Inks:Offer vibrant colors but fade faster over time.
- Solvent Inks:Used in professional printers for outdoor durability.
Choosing the right ink type affects how long your canvas stays vibrant. Pigment inks are best for indoor displays. Dye inks work well if you want bright colors but don’t need long-term durability. Consider where and how the canvas will be used when selecting inks.
Diy Canvas Stretching Techniques
Stretching your photo onto a canvas gives it a professional, gallery-ready look. DIY canvas stretching lets you control every detail. It saves money and offers a fun, hands-on experience. Follow simple steps to make your photo pop on canvas.
Materials Needed
- Canvas print or photo on canvas fabric
- Wooden stretcher bars (size based on your photo)
- Staple gun with staples
- Scissors or utility knife
- Measuring tape or ruler
- Flat surface or work table
- Rubber mallet (optional)
- Canvas pliers (optional, for better grip)
Step-by-step Stretching Guide
Start by assembling the wooden stretcher bars into a frame. Ensure corners fit tightly at right angles. Lay the canvas print face down on a clean surface.
Place the frame on the back of the canvas, centering the photo. Pull one side of the canvas tightly over the frame edge. Secure with a staple in the center of that side.
Move to the opposite side. Pull the canvas tight and staple it in the center. Repeat this for the remaining two sides.
Work your way from the center staples towards the corners. Add staples every 2 to 3 inches, keeping the canvas taut. Use canvas pliers for a stronger grip.
Fold the corners neatly and staple them down. Check for any loose areas and secure with extra staples. Trim excess canvas fabric from the back.
Tips For A Smooth Finish
- Pull the canvas evenly on all sides to avoid wrinkles.
- Staple tightly but do not tear the fabric.
- Use a rubber mallet to gently tap stretcher bars if needed.
- Keep the canvas surface clean during stretching.
- Practice on a small canvas before larger projects.
- Store stretched canvases flat or hung to keep shape.

Credit: www.fotor.com
Creative Finishing Touches
Creative finishing touches make your photo canvas truly unique. They add depth, personality, and protection. These small details bring your artwork to life and make it stand out on any wall.
Adding Texture And Effects
Texture adds a tactile feel to your canvas. Use modeling paste or gel mediums to create raised surfaces. Apply with a palette knife for bold strokes or a sponge for soft patterns. Effects like crackle or metallic finishes give your photo a new dimension. Experiment with layering to enhance shadows and highlights.
Personalizing With Paint Or Markers
Paint or markers let you add your own artistic touch. Use acrylic paint to highlight parts of the photo or add new elements. Fine-tip markers work well for detailed accents or writing. Choose colors that complement the image. Personal messages or dates make the canvas more meaningful.
Protective Coatings And Sealants
Sealants protect your canvas from dust, moisture, and fading. Use a clear acrylic spray or brush-on varnish. Matte, satin, or gloss finishes change the look and feel of the artwork. Apply thin, even coats and let each dry completely. Proper sealing ensures your canvas stays beautiful for years.
Displaying Your Canvas Art
Displaying your canvas art correctly can transform any room. It highlights your creativity and adds personality to the space. Choosing the right spot and accessories makes your canvas stand out. The way you hang and light your art affects its overall appeal.
Placement Ideas For Impact
Pick a wall where the canvas can be the main focus. Above a sofa or bed works well. Hallways and entryways offer great spots for smaller canvases. Group several canvases together for a gallery look. Keep the art at eye level for easy viewing. Avoid cluttered walls to let your canvas shine.
Hanging Hardware And Techniques
Use sturdy hooks or wall anchors to support the canvas weight. D-rings and wire are common tools for hanging. Command strips provide damage-free options for light canvases. For a clean look, hide wires behind the canvas. Measure twice before drilling holes to ensure perfect placement. Level the canvas to avoid a tilted display.
Lighting To Enhance Visuals
Soft, warm lighting brings out colors and details. Use adjustable spotlights or picture lights for focused illumination. Avoid harsh, direct sunlight to prevent fading. LED lights produce less heat and save energy. Position lights to reduce shadows on the canvas. Experiment with angles to highlight texture and depth.
Maintaining And Caring For Canvas
Keeping your photo canvas in great shape ensures it stays vibrant and beautiful for years. Proper care prevents damage and preserves the quality of your artwork. Here’s how you can maintain and care for your canvas effectively.
Cleaning Tips
Dust your canvas regularly using a soft, dry cloth or a feather duster. Avoid using water or cleaning solutions, as they can damage the paint or photo surface. If you spot a stain, gently wipe it with a slightly damp microfiber cloth and dry it immediately.
Have you ever tried to clean a canvas only to make it worse? Being gentle is key—too much pressure can leave marks or push dirt deeper into the fabric. Keeping cleaning simple helps maintain the original look without risking damage.
Avoiding Sun Damage
Direct sunlight can fade your canvas colors over time. Place your canvas away from windows or use UV-protective glass if framing is an option. Consider rotating your canvas occasionally to prevent uneven fading.
Think about where your canvas hangs—does it catch the morning sun or afternoon rays? Even indirect sunlight can cause gradual discoloration. Protecting your art from light extends its life and keeps the colors as vivid as the day you made it.
Storage Solutions
If you need to store your canvas, keep it in a cool, dry place to avoid mold and warping. Store it upright or flat, but never stack heavy objects on top. Wrapping the canvas in acid-free paper can add an extra layer of protection.
Have you ever found a cherished canvas ruined by poor storage? Taking a few precautions can save your artwork from moisture damage and dust buildup. Good storage habits ensure your canvas stays ready to display whenever you want.

Credit: www.jenniferbrecheisen.com
Frequently Asked Questions
How Do I Turn A Photo Into A Canvas Print?
To make a photo into a canvas print, select a high-resolution image. Upload it to an online canvas printing service or visit a local print shop. Choose canvas size and style, then place your order. The image will be printed on canvas and stretched over a wooden frame.
What Photo Quality Is Best For Canvas Printing?
High-resolution photos with at least 300 DPI are ideal. Clear, sharp images with good lighting work best. Avoid blurry or pixelated pictures. Higher quality ensures the canvas print looks detailed and vibrant. Using RAW or JPEG files from a good camera is recommended.
Can I Customize Canvas Size And Frame Options?
Yes, most services let you customize canvas sizes and frame styles. You can select square, rectangular, or panoramic dimensions. Frame options include wood types and colors. Customizing helps match your decor and personal style perfectly. Always check available options before ordering.
How Long Does Canvas Printing Usually Take?
Canvas printing typically takes 3 to 7 business days. Some services offer express or same-day printing for an extra fee. Shipping time varies based on location. Plan ahead if you need the canvas by a specific date. Always check estimated delivery times before purchase.
Conclusion
Turning a photo into a canvas brings your memories to life. It adds a personal touch to any room. The process is simple and fun to try. Choose a clear image and follow easy steps. Your artwork will look great on walls or gifts.
Enjoy seeing your favorite moments in a new way. This creative project fits any skill level. Start today and make your photos stand out. A beautiful canvas can brighten your space instantly.


