
Are you tired of your plain recessed lights and want to add a stylish touch to your space? Changing recessed lights to pendant lights can completely transform the look and feel of any room.
Imagine your kitchen island or dining area glowing with a beautiful pendant light that draws attention and adds personality. In this guide, you’ll learn simple steps to make this switch safely and effectively. Keep reading to discover how you can upgrade your lighting and give your home a fresh, modern vibe with just a few easy changes.
Tools And Materials Needed
Changing a recessed light to a pendant requires specific tools and materials. Having the right items ensures a smooth and safe installation. Preparing everything before starting saves time and avoids mistakes.
Basic Electrical Tools
- Voltage tester – to check power is off
- Wire stripper – to remove insulation cleanly
- Screwdriver set – for removing and securing fixtures
- Pliers – to twist and secure wires
- Electrical tape – for extra wire protection
- Wire nuts – to connect wires safely
- Drill (optional) – if new holes are needed
Choosing The Right Pendant Light
Select a pendant light that fits your room style and size. Consider the height of the ceiling and the length of the cord. Make sure the light fixture is compatible with your electrical box. Check the wattage and bulb type recommended for the fixture.
Safety Equipment
- Insulated gloves – protect from electric shock
- Safety goggles – shield eyes from debris
- Dust mask – avoid inhaling dust during installation
- Ladder – reach ceiling safely and comfortably
- Flashlight – for working in dim areas
Preparing The Workspace
Preparing your workspace is key before changing a recessed light to a pendant. A well-organized area helps you work safely and efficiently. It also prevents damage to your home and tools.
Turning Off Power
Safety starts with cutting the power to the light fixture. Locate your circuit breaker and switch off the correct breaker for the room you’re working in.
Double-check by flipping the light switch to confirm there’s no electricity running to the recessed light. Have a voltage tester handy to be absolutely sure. Have you ever underestimated this step and faced a shocking surprise?
Clearing The Area
Next, clear the space around the light fixture. Remove furniture or cover it with a drop cloth to catch dust and debris. This not only protects your belongings but gives you plenty of room to move around.
Good lighting is essential, so open windows or add a work lamp. A clutter-free workspace reduces mistakes and stress. What’s your usual strategy to keep a workspace neat during home projects?
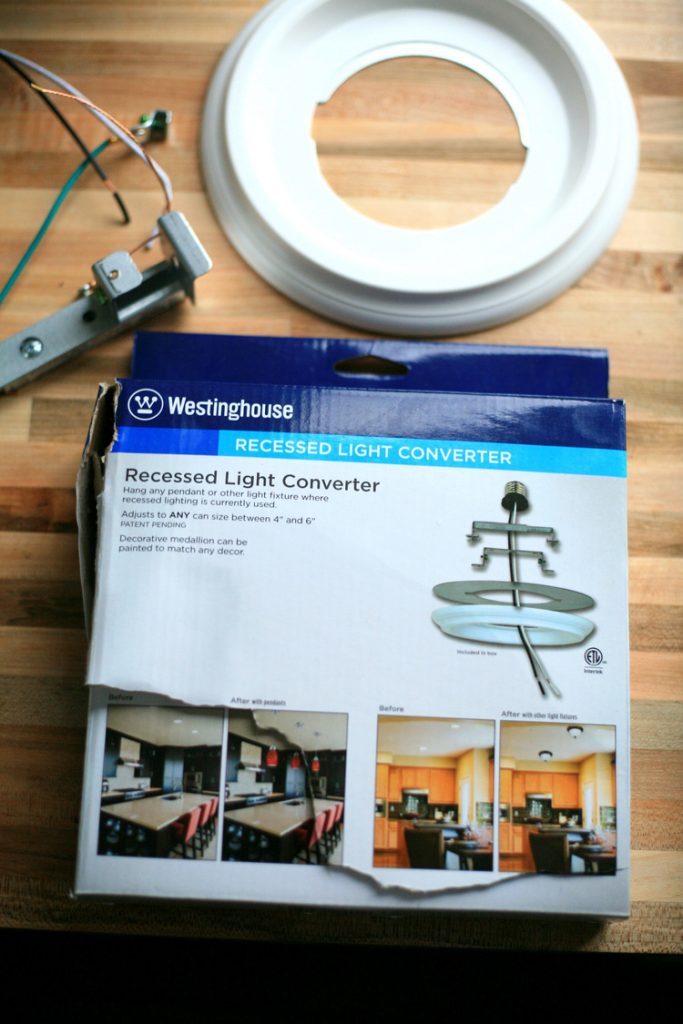
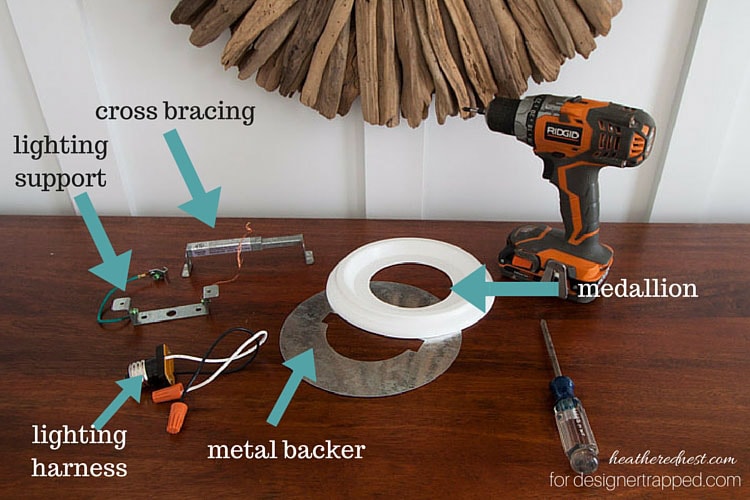
Gathering Supplies
Before you start, gather all the tools and materials you’ll need. Typical supplies include a screwdriver, wire stripper, voltage tester, new pendant light kit, wire nuts, and electrical tape.
Having everything ready prevents interruptions and keeps your momentum going. Consider checking if your pendant light requires special mounting hardware or bulbs. Are you the type to prepare everything in advance or grab tools as you go?
Removing The Recessed Light
Changing a recessed light to a pendant can significantly enhance the aesthetic of your room. However, the process begins with the careful removal of the existing recessed light. Taking it out may seem daunting, but breaking it down into manageable steps makes it surprisingly straightforward. Let’s dive into the process of removing that recessed fixture.
Detaching The Trim And Bulb
Start by gently removing the trim, which is typically held in place by a few clips. Carefully release these clips and slide the trim out. Next, unscrew the bulb and set it aside safely. Remember, bulbs can be fragile, so handle them with care to avoid any mishaps.
Disconnecting Wiring
Before touching any wires, ensure the power is completely turned off at the circuit breaker. With a voltage tester, double-check that no electricity is running to the fixture. Once confirmed, carefully disconnect the wires by unscrewing the wire nuts. Keep track of the wire configuration; taking a picture with your phone can be a useful reference later.
Removing The Housing
With the wiring safely disconnected, it’s time to remove the housing. Most recessed light housings are secured to the ceiling with clips or screws. Release these and gently pull the housing down. You might find it a tight squeeze, but with a bit of patience, it will come loose. Consider this a mini workout for your arms!
Have you ever tackled a project like this before? It might seem intimidating at first, but breaking it down into these simple steps makes it entirely doable. And just think, you’re one step closer to that stylish pendant lighting!
Installing The Pendant Light
Installing a pendant light in place of a recessed fixture can dramatically change the mood and style of your space. It’s a hands-on process that requires attention to detail, especially when it comes to mounting and wiring. Let’s walk through the essential parts of installing your new pendant light so you can enjoy a stylish upgrade safely and securely.
Mounting The Fixture Box
The first thing you need is a sturdy fixture box that can support the weight of your pendant light. Unlike recessed lights, pendant fixtures hang from the ceiling, so a regular old box won’t do. Opt for a ceiling-rated electrical box designed for heavy fixtures.
Secure the box to a ceiling joist or use a brace bar if you can’t attach it directly to a joist. This step is crucial—if the box isn’t firmly mounted, your pendant light could swing or even fall.
Connecting Electrical Wires
Before touching any wires, make sure the power is off at the breaker. Safety can’t be stressed enough here. Once the power is off, match the wires from the pendant light to the house wiring: black (hot) to black, white (neutral) to white, and green or bare copper (ground) to ground.
Use wire nuts to secure the connections and wrap them with electrical tape for extra safety. If you find your wires are too short, don’t stretch them—use wire connectors and an extra length of wire to extend them safely.
Securing The Pendant
After wiring, it’s time to attach the pendant fixture to the mounted box. Most pendants come with a mounting bracket that screws onto the box, providing a stable base. Tighten the screws evenly to avoid any tilting.
Adjust the length of the pendant cord or rod to suit your space before securing the canopy against the ceiling. Check that everything feels solid—your pendant should hang straight and not wobble.
Adjusting Pendant Height And Position
Adjusting the height and position of your pendant light is key to achieving the perfect look and function in your space. Too high, and the light loses its impact; too low, and it can obstruct views or feel cramped. Getting this balance right allows your pendant to shine both as a design element and a practical light source.
Measuring Drop Length
Start by deciding how low you want your pendant to hang. A common rule is to keep the bottom of the fixture about 28 to 34 inches above a table or countertop. If it’s in an open area, consider a height that clears heads—usually at least 7 feet from the floor.
Use a tape measure to mark this length from the ceiling to where the pendant’s bottom will sit. Double-check your measurements before cutting or adjusting cords. It’s easier to shorten than to lengthen once the fixture is installed.
Adjusting Cord Or Chain
Most pendant lights come with adjustable cords or chains to set the desired drop length. If your fixture uses a cord, gently pull it through the canopy and secure it at the right length. For chain-hung pendants, remove links with pliers until you reach the perfect drop.
Make sure the cord or chain is not twisted and that the weight is evenly supported. This prevents unnecessary strain and keeps your pendant hanging straight. Remember, neat wiring inside the canopy is just as important for safety and aesthetics.
Leveling The Fixture
Once the pendant is hanging at the right height, check if it’s level. A crooked light not only looks off but can affect how the light spreads. Use a small level tool or a smartphone app to verify evenness.
If you notice tilting, adjust the mounting bracket or reposition the fixture slightly. Sometimes, loosening screws and gently shifting the canopy solves the issue. A perfectly level pendant light completes the transformation from recessed to standout feature.

Credit: hellofromliz.com
Testing And Final Touches
After installing your new pendant light, the final phase is crucial. Testing and final touches ensure safety and enhance the room’s look. This phase confirms your work is secure and stylish.
Restoring Power
Turn the main power switch back on carefully. Avoid sudden surges by flipping the breaker slowly. Ensure no tools or wires remain inside the fixture. Safety first to prevent shocks or short circuits.
Checking Light Functionality
Switch on the pendant light to test its operation. Confirm the bulb lights up without flickering or dimming. Check if the fixture is stable and properly mounted. Listen for unusual sounds like buzzing. Test the switch and dimmer, if installed.
Cleaning And Styling Tips
Remove dust or fingerprints from the pendant light using a soft cloth. Avoid harsh chemicals that may damage the finish. Adjust the height or angle for the best lighting effect. Consider pairing with matching decor to enhance the room’s style.
Troubleshooting Common Issues
Troubleshooting common issues is essential when changing recessed lights to pendant fixtures. Problems can arise from electrical connections, fixture mounting, or bulb compatibility. Identifying these issues early helps avoid safety risks and ensures your new pendant light works perfectly.
Flickering Lights
Flickering often means a poor connection or incompatible bulbs. Check if the bulb fits the fixture and is rated for dimming, if used. Tighten the bulb securely but do not overtighten. Inspect the switch for any signs of wear or damage. Loose wiring inside the fixture or switch can cause flickering. Turn off power before checking wires.
Loose Fixtures
Loose pendant lights can wobble or hang unevenly. Ensure the mounting bracket is firmly attached to the ceiling box. Use the correct screws and anchors for your ceiling type. Adjust the pendant’s chain or rod length to balance the fixture. Support the fixture while tightening screws to prevent strain on wires. A stable fixture improves safety and appearance.
Wiring Problems
Wiring issues are common when converting recessed lights to pendants. Double-check wire connections using wire nuts or terminal blocks. Match wire colors correctly: black to black, white to white, and ground to ground. Avoid loose or exposed wires to prevent shorts and shocks. Use a voltage tester to confirm power is off before working. If unsure, consult a licensed electrician for help.
Credit: designertrapped.com

Credit: hellofromliz.com
Frequently Asked Questions
How Do I Convert Recessed Lights To Pendant Lights?
To convert recessed lights to pendant lights, first turn off power. Remove the recessed fixture and install a ceiling box. Then, connect wiring and hang the pendant light according to manufacturer instructions. Ensure proper support and safety compliance.
What Tools Are Needed To Change Recessed To Pendant Lighting?
You will need a voltage tester, screwdriver, wire stripper, drill, ceiling box, and pendant light fixture. Safety gear like gloves and goggles is also recommended. These tools help safely remove and install the new lighting fixture.
Can I Change Recessed Lights To Pendant Lights Myself?
Yes, if you have basic electrical knowledge and follow safety guidelines. Turn off power at the breaker, carefully remove existing fixtures, and install the pendant light with proper wiring and support. Otherwise, hire a licensed electrician.
How Much Does It Cost To Replace Recessed Lights With Pendants?
Costs vary based on fixture type and labor. Fixtures range from $50 to $200 each. Electrician fees can add $100 to $300 per light. DIY installation reduces costs but requires skill and tools.
Conclusion
Changing recessed lights to pendant lights can refresh any room’s look. The process is simple and does not require much time. Always turn off the power before starting work. Choose a pendant style that fits your space and taste. Follow safety steps carefully to avoid problems.
Enjoy the new lighting and the cozy feel it brings. This small change makes a big difference in your home’s style. Try it yourself and see how it brightens your space.


