
Are your string lights suddenly not working? It’s frustrating when your favorite lights go out, especially when you don’t know why.
The good news is, you might just need to change the fuse. This simple fix can bring your lights back to life quickly, saving you time and money. In this guide, you’ll learn exactly how to change the fuse on your string lights step by step.
Keep reading, and you’ll have your lights glowing again in no time.
Safety First
Before you start changing the fuse on your string lights, prioritizing safety is essential. Electrical components can be tricky and sometimes dangerous if mishandled. Taking simple precautions can prevent accidents and save you from costly repairs or injuries.
Unplugging The Lights
Always unplug your string lights before inspecting or replacing the fuse. Even if the lights seem off, residual electricity can still pose a risk. I once skipped this step and felt a small shock—trust me, it’s not worth the risk.
Unplugging ensures no current flows through the wires, making it safer to open the fuse compartment. Never attempt to change the fuse while the lights are plugged in. Ask yourself: are you really ready to handle live wires?
Gathering Necessary Tools
Having the right tools at hand makes the process smoother and safer. Typically, you’ll need a small screwdriver to open the fuse cover and a replacement fuse that matches your string lights’ specifications.
Using incorrect tools or fuses can damage your lights or cause electrical hazards. Double-check the fuse rating printed on your string light’s plug or manual before buying a replacement. Imagine trying to fit a square peg in a round hole—tools and parts must match perfectly.

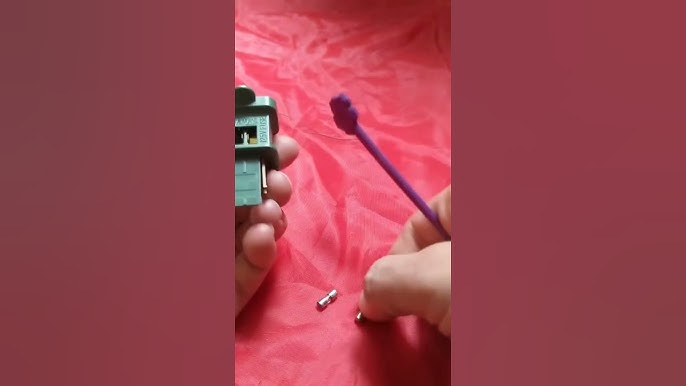
Credit: www.youtube.com
Locating The Fuse Compartment
Finding the fuse compartment is the first step in changing a fuse on string lights. It holds the small fuse that protects the lights from electrical damage. Knowing where this compartment is located helps save time and effort. Most string lights have a small box near the plug or control switch. This box can be opened to access the fuse inside. Understanding where to look makes the process simple and safe.
Common Fuse Box Positions
- Near the plug on the power cord
- Inside the light control module or switch
- At the beginning of the string of lights
- Attached to the transformer or adapter in some models
The fuse box is usually small and rectangular. It often has a sliding or snap-open cover. Checking these common spots helps find it quickly.
Identifying Fuse Type
The fuse type can vary between string light models. Most use small glass tube fuses or blade fuses. You can identify the fuse by:
- Looking at the shape and size inside the compartment
- Reading any markings on the fuse itself
- Checking the user manual for fuse specifications
Knowing the correct fuse type ensures you replace it with the right one. This prevents damage and keeps your lights working safely.
Removing The Old Fuse
Begin by unplugging the string lights to ensure safety. Open the fuse holder carefully and take out the old fuse. Check the fuse type before replacing it with a new one.
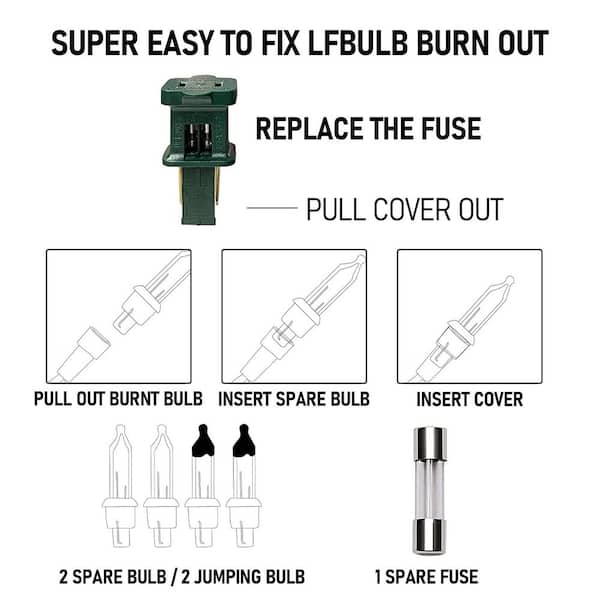
Changing a fuse on string lights might seem like a daunting task, but it’s simpler than you think. Removing the old fuse is a crucial step in this process. It’s where careful attention can make all the difference between a successful repair and a frustrating experience. Let’s walk through how you can remove the old fuse with ease and confidence.Opening The Fuse Holder
To begin, ensure your string lights are unplugged to avoid any electrical hazard. Locate the fuse holder, typically found in the plug of your string lights. It might be a small compartment with a sliding or hinged cover. Gently open the fuse holder using your fingers or a small flathead screwdriver. If it’s a sliding cover, push it carefully to avoid breaking the mechanism. This is your gateway to accessing the fuse, so handle it with care.Extracting The Fuse Carefully
Once the fuse holder is open, you will see the old fuse nestled inside. Use your fingers or a pair of tweezers to grasp the fuse gently. Be cautious not to apply too much pressure, as the fuse can be fragile and might break. If it feels stuck, wiggle it slightly to loosen it. Remember, the goal is to extract it without causing any damage to the holder or the fuse itself. Have you ever wondered why the fuse might blow in the first place? It’s often due to a power surge or a short circuit. Identifying these issues can prevent future mishaps. Removing the old fuse is a straightforward process once you understand the mechanics behind it. With the old fuse out, you’re one step closer to getting your string lights shining brightly again. Have you ever had to change a fuse before? Share your experiences and tips in the comments below!
Credit: www.youtube.com
Choosing The Right Replacement Fuse
Choosing the right replacement fuse is crucial for the safe and effective operation of your string lights. Using the wrong fuse can cause your lights to malfunction or even pose a fire risk. Taking a moment to identify the correct specifications ensures your string lights stay bright and safe.
Checking Fuse Ratings
Start by looking at the fuse rating printed on the original fuse or in the product manual. You need to match the amperageand voltageexactly. For example, if your fuse is rated at 3 amps and 125 volts, the replacement must have the same ratings.
Using a fuse with a higher amp rating can cause excessive current flow, damaging the lights or wiring. A fuse with a lower rating might blow too soon, interrupting your light display unnecessarily. Always double-check these numbers before buying.
Where To Buy Replacement Fuses
Many hardware stores and big-box retailers carry replacement fuses suitable for string lights. Online marketplaces like Amazon or specialty electrical supply websites also offer a wide range of options. Make sure the seller clearly states the fuse ratings and compatibility.
Local stores can be helpful if you want to get the fuse immediately and avoid shipping delays. However, online stores often provide detailed product descriptions and customer reviews that help you confirm you’re getting the right part.
Installing The New Fuse
Installing the new fuse is a simple but crucial part of fixing your string lights. This step restores power and ensures the lights work safely. Handling the fuse with care prevents damage and keeps your lights running smoothly.
Inserting The Fuse Correctly
First, check the fuse type and size. Use the exact replacement recommended by the manufacturer. Hold the fuse by its ends to avoid damage. Slide the fuse gently into the fuse holder. Make sure it fits snugly without forcing. The metal ends of the fuse should touch the contacts inside.
Securing The Fuse Compartment
Close the fuse compartment carefully after insertion. Press the cover until it clicks or fits tightly. A loose cover can cause the fuse to fall out. Use tape to seal the compartment if it does not close well. Ensure no wires are pinched or damaged when closing. This keeps the fuse safe and the lights working.
Credit: www.homedepot.com
Testing The Lights
Testing string lights after changing the fuse is key to ensure they work safely. This step helps spot any issues before full use. Simple checks can save time and prevent electrical problems.
Plugging In And Checking
Plug the string lights into a power outlet carefully. Watch for any flickering or dim bulbs. Lights should glow evenly without sparks or buzzing sounds. If all bulbs light up, the fuse change was successful.
Troubleshooting If Lights Don’t Work
Check the power source first. Try another outlet to rule out a socket problem. Inspect the fuse again to confirm it is the right type and installed correctly. Look over the light string for broken bulbs or loose wires. Replace any damaged bulbs or repair wires before testing again.
Preventing Future Fuse Issues
Preventing future fuse issues helps keep your string lights working longer. Taking simple steps can reduce the chance of fuses blowing. Careful handling and proper use protect the lights and save time on repairs.
Proper Storage Tips
Store string lights in a dry place to avoid moisture damage. Coil the lights gently to prevent wire breaks. Use a spool or a container to keep them neat. Avoid tangling by separating sections with twists or ties. Proper storage stops stress on wires and fuses.
Avoiding Overloading The String Lights
Check the maximum wattage for your string lights. Do not connect too many sets together. Overloading causes extra heat that can blow fuses. Use a power strip with overload protection for safety. Spread out power sources if you need more lights.
Frequently Asked Questions
How Do I Know If A Fuse In String Lights Is Blown?
Check if the string lights stop working entirely. Inspect the fuse inside the plug. A blown fuse usually looks blackened or broken. Replace the fuse if damaged to restore power and functionality.
What Type Of Fuse Is Used In String Lights?
String lights typically use 3-amp or 5-amp glass tube fuses. Check the fuse rating printed on the plug or manual. Using the correct fuse prevents electrical damage and ensures safe operation.
Can I Replace A Fuse In String Lights Myself?
Yes, you can replace the fuse yourself safely. Unplug the lights first. Open the fuse compartment carefully using a small screwdriver. Insert a new fuse matching the original rating and close the compartment.
Why Do Fuses Blow Frequently In String Lights?
Fuses may blow due to power surges, short circuits, or using wrong fuse ratings. Overloading the circuit or damaged wiring can also cause frequent fuse failure. Inspect lights and wiring for faults before replacing the fuse.
Conclusion
Changing the fuse on string lights is simple and safe. Always unplug the lights before starting. Use the correct fuse type for your lights. Check the fuse holder carefully and replace the old fuse. Test the lights after replacing the fuse to ensure they work.
Regular checks help keep your lights shining bright. Small steps keep your decorations looking great. Now, enjoy your beautifully lit space without worry.


