
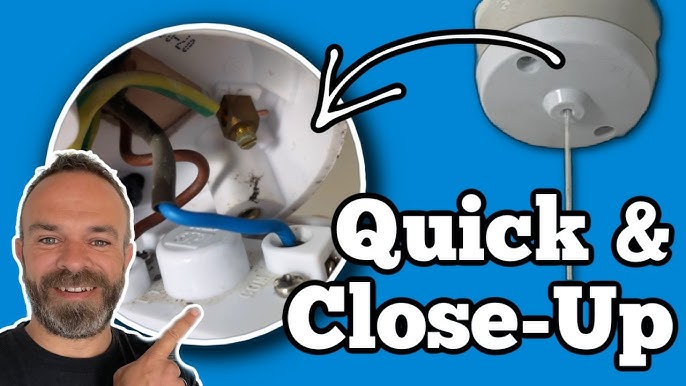
Is your light’s pull string broken or stuck? Don’t worry—you can fix it yourself quickly and easily.
Replacing a pull string might seem tricky, but with the right steps, you’ll have your light working smoothly again in no time. Keep reading, and you’ll discover simple tips that save you time and money, even if you’ve never done this before.
Let’s get your light back to shining bright!
Tools And Materials Needed
Replacing a pull string on a light requires the right tools and materials. Having everything ready makes the task easier and faster. This guide lists essential tools and recommended replacement parts for the job.
Essential Tools
- Screwdriver set (flathead and Phillips)
- Pliers (needle-nose preferred)
- Wire cutters or scissors
- Measuring tape or ruler
- Flashlight or portable light source
- Step ladder or sturdy stool
- Electrical tape
Recommended Replacement Parts
- Durable pull string or cord (nylon or cotton)
- Pull string connector or ball chain connector
- Light switch pull chain (if applicable)
- Small screws or fasteners (if needed)
- Lubricant spray (optional for smooth operation)

Credit: www.reddit.com
Safety Precautions
Replacing a pull string on a light requires careful attention to safety. Small mistakes can cause electric shock or injury. Taking safety precautions protects you and your home during this simple repair. Follow these key steps before starting work on the pull string.
Power Off The Light
Always turn off the power to the light before working on it. Locate the correct switch or circuit breaker and switch it off. Confirm the light is off by trying to pull the string. No power means no risk of electric shock while replacing the string.
Work In A Well-lit Area
Choose a bright workspace to avoid accidents. Good lighting helps you see small parts and tools clearly. It reduces the chance of mistakes or dropping components. Use a flashlight or portable lamp if needed for extra light.
Remove The Light Cover
Carefully twist or pull the light cover to remove it from the fixture. This allows easy access to the pull string mechanism inside. Use gentle force to avoid breaking the cover or damaging the light.
Removing the light cover is a crucial step in replacing the pull string on a light fixture. It’s a task that might seem intimidating at first, but breaking it down into smaller steps makes it manageable. Whether you’re a DIY enthusiast or just someone who wants to fix things without calling a professional, learning how to remove the light cover will save you time and money.Locate Screws Or Clips
Begin by examining the light fixture closely. Most covers are secured with screws or clips, and identifying these will guide your next steps. If your light cover has screws, you’ll typically find them on the outer rim or near the center. In some cases, the cover might be held in place by clips. These are often hidden, requiring a careful look around the edges. A small flashlight can help you spot these hidden fasteners.Carefully Detach The Cover
Once you’ve located the screws or clips, it’s time to remove them. Use the appropriate screwdriver for screws or gently unclip the cover. It’s important to support the cover with one hand while removing screws or clips to prevent it from falling. If the cover feels stuck, resist the urge to force it off. Instead, check for any missed screws or clips. If it’s still stubborn, a gentle wiggle can sometimes do the trick. Have you ever found yourself halfway through a project, only to realize you missed a crucial step? Paying attention to details here will prevent any mishaps. Plus, it’s a great feeling to know that you can handle small home repairs on your own. Don’t you agree that these small successes in DIY can boost your confidence for bigger projects?Detach The Old Pull String
Detaching the old pull string is the first crucial step to replacing it. This task requires a bit of attention to detail, but it’s straightforward once you know what to look for. Handling the old string carefully will make the replacement process smoother and prevent damage to the light mechanism.
Identify The String Attachment
Start by closely examining where the pull string is attached to your light fixture. The string usually connects to a small plastic or metal piece inside the pull mechanism. Sometimes, it might be tied in a knot or looped around a gear or spindle.
Look for any visible knots, clips, or hooks securing the string. If your light has a clear casing, you might see exactly how the string is anchored. If not, gently wiggle the string to understand how it’s fixed without pulling too hard.
Remove The String From The Mechanism
Once you know where the string connects, carefully undo the knot or unclip it. If it’s looped around a gear, slowly unwind it without forcing anything. This prevents breaking small parts inside the mechanism.
Sometimes the old string might be stuck due to dirt or wear. Use a small tool, like tweezers or a toothpick, to loosen it carefully. Have you noticed how a little patience here saves you from frustrating jams later on?
After detaching, pull the string out completely from the fixture. Keep the old string nearby for reference—it helps when choosing the right replacement length and type.
Install The New Pull String
Installing the new pull string is a key part of fixing your light. This step restores the pull mechanism so you can turn the light on and off easily. Follow simple actions to secure the string properly. Ensuring the string fits well prevents it from slipping out later.
Thread The String Through The Hole
Locate the hole on the light fixture where the pull string goes. Insert one end of the new string through this hole. Pull the string through until enough length remains on both sides. This allows for easy handling and tying. Make sure the string slides smoothly and is not twisted.
Secure The String To The Switch
Find the small hole or hook on the pull switch inside the fixture. Tie a firm knot at the end of the string to stop it from slipping. Loop the string through the switch’s hole or around the hook. Pull the string tight and secure the knot firmly. Test the pull by gently tugging to check it holds well.
Credit: www.diychatroom.com
Test The New Pull String
Testing the new pull string is essential to ensure the light works correctly. This step confirms the string is installed properly and the light responds as expected. Check the string’s movement and the light’s reaction carefully. This process helps catch any issues early, saving time and effort later.
Check For Smooth Operation
Pull the string slowly and watch the light’s response. It should turn on and off without sticking or delay. Listen for any unusual noises like grinding or snapping. The string should move freely without resistance or slipping. Repeat several pulls to confirm consistent performance. Smooth operation means the string fits well and the mechanism works properly.
Make Adjustments If Needed
If the string feels tight, loose, or doesn’t activate the light, adjustments are necessary. Check the knot or attachment points for tightness. Trim excess string if it hangs too long or gets tangled. Re-seat the string in the pulley or switch mechanism. Test again after each adjustment to find the perfect fit. Proper tension ensures easy use and extends the string’s life.
Reattach The Light Cover
After you’ve successfully replaced the pull string, the next important task is to reattach the light cover. This step ensures your light fixture looks neat and functions safely. Taking the time to properly secure the cover can prevent dust buildup and accidental damage.
Align The Cover Properly
Start by examining how the cover fits onto the fixture. Look for any grooves, tabs, or notches that guide the cover’s placement. Aligning these correctly is essential to avoid forcing the cover, which can cause cracks or misalignment.
Take a moment to hold the cover gently against the fixture before pressing it in. Does it sit flush with the ceiling or wall? If it feels loose or uneven, double-check the position. A well-aligned cover makes a big difference in appearance and stability.
Secure With Screws Or Clips
Once the cover is aligned, it’s time to fasten it securely. Many light covers attach with small screws, while others use clips or snap-in designs. Use a screwdriver that fits well to avoid stripping screws and ensure a tight hold.
- If screws are involved, tighten them evenly, switching between each to keep the cover balanced.
- For clip-on covers, press firmly but gently until you hear a click or feel the cover snap into place.
Have you ever noticed a light cover wobbling or falling off unexpectedly? That usually happens because it wasn’t secured properly. Taking these extra seconds to fasten the cover will save you from annoying repairs later.
Maintenance Tips
Keeping the pull string on your light in good shape doesn’t just save you time and money—it ensures safety and convenience every time you reach for that switch. Maintenance is simple if you make it a regular habit. A little attention now can prevent bigger problems later.
Regular Inspection
Check your pull string every few months for signs of fraying, stiffness, or stretching. Even if it looks fine, give it a gentle tug to see if it moves smoothly without catching or slipping. If you notice any rough spots or worn areas, it’s time to replace the string before it snaps unexpectedly.
Look closely where the string attaches to the light fixture. Is the knot secure? Has the string started to unravel near the fixture? These small details often get overlooked but are key to avoiding sudden failures. Don’t forget to inspect the pull handle too—sometimes the weakest link is right at your fingers.
Preventing Future Wear
Think about what causes your pull string to wear out quickly. Is it rubbing against sharp edges or getting caught in tight spaces? Try to route the string so it hangs freely without rubbing against anything that could fray it.
You can also choose a more durable string material like nylon or polyester, which lasts longer than cotton. Adding a small bead or rubber stopper near the end helps reduce strain on the knot and makes pulling easier. Have you ever noticed how a simple change like that can make a big difference in how smoothly the string operates?
Finally, avoid yanking the string too hard. Gentle, steady pulls will extend its life and keep your light working perfectly without sudden breaks. What’s your routine for checking small parts around the house? Making this a habit can save you frustration down the road.

Credit: www.familyhandyman.com
Frequently Asked Questions
How Do I Replace A Broken Pull String On A Light?
First, turn off the power for safety. Remove the light cover and old string. Thread a new string through the hole. Attach it securely to the switch mechanism. Test by pulling the string to ensure proper function.
What Tools Do I Need To Replace A Pull String?
You will need a screwdriver, replacement pull string, and scissors. Optionally, use pliers to help thread the string. A ladder may be required for ceiling lights. These tools ensure a smooth and safe replacement process.
Can I Use Any String As A Pull Replacement?
Use a durable, thin nylon or polyester string. Avoid thick or weak materials that may break easily. The string must fit through the pull switch hole. Proper string choice ensures long-lasting and reliable operation.
How Long Does It Take To Replace A Pull String?
Replacing a pull string typically takes 10 to 15 minutes. Time varies with light fixture type and access difficulty. Proper preparation speeds up the process and ensures safety.
Conclusion
Replacing a pull string on a light is simple and quick. Follow the steps carefully to avoid mistakes. Use the right tools and a new string for safety. Test the light after fixing the string to ensure it works well.
Doing this yourself saves money and gives confidence. Keep your home light working smoothly with easy repairs like this. Try it, and you will see how easy it can be. No need to call a professional every time. Small fixes make a big difference.


