
Are you looking to add a warm, cozy glow to your space? Hanging string lights on your wall can instantly transform any room or outdoor area, making it feel inviting and magical.
But if you’re unsure how to get started or worried about making mistakes, you’re in the right place. This guide will walk you through simple, step-by-step tips to hang your string lights safely and beautifully. By the end, you’ll have the confidence to brighten up your home exactly the way you want.
Keep reading, and let’s light up your space together!
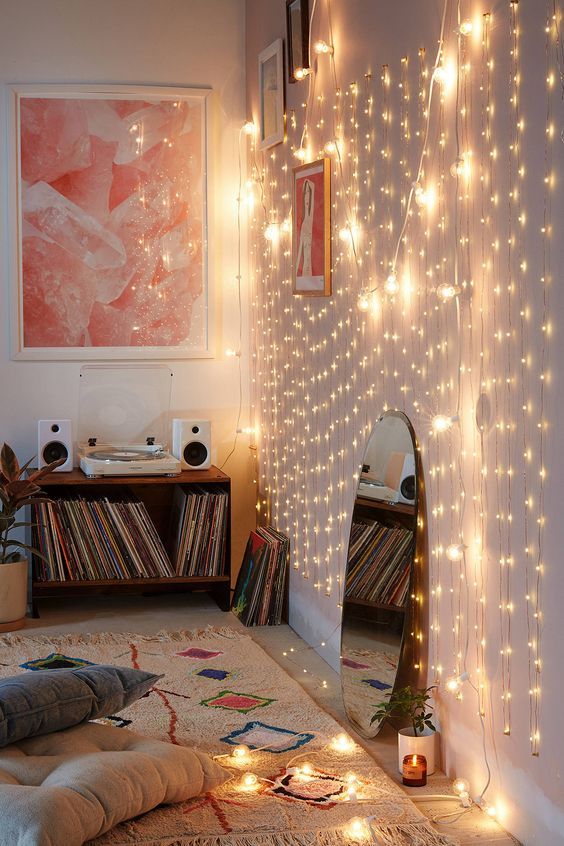
Credit: www.digsdigs.com
Choosing The Right String Lights
Choosing the right string lights is crucial for creating the perfect ambiance on your wall. Your choice affects not only the look but also the durability and safety of your setup. Let’s break down what you need to consider before buying your lights.
Types Of String Lights
There are several types of string lights available, each suited for different styles and uses. LED lights are energy-efficient and last longer, making them a popular choice. Incandescent bulbs offer a warm, classic glow but consume more power.
Consider the bulb shape and size too. Globe bulbs add a modern touch, while fairy lights create a delicate, twinkling effect. Think about the mood you want to set and how the lights will complement your space.
Length And Power Needs
Measure the wall space where you plan to hang the lights. Choose a length that fits well without too much excess or shortage. Too many lights in one circuit can cause power issues, so check the maximum length recommended by the manufacturer.
Decide if you want plug-in lights or battery-operated ones. Battery-powered lights offer flexibility but may need frequent battery changes. Plug-in lights are more reliable for long-term use but require nearby outlets.
Weather Resistance
If your wall is outdoors or in a humid area, weather resistance is non-negotiable. Look for string lights labeled as waterproof or weatherproof to withstand rain, wind, or moisture. This ensures your lights stay bright and safe over time.
Even indoor walls near windows or kitchens can benefit from durable, moisture-resistant lights. Don’t overlook this detail—your lights should match the environment to avoid damage and electrical hazards.
Preparing The Wall Surface
Preparing the wall surface is essential for hanging string lights safely and neatly. A clean and sound wall ensures the lights stay secure and look great. Taking time to prepare prevents damage and makes the process easier.
Cleaning The Wall
Start with a clean wall to help hooks or adhesive sticks hold better. Use a soft cloth and mild soap mixed with water. Wipe down the entire area where you plan to hang the lights. Let the wall dry completely before moving on.
Checking For Damage
Inspect the wall for cracks, peeling paint, or loose plaster. Damaged spots may not support the weight of the lights. Repair any damage with filler or patch kits. Allow repairs to dry fully before hanging your string lights.
Selecting Attachment Points
Choose spots that can hold the lights without strain. Look for studs, hooks, or nails already in the wall. If none exist, consider using removable adhesive hooks. Space attachment points evenly to keep lights straight and secure.
Tools And Materials Needed
String lights, hooks or adhesive clips, and a measuring tape make the job easier. A ladder and a drill can help with higher walls. Choose materials that suit your wall type for a secure hold.
To transform any space into a cozy haven, string lights are your go-to decor. But before you can bask in their glow, knowing the right tools and materials is key. Let’s dive into what you’ll need to make your string light dreams come true.Hooks And Clips
Using hooks and clips ensures your lights stay securely in place. Command hooks are popular for their ease of use and clean removal. Clips, like those designed for Christmas lights, work wonders on walls and even ceilings. Choose the right type based on where you’re hanging them. For indoor use, plastic hooks are light and effective. Outdoor settings may call for metal hooks for durability.Adhesive Options
Adhesives offer a sleek, nail-free option. Double-sided tape is a quick fix but may not hold heavier lights. Sticky tack is another option, especially for temporary setups. Consider the surface you’re working with. Smooth walls pair well with adhesive strips, while textured surfaces might need a stronger adhesive. Be mindful of potential residue when removing.Additional Supplies
Beyond hooks and adhesives, a few other tools will make the job easier. A measuring tape ensures your lights are evenly spaced. A level can help keep them straight and professional-looking. Don’t forget safety gear. A step stool or ladder will help you reach higher spots without risking a fall. And always have an extra set of lights on hand—because who hasn’t experienced that dreaded half-lit string? What’s your favorite setup for string lights? Share your tips in the comments!Step-by-step Hanging Process
Hanging string lights on a wall creates a warm and inviting space. The process requires careful planning and simple tools. Following clear steps ensures your lights stay secure and look great. This guide breaks down the hanging process into easy parts.
Measuring And Marking
Start by measuring the length of your string lights. Use a tape measure to find the wall space you want to cover. Mark spots where hooks or clips will go. Space the marks evenly to keep lights straight. Use a pencil for light, easy-to-remove marks.
Attaching Hooks Or Clips
Choose hooks or clips suitable for your wall type. For drywall, adhesive clips work well and avoid damage. For brick or wood, use screw-in hooks for a strong hold. Attach hooks or clips at the marked spots. Make sure each is secure before moving to the next.
Securing The Lights
Carefully hang the string lights on the hooks or clips. Avoid pulling the wires too tight to prevent damage. Leave a little slack for flexibility and to handle wall irregularities. Check that lights are evenly spaced and adjust if needed. Plug in the lights to test and enjoy your new setup.
Creative Arrangement Ideas
Creative arrangements bring life to string lights on walls. They transform simple bulbs into art. Using different ideas helps create unique looks. Lights become a part of the room’s style. Here are some inspiring ways to arrange your string lights.
Patterns And Shapes
Arrange lights in fun shapes like hearts, stars, or waves. Use tape or small hooks to keep them in place. Patterns add interest and charm to plain walls. Try geometric shapes for a modern look. Curves and loops create a soft, cozy feel. Change shapes seasonally for fresh decor.
Layering And Grouping
Hang multiple strands close to each other for depth. Layering lights adds a warm, glowing effect. Group lights in clusters to highlight a wall section. Mix short and long strands for texture. This style works well in living rooms and bedrooms. It creates a rich, inviting atmosphere.
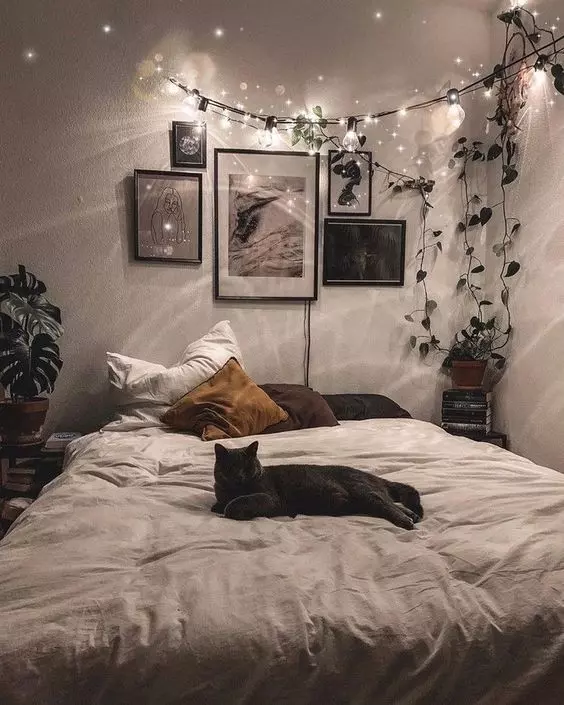
Combining With Other Decor
Pair string lights with photos, posters, or art. Wrap lights around shelves or plants for extra glow. Use fairy lights with fabric or garlands for softness. Combine different light colors to match your theme. This adds personality and warmth to any space. Lights and decor together tell a story.

Credit: www.digsdigs.com
Safety Tips For String Lights
Hanging string lights can brighten any space beautifully. Safety must come first to avoid accidents and damage. Follow these essential tips to keep your lights safe and your home secure.
Avoiding Overloads
Do not plug too many lights into one outlet. Overloading causes heat and can start fires. Check the wattage limits on your outlets and light strings. Use power strips with built-in circuit breakers for extra protection.
Proper Electrical Setup
Use lights designed for indoor or outdoor use, depending on where you hang them. Make sure all plugs and wires are dry before use. Avoid running cords under rugs or through doorways to prevent damage. Always use grounded outlets and avoid using extension cords longer than necessary.
Regular Maintenance Checks
Inspect lights regularly for frayed wires, broken bulbs, or loose connections. Replace damaged bulbs immediately to avoid short circuits. Turn off string lights when not in use or when sleeping. Store lights in a dry place to prevent wear and tear during off-seasons.
Removing And Storing Lights
Taking down your string lights carefully and storing them properly can save you a lot of trouble next season. If you rush or handle them carelessly, you risk damaging bulbs or tangling wires. Let’s look at how to remove and store your lights so they stay in great shape.
Careful Removal Techniques
Start by unplugging the lights to avoid any electrical issues. Gently detach each hook or adhesive strip holding the lights to the wall. Avoid pulling directly on the wires; instead, hold the socket or the base of the hook to prevent damage.
Have you noticed how a little patience makes the removal process smoother? Taking your time reduces the chances of broken bulbs and tangled cords, which can be frustrating to fix later.
Cleaning Before Storage
After removal, wipe down the lights with a dry or slightly damp cloth to remove dust or dirt. Check each bulb for any cracks or damage—replace any faulty bulbs before storing. This simple step prevents problems next time you use your lights.
Do you keep your lights clean before storage? A quick cleanup can extend the life of your string lights far beyond the season.
Organized Storage Tips
Wrap your lights loosely around a piece of cardboard or a spool to avoid tangling. Use twist ties or reusable cable ties to secure loops without pinching the wires. Store the wrapped lights in a labeled box or bag, keeping them in a dry, cool place away from direct sunlight.
Think about how much easier it will be to set up your lights next time if you open the box and find them neat and ready to go. Isn’t that worth the little extra effort now?

Credit: www.digsdigs.com
Frequently Asked Questions
How Do I Hang String Lights Without Damaging Walls?
Use adhesive hooks or removable mounting tape to hang string lights. These options avoid nails or screws and prevent wall damage. Choose hooks rated for the lights’ weight and clean the surface before applying for better adhesion.
What Is The Best Way To Secure String Lights On A Wall?
Secure string lights using command hooks, clips, or nails spaced evenly along the wall. Ensure hooks fit the light strand thickness. Avoid overstretching the lights to prevent damage and maintain a neat appearance.
Can I Hang String Lights Indoors And Outdoors The Same Way?
Indoor and outdoor hanging methods differ due to weather exposure. Use weatherproof clips or hooks outdoors and waterproof string lights. Indoors, adhesive hooks or nails work well. Always check the product’s suitability for outdoor use.
How Far Apart Should String Lights Be Spaced On A Wall?
Space string lights about 12 to 18 inches apart for even lighting. This distance prevents sagging and ensures a balanced look. Adjust spacing based on wall size and light strand length.
Conclusion
Hanging string lights on a wall adds charm and warmth instantly. Choose the right tools and plan your layout clearly. Secure the lights carefully to avoid damage or accidents. Test the lights before finalizing their position. Simple steps make the process smooth and fun.
Enjoy the cozy glow that brightens your space. Small efforts create a big difference in your room. Try different styles to find what fits best. Bright walls, happy nights.


