
Looking to brighten up your workspace with a stylish and energy-saving light? You’re in the right place.
Making your own LED desk lamp is easier than you might think, and it lets you customize the brightness and design exactly how you want. Imagine having a lamp that fits perfectly on your desk, saves electricity, and adds a modern touch to your room.
Keep reading, and you’ll discover simple steps to create your very own LED desk lamp that looks great and works even better. By the end, you’ll have a clear guide to turn your idea into a glowing reality. Let’s get started!
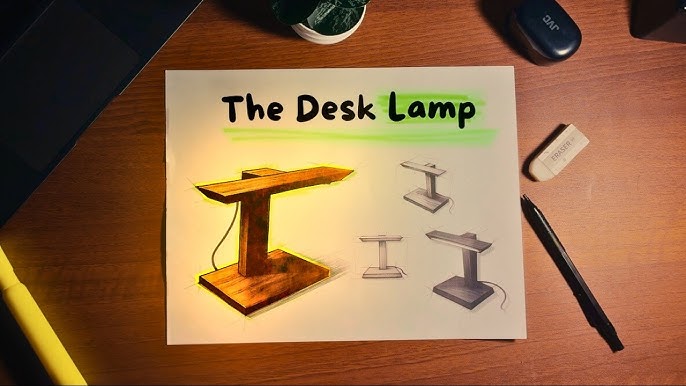
Choosing The Right Led Components
Choosing the right LED components is key to building a functional desk lamp. The quality of LEDs affects brightness, energy use, and lifespan. Selecting suitable drivers and power supplies ensures safety and stable performance. This section explains how to pick the best parts for your LED desk lamp.
Types Of Led Lights
LEDs come in many shapes and sizes. Common types include:
- SMD LEDs:Small, surface-mounted, great for even light.
- COB LEDs:Chip-on-board, very bright and efficient.
- Filament LEDs:Look like old bulbs, offer soft light.
Choose based on brightness needs and design style. SMDs suit modern lamps. COBs fit high brightness tasks. Filament LEDs add a vintage look.
Selecting Led Drivers
LED drivers control power flow to LEDs. They protect LEDs from voltage changes. Drivers come in two types:
- Constant Current:Keeps current steady, ideal for most LEDs.
- Constant Voltage:Maintains voltage, used with LED strips.
Match driver specs with LED requirements. This prevents flickering and damage.
Power Supply Options
The power supply powers the driver and LEDs. Common options include:
- Wall adapters:Easy to find and use.
- Rechargeable batteries:Portable but need charging.
- USB power:Convenient for desk setups.
Pick a power supply with correct voltage and current limits. Safety and reliability matter most.

Credit: www.youtube.com
Gathering Necessary Tools And Materials
Gathering all the right tools and materials is the first step to building an LED desk lamp. Having everything ready makes the process smoother and safer. This section helps you understand what you need before starting.
Basic Electrical Tools
- Soldering iron for connecting wires securely
- Wire cutters to trim wires cleanly
- Wire strippers for removing insulation safely
- Multimeter to check electrical connections and voltage
- Screwdrivers for assembling lamp parts
- Heat shrink tubing for insulating solder joints
- Electrical tape as extra insulation
Lamp Frame Materials
- LED strip or LED bulbs with suitable brightness
- Power supply or USB adapter for LED power
- Desk lamp base or sturdy stand for support
- Flexible arm or adjustable neck for positioning
- Switch to turn the lamp on and off
- Wires compatible with LED and power supply
- Enclosure or casing to protect components
Safety Gear Essentials
- Safety glasses to protect your eyes
- Insulated gloves to avoid electric shocks
- Work mat or non-slip surface to keep parts steady
- Ventilated area to avoid fumes from soldering
- Fire extinguisher nearby for emergencies
Designing Your Desk Lamp
Designing your LED desk lamp is where creativity meets functionality. This phase shapes how your lamp will look, feel, and perform on your desk. Taking time to plan each detail can save you headaches later and ensure your lamp fits perfectly with your workspace.
Lamp Shape And Size
The shape and size of your lamp affect both its style and usability. Think about how much desk space you can spare and what lighting coverage you need. A slim, tall lamp might suit a minimalist desk, while a wider base can offer more stability.
Consider shapes like circular, rectangular, or even an angled design that directs light exactly where you want it. Have you measured your desk space to see what fits comfortably? Small changes here can make a big difference in daily use.
Adjustable Features
Adjustability lets you customize your lamp’s position and brightness to match your tasks and mood. Adding a swivel head, extendable arm, or dimmable switch can greatly increase your lamp’s versatility.
Think about how often you switch between reading, writing, or screen work. Would a flexible gooseneck or multiple brightness settings make your lamp more useful? Including these features means your lamp works as hard as you do.
Heat Dissipation Considerations
LED lamps generate less heat than traditional bulbs, but managing heat is still important to protect components and prolong lamp life. Use materials like aluminum or design vents in the lamp’s body to allow heat to escape.
Have you thought about where the heat will go when the lamp is on for hours? Simple design tweaks such as spacing the LED module away from plastic parts can prevent overheating. Good heat management keeps your lamp safe and reliable.
Wiring And Assembly Steps
Wiring and assembling your LED desk lamp is where the project truly comes to life. Careful attention to wiring ensures your lamp lights up safely and efficiently. Assembly brings all parts together into a functional and stylish piece for your workspace.
Connecting Leds To Drivers
Start by identifying the positive and negative terminals on your LEDs and driver. Connect the LEDs in the correct order based on whether your design requires series or parallel wiring.
Double-check polarity before making connections to avoid damage. Use a multimeter to confirm continuity and proper voltage levels after wiring. Have you ever connected LEDs the wrong way and seen them not light up? It’s a common mistake but easy to fix with patience.
Soldering Techniques
Use a clean, well-heated soldering iron to make strong, reliable joints. Apply solder quickly—too much heat can damage components. Keep wires steady and avoid cold joints by ensuring the solder flows smoothly and covers the connection fully.
Trim excess wire length after soldering for a neat finish. Practice on spare wires if you’re new to soldering; it boosts your confidence and results. How comfortable do you feel holding a soldering iron? Getting hands-on makes a big difference.
Assembling The Lamp Frame
Lay out all parts before assembly to visualize how they fit together. Secure the lamp base and arm firmly; loose joints can cause wobbling or breakage. Use screws or adhesive as needed, depending on your frame material.
Integrate the wiring inside the frame carefully to avoid pinching or exposure. Test your wiring again once the frame is assembled to catch any issues early. Think about your workspace—how can your lamp’s design best fit and support your daily tasks?
Testing And Troubleshooting
Testing and troubleshooting your LED desk lamp is a key step to ensure it works safely and efficiently. It’s normal to face small hiccups during your build, but with a careful approach, you can quickly identify and fix them. Let’s dive into some practical ways to check your lamp and solve common problems.
Checking Electrical Connections
Loose or incorrect wiring is the top reason your LED lamp might not light up. Take a close look at every connection point, especially where wires meet the LED strip and power source.
- Make sure all wires are firmly connected without any exposed copper that might short circuit.
- Use a multimeter to test continuity; if you see no reading, that part of the circuit is broken.
- Double-check polarity. LEDs only work if positive and negative wires are correctly attached.
Sometimes a wire looks fine but actually isn’t making contact. Have you tried gently tugging each wire? That small check saved me hours once.
Adjusting Brightness Levels
Brightness control is what makes your lamp comfortable and versatile. If your lamp has a dimmer or adjustable resistor, test it by slowly changing the setting and watching the LED’s brightness.
- If the light flickers or doesn’t change smoothly, check the dimmer’s wiring and component specs.
- Some LEDs require a specific type of dimmer—make sure your component matches the LED requirements.
- Try swapping the resistor or dimmer if your lamp stays too dim or too bright.
Adjusting brightness isn’t just about comfort; it can also extend your lamp’s lifespan. Have you noticed how a slightly dimmer light feels less harsh over long working hours?
Common Issues And Fixes
Not all problems are wiring-related. Here are some typical issues you might face and how to fix them:
| Problem | Cause | Solution |
|---|---|---|
| LED does not light up | Incorrect polarity or loose connection | Reverse wires or tighten connections |
| LED flickers | Unstable power supply or loose wire | Check power source and secure wiring |
| Light too dim | Wrong resistor or power level | Replace resistor with correct value |
| Overheating | Poor heat dissipation | Add a heat sink or improve ventilation |
Have you ever ignored a flicker and ended up with a dead LED? Small signs like that should never be overlooked.
Credit: www.amazon.com.au
Finishing Touches And Customization
Finishing touches and customization bring your LED desk lamp to life. This stage lets you express style and improve function. Small changes can make your lamp unique and fit your workspace perfectly.
Painting And Decorating
Choose paint that sticks well to your lamp’s material. Spray paint works great on metal and plastic surfaces. Use painter’s tape to protect areas you want to keep clean.
Try simple color blocks or patterns for a modern look. Stickers or decals add personality without much effort. A matte finish gives a soft, elegant feel, while gloss adds shine.
Adding Switches And Dimmers
Install a switch for easy on/off control. Choose a toggle, push-button, or touch switch based on your preference. Dimmer switches allow you to adjust brightness smoothly.
Test wiring carefully to avoid shorts or loose connections. Place switches where you can reach them without trouble. This step boosts convenience and energy efficiency.
Cable Management Tips
Keep cables tidy to avoid clutter on your desk. Use cable clips or adhesive hooks to guide wires along surfaces. Twist ties and Velcro straps help bundle excess cable length.
Hide cables behind your desk or inside hollow lamp arms. Clear cable management improves safety and makes your lamp look neat. Plan cable paths before final assembly.
Energy Efficiency And Maintenance Tips
Creating an LED desk lamp saves energy and cuts electricity costs. Regular cleaning and using quality parts keep it bright and long-lasting. Simple care helps maintain good light without wasting power.
Creating your own LED desk lamp can be a rewarding project, blending creativity with functionality. However, ensuring your lamp remains energy efficient and well-maintained over time requires some attention to detail. Here are some practical tips to help you keep your LED desk lamp shining brightly and efficiently.Maximizing Led Lifespan
To get the most out of your LED, avoid high temperatures. LEDs are sensitive to heat, which can shorten their lifespan. Ensure your lamp has good ventilation, or consider adding a small fan if your design allows. Use a dimmer switch to control brightness. Lowering the intensity can extend the life of your LED. Plus, it offers flexibility in lighting for different tasks.Cleaning And Care
Dust buildup can reduce the efficiency of your LED lamp. Regularly clean the lamp’s surface with a soft, damp cloth. Avoid harsh chemicals that can damage the finish or the electronics. Keep the lamp’s lenses and bulbs free from fingerprints and smudges. Clean them gently with a microfiber cloth to maintain optimal light output.Upgrading Components
LED technology is rapidly advancing. Consider upgrading your LEDs every few years to newer, more efficient models. This can save energy and improve light quality. Think about smart technology. Adding smart bulbs or integrating your lamp with home automation systems can enhance its functionality and energy efficiency. Is your workspace ready for a tech upgrade? By focusing on these energy efficiency and maintenance tips, your DIY LED desk lamp can remain a trusted tool in your workspace for years to come.
Credit: www.youtube.com
Frequently Asked Questions
What Materials Do I Need For An Led Desk Lamp?
You need LED bulbs, a lamp base, wiring, a switch, and a power source. Additional tools include soldering equipment and a lampshade.
How Do I Assemble The Led Desk Lamp Parts?
Connect the LED bulbs to the wiring, attach the switch, secure everything to the lamp base, and test the power connection.
Can I Customize The Brightness Of My Led Desk Lamp?
Yes, using a dimmer switch or adjustable LED bulbs allows you to control brightness levels easily.
What Safety Tips Should I Follow While Making An Led Lamp?
Always disconnect power before assembly, use insulated tools, avoid overloading circuits, and follow wiring guidelines carefully.
Conclusion
Making an LED desk lamp is simple and fun. You only need a few materials and some patience. This project helps you save money and learn new skills. A homemade lamp also fits your style and needs perfectly. Try different designs and colors to make it unique.
Enjoy brighter light while working or reading. Start your DIY lamp today and see the difference it makes!


