
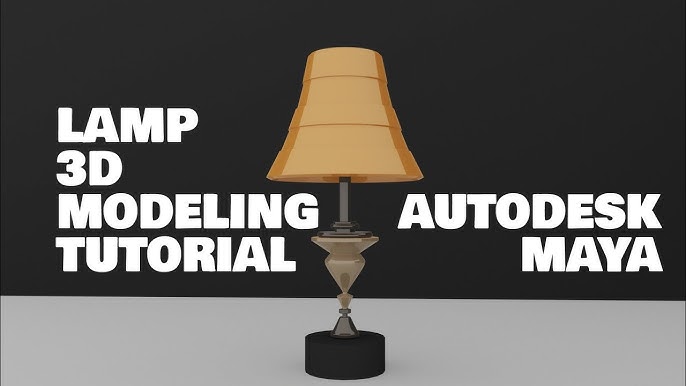
Are you ready to bring your creativity to life and design your very own desk lamp in Maya? Whether you’re a beginner or have some experience, this guide will walk you through every simple step.
Imagine turning a blank screen into a sleek, stylish lamp that you can show off or use in your projects. By the end of this article, you’ll have the skills to create a professional-looking 3D desk lamp that stands out.
Let’s get started and make your vision shine!
Setting Up Your Workspace
Setting up your workspace in Maya is essential before diving into modeling your desk lamp. A clean and organized interface helps you focus on the creative process without distractions. It also speeds up your workflow and reduces frustration, especially if you’re new to 3D design.
Configuring Maya Interface
Start by customizing the Maya interface to fit your needs. You can rearrange panels, hide unnecessary menus, and adjust the viewport layout. For modeling a desk lamp, having the Perspective Viewand Outlinervisible is helpful to track your objects and navigate the scene easily.
Don’t forget to save your workspace layout once you’re comfortable with it. This way, you won’t waste time setting it up again. Have you noticed how a cluttered screen can slow down your creative flow? Fixing this early can make modeling feel less overwhelming.
Preparing Reference Images
Reference images are your best friends when creating detailed models like a desk lamp. Gather pictures from different angles—front, side, and top views—to understand the lamp’s shape and proportions. You can find these online or take photos of a real lamp you like.
Import these images into Maya as image planes within your viewport. This allows you to trace and build your lamp model with accuracy. Think about what details matter most to you: Is it the lampshade’s curve or the base’s design? Having clear references helps you focus on these elements.
Credit: walmen.co
Creating The Lamp Base
Creating the lamp base is the first step in building your desk lamp in Maya. This part supports the lamp and gives it stability. A good base design makes the lamp look strong and balanced. Focus on simple shapes first, then add small details to make it realistic. Keep the shape clean and easy to modify.
Modeling The Base Shape
Start with a simple polygon shape like a cylinder or cube. Use the scale tool to adjust its size to fit your lamp design. Make the base wider at the bottom for better stability. Use the extrude tool to add thickness and depth. Keep the shape smooth by adding edge loops and using the smooth tool. Check the proportions often. The base should look sturdy but not too heavy.
Adding Details And Refinements
After the basic shape is ready, add small details to enhance realism. Create bevels on edges to avoid sharp corners. Use the inset tool to add grooves or patterns on the base surface. Add small objects like screws or buttons for extra detail. Use the soft selection tool for subtle shape changes. Always check the model from different angles. These refinements make your lamp base look professional and complete.
Modeling The Lamp Arm
Create the lamp arm by shaping a simple cylinder and adjusting its length and thickness. Use edge loops to add bends and smooth the curves for a natural look. Keep the geometry clean to make further modeling easier.
Modeling the lamp arm is a crucial step in creating a desk lamp in Maya. This part brings both functionality and aesthetics to your design. The arm must be both sturdy and visually appealing. Let’s dive into the process of modeling the lamp arm.Shaping The Arm Structure
Begin by selecting a cylinder for the arm’s base shape. Scale the cylinder to match the desired length and thickness of your lamp arm. Use the “Extrude” tool to create bends and joints. This will give your lamp arm flexibility and a realistic look. Adjust the vertices to refine the curves and angles. Ensure the arm looks sleek and modern.Connecting Arm To Base
Position the arm above the lamp base. Use the “Snap” tool to align it perfectly. Connect the arm to the base using the “Parent” function. This ensures the arm moves with the base. Check the pivot points for smooth rotation and movement. Adjust as needed for a seamless connection.
Credit: walmen.co
Designing The Lamp Shade
Designing the lamp shade is a crucial step in creating a desk lamp in Maya. The shade defines the lamp’s style and controls how light spreads. It needs to look good and fit well with the lamp base. This process starts with building the basic shape and then adjusting its size and angles for the perfect look.
Forming The Shade Geometry
Start by creating a simple shape like a cylinder or cone. Use Maya’s polygon tools to build the base form. Keep the shape clean with few faces for easy editing. Use the Extrude tool to add thickness to the shade. Make sure the inside and outside surfaces are smooth. This gives the shade a realistic look when rendered.
Adjusting Size And Angles
Change the shade’s height and diameter to fit the lamp base. Scale the shape uniformly or non-uniformly for unique designs. Rotate the shade to create tilt or flare effects. Use vertex or edge manipulation to fine-tune curves and edges. Check the shade’s alignment with the lamp arm for balance. Small tweaks here improve the lamp’s overall appearance.
Adding Materials And Textures
Adding materials and textures to your desk lamp model in Maya brings it to life. This step gives your lamp color, shine, and realism. Without materials, your model looks flat and unfinished. Textures add fine details that mimic real-world surfaces. These elements work together to make your 3D lamp look believable and professional.
Applying Basic Materials
Start by selecting your lamp model or parts of it. Open the Hypershade window to create new materials. Choose from common types like Lambert, Blinn, or Phong. Each material type handles light differently.
- Lambert works well for matte surfaces without shine.
- Blinn is good for surfaces with soft highlights.
- Phong creates sharp, shiny reflections.
Assign the material to the selected part by right-clicking and choosing “Assign Material to Selection.” Adjust the color and reflectivity in the material’s attribute editor. Keep colors simple and close to your reference desk lamp.
Using Textures For Realism
Textures add detailed patterns or images to your lamp’s surface. Use image files like JPG or PNG for textures. Common textures include metal scratches, wood grain, or fabric patterns.
To add a texture, connect a file texture node to the material’s color attribute. You can also link textures to bump or specular maps for surface details and light effects. Adjust the texture’s placement using UV mapping tools. This controls how the texture wraps around your model.
Small texture tweaks can make your desk lamp appear more realistic. Try combining multiple textures for complex surfaces. This adds depth and detail without extra modeling.

Credit: www.coohom.com
Setting Up Lighting And Rendering
Setting up lighting and rendering is key to making your desk lamp model look real. It shows off the lamp’s details and materials clearly. Proper lighting creates mood and depth in the scene. Rendering turns your 3D model into a final image you can share.
Placing Light Sources
Start by adding light sources near the lamp. Use a point light to mimic the bulb’s glow. Place it inside the lamp shade for natural light spread. Add a fill light to soften shadows on the desk and surroundings. Use a directional light as a main light source to highlight the lamp shape. Adjust light intensity and color for warm or cool effects. Experiment with light angles to avoid harsh shadows.
Configuring Render Settings
Open the render settings to prepare for the final image. Choose a renderer like Arnold for good quality and speed. Set the image resolution based on where you want to use it. Increase sample rates to reduce noise and improve clarity. Enable ray tracing for realistic reflections and shadows. Adjust gamma and color management to keep colors accurate. Save the render in a high-quality format like PNG or EXR for best results.
Final Touches And Exporting
After shaping and detailing your desk lamp in Maya, the final phase begins. This stage ensures your model is clean, polished, and ready for use or sharing. The final touches enhance the quality and visual appeal of your lamp. Exporting the project correctly saves your work for other software or presentations.
Reviewing The Model
Carefully check the entire lamp model for any errors. Look for:
- Missing faces or holes in the mesh
- Incorrect normals that affect lighting
- Unapplied transformations or scales
- Overlapping or unnecessary vertices
- Proper alignment and proportions
Use Maya’s wireframe and shaded views to spot issues. Fix problems by merging vertices or cleaning the mesh. Check materials and textures for consistency. Adjust lighting if needed to preview the final look.
Exporting The Project
Select the desk lamp and prepare to export. Choose a file format based on your use case. Common formats include:
- FBX– great for game engines and animation
- OBJ– widely supported for 3D printing and modeling
- DAE– useful for collaborative projects
Go to File > Export Selectionor Export All. Set export options carefully:
- Include textures and materials
- Apply transformations
- Choose the correct scale
- Check animation settings if applicable
Save the file in a clear folder with a descriptive name. Back up your project files to avoid data loss. Your desk lamp model is now ready for use in other software or presentations.
Frequently Asked Questions
How Do I Start Modeling A Desk Lamp In Maya?
Begin by creating basic shapes like cylinders and cubes for the lamp’s base and stand. Use the Extrude and Scale tools to refine the shape. Organize components into groups for easier editing.
What Materials Work Best For A Desk Lamp Model?
Use reflective materials like metal or plastic shaders to mimic real lamp surfaces. Apply appropriate textures to simulate paint or metal finishes. Adjust specularity for a realistic shine.
How Can I Add Realistic Lighting To My Desk Lamp?
Use an Area Light or Spot Light in Maya near the lamp’s bulb. Adjust intensity and color to simulate real light. Enable shadows for depth and realism.
What Rendering Settings Optimize Desk Lamp Visualization?
Use Arnold Renderer with ray tracing enabled for realistic lighting effects. Adjust sampling rates to reduce noise. Set resolution to high for detailed output.
Conclusion
Creating a desk lamp in Maya is simple and fun. Follow each step carefully and take your time. Use basic shapes and tools to build your model. Adjust details to make your lamp look real. Practice helps you improve your skills fast.
Keep experimenting with different designs and colors. Soon, you will create even better 3D objects. Enjoy the process and be patient with yourself. Your creativity will grow with every project you try. This guide gives you a strong start in 3D modeling.


