
Are your motion sensor lights not working the way you want? Maybe they turn on too late, stay on too long, or don’t detect movement properly.
You’re not alone—many people struggle with getting these lights just right. But here’s the good news: adjusting your motion sensor lights is easier than you think. In this guide, you’ll discover simple steps to customize your lights to fit your space perfectly.
Keep reading, and you’ll soon have smart, responsive lighting that works exactly how you need it.

Credit: www.amazon.ca
Types Of Motion Sensor Lights
Motion sensor lights come in various types designed for different uses. Choosing the right type affects how well the light works. Understanding the main types helps in adjusting the settings correctly. The two key categories are indoor and outdoor models, each with unique features. Also, sensor technology varies, influencing the light’s response and range.
Indoor Vs Outdoor Models
Indoor motion sensor lights are made for rooms, hallways, and closets. They detect small movements and turn on lights softly. These models often have shorter detection ranges to avoid false triggers.
Outdoor models are built to handle weather and rough conditions. They cover larger areas like driveways, gardens, and porches. These lights are brighter and have wider sensor ranges for safety and security. Outdoor lights usually include features to resist rain, dust, and extreme temperatures.
Common Sensor Technologies
Passive Infrared (PIR) sensors detect heat from people or animals. They react to body heat changes and are common in both indoor and outdoor lights. PIR sensors work best in clear, unobstructed areas.
Ultrasonic sensors emit sound waves and measure their reflection. They sense motion by changes in wave patterns. These sensors work well in areas with obstacles but may cause false alarms.
Microwave sensors send out microwave pulses and detect movement by changes in the waves. They cover larger areas and pass through thin walls. These sensors are sensitive and use more power.
Dual-technology sensors combine two types, like PIR and microwave. This reduces false triggers and improves accuracy. Lights with dual sensors are reliable for high-security areas.
Key Adjustment Features
Adjusting motion sensor lights isn’t just about turning a dial and hoping for the best. Understanding the key adjustment features gives you control over how these lights respond to movement, making your home safer and more energy-efficient. Let’s dive into the essential settings that help you fine-tune your motion sensor lights for optimal performance.
Sensitivity Settings
Sensitivity determines how easily your motion sensor detects movement. If the sensitivity is too high, your light might turn on for every small motion, like leaves rustling or a passing car. Too low, and it might miss people walking by.
Try adjusting the sensitivity in small increments and observe how your light reacts. For example, setting it slightly lower helped me avoid constant triggering from my neighbor’s cat. Would you rather have the light turn on frequently or risk missing some movement altogether?
Light Duration Control
This feature controls how long the light stays on after detecting motion. You can set it anywhere from a few seconds to several minutes depending on your needs. If you’re coming home late, a longer duration means you won’t be left in the dark while you get inside.
Think about your typical routine. Do you need the light to stay on long enough to safely enter your house, or would a short burst suffice for quick tasks? Adjusting this setting can also save energy by preventing the light from staying on unnecessarily.
Detection Range
Detection range specifies how far the sensor can “see” motion. A wider range covers more ground but might pick up unwanted movement from far away, like passing cars or neighbors. A shorter range focuses on a smaller area, increasing accuracy.
When I adjusted the detection range on my porch light, I noticed fewer false alarms from street traffic. You might want to test different ranges to find the sweet spot that covers your entryway without being triggered by distant movement. How much space do you really need your sensor to cover?
Preparing For Adjustment
Check the motion sensor light’s position and power source before adjusting. Clear any obstructions that may block the sensor’s view. Ensure the settings match your desired sensitivity and timing for best results.
Preparing for Adjustment Adjusting motion sensor lights can improve your home’s security and energy efficiency. Before you start, ensure you are well-prepared for the task. This involves taking safety precautions and gathering the right tools.Safety Precautions
Safety is a priority when dealing with electrical devices. Turn off the power at the circuit breaker to avoid electrical shock. Use a voltage tester to confirm no power flows to the light. This ensures a safe working environment. Secure a stable ladder if your sensor lights are high. Wear rubber-soled shoes to prevent slipping. Ensure your workspace is dry to avoid any accidents.Tools You’ll Need
Gathering the right tools makes the adjustment process smoother. You will need a flathead screwdriver to adjust the sensor settings. A ladder is essential for reaching high-mounted lights. A voltage tester is crucial for safety checks. A flashlight can be helpful if working in dim light. Having these tools ready ensures efficiency in your adjustment process.
Credit: www.youtube.com
Step-by-step Adjustment Guide
Adjusting motion sensor lights properly can make a huge difference in how they perform. If your lights turn on too often or not long enough, it can be frustrating. This step-by-step adjustment guide will help you fine-tune your settings for optimal lighting and energy savings.
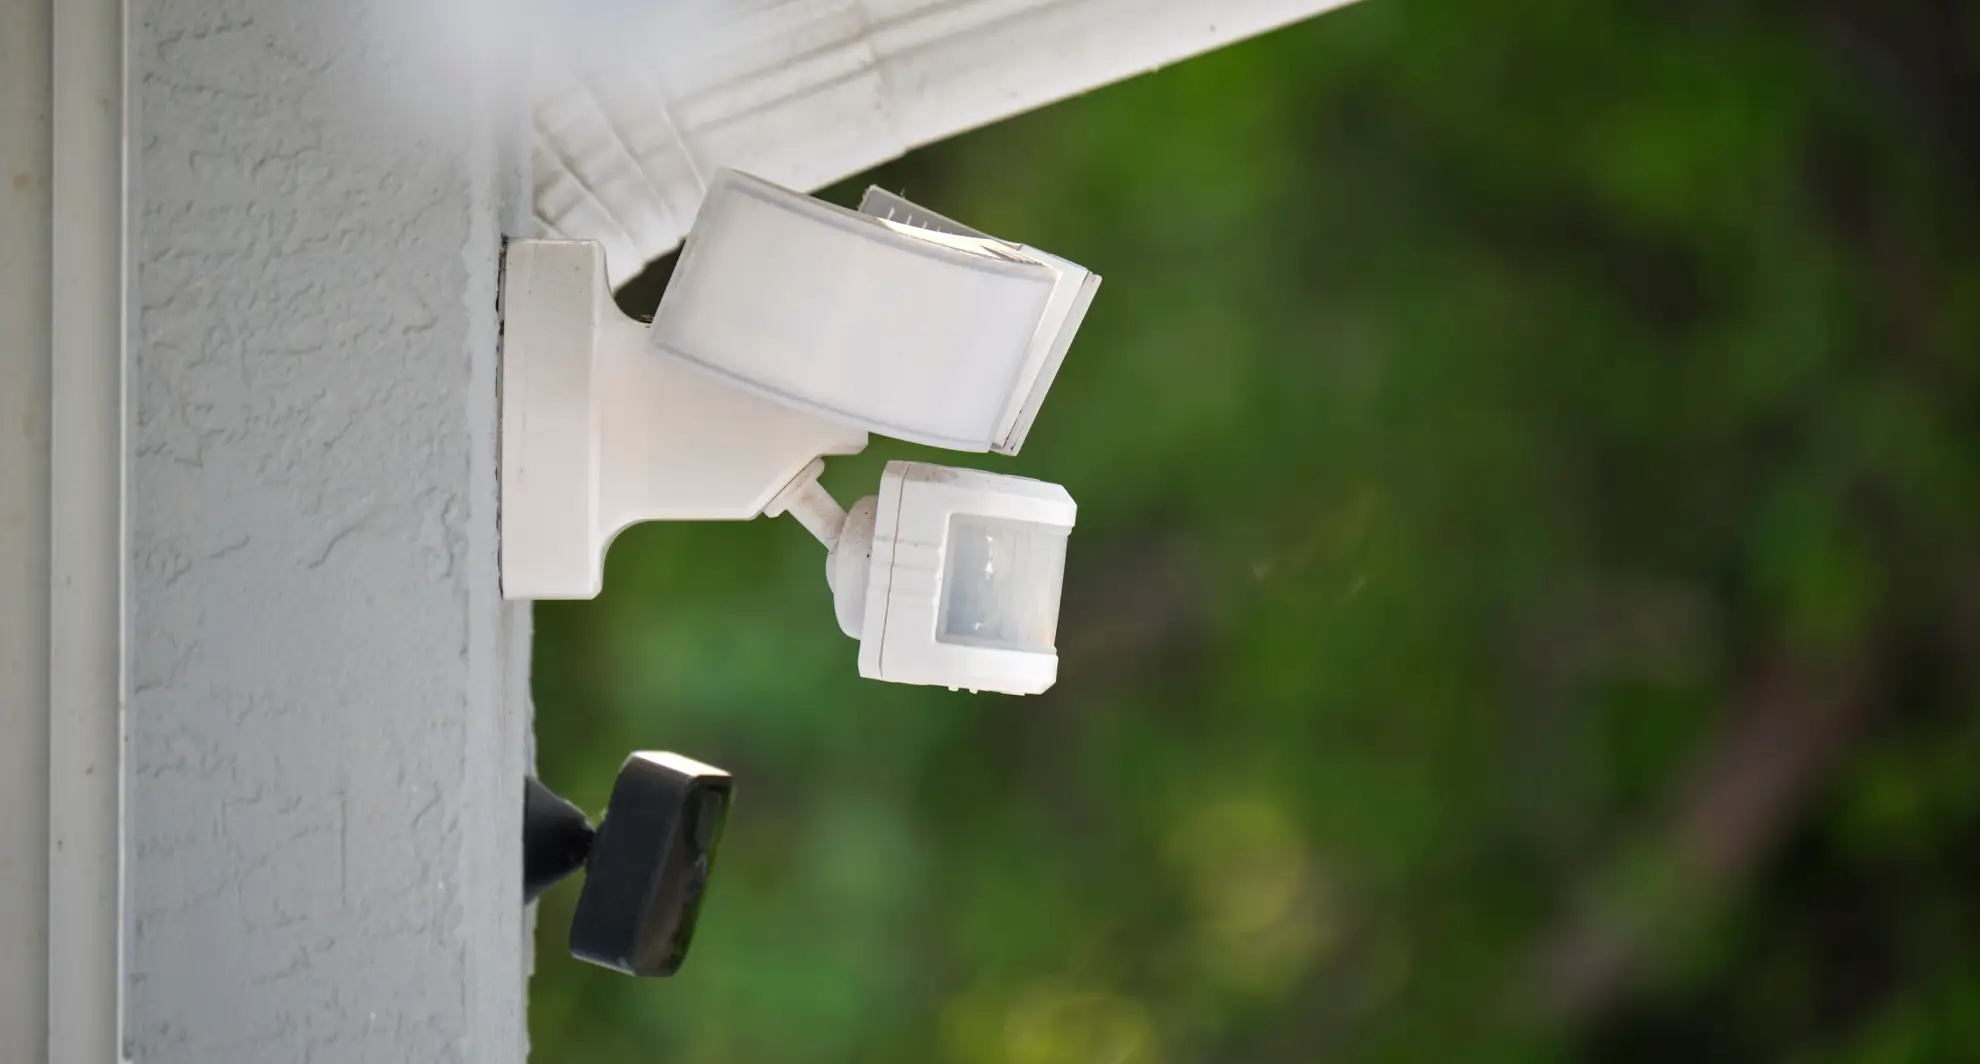
Locating The Adjustment Controls
Most motion sensor lights have small dials or switches hidden behind a cover or near the sensor itself. Look closely around the fixture or check the manual for exact locations. Sometimes, the controls are labeled as sensitivity, duration, or range—knowing this makes the adjustment process quicker.
Setting Sensitivity Levels
Sensitivity controls how easily the sensor detects movement. If your light turns on every time a small animal passes by, lower the sensitivity. On the other hand, if it misses people walking nearby, increase it. Try walking past the sensor after each adjustment to see how it reacts.
Adjusting Light Duration
This setting determines how long the light stays on after detecting motion. Some situations call for a short burst of light, while others need it to stay on longer. You can set it from a few seconds to several minutes—think about how you use the space to choose the best duration.
Modifying Detection Range
The detection range controls how far the sensor can “see” motion. If your sensor covers too wide an area, it might trigger unnecessarily. Narrowing the range helps focus on the most important zones. You can adjust this by changing the angle or using the range dial if available.
Testing And Fine-tuning
Testing and fine-tuning your motion sensor lights is crucial to make sure they work exactly how you want. This process helps you catch any quirks or blind spots before relying on the lights for security or convenience. Spending time on adjustments can save you from constant frustration and false triggers.
Ideal Conditions For Testing
Test your motion sensor lights in the exact environment where they will be used. Do this at night or in low-light conditions to better see the light activation. Avoid testing during bright daylight, as the sensor might not respond correctly.
Walk around the sensor’s detection zone at different speeds and angles. This helps ensure the sensor picks up movement reliably. Also, test from various distances to set the right sensitivity level.
- Choose a clear night or a dark evening for accurate results.
- Make sure no objects block the sensor’s view.
- Check if pets or small animals trigger the light unintentionally.
Common Issues And Fixes
If your light turns on too often, it might be set too sensitive. Try lowering the sensitivity setting to avoid detecting small movements like leaves or pets. On the other hand, if it rarely turns on, increase the sensitivity or adjust the detection range.
Another common problem is the light staying on too long or not long enough. Adjust the timer setting to control how long the light stays lit after motion is detected. Some models allow you to set this from a few seconds to several minutes.
| Issue | Possible Cause | Fix |
|---|---|---|
| Light triggers too frequently | High sensitivity or obstructed sensor | Lower sensitivity and clear obstacles |
| Light doesn’t turn on | Low sensitivity or sensor angle wrong | Increase sensitivity and adjust angle |
| Light stays on too long | Timer setting too high | Reduce timer duration |
| Light turns off too quickly | Timer setting too low | Increase timer duration |
Have you noticed your sensor light reacting to shadows or passing cars? Consider repositioning the sensor away from busy streets or moving tree branches. These small changes often improve performance significantly.
Tips For Optimal Performance
Adjusting motion sensor lights correctly improves their efficiency and lifespan. Proper settings help detect movement accurately and save energy. Follow simple tips to enhance your motion sensor light’s performance.
Placement Recommendations
Place motion sensor lights where movement often occurs. Avoid pointing sensors toward busy roads or trees. These can cause unnecessary triggers. Mount the sensor at a height of 6 to 10 feet for best coverage. Angle the sensor slightly downward to cover the desired area. Keep sensors away from direct sunlight or heat sources. This prevents false alarms and sensor damage.
Avoiding False Triggers
False triggers waste energy and reduce sensor life. Avoid placing sensors near heating vents or air conditioners. These create sudden temperature changes that activate the light. Shield sensors from animals and small moving objects. Use adjustable sensitivity settings to reduce false alarms. Test settings during different times of the day. Fine-tune the detection range to cover only necessary areas.
Credit: mrelectric.com
Frequently Asked Questions
How Do I Adjust Motion Sensor Light Sensitivity?
To adjust sensitivity, locate the sensor dial or switch on the device. Turn it clockwise to increase detection range and counterclockwise to decrease it. Test the settings by walking near the sensor to ensure it triggers appropriately without false alarms.
How Can I Change Motion Sensor Light Duration?
Find the time delay dial on your motion sensor light. Rotate it to set how long the light stays on after activation. Shorten or lengthen the duration to suit your needs, ensuring energy efficiency and convenience.
What Is The Best Angle For Motion Sensor Lights?
Position the sensor at a 45-degree angle facing the area you want to monitor. Avoid pointing it directly at heat sources or busy streets to reduce false triggers. Proper angle ensures accurate detection and optimal performance.
How Do I Reset A Motion Sensor Light?
Turn off the power to the motion sensor light for 30 seconds. Turn it back on to reset the system. This process clears any settings or glitches, allowing you to start fresh with new adjustments.
Conclusion
Adjusting motion sensor lights is easier than it seems. Start by setting the correct sensitivity level. Aim the sensor where movement happens most. Test the light to make sure it works well. Change the timer to fit your needs. Proper adjustments save energy and improve safety.
Small changes can make a big difference. Take your time and adjust step by step. Your home will feel brighter and more secure. Simple tweaks keep your motion sensor lights effective.


