
Moving your Sleep Number bed to a new home can feel like a big task. You want your bed to feel just right, giving you the perfect sleep every night.
But setting it up after a move might seem tricky. Don’t worry—you’re in the right place. You’ll discover simple steps to get your Sleep Number bed ready quickly and easily. By the end, you’ll enjoy the comfort you love without any hassle.
Keep reading to make your new space feel like home, starting with the bed that knows how you sleep best.
Unpack Your Sleep Number Bed
Unpacking your Sleep Number bed after a move can feel like opening a complex puzzle. Taking the time to carefully unpack and organize the parts ensures a smoother assembly and prevents frustration later on. Handling everything with care also protects your investment and helps you get back to restful nights quickly.
Check All Components
Start by laying out all the boxes and packages in a clean, spacious area. Open each box carefully and check the contents against the Sleep Number bed’s parts list. This includes the mattress layers, air chambers, pump, remote control, power cords, and any hardware.
Missing even one small piece can delay your setup, so double-check everything. Have you ever started putting something together only to realize a crucial part is missing? Avoid that hassle by confirming all components upfront.
Organize Parts For Assembly
Once you’ve confirmed all parts are present, group similar items together. Place screws, bolts, and tools in one container so they don’t get lost. Lay out the mattress layers and air chambers in the order you’ll assemble them.
This simple step saves time and reduces stress during assembly. Imagine how much easier it is to grab what you need when everything is organized neatly. Do you see how this preparation can speed up your setup and improve your experience?
Credit: support.sleepnumber.com
Prepare The Bed Frame
Preparing the bed frame is a crucial part of setting up your Sleep Number bed after moving. It lays the foundation for comfort and proper function. Taking the time to carefully prepare the frame ensures stability and a smooth experience when adjusting your bed later.
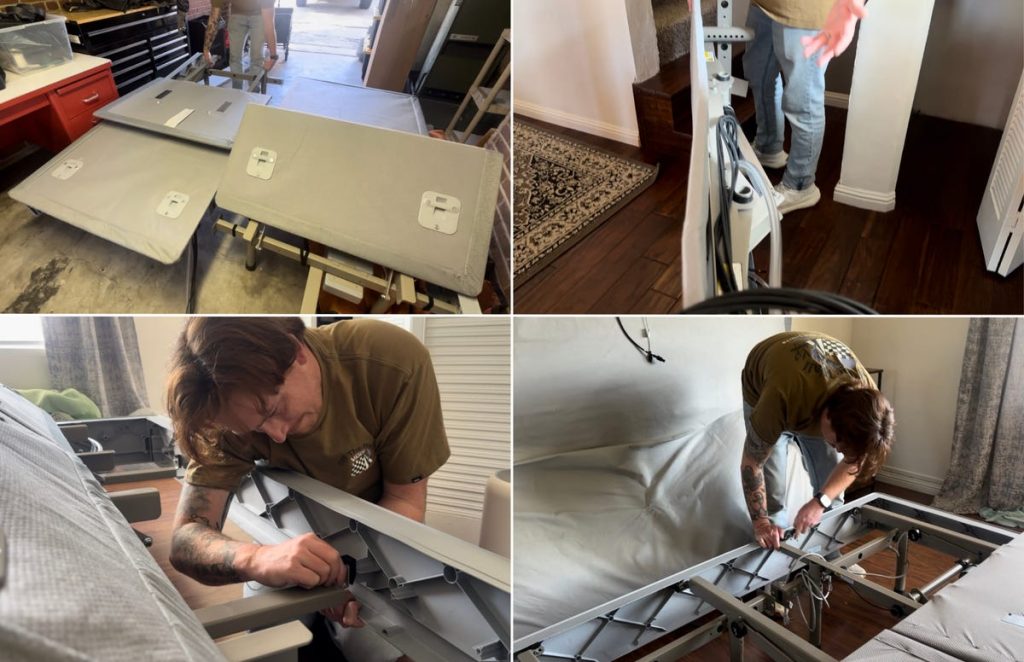
Assemble The Frame Base
Start by unpacking all frame components and laying them out in your bedroom. Make sure you have the side rails, crossbars, and center support ready. Align the rails according to the instructions, paying close attention to orientation—this affects how the mattress and air chambers fit.
Don’t rush this part. I once skipped double-checking the alignment and ended up needing to disassemble and reassemble the frame, which cost me time and patience. Your goal is a solid, level base that will support your Sleep Number mattress evenly.
Secure The Frame Connections
Once the frame base is assembled, tighten all screws, bolts, and connectors firmly. Loose connections can cause squeaking or instability when you adjust your bed’s firmness. Use the correct tools, and avoid overtightening, which can strip screws or damage the frame.
Test the frame’s sturdiness by gently shaking it. If it moves or feels wobbly, revisit each connection point. A stable frame means your Sleep Number bed will work flawlessly and last longer. Have you noticed how a solid base improves your sleep quality? This step directly influences that experience.
Install The Air Chambers
Installing the air chambers correctly is essential for your Sleep Number bed to function properly after a move. These chambers provide the adjustable comfort that makes your bed unique. Paying attention to their placement and connections ensures you get the best sleep experience right from the start.
Position The Air Chambers Correctly
Place each air chamber inside the mattress frame exactly where it was before moving. Usually, the chambers are divided into two halves for each side of the bed. Make sure the chambers sit flat and do not overlap or bunch up, as this can affect air flow and comfort.
Check for labels or markings on the chambers that indicate which side they belong to. If you don’t see any, matching the size and shape to the frame sections will help. A poorly positioned chamber can cause uneven firmness and reduce the bed’s lifespan.
Attach Air Hoses
Once the chambers are in place, connect the air hoses securely to their ports. Each hose should fit snugly without forcing it, to prevent air leaks. You might hear a slight click or feel the hose lock into place, confirming a good connection.
Double-check that the hoses aren’t twisted or kinked. Twists can block air flow and cause the bed to feel uneven. After connecting, gently pull on each hose to ensure it’s firmly attached—loose hoses are a common cause of air loss.
Set Up The Mattress Layers
Setting up the mattress layers correctly is key to enjoying your Sleep Number bed after a move. Each layer plays a specific role in comfort and support, so handling them with care ensures your bed feels just right.
Place The Foam Layers
Start by laying out the foam layers flat on your bed frame. These layers should be placed in the order they were originally arranged to maintain the correct support zones.
Make sure the foam aligns with the edges of the bed frame without any gaps. If you notice any wrinkles or folds, smooth them out gently to avoid discomfort while sleeping.
Have you ever tried to rush this part and ended up with an uneven sleeping surface? Taking your time here makes a big difference.
Fit The Mattress Cover
Next, slide the mattress cover over the foam layers carefully. The cover protects the foam and gives the mattress its finished look.
Check that the zipper runs smoothly and the cover fits snugly without bunching. A tight fit keeps the mattress layers from shifting as you move during the night.
Think about how a loose cover could affect your sleep quality—keeping it secure helps maintain the bed’s comfort and longevity.
Connect The Control System
Connect the control system by plugging in the power cable and linking the control box to the mattress. Ensure all connections are secure before turning on the bed. This allows you to adjust firmness and settings easily.
After a busy day of moving, setting up your Sleep Number bed might feel like a daunting task. But connecting the control system is simpler than you might think. This crucial step ensures you enjoy the personalized comfort that Sleep Number beds promise. Let’s break it down so you can get to relaxing faster.Plug In The Power Supply
First, locate the power cord that comes with your bed. Plug it into the power port on the pump, typically found at the foot of the bed. Ensure the cord is securely connected to a power outlet. Pro tip: Avoid using an extension cord as it may affect performance. Check the indicator light on the pump to confirm it’s powered up. If the light isn’t on, double-check your connections.Sync The Remote Or App
Your Sleep Number bed can be controlled with a remote or an app on your smartphone. To sync the remote, press the “sync” button on the pump and the remote simultaneously. Wait for the confirmation light or message. Prefer using an app? Download the SleepIQ app from your app store. Follow the in-app instructions to connect via Bluetooth. Consider: Is your Wi-Fi stable and strong enough to support the app’s connectivity? A reliable internet connection ensures seamless adjustments. Getting the control system connected means you’re just moments away from a restful sleep. How satisfying is that?Adjust Your Sleep Number Settings
Adjusting your Sleep Number settings after moving is crucial to ensure you get the best rest possible. Your new environment might affect how your bed feels, so fine-tuning the firmness can make a big difference. Taking the time to personalize your settings helps you wake up refreshed and ready for the day.
Find Your Ideal Firmness
Start by testing different firmness levels using the Sleep Number remote or app. Try adjusting the number gradually—small changes can have a big impact on comfort.
Pay attention to how your body feels after a few nights at each setting. Is your back supported? Are pressure points relieved? Your ideal firmness should support your natural sleeping position without causing discomfort.
Consider how your partner prefers the bed too, if you share it. The Sleep Number bed allows for different settings on each side, so both of you can find your perfect level of comfort.
Save Your Preferences
Once you find the right firmness, save your settings to avoid losing them after powering off the bed or moving it again. This makes it easier to maintain consistent comfort night after night.
Use the app or remote’s memory function to store your preferences. It’s a simple step that saves time and hassle, especially if you like to tweak your firmness often.
Think about setting different profiles if you have guests or if your needs change during the year. This way, you can quickly switch between saved firmness levels without starting from scratch each time.
Troubleshooting Common Issues
Setting up your Sleep Number bed after moving can bring some unexpected hiccups. Troubleshooting common issues quickly helps you enjoy your bed’s comfort without delay. Knowing what to check and how to fix these problems saves time and stress.
Air Chamber Leaks
If your mattress isn’t inflating properly or loses firmness overnight, an air chamber leak might be the cause. Check the air hoses and connections for any visible holes or loose fittings. Even a small puncture can cause a slow leak that’s hard to notice at first.
Try pressing gently along the air chambers while listening for a hissing sound. If you find a leak, patch kits designed for air mattresses can be a quick fix. Sometimes, replacing a damaged hose is necessary, and Sleep Number customer service can guide you through that process.
Remote Not Responding
Your remote controls the bed’s firmness, so it’s frustrating if it stops working. Start by checking the batteries—weak or dead batteries are often the culprit. Make sure the remote is within range and pointed directly at the bed’s control unit.
If it still doesn’t respond, try resetting the remote by removing the batteries for a minute, then reinserting them. Occasionally, interference from other wireless devices can disrupt signals, so consider turning off nearby electronics temporarily. Have you noticed if the remote works better at certain spots in the room?
Uneven Mattress Firmness
Feeling uneven firmness on your Sleep Number bed can disturb your sleep quality. This usually happens if the air chambers aren’t balanced correctly. Use the remote to adjust each side individually and find the right balance.
Inspect the air hoses for any blockages or kinks that might restrict air flow. If one side consistently feels softer, it might be time to recalibrate the bed’s settings or check for internal leaks. Have you tried swapping the hoses to see if the issue moves with the hose or stays on one side?

Credit: www.cnet.com
Maintenance Tips After Setup
Setting up your Sleep Number bed is just the beginning. To keep it comfortable and functioning well, regular maintenance is key. Taking care of your bed after setup helps you avoid problems and extends its lifespan.
Regular Cleaning
Dust and dirt can build up on your Sleep Number bed, affecting both comfort and hygiene. Use a vacuum with a soft brush attachment to clean the mattress surface and air chambers gently.
Spot clean spills immediately with a mild detergent and a damp cloth. Avoid soaking the mattress or using harsh chemicals, which can damage materials.
Don’t forget to wash the bedding and mattress cover regularly to keep everything fresh. Clean surroundings can also reduce allergens around your sleeping area.
Checking For Wear And Tear
Inspect your bed’s air chambers and connections every few months. Look for any leaks, cracks, or loose hoses that could impact air pressure and comfort.
If you notice uneven firmness or strange noises, it could be a sign of a problem. Testing the air pressure system helps catch issues early before they become costly repairs.
Pay attention to the bed frame and base as well. Tighten any loose bolts and check for signs of rust or damage that might affect stability.
Credit: support.sleepnumber.com
Frequently Asked Questions
How Do I Reassemble A Sleep Number Bed After Moving?
To reassemble, first connect the base frame securely. Next, attach the air chambers and connect the hoses. Finally, plug in the control unit and calibrate the bed for comfort.
What Tools Are Needed To Set Up A Sleep Number Bed?
You typically need a screwdriver and possibly an Allen wrench. Most Sleep Number beds come with necessary tools for assembly included.
How Do I Calibrate My Sleep Number Bed After Moving?
Use the remote to inflate or deflate air chambers. Adjust until you reach your preferred firmness level. Calibration ensures optimal comfort and support.
Can I Move A Sleep Number Bed Without Deflating It?
It is best to deflate air chambers before moving. This prevents damage and makes handling easier. Always follow manufacturer guidelines for moving.
Conclusion
Setting up your Sleep Number bed after moving does not have to be hard. Follow the steps carefully to get the best comfort. Check every part and connect them right. Adjust the number to find what feels good. Take your time, and don’t rush the process.
Soon, you will enjoy restful nights in your new home. A well-set bed makes all the difference for sleep. Keep the instructions close for any future changes. Sleep well, and wake up refreshed every day.


