
Are you ready to transform your outdoor space into a thriving garden? Setting up a raised garden bed is a simple way to grow healthier plants, reduce weeds, and enjoy gardening even if your soil isn’t perfect.
Imagine having a neat, organized garden that makes planting, watering, and harvesting easier than ever. In this guide, you’ll learn exactly how to build your own raised garden bed step by step, even if you’ve never done it before. Keep reading to discover the secrets to a successful garden that you’ll love spending time in.

Credit: www.sproutboxgarden.com
Choosing The Right Location
Choosing the right location for your raised garden bed is key for healthy plants. The spot must meet several needs to help your garden grow strong. Consider sunlight, soil, drainage, and how easy it is to reach.
Sunlight Requirements
Most vegetables and flowers need at least six hours of sunlight daily. Choose a place that gets direct sun in the morning and afternoon. Avoid shady spots near tall trees or buildings. Too little sun slows plant growth and lowers yields.
Soil And Drainage
Good drainage prevents water from pooling around roots. Avoid low spots where water collects after rain. Raised beds help control soil quality, but the base soil should drain well. Check if the ground feels soggy or stays wet for long. If yes, pick a higher spot or improve drainage with gravel or sand.
Accessibility And Space
Place the bed where you can reach all sides easily. Leave enough space for walking and gardening tools. Think about carrying soil, plants, and water to the bed. A spot near a water source saves time and effort. Also, make sure the area allows your garden to grow without crowding.
Selecting Materials
Selecting the right materials is important for building a strong raised garden bed. The materials affect durability, cost, and how the bed looks. Choose materials that last long and fit your garden style. Some materials work better for certain plants or climates. Knowing your options helps you pick the best fit.
Wood Options
Wood is a popular choice for raised garden beds. It is natural and easy to work with. Cedar and redwood resist rot and bugs well. Pine is cheaper but needs treatment to last. Avoid wood treated with harmful chemicals. Use untreated or naturally resistant wood for safe growing.
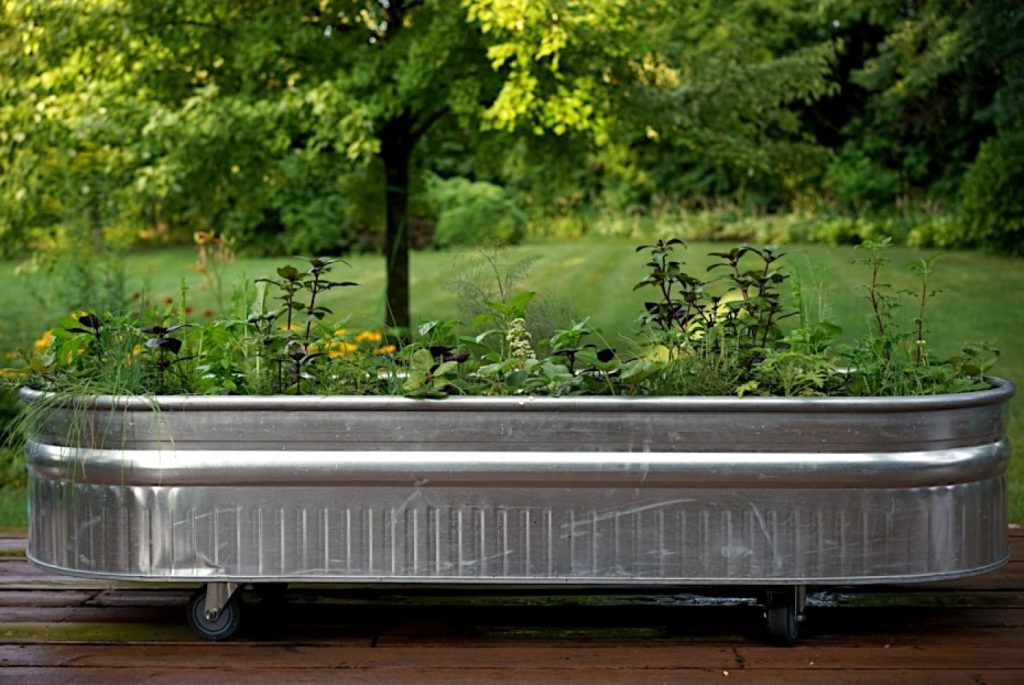
Alternative Materials
Besides wood, other materials work well. Concrete blocks are strong and last long. They can be stacked to any height. Metal, like galvanized steel, offers a modern look. It resists rust and is lightweight. Recycled plastic is durable and easy to clean. Choose materials based on budget and style.
Tools Needed
- Measuring tape for accurate sizing
- Saw to cut wood or other materials
- Drill for screws and bolts
- Screwdriver or impact driver
- Level to ensure even edges
- Hammer for nails
- Gloves to protect your hands
Building The Frame
Choose sturdy wood or metal to build your raised garden bed frame. Measure and cut the pieces carefully for a strong structure. Secure the corners tightly to keep soil contained and support your plants.
Building the frame of your raised garden bed is a crucial step that sets the foundation for a thriving garden. It’s the part where creativity meets practicality, allowing you to tailor the design to your space and style. Let’s dive into the process, ensuring your frame is both sturdy and visually appealing.Measuring And Cutting
First, measure the area where you plan to place your garden bed. Accurate measurements ensure the frame fits perfectly in your desired spot. Use a tape measure to mark out the dimensions on your lumber. Cut the wood according to these measurements. A saw can do the job efficiently, but ensure the cuts are straight for a snug fit. Remember, precision here will prevent future headaches when assembling.Assembling The Structure
Now, it’s time to bring the pieces together. Lay the cut wood on a flat surface, aligning the pieces as per your design. Use corner brackets to join the edges securely. Screws are your best friend here. They provide a firm hold, ensuring the frame remains intact even under pressure. Take a moment to admire your handiwork—it’s satisfying to see the structure take shape.Securing The Frame
With the frame assembled, the next step is to secure it in place. Consider the ground conditions; if it’s uneven, level it out to prevent future shifting. Anchor the frame using stakes or additional support at the corners. This step is crucial for stability, especially if you’re in a windy area. Does it look sturdy? Give it a gentle shake to test its firmness. You’ve now laid the groundwork for a garden that can flourish for seasons to come.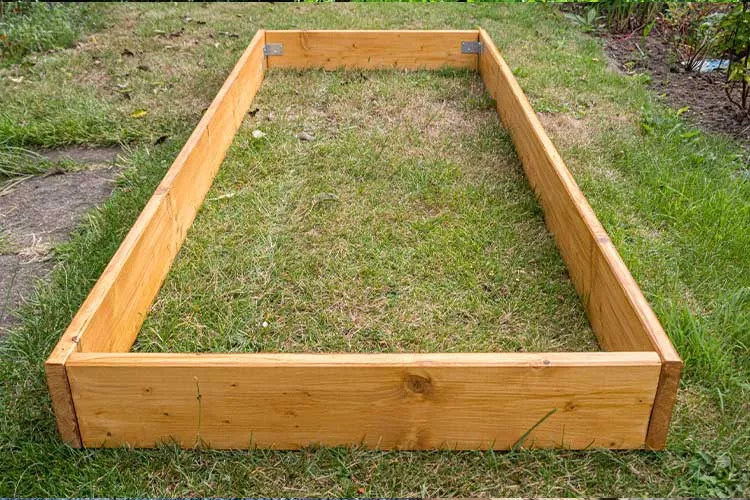
Credit: www.farmfreshchoice.com
Preparing The Bed Base
Preparing the bed base is key to a successful raised garden bed. It sets the stage for healthy plants and strong growth. Start with a clear, flat space to build your bed. Then focus on stopping weeds and improving the soil. These steps ensure your garden thrives.
Clearing The Area
Remove grass, weeds, and rocks from the spot. Use a shovel or rake to clear the soil surface. Make sure the area is level and smooth. This helps the raised bed sit evenly and prevents water pooling.
Lining For Weed Control
Lay a weed barrier fabric on the cleared ground. This stops weeds from growing up into your bed. Use landscape fabric or thick cardboard as a base layer. Secure it with garden staples or small rocks. This layer keeps your plants safe from unwanted weeds.
Improving Soil Quality
Mix compost or organic matter into the soil beneath the bed. This enriches the soil and boosts nutrients. Break up hard soil to improve drainage and root growth. Healthy soil creates a perfect home for your plants to grow strong and healthy.
Filling The Bed
Filling a raised garden bed correctly sets the stage for healthy plant growth. The right soil mix, proper layering, and nutrient addition work together to create an ideal environment. This section explains how to fill your bed efficiently and effectively.
Choosing The Right Soil Mix
Start with a soil mix that drains well and holds moisture. Use equal parts of garden soil, compost, and coarse sand or perlite. This mix balances nutrients and airflow. Avoid heavy clay or pure sand to prevent waterlogging or dryness.
Layering Techniques
Layering helps improve soil structure and drainage. Begin with a base of coarse materials like small branches or straw. This layer prevents soil compaction and improves airflow. Next, add a middle layer of partially decomposed organic matter. Finally, top with your prepared soil mix for planting.
Adding Compost And Fertilizers
Compost enriches soil with essential nutrients and beneficial microbes. Spread a 2-3 inch layer of compost over the top soil. Mix it gently to blend with the soil mix. Use organic fertilizers like bone meal or fish emulsion to boost nutrient levels. Follow package instructions for safe application rates.
Planting Tips
Planting in a raised garden bed is easy and rewarding. Proper planning helps plants grow strong and healthy. Follow these tips to get the best results for your garden.
Selecting Suitable Plants
Choose plants that fit your climate and soil type. Pick vegetables and flowers that grow well in raised beds. Consider sun exposure and plant height. Use plants that need similar water and care.
Spacing And Arrangement
Give each plant enough space to grow. Crowded plants may not get enough air or light. Arrange taller plants at the back or center. Place shorter plants around the edges. Use this simple spacing guide:
| Plant Type | Spacing |
|---|---|
| Leafy Greens | 6-8 inches apart |
| Root Vegetables | 3-4 inches apart |
| Tomatoes and Peppers | 18-24 inches apart |
Watering Practices
Water plants deeply but less often to encourage strong roots. Early morning is the best time to water. Avoid wetting leaves to prevent disease. Use drip irrigation or soaker hoses for even moisture. Check soil moisture regularly to avoid overwatering.
Maintenance And Care
Maintaining your raised garden bed is key to keeping your plants healthy and productive. Regular care helps you spot problems early and enjoy a thriving garden all season long. Let’s look at some essential tasks to keep your raised bed flourishing.
Regular Watering
Raised beds dry out faster than ground-level gardens because they have better drainage. This means you need to check the moisture daily, especially during hot weather. Aim to keep the soil consistently moist but not soggy to avoid root rot.
Using a drip irrigation system or soaker hoses can make watering easier and more efficient. You might find that watering in the early morning helps reduce evaporation and gives plants a good start to the day. Have you noticed how much better your plants look when they get the right amount of water?
Weed Management
Weeds compete with your plants for water and nutrients, so keeping them under control is crucial. Raised beds usually have fewer weeds, but some seeds can still sneak in. Pull weeds as soon as you spot them to prevent them from spreading.
Adding a layer of mulch helps block light and stops new weeds from growing. Organic mulches, like straw or wood chips, also improve soil health as they break down. What’s your biggest challenge with weeds in your garden?
Pest Control
Pests can quickly damage your plants if you don’t act early. Check leaves and stems regularly for signs like holes, discoloration, or sticky residue. Handpicking pests or spraying with a mild soap solution can often solve problems without harsh chemicals.
Encouraging beneficial insects like ladybugs and lacewings helps keep pest populations down naturally. Planting companion plants such as marigolds or basil can also deter unwanted bugs. Have you tried any natural pest control methods that worked well for you?

Credit: migardener.com
Seasonal Adjustments
Adjusting your raised garden bed through the seasons keeps your plants healthy and your soil productive. Each season brings unique challenges and opportunities. Paying close attention to these changes can save you time and effort while boosting your garden’s output.
Preparing For Winter
As temperatures drop, protect your raised bed from harsh winter conditions. Clear out dead plants and remove any debris to prevent pests and diseases from settling in.
Cover your soil with mulch or straw to keep it insulated. You might also consider adding a cold frame or row cover to extend your growing season and protect sensitive plants.
Have you thought about how frost affects your soil structure? Taking steps now can prevent damage and make spring planting easier.
Crop Rotation
Rotating crops in your raised bed helps prevent soil depletion and reduces the risk of disease. Avoid planting the same family of plants in the same spot year after year.
Try grouping plants into categories like legumes, leafy greens, and root vegetables. Moving these groups around each season gives your soil a chance to recover and balance nutrients.
Not sure how to plan your rotation? A simple chart or calendar can help you keep track of what you planted where and when.
Soil Renewal
After each growing season, replenish your soil to maintain its fertility. Add organic matter such as compost, aged manure, or leaf mold to boost nutrient levels.
Check your soil’s pH and texture regularly. Adjust with lime or sulfur if needed to create the best environment for your plants.
How often do you test your soil? Regular checks can reveal hidden deficiencies before they affect your harvest.
Frequently Asked Questions
What Materials Are Best For Raised Garden Beds?
Wood, stone, and metal are popular materials for raised beds. Cedar and redwood resist rot and last longer. Avoid treated wood with harmful chemicals. Choose materials that suit your budget, style, and garden size for durability and aesthetic appeal.
How Deep Should A Raised Garden Bed Be?
A raised garden bed should be at least 12 inches deep. This depth allows roots to grow well and supports most vegetables. For root vegetables, increase depth to 18 inches. Proper depth ensures good drainage and healthy plant growth.
Can You Place Raised Beds Directly On Grass?
Yes, you can place raised beds on grass. However, remove or kill the grass first to prevent weeds. Adding a weed barrier or cardboard under the bed helps stop grass from growing up through the soil.
How Often Should You Water Raised Garden Beds?
Water raised beds when the top inch of soil feels dry. Typically, this means watering 2-3 times per week. Adjust frequency based on weather, soil type, and plant needs to keep soil moist but not waterlogged.
Conclusion
Setting up a raised garden bed brings many benefits to your garden. It helps improve soil quality and drainage. You can control what plants grow best. Raised beds make gardening easier on your back. They also keep pests away better than ground gardens.
Start small, then expand as you gain confidence. Enjoy watching your plants grow strong and healthy. Gardening becomes more fun and rewarding this way. Give your garden a fresh, neat look with raised beds. Try it today and see the difference yourself.


