
Looking to hang a mirror on your wall but don’t want to deal with nails or damaging your paint? You’re not alone.
Finding a simple, damage-free way to hang mirrors can be tricky, especially if you’re renting or want to keep your space looking flawless. Imagine having a perfectly placed mirror that stays secure without leaving holes or marks behind. You’ll discover easy, effective methods to hang your mirror without nails—saving you time, effort, and stress.
Keep reading, and soon your walls will look stylish and spotless.
Choose The Right Mirror
Choosing the right mirror is essential when you want to hang it without nails. The wrong choice can lead to damage or an insecure hold. Pay attention to the mirror’s features to ensure it stays safely on your wall and complements your space.
Consider Mirror Weight And Size
The weight of your mirror plays a big role in deciding how to hang it without nails. Heavy mirrors usually require stronger support, like adhesive hooks rated for high weight or specialized mounting strips.
Size matters too. A large mirror can be tricky to balance and keep stable without traditional fixtures. Ask yourself: Can the hanging method support the mirror’s full weight? If not, look for lighter alternatives or smaller mirrors.
Select Suitable Frame Materials
The frame material affects both the mirror’s weight and how well it sticks to the wall. Lightweight frames made from plastic or aluminum are easier to hang with adhesives or hooks.
Wood or metal frames often add extra weight and may require more secure mounting solutions. Think about the texture of the frame—smooth surfaces hold tape better than rough or porous ones.
Have you checked the frame’s back? Some frames have built-in hangers that might not work without nails. Choosing a frame with a flat back can open up more options for nail-free hanging.

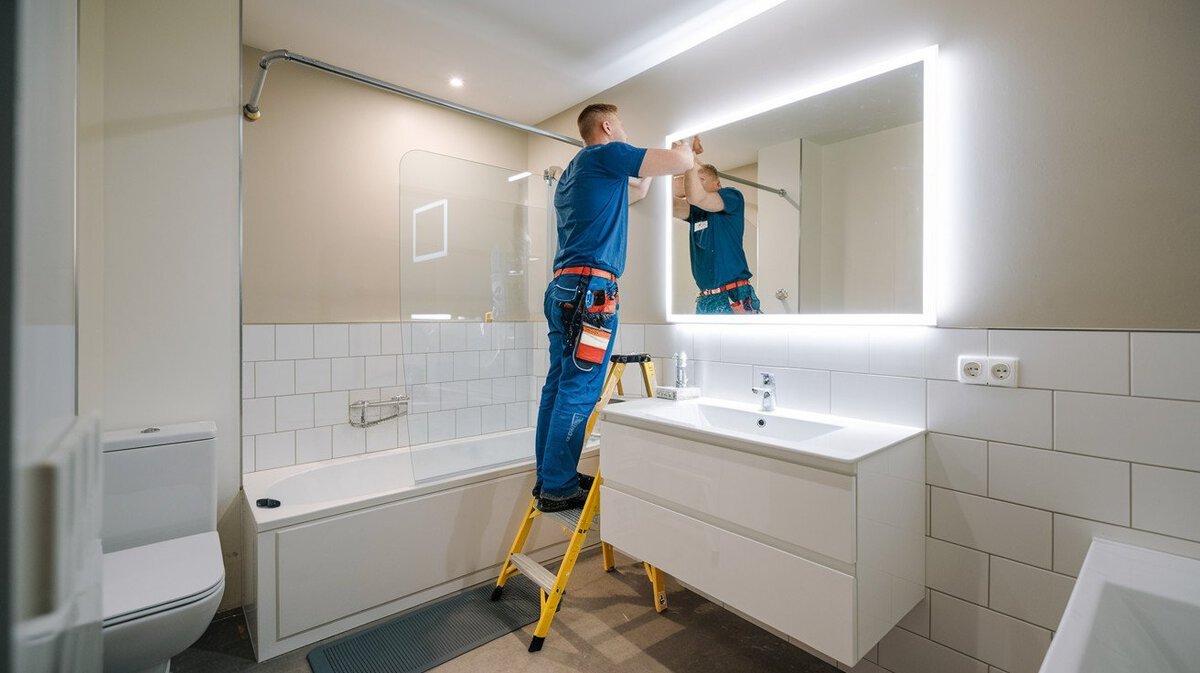
Credit: ledmirrorworld.co.uk
Prepare The Wall Surface
Clean the wall thoroughly to remove dust and grease. Smooth surfaces help adhesive stick better. Ensure the area is dry before attaching the mirror.
Preparing the wall surface is a crucial step in hanging a mirror without nails. A well-prepared wall ensures strong adhesion and keeps the mirror secure. Follow these steps to get your wall ready for a hassle-free hanging experience.Clean And Dry The Wall
Start by cleaning the wall surface. Use a soft cloth to remove dust and dirt. A clean surface improves the adhesive’s grip. For stubborn grime, a mild detergent solution works well. Wipe the wall with a damp cloth and let it dry completely. Moisture can weaken adhesive strength, so ensure the wall is fully dry.Check Wall Material Compatibility
Identify the wall material before proceeding. Different materials require different adhesives. Plaster walls may need a different approach than tile or drywall. Some adhesives work best on smooth surfaces, while others suit textured walls. Read adhesive labels carefully to match them with your wall type. This ensures the mirror stays securely in place.Use Adhesive Strips
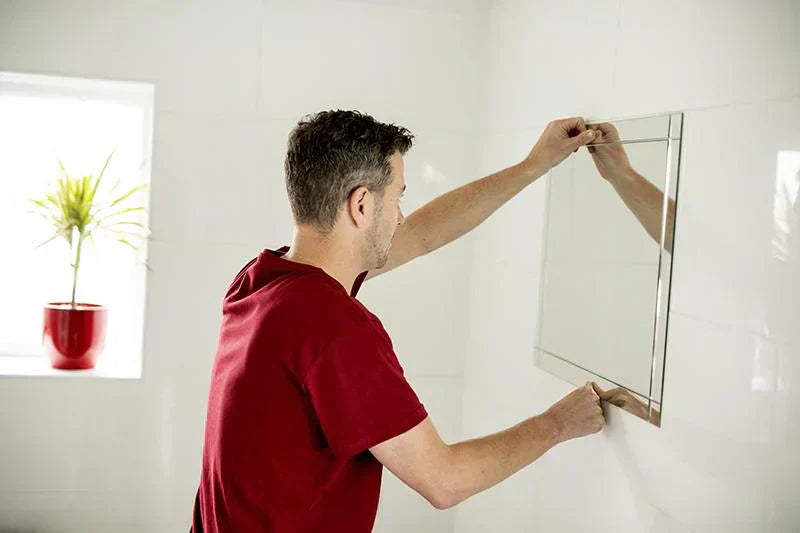
Using adhesive strips to hang a mirror is a simple and clean option. It avoids wall damage caused by nails or screws. This method works well for lightweight to medium-weight mirrors. Adhesive strips provide strong hold and easy removal without marks.
Choose the right adhesive strips for your mirror and follow instructions carefully. Proper application ensures the mirror stays secure and looks great on your wall.
Pick Strong Double-sided Tape
Not all tapes hold the same weight. Use heavy-duty double-sided tape made for hanging items. Look for tapes labeled for mirrors or picture frames. These tapes have strong adhesive that grips the wall and mirror firmly.
Check the weight limit on the package. Choose tape that supports more than your mirror’s weight. This prevents the mirror from falling and causing damage.
Apply Strips Properly
Clean the wall surface with rubbing alcohol before applying tape. Dirt or dust weakens the adhesive. Let the wall dry completely.
Cut the tape into pieces if needed. Stick strips evenly around the mirror’s edges. Press each strip firmly for 30 seconds to secure it.
Remove the tape backing carefully. Press the mirror against the wall with steady pressure. Hold for one minute to ensure strong bonding. Avoid moving the mirror for at least one hour after hanging.
Try Command Hooks Or Hangers
Command hooks or hangers offer a simple way to hang mirrors without damaging walls. These adhesive strips hold strong and peel off cleanly. They work well for renters or anyone avoiding nails. Using the right hooks ensures your mirror stays secure and your wall stays intact.
Choose Hooks For Mirror Weight
Select hooks based on the mirror’s weight. Each Command hook package shows its weight limit. Choose hooks that hold more than your mirror’s weight for safety. Lightweight mirrors need small hooks. Heavy mirrors require large or multiple hooks.
- Check mirror weight on label or manual
- Pick hooks rated above mirror weight
- Use extra hooks for added support
Install Hooks Correctly
Clean the wall surface with rubbing alcohol. Avoid soaps or cleaners that leave residue. Let the surface dry completely before applying hooks. Press hooks firmly for 30 seconds to stick well. Wait one hour before hanging the mirror. Follow package instructions for best results.
Utilize Mirror Mounting Putty
Utilizing mirror mounting putty offers a simple way to hang mirrors without nails. This putty is a soft, sticky substance that holds mirrors firmly on walls. It prevents damage to walls and keeps your space looking neat. This method works best for small to medium-sized mirrors.
Select Appropriate Putty
Choose putty designed specifically for mounting. Look for labels like “mirror mounting putty” or “sticky tack.” Avoid regular glue or tape, as they may not hold well. Check the weight limit on the package to match your mirror size. Use putty that is easy to remove and won’t leave marks.
Apply Putty For Secure Hold
Clean the wall surface and mirror back before applying putty. Tear the putty into small pieces and roll them into balls. Press each ball firmly on the mirror edges or corners. Press the mirror against the wall and hold for a few seconds. Test the mirror’s stability and add more putty if needed. This ensures a strong grip without nails or hooks.
Apply Velcro Strips
Applying Velcro strips to hang a mirror without nails is a smart choice, especially if you want to avoid wall damage. Velcro offers a strong hold while being easy to remove or adjust. Before you start, make sure you choose the right type and apply it properly for a secure and lasting grip.
Select Heavy-duty Velcro
Not all Velcro strips can support the weight of a mirror. Choose heavy-duty Velcro designed for hanging objects on walls. Look for products that specify weight limits on the package—this helps you pick one strong enough for your mirror.
Think about the mirror’s size and weight before buying. For example, a small decorative mirror might need strips rated for 5 pounds, while a larger one could require strips rated for 15 pounds or more.
Do you know the exact weight of your mirror? It’s an important detail that will guide your choice and prevent accidents.
Attach Velcro To Mirror And Wall
Clean both the mirror’s back and the wall surface thoroughly. Dirt or dust reduces the adhesive’s strength. Use rubbing alcohol and a clean cloth for the best results.
Next, cut the Velcro strips to fit the size of your mirror. Attach one side of the Velcro firmly to the mirror’s frame or back, pressing down for at least 30 seconds. Then, attach the matching side to the wall, making sure the spots align perfectly.
Press the mirror against the wall carefully to engage the Velcro. Hold it for a few seconds to ensure a strong bond. How often do you check the hold to avoid unexpected falls? It’s worth a quick daily glance after the first few days.
Explore Alternative Hanging Methods
Finding ways to hang a mirror without nails can be a game-changer, especially if you want to avoid wall damage or live in a rental. There are smart alternatives that keep your walls intact and still let you showcase your mirror beautifully. Let’s look at some practical options that might fit your space and style perfectly.
Use Leaning Or Shelves
Leaning a mirror against the wall is simple and creates a relaxed, modern vibe. You just need a sturdy floor or a wide shelf to support the mirror’s weight safely.
If you have a console table or a thick floating shelf, placing the mirror on it can add depth to your room. It also allows you to easily move or adjust the mirror whenever you want a new look.
Think about the size of your mirror and the surface you plan to use. Will it stay stable if bumped? This method works best with heavier shelves or furniture that won’t tip over easily.
Consider Easel Stands
Easel stands offer a creative and flexible way to display your mirror without touching the wall. They come in various sizes and styles, so you can find one that complements your mirror and room décor.
This option is especially useful if you like to rearrange your space often or want a statement piece that stands out. Plus, it’s easy to set up and move around, saving you from the hassle of wall repairs.
Have you thought about where an easel could fit in your home? It might just be the perfect spot to highlight your mirror while keeping your walls pristine.
Credit: bfymirror.com
Avoid Common Mistakes
Hanging a mirror without nails can save your walls and still create a stunning focal point. However, avoiding common mistakes is key to ensuring your mirror stays secure and looks great. Let’s dive into some pitfalls you might not expect but must watch out for.
Overloading Adhesives
It’s tempting to use heavy-duty adhesives and assume they can hold any mirror weight. But every adhesive has a weight limit. Exceeding this can cause your mirror to fall, damaging both the wall and the mirror itself.
Think about the size and weight of your mirror before choosing an adhesive. Sometimes, people add extra strips thinking it will increase strength, but too much adhesive can actually weaken the bond by not drying properly. Have you checked the packaging for weight recommendations?
Ignoring Wall Surface Type
Your wall’s surface greatly affects how well adhesives stick. Smooth surfaces like painted drywall or tiles usually work well. Rough or porous surfaces, such as brick or textured walls, may prevent adhesives from forming a strong bond.
Consider testing a small adhesive patch on your wall before committing. If it doesn’t hold firmly after 24 hours, you need a different method or surface preparation. Have you thought about how your wall’s texture might influence your hanging strategy?
Remove Mirrors Without Damage
Removing mirrors without causing damage is important for preserving your walls and the mirror itself. Careful techniques help prevent cracks, scratches, or holes. This section guides you through safe removal and cleaning leftover residue from the wall.
Safe Removal Techniques
Start by loosening the mirror gently. Use a putty knife or thin plastic card to slide under the edges. Work slowly to avoid breaking the glass.
Support the mirror with your hands while prying it away from the wall. Avoid pulling too hard in one spot.
For mirrors attached with adhesive strips, warm the area with a hairdryer. Heat softens the glue for easier removal.
Use even pressure to peel the mirror off. Keep the mirror steady to prevent sudden falls.
Cleaning Residue From Wall
After mirror removal, some adhesive or tape residue may remain on the wall. Use a soft cloth dampened with warm, soapy water to wipe the area first.
For stubborn residue, apply a small amount of rubbing alcohol or vinegar. Test on a small spot to ensure no paint damage.
Gently rub the residue until it lifts away. Avoid harsh scrubbing that might harm the wall surface.
Dry the wall with a clean cloth. The wall will be smooth and ready for repainting or new decorations.

Credit: bfymirror.com
Frequently Asked Questions
What Are The Best Alternatives To Nails For Hanging Mirrors?
Use adhesive strips, hooks, or mounting tape designed for walls. These options hold mirrors securely without damaging surfaces. They are easy to install and remove, making them ideal for renters or fragile walls.
How Do Adhesive Strips Hold A Mirror Safely On Walls?
Adhesive strips use strong glue that bonds firmly to both mirror and wall surfaces. They distribute weight evenly and prevent slipping. Always follow weight limits specified by the manufacturer for safe hanging.
Can I Hang A Heavy Mirror Without Nails?
Yes, heavy mirrors can be hung using heavy-duty adhesive hooks or specialized mounting tapes. Ensure the product supports the mirror’s weight and the wall surface is clean and dry before application.
Will Hanging Mirrors Without Nails Damage My Walls?
No, using adhesive hooks or strips usually leaves no marks or holes. They are designed to peel off cleanly without paint or drywall damage, preserving wall integrity.
Conclusion
Hanging a mirror without nails is simple and safe. Use strong adhesive strips or hooks designed for walls. These tools keep your mirror steady and avoid damage. Choose the right method based on your mirror’s size and wall type. Take time to measure and place it carefully.
Enjoy a clean wall with no holes or marks. Your room feels fresh and stylish with the mirror in place. Small changes can make a big difference in your space. Try these ideas and see how easy it is to hang mirrors without nails.


