
Removing a large bathroom mirror from your wall might seem like a tough job. But with the right steps, you can do it safely and without damage.
Whether you’re updating your bathroom or fixing a problem, knowing how to remove that mirror is key. In this guide, you’ll discover simple tips that make the process easier than you think. Keep reading, and you’ll be ready to tackle the task confidently and quickly.

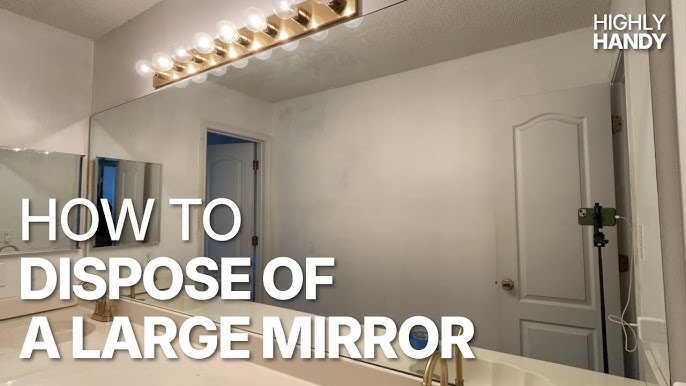
Credit: hanashappyhome.com
Tools Needed
Removing a large bathroom mirror from the wall requires more than just muscle. Having the right tools makes the process smoother and safer. Before you start, gather everything you need to avoid interruptions and reduce the risk of damage or injury.
Essential Safety Gear
Safety should be your top priority when handling a large mirror. Glass can shatter unexpectedly, and sharp edges can cause cuts. Protect yourself with the right gear to stay safe throughout the removal.
- Safety gloves:Choose thick, cut-resistant gloves to protect your hands from sharp edges and broken glass.
- Safety goggles:Shield your eyes from any flying shards or dust.
- Long-sleeved clothing:Wear clothes that cover your arms to prevent scratches.
- Dust mask:If your mirror is glued with adhesive, a mask will help you avoid inhaling dust or particles.
Recommended Tools List
Having the correct tools on hand can save you time and prevent damage to your walls or mirror. These items help you carefully loosen and lift the mirror without risking harm.
- Putty knife or thin pry bar:Use these to gently loosen adhesive or caulk around the mirror edges.
- Utility knife:Perfect for cutting through caulk or silicone sealant holding the mirror in place.
- Suction cups:These provide a secure grip, making it easier to lift and remove the mirror safely.
- Painter’s tape:Apply tape in a grid pattern on the mirror surface to reduce the chance of shattered glass falling if it breaks.
- Step ladder:If your mirror is mounted high, a sturdy ladder will give you the reach and stability you need.
- Helper:While not a tool, having someone to assist you can make the process much safer and more manageable.
Do you have all these items ready? Preparing your tools carefully can turn a daunting task into a straightforward project. Think about how much easier and safer your mirror removal will be with the right gear in hand.

Credit: www.youtube.com
Preparing The Area
Clear the space around the mirror to avoid accidents. Lay down a drop cloth to protect the floor from dust and debris. Gather all necessary tools nearby for easy access.
Before you tackle the task of removing a large bathroom mirror from the wall, it’s crucial to prepare the area properly. Preparing the area not only ensures your safety but also protects your bathroom from potential damage. By taking a few preliminary steps, you can make the removal process smooth and stress-free.Clearing The Surrounding Space
Start by removing all items from the bathroom countertop. This includes toiletries, toothbrush holders, and any decorative pieces. Having a clear space will give you room to maneuver and prevent accidental breakage. Next, take down any wall-mounted items near the mirror. This could be towel racks, shelves, or wall art. Consider how annoying it would be to break something simply because it was in the way!Protecting The Floor And Fixtures
Lay down a thick blanket or drop cloth on the floor directly beneath the mirror. This acts as a cushion in case the mirror slips during removal. You wouldn’t want shards of glass scattered all over your bathroom floor. Cover the sink and any nearby fixtures with towels or another drop cloth. This adds an extra layer of protection and peace of mind. Imagine the hassle of having to repair a chipped sink or scratched faucet! Are you prepared to start the mirror removal now? Taking these steps ensures that your bathroom is ready for a smooth and safe transition.Assessing The Mirror Attachment
Before you start removing a large bathroom mirror, understanding how it’s attached to the wall is crucial. This assessment helps you avoid damage to both the mirror and your wall. It also ensures you choose the right tools and techniques for a smooth removal process.
Checking Mounting Type
Mirrors can be mounted in different ways, such as with clips, brackets, or directly adhered to the wall. Take a close look around the edges for any visible clips or screws holding the mirror in place. If you don’t see any hardware, the mirror is likely glued or taped.
Sometimes, mounting methods can be hidden behind decorative trim or caulk. Gently run your fingers along the edges to detect any raised hardware or seams. This simple check can save you from applying force where it’s not needed.
Identifying Adhesive Or Hardware
If you find no mechanical fasteners, the mirror is probably attached with adhesive. Common adhesives include mirror mastic, double-sided tape, or construction glue. Knowing this helps you prepare the right tools, like a putty knife or heat gun, to soften the glue.
Look for signs of adhesive by checking if the mirror edges are flush against the wall without gaps. Ask yourself: does the mirror feel firmly stuck without any give? If yes, adhesive removal will require patience and gentle prying.
Once you know the attachment method, you’re better equipped to plan your removal strategy. What’s your bathroom mirror mounted with? Identifying this now can prevent costly mistakes later.
Removing The Mirror Safely
Removing a large bathroom mirror needs care and attention. Safety is the priority to avoid injuries and damage. Prepare your workspace with protective gear and tools. Work slowly and carefully to keep the mirror intact and your wall safe.
Loosening The Edges
Start by gently loosening the mirror’s edges. Use a putty knife or a thin, flat tool. Slide it under the frame or seal carefully. Move slowly to avoid cracking the glass. Tap the tool lightly to help break the seal. Keep the mirror supported as you work around it.
Handling Adhesive Removal
Mirrors often stick with strong adhesive. Use adhesive remover or a mixture of warm water and soap. Apply it around the edges with a cloth or sponge. Let it soak to soften the glue. Use a plastic scraper to peel off the softened adhesive. Avoid metal tools that can scratch the mirror or wall.
Detaching From Mounting Brackets
Check if the mirror uses mounting brackets or clips. Use a screwdriver to remove screws or bolts holding the brackets. Support the mirror firmly while loosening the hardware. Carefully pull the mirror away from the wall. Have a helper hold the mirror for extra safety and control.
Dealing With Wall Damage
Removing a large bathroom mirror often leaves behind some wall damage. This can include leftover adhesive or small holes from mounting hardware. Taking care of these issues promptly will ensure your wall looks smooth and ready for its next update.
Removing Residual Adhesive
Adhesive residue can be stubborn and sticky, making your wall look messy. Start by softening the glue with a hairdryer on low heat—this loosens the bond without damaging the paint.
Once warm, gently scrape off the residue using a plastic putty knife. Avoid metal tools as they may gouge the wall surface. If some adhesive remains, apply a small amount of rubbing alcohol or adhesive remover on a cloth and rub the area carefully.
Have you noticed that some adhesives dissolve quicker with certain products? Test a small spot first to avoid discoloration. Patience here pays off—don’t rush or you might damage the wall further.
Repairing Small Wall Holes
Small holes from screws or anchors are common after mirror removal. Filling these is simple but key to a polished finish. Grab some spackling paste or lightweight wall filler from your local hardware store.
Use a putty knife to press the filler into the hole and smooth it flat. Let it dry fully—usually about an hour—and then lightly sand the patch until it blends with the surrounding wall. If the hole is deep, applying the filler in layers can prevent cracking.
Wondering if you should paint over the repair? Yes, a fresh coat of paint will hide the patch perfectly. Matching the paint color exactly can be tricky, so try to use leftover paint or take a chip to the store for color matching.
Disposing Or Storing The Mirror
After carefully removing a large bathroom mirror, deciding what to do next is crucial. You can either dispose of it responsibly or store it safely for later use. Handling this step correctly protects both your space and the environment.
Safe Disposal Methods
Mirrors are not like regular glass; they often have backing materials that require special disposal. Check with your local waste facility if they accept mirrors, as many have specific guidelines.
If your community doesn’t accept mirrors curbside, consider these options:
- Take the mirror to a recycling center that handles glass and mirrors.
- Wrap the mirror in thick blankets or bubble wrap to avoid injury during transport.
- Contact a professional junk removal service that handles fragile items.
Have you thought about donating? Some thrift stores or community centers might accept mirrors in good condition. This not only helps others but also reduces waste.
Storing For Future Use
If you plan to reuse the mirror, storing it properly is key. Choose a dry, temperature-controlled area to prevent moisture damage or warping.
Here are tips for safe storage:
- Place the mirror upright against a wall, never flat on the ground.
- Use padding like foam sheets or blankets on both sides to protect the surface.
- Secure the mirror with straps or lean it in a corner where it won’t be bumped.
Think about labeling the mirror with the removal date and location. This small step saves time and confusion when you’re ready to reinstall or move it again.

Credit: www.youtube.com
Frequently Asked Questions
How Do I Safely Remove A Large Bathroom Mirror?
Start by protecting the floor and walls with a drop cloth. Use gloves and safety glasses. Score the edges with a utility knife to cut through caulk. Gently pry the mirror off using a flat tool. Work slowly to avoid damage or injury.
What Tools Are Needed To Remove A Bathroom Mirror?
You will need a utility knife, putty knife or flat pry bar, gloves, safety glasses, and a drop cloth. These tools help you cut caulk, protect yourself, and carefully detach the mirror without breaking it.
How To Prevent Wall Damage When Removing A Mirror?
Score caulk edges first to loosen the mirror. Use gentle, even pressure when prying. Support the mirror’s weight to avoid sudden falls. Remove adhesive residue with a scraper or solvent. Patch any small holes or dents afterward for a smooth finish.
Can I Reuse The Bathroom Mirror After Removal?
Yes, if the mirror remains intact without cracks or chips. Handle carefully during removal to avoid damage. Clean off old adhesive or caulk before reinstalling. Proper storage also ensures it stays in good condition for reuse.
Conclusion
Removing a large bathroom mirror takes patience and care. Use the right tools and move slowly to avoid damage. Keep safety in mind by wearing gloves and protective eyewear. Take your time to separate the mirror from the wall gently.
This helps prevent cracks and injury. After removal, clean the wall before installing a new mirror. Following these steps makes the process smoother and safer. Now, you can update your bathroom with confidence and ease.


