
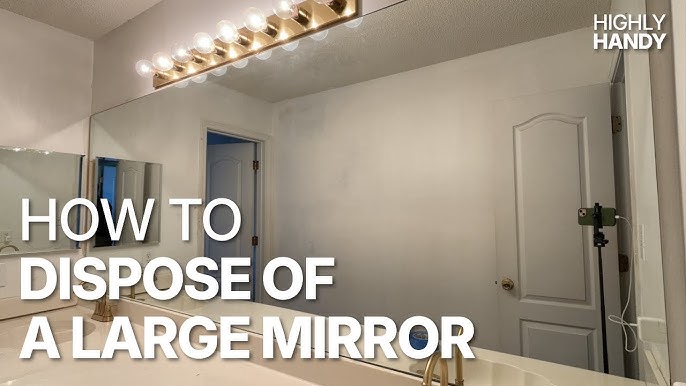
Removing a large mirror from your bathroom wall might seem like a tough job. But with the right steps, you can do it safely and without damage.
Imagine avoiding cracked walls or broken glass while getting the mirror down smoothly. In this guide, you’ll learn exactly how to handle the job with confidence. Keep reading, and you’ll discover simple tricks that make the process easier than you think.
Your bathroom makeover starts here—let’s get that mirror off the wall the right way!

Credit: www.angi.com
Tools And Materials Needed
Removing a large mirror from your bathroom wall requires the right tools and materials to ensure the process is safe and smooth. Having everything ready before you start can save you time and prevent damage to your wall or mirror. Let’s look at what you’ll need to get the job done efficiently.
Basic Safety Gear
Safety should be your top priority. You’ll want to protect your eyes and hands from sharp edges or broken glass. Grab a pair of thick work gloves and safety goggles before you begin.
Cutting Tools
A utility knife is essential to cut through any caulk or adhesive holding the mirror in place. Sharp blades make the job easier and reduce the risk of damage. Keep extra blades nearby—you don’t want to struggle with a dull knife halfway through.
Prying Tools
A putty knife or a thin pry bar helps gently separate the mirror from the wall. These tools slip behind the mirror to loosen it without cracking the glass. Using something too thick or forceful can cause the mirror to break, so choose wisely.
Adhesive Remover
Once the mirror is off, you may find sticky residue on the wall. An adhesive remover or rubbing alcohol will help clean this up. This step is important if you plan to repaint or install a new mirror.
Support Materials
Since large mirrors are heavy, having a helper or a sturdy surface to rest the mirror on is crucial. You might also want towels or blankets to cushion the mirror during removal. This prevents accidental chips or cracks.
Measuring Tools
Before you start prying, use a tape measure or level to note the mirror’s size and position. This helps if you need to replace it or patch up the wall afterward. Knowing the exact dimensions makes your next steps much easier.
Do you have all these tools ready? Missing just one can turn a simple job into a frustrating task. Preparing well means you can focus on the removal without surprises.
Prepare The Work Area
Clear the bathroom space and cover surfaces to catch dust or debris. Gather tools and safety gear nearby for easy access. Ensure good lighting to see edges and fasteners clearly.
Removing a large mirror from your bathroom wall requires preparation. A well-prepared work area ensures safety and efficiency. It reduces the risk of accidents and damage. Follow these steps to get your space ready.Clear The Surrounding Area
Remove items near the mirror. This includes toiletries, decor, and towels. A clear space prevents them from getting damaged. It also gives you more room to work.Protect The Floor
Lay down a drop cloth or old blanket. This protects tiles from scratches or glass shards. It also makes cleanup easier if the mirror breaks.Gather Necessary Tools
Have tools ready before starting. You may need a screwdriver, putty knife, or adhesive remover. Keep these within reach to avoid interruptions.Ensure Adequate Lighting
Good lighting is crucial for safety. Use a portable lamp if needed. Make sure you can clearly see the entire mirror and wall.Wear Safety Gear
Put on gloves and safety goggles. These protect you from sharp edges or broken glass. Safety gear is essential for preventing injuries.Assess Mirror Attachment
Before removing a large mirror from your bathroom wall, it is important to assess how the mirror is attached. This helps avoid damage to the wall or the mirror itself. Different mirrors use different mounting methods, so identifying the attachment type is key.
Start by examining the edges and corners of the mirror carefully. Look for clips, brackets, or visible screws. Some mirrors may be glued directly to the wall, while others might be hung on hooks or mounted with adhesive strips.
Knowing how the mirror is fixed will guide the removal process. It also helps to prepare the right tools and safety gear. Take your time during this step to ensure a smooth and safe mirror removal.
Check For Mirror Clips Or Brackets
Mirror clips and brackets are common for large mirrors. These hold the mirror firmly in place along its edges. Check if you can see small metal or plastic clips gripping the mirror. Some clips can be unscrewed or gently pried off.
Look For Screws Or Hooks
Some mirrors hang on screws or hooks anchored in the wall. Gently wiggle the mirror to see if it moves. If it does, you may find screws behind or on top. Removing these screws will free the mirror safely.
Identify Adhesive Or Glue
Mirrors can also be glued directly to the wall. This method requires more care to avoid damage. Look for any signs of adhesive around the mirror edges. The mirror may feel firmly stuck without any clips or screws visible.
Assess Wall Material
Understanding the wall type helps during removal. Drywall, tile, or plaster walls react differently to mirror removal. Be gentle with tile walls to avoid cracking. Use caution on drywall to prevent tearing or holes.
Protect Yourself And The Surroundings
Removing a large mirror from a bathroom wall needs careful planning. Protecting yourself and the area around you is important. Mirrors can break easily and cause injury. The bathroom often has hard surfaces and water, which makes safety a priority.
Wear the right clothes and gear. Clear the space around the mirror to avoid accidents. Take steps to keep the floor and walls safe from damage. This helps make the process smooth and accident-free.
Wear Protective Gear
- Put on thick gloves to protect your hands from glass cuts.
- Wear safety goggles to shield your eyes from shards or dust.
- Use long sleeves and pants to cover your skin.
- Consider a dust mask if the adhesive creates dust or debris.
Clear The Area
- Remove any items near the mirror that could break or get in the way.
- Move furniture and rugs to create a clear working space.
- Cover the floor with a drop cloth or thick blanket to catch falling pieces.
- Keep pets and children out of the bathroom during the work.
Protect Walls And Fixtures
- Use painter’s tape around the edges of the mirror frame to protect the wall.
- Place soft padding or foam sheets between the mirror and nearby fixtures.
- Check for water pipes or electrical wires behind the mirror before removal.
- Have a helper hold the mirror steady to avoid sudden falls.
Loosen The Mirror Edges
Loosening the edges of a large bathroom mirror is a crucial step before you can safely remove it from the wall. Mirrors often have strong adhesive or mounting clips securing them, so careful attention is needed to prevent damage to both the mirror and your bathroom walls.
Take your time during this process. Rushing can lead to cracks or chips, which are costly and dangerous to handle. Have the right tools ready and prepare a clean workspace to place the mirror once it’s free.
Gather The Right Tools
Before you start, collect tools that will help you loosen the mirror edges effectively. These include:
- A utility knife or razor blade
- A putty knife or thin scraper
- Protective gloves and safety glasses
- Painter’s tape
These tools will help you cut through adhesives and gently pry the mirror without causing damage.
Protect The Mirror Surface
Use painter’s tape to cover the surface of the mirror, especially along the edges. This prevents small glass shards from falling if the mirror chips during removal. It also gives you a firm grip and reduces the risk of scratches.
Cut Through The Adhesive Carefully
Run a utility knife along the mirror’s edges where it meets the wall. Apply steady, gentle pressure to slice through the adhesive or caulk holding the mirror in place.
Don’t try to force the knife too deep; just enough to break the seal. You might need to repeat this several times to loosen all sides completely.
Use A Putty Knife To Pry Gently
Once the adhesive is cut, slide a putty knife or thin scraper under the mirror’s edge. Work slowly and carefully to avoid cracking the glass.
Move the knife back and forth gently to create space between the mirror and wall. You may need to insert the putty knife at different points around the edge to gradually free the mirror.
Ask Yourself: Is The Mirror Ready To Be Lifted?
After loosening the edges, check if the mirror moves slightly when you gently wiggle it. If it feels stuck or tight, don’t force it. Return to cutting and prying to loosen the edges further.
Patience here will save you from accidental damage and make the final removal much smoother.
Remove The Mirror Safely
Removing a large mirror from your bathroom wall requires careful attention to safety. Mirrors can be heavy and fragile, and a single wrong move might lead to injury or damage. Taking the right precautions helps you avoid accidents and keeps your bathroom intact.
Gather The Right Tools And Protective Gear
Before you start, make sure you have the tools you need within reach. This usually includes a putty knife, a utility knife, adhesive remover, and a pry bar. Don’t forget to wear thick gloves and safety goggles to protect your hands and eyes from sharp edges or flying debris.
Have you ever tried pulling off something heavy without gloves? It’s surprisingly easy to get cuts or scrapes. Your safety gear is your first line of defense.
Prepare The Area Around The Mirror
Clear the space around the mirror to avoid tripping hazards. Lay down a drop cloth or old blanket beneath the mirror to catch any falling pieces. This simple step can save you from a messy cleanup or broken tiles.
Also, consider turning off the bathroom’s power if the mirror has integrated lighting. Safety isn’t just about physical protection—electric shocks are a real risk if you overlook this.
Loosen The Edges Carefully
Use a utility knife to score the caulk or paint sealing the mirror edges. This prevents the wall surface from peeling off with the mirror. Then, gently slide a putty knife or pry bar behind the mirror, working slowly to loosen it.
Have patience here. Rushing can crack the mirror or damage your wall. Your slow and steady approach protects both.
Enlist Help To Lift The Mirror
Large mirrors are awkward and heavy to handle alone. Ask a friend or family member to help you lift and carry it away from the wall. This reduces the chance of dropping the mirror or injuring yourself.
Think about how you’ll move the mirror once it’s off the wall. Planning ahead makes the process smoother and safer for everyone involved.
Clean The Wall After Removal
After removing a large mirror from your bathroom wall, the real work begins—cleaning the wall. Leftover adhesive, dirt, and marks can make the wall look worse than before. Cleaning it properly sets the stage for repainting, retiling, or hanging a new mirror without hassle.
Assess The Wall Surface For Residue And Damage
Look closely at the wall to spot any glue, caulk, or paint scratches left behind. Sometimes, adhesive can be stubborn and sticky. Is the drywall or tile surface damaged? Identifying these issues early helps you decide what cleaning tools and repairs you’ll need.
Remove Adhesive Residue Safely
Use a plastic scraper or putty knife to gently lift off thick glue patches. Avoid metal scrapers as they can gouge the wall. For sticky spots, dab a cloth with rubbing alcohol or a commercial adhesive remover and rub carefully.
Test the remover on a small hidden spot first. Does it discolor the paint or tile? If yes, switch to a milder cleaner like warm soapy water.
Clean Dirt And Dust Thoroughly
Mix warm water with a few drops of mild dish soap. Use a soft sponge or microfiber cloth to wipe the entire wall surface. This removes dust and grime that settled during the mirror removal.
Rinse with a clean damp cloth to avoid soap streaks. Let the wall dry completely before moving on.
Repair Any Surface Imperfections
If you notice holes or dents, fill them with spackling paste or wall filler. Smooth the area with a putty knife and allow it to dry fully. Sand the patch gently with fine-grit sandpaper to blend it with the wall.
How smooth do you want your wall before repainting? Taking time here improves the final look dramatically.
Final Touches To Prepare For Next Steps
Once the wall is clean and smooth, wipe it down one last time with a dry cloth. This removes any dust from sanding or cleaning. Now, your wall is ready for primer, paint, or a fresh mirror installation.
Have you considered using a mold-resistant primer in a bathroom? It can extend the life of your paint and prevent moisture damage.
Repair Wall Damage
Removing a large mirror from your bathroom wall can leave behind damage that needs attention. Repairing the wall properly ensures your space looks neat and ready for a fresh update. Ignoring the damage might lead to bigger problems like peeling paint or crumbling drywall.
Assess The Damage Carefully
After the mirror is off, take a close look at the wall. You might find holes from screws or anchors, chipped paint, or even pieces of drywall missing. Sometimes damage is not obvious until you run your hand over the surface.
Ask yourself: How deep are the holes? Is the drywall cracked or just scratched? This will guide what tools and materials you need.
Gather The Right Repair Materials
For small holes and scratches, spackling paste or lightweight joint compound works well. Larger holes might require drywall patches or mesh tape. Don’t forget sandpaper, a putty knife, primer, and matching paint to finish the job.
- Spackling paste for small holes
- Drywall patch kit for larger holes
- Putty knife for smooth application
- Sandpaper (medium and fine grit)
- Primer and paint matching your wall color
Fill And Smooth The Surface
Start by applying spackling paste or joint compound to the damaged areas with a putty knife. Press firmly to fill holes completely and spread evenly beyond the edges. Let it dry fully, which may take several hours depending on the product.
Once dry, sand the surface gently to blend with the surrounding wall. If needed, apply a second layer for a smoother finish. This step makes a big difference in how seamless the repair looks.
Prime And Paint The Repaired Wall
Priming seals the patched spots and prevents paint from soaking unevenly. Use a quality primer and let it dry before painting. Choose paint that matches your bathroom wall exactly to avoid noticeable patches.
Applying thin, even coats of paint helps achieve a consistent look. Don’t rush this part — waiting between coats ensures a professional finish.
Prevent Future Damage
Think about why the mirror caused damage and how to avoid it next time. Using wall anchors suitable for heavy loads can protect your drywall. You might also consider adhesive hooks or brackets designed for bathrooms.
Have you checked if your wall type supports heavy fixtures? Knowing this can save you from repeating repairs and keep your bathroom looking great.
Dispose Or Store The Mirror
After safely removing a large mirror from your bathroom wall, deciding what to do next is important. You can either dispose of the mirror or store it for future use. Each choice needs careful handling to avoid damage or injury. Below are tips to help you manage your mirror properly.
How To Dispose Of A Large Mirror Safely
Mirrors contain glass that can break easily. Wrap the mirror in thick blankets or bubble wrap to protect it. Secure the wrapping with strong tape to prevent it from coming loose. Check local rules about disposing of glass items. Some areas require special handling or drop-off at recycling centers. Avoid throwing large mirrors in regular trash to prevent accidents.
Best Ways To Store A Large Mirror
Storing a mirror needs a dry, safe space. Place the mirror upright against a sturdy wall. Use soft padding like blankets or foam between the mirror and wall. Keep the mirror away from heavy traffic or areas where it can fall. Label the mirror as fragile to alert others. Store mirrors in areas with stable temperature and low humidity to avoid damage.

Credit: www.youtube.com

Credit: www.youtube.com
Frequently Asked Questions
How Do I Safely Remove A Large Bathroom Mirror?
To safely remove a large bathroom mirror, use gloves and protective eyewear. Score around edges with a utility knife. Gently pry the mirror using a putty knife or suction cups. Work slowly to avoid cracking or breaking the glass.
What Tools Are Needed To Remove A Bathroom Mirror?
You need gloves, safety goggles, a utility knife, putty knife, suction cups, and a pry bar. These tools help protect you and carefully detach the mirror without damage.
How To Prevent Wall Damage When Removing A Mirror?
Score around the mirror edges first to cut through caulk or adhesive. Use gentle prying tools and avoid force. If glued, soften adhesive with heat or solvent before removal to minimize wall damage.
Can I Remove A Mirror Glued To Drywall?
Yes, but carefully. Score edges and soften adhesive with a hairdryer or heat gun. Use putty knives to slowly pry the mirror off. Take your time to avoid drywall damage.
Conclusion
Removing a large bathroom mirror takes care and patience. Use the right tools to avoid damage. Work slowly to keep yourself safe and protect the wall. Clean the area after removal for a fresh start. Now, you can update your bathroom with ease and confidence.
Simple steps lead to good results every time.


