

Is your oven ventilation looking greasy or clogged? You might not realize it, but a dirty oven vent can affect how well your kitchen smells and even how safely your oven works.
Cleaning it might sound tricky, but with the right steps, you can do it yourself quickly and easily. In this guide, you’ll discover simple tips to get your oven ventilation sparkling clean, improving your cooking experience and keeping your kitchen fresh.
Ready to breathe new life into your oven? Let’s dive in!
Why Clean Oven Ventilation Matters
Keeping your oven ventilation clean is more important than you might think. It impacts not only how well your oven works but also your kitchen’s air quality and safety. Ignoring it can lead to inefficient cooking and even potential hazards.
Improves Cooking Performance
Clogged vents reduce airflow, making your oven take longer to heat up or cook unevenly. You might notice burnt spots on food or longer cooking times. Cleaning the vents helps your oven maintain consistent temperatures, so your meals come out just right.
Prevents Fire Hazards
Grease and food particles trapped in vents can catch fire. This risk increases if you cook often or use high heat. Regular cleaning removes these flammable buildups, keeping your kitchen safer.
Enhances Air Quality
Dirty oven vents let smoke and odors linger in your kitchen. This can affect your breathing and comfort, especially if someone has allergies or asthma. Cleaning your vents helps keep the air fresh and reduces unpleasant smells.
Extends Oven Lifespan
Blocked ventilation forces your oven’s motor and fans to work harder. This extra strain can cause parts to wear out faster. By cleaning the vents, you reduce stress on the oven and avoid costly repairs or replacements.
Saves Energy And Money
An oven with clean vents uses energy more efficiently. It heats up faster and maintains temperature with less effort. This efficiency lowers your electricity bill and helps you save money over time.
Tools And Materials Needed
Cleaning your oven ventilation requires the right set of tools and materials to make the process safe and effective. Having everything prepared before you start saves time and helps avoid frustration. You might be surprised how a few simple items can make a big difference in how thoroughly you clean.
Basic Cleaning Supplies
- Dish Soap:A mild detergent helps break down grease without damaging surfaces.
- Warm Water:Essential for mixing with soap and rinsing off residue.
- Sponge or Soft Cloth:Use these for wiping away dirt without scratching your oven parts.
- Scrub Brush or Old Toothbrush:Great for reaching small crevices and stubborn grime.
Protective Gear
- Rubber Gloves:Protect your hands from harsh chemicals and grime.
- Safety Goggles:Prevent any accidental splashes from getting into your eyes.
Specialized Tools
- Screwdriver:You may need this to remove vent covers or panels safely.
- Vacuum Cleaner with Brush Attachment:Perfect for sucking up dust and loose debris before wiping.
- Spray Bottle:Handy for applying cleaning solutions evenly.
Cleaning Agents And Solutions
- Baking Soda:A natural abrasive that helps lift stubborn stains.
- White Vinegar:Cuts through grease and deodorizes the ventilation system.
- Commercial Oven Cleaner (Optional):Use only if natural methods don’t do the trick, and always follow instructions carefully.
Do you have these tools ready? Gathering them before starting makes your cleaning session smoother and more efficient. What other household items could double as cleaning tools for your oven ventilation? Sometimes the answer is already in your kitchen cabinet.
Safety Precautions Before Cleaning
Before you start cleaning your oven ventilation, taking safety precautions is essential. Oven vents can accumulate grease, dust, and debris that might cause unexpected issues if disturbed improperly. Protecting yourself and your home ensures a smooth and hazard-free cleaning process.
Turn Off Power And Gas Supply
Always switch off the oven’s power to avoid any electrical shocks. If your oven uses gas, make sure to turn off the gas supply as well. This step reduces the risk of accidents while you clean the ventilation system.
Wear Protective Gear
Put on gloves to protect your hands from sharp edges and cleaning chemicals. Eye protection is equally important, especially if you use sprays or scrapers. I once skipped gloves and ended up with irritated skin, which slowed down my progress significantly.
Ensure Proper Ventilation
Open windows or turn on exhaust fans to keep fresh air flowing. Cleaning products and loosened dust can create fumes or airborne particles that you don’t want to breathe in. Have you noticed how a stuffy kitchen makes cleaning feel much harder?
Use The Right Tools And Cleaners
Select non-abrasive cleaners designed for oven parts to avoid damage. Avoid harsh chemicals that can release toxic fumes or corrode metal components. Using the wrong cleaner once caused me to scratch the vent cover, a mistake easily prevented by checking product labels.
Keep Children And Pets Away
Make sure your workspace is clear of children and pets during cleaning. They can accidentally come into contact with cleaning solutions or sharp objects. It’s better to pause your cleaning if distractions are likely.
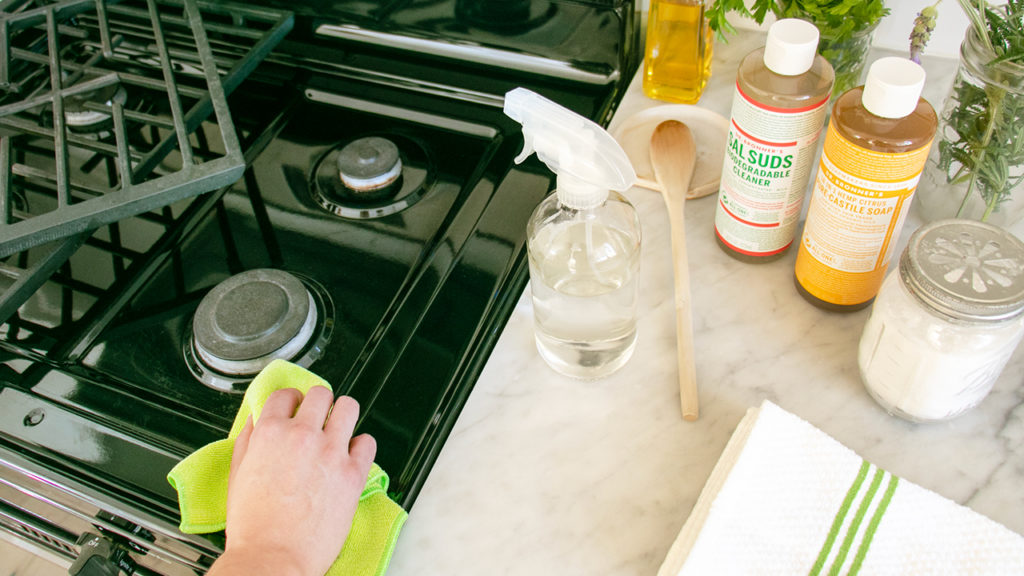
Credit: www.lisabronner.com
Removing The Vent Cover
Removing the vent cover is the first key step in cleaning oven ventilation. The vent cover collects dust, grease, and grime over time. Taking it off carefully allows thorough cleaning. It also prevents damage to the oven parts during the process.
Start by identifying the type of vent cover on your oven. Some covers are held by screws, while others snap into place. Knowing this helps you choose the right tools and avoid breaking the cover.
Gathering Necessary Tools
Prepare tools before removing the vent cover. Common tools include:
- Screwdriver (Phillips or flathead)
- Soft cloth or sponge
- Protective gloves
- Small brush
Having these ready ensures a smooth and safe removal process.
Turning Off The Oven And Cooling
Always switch off the oven and let it cool completely. Hot surfaces can cause burns. Cooling also makes the vent cover easier to handle.
Locating And Unscrewing The Vent Cover
Look for screws around the vent cover edges. Use the correct screwdriver to unscrew them carefully. Keep screws in a safe place to avoid losing them. If the cover snaps in place, gently pry it using your fingers or a flat tool.
Handling The Vent Cover Carefully
Once loose, remove the vent cover slowly. Avoid bending or cracking it. Place it on a clean surface for cleaning. Check for any stuck debris before cleaning.
Cleaning The Vent Cover
Remove the vent cover carefully to avoid damage. Soak it in warm, soapy water and scrub gently to remove grease and dust. Rinse well and dry before placing it back.
Cleaning the oven ventilation is a crucial task that often goes overlooked. The vent cover is a key component, and maintaining its cleanliness can significantly improve your kitchen’s air quality. A clean vent cover not only enhances the efficiency of your oven but also ensures that unpleasant odors are minimized.Remove The Vent Cover
Start by ensuring your oven is off and cool to the touch. Carefully detach the vent cover, which might be secured by screws or clips. It’s crucial to keep track of any small parts to avoid losing them.Soak In Warm Soapy Water
Fill your sink or a large basin with warm water and add a few drops of dish soap. Submerge the vent cover, allowing it to soak for at least 15 to 20 minutes. This helps loosen any grease or grime that’s accumulated.Scrub Away Residue
After soaking, use a soft brush or sponge to scrub the vent cover gently. Pay attention to corners and edges where debris might be stubborn. If needed, a toothbrush can be very effective for hard-to-reach spots.Rinse And Dry Thoroughly
Rinse the vent cover under running water to remove any soap residue. Ensure it’s completely dry before reattaching it to the oven. You can use a clean towel for drying or leave it to air dry on a dish rack.Reattach The Vent Cover
Once dry, reattach the vent cover securely. Double-check that it’s fixed properly to prevent any rattling or falling during oven use. A clean vent cover not only improves air flow but also keeps your cooking area looking neat. Taking the time to clean the vent cover regularly can prevent build-up and improve the overall efficiency of your oven. Have you checked yours lately?Clearing The Vent Ducts
Clearing the vent ducts is essential for a clean and efficient oven ventilation system. Dirt, grease, and dust can build up inside these ducts. This buildup blocks airflow and causes odors or smoke. Regular cleaning improves air quality and prevents fire hazards.
Cleaning vent ducts requires patience and the right tools. It also helps your oven work better and last longer. Below are key steps to clear the vent ducts safely and effectively.
Gathering Necessary Tools And Materials
Prepare these items before starting:
- Screwdriver to remove vent covers
- Vacuum cleaner with hose attachment
- Long brush or flexible cleaning brush
- Warm soapy water and cloths
- Flashlight to see inside ducts
Removing And Cleaning The Vent Covers
Unscrew the vent covers carefully. Soak covers in warm soapy water. Use a brush to remove grease and dirt. Rinse and dry thoroughly before reattaching. Clean covers improve airflow and prevent dust buildup.
Vacuuming Inside The Vent Ducts
Insert the vacuum hose into the duct opening. Move it back and forth to remove loose debris. Use a flashlight to check for remaining dust. Vacuuming clears most dirt and improves ventilation.
Scrubbing The Interior Walls Of The Ducts
Use a long, flexible brush to scrub inside ducts. Rotate the brush to loosen stuck grease and grime. Wipe away loosened dirt with a damp cloth. This step reaches areas vacuuming misses.
Reassembling And Testing The Ventilation
Reattach the cleaned vent covers securely. Turn on the oven vent to check airflow. Ensure no unusual sounds or blockages. A clean vent duct improves kitchen air and oven safety.
Deep Cleaning With Homemade Solutions
Cleaning oven ventilation can be easy using simple homemade solutions like vinegar and baking soda. These ingredients break down grease and grime effectively. Regular cleaning keeps vents clear and improves kitchen air quality.
Cleaning the oven ventilation is essential for a healthy kitchen. A clean vent improves air quality and reduces fire risks. Homemade solutions offer a natural way to deep clean. They are effective and safe for your family.Using Baking Soda And Vinegar
Baking soda and vinegar are powerful cleaning agents. First, remove the vent filter. Mix equal parts of baking soda and water to form a paste. Apply the paste to the filter. Let it sit for 15 minutes. Rinse with warm water. For extra cleaning, spray vinegar on the filter. It will bubble and lift grime. Rinse again and let it dry.Lemon And Salt Scrub
Lemon and salt can scrub away tough stains. Cut a lemon in half. Sprinkle salt on the cut side. Use it to scrub the vent surfaces. The lemon’s acidity breaks down grease. Salt adds abrasion to remove dirt. Rinse the area with water. Wipe it dry with a cloth. This method leaves a fresh scent behind.Steam Cleaning With Water
Steam cleaning uses water to loosen dirt. Boil water in a pot. Place it under the vent for steam exposure. The steam loosens grease and grime. After steaming, wipe the vent with a damp cloth. Ensure all dirt is removed. This method is chemical-free and easy.Using Dish Soap Solution
Dish soap is gentle and effective. Mix dish soap with warm water. Remove the vent filter and soak it in the solution. Let it sit for 20 minutes. Use a brush to scrub stubborn spots. Rinse thoroughly with water. Allow the filter to dry completely before reinstalling.Preventive Tips For Clean Ventilation
Regular maintenance keeps the vent clean longer. Wipe the vent weekly with a damp cloth. Avoid letting grease build up. Check and clean the filter every month. This prevents clogs and ensures efficient air flow. Keep your kitchen fresh and safe with these simple tips.
Credit: www.familyhandyman.com
Reassembling The Vent
Reassembling the vent after cleaning is a crucial step that ensures your oven’s ventilation works efficiently and safely. Taking your time here can prevent future issues like smoke buildup or poor airflow. It’s not just about putting parts back together; it’s about making sure everything fits perfectly and functions as it should.
Check Each Component For Damage
Before you start putting the vent back together, inspect each piece carefully. Look for cracks, warping, or worn-out seals that might have gone unnoticed before. Damaged parts can affect the vent’s performance and might need replacing to avoid future problems.
Align The Vent Cover Correctly
Make sure the vent cover lines up exactly with the mounting points on your oven. Misalignment can cause gaps where smoke and heat escape, reducing efficiency. I once reassembled a vent incorrectly, and the kitchen filled with smoke every time I used the oven—double-checking alignment saved me from that hassle.
Secure Screws And Fasteners Firmly
Use a screwdriver to tighten all screws and fasteners securely, but don’t overtighten. Loose screws can cause rattling noises, while overtightening might strip the threads or crack the vent parts. If some screws are missing or stripped, replace them to keep everything stable.
Test The Ventilation System
Once assembled, turn on your oven and observe the vent’s airflow. Is the air moving smoothly without unusual sounds or leaks? Testing immediately helps you spot and fix issues before they become bigger problems.
Maintaining Oven Ventilation
Maintaining oven ventilation helps keep your kitchen safe and your oven working well. Clean vents allow heat and smoke to escape. This prevents buildup of grease and dirt that can cause problems.
Regular care of oven ventilation extends its life. It also stops bad smells and smoke inside your kitchen. Simple steps can make a big difference.
Check Vent Filters Regularly
Look at your oven’s vent filters every few weeks. Clean filters stop dust and grease from blocking airflow. Remove filters gently and wash them with warm, soapy water. Let them dry completely before putting them back.
Clear Vent Openings
Make sure vent openings are free from dust and debris. Use a soft brush or cloth to wipe around the vents. Avoid pushing dirt inside the vent system. This keeps air flowing smoothly.
Use A Vacuum For Deep Cleaning
Vacuum vents to remove hidden dust and crumbs. Use a vacuum with a brush attachment. This method reaches areas a cloth cannot. Clean vents reduce fire risk and improve air quality.
Inspect Vent Fans
Check the vent fan for dirt buildup and damage. Turn off the oven and unplug it first. Use a soft cloth to clean fan blades carefully. A clean fan works more quietly and efficiently.
Schedule Professional Maintenance
Have a professional check your oven vents once a year. Experts find and fix issues that are hard to see. This service keeps your ventilation in top shape. It also ensures safety in your kitchen.

Credit: www.reddit.com
Frequently Asked Questions
How Often Should I Clean My Oven Ventilation?
You should clean oven ventilation every 3 to 6 months. Regular cleaning prevents grease buildup and improves airflow. Frequent use may require more frequent cleaning. This helps maintain oven efficiency and ensures safety by reducing fire risks.
What Tools Are Needed To Clean Oven Ventilation?
Use a screwdriver, brush, vacuum, and mild detergent. A soft cloth helps wipe surfaces after cleaning. Avoid harsh chemicals to protect ventilation parts. Proper tools make cleaning easier and more effective.
Can I Clean Oven Ventilation Myself Safely?
Yes, you can clean oven ventilation safely at home. Always unplug the oven and wait for it to cool. Follow manufacturer instructions and avoid damaging delicate parts. If unsure, consult a professional for help.
Why Is Cleaning Oven Ventilation Important?
Cleaning oven ventilation removes grease and debris that block airflow. This improves cooking efficiency and reduces fire hazards. It also prevents unpleasant odors and extends oven lifespan. Regular maintenance keeps your kitchen safer and cleaner.
Conclusion
Cleaning your oven ventilation keeps air fresh and kitchen safe. Regular care stops grease buildup and bad smells. Simple steps save time and avoid damage. You can use basic tools and safe cleaners. A clean vent helps your oven work better.
Small efforts bring big benefits for your home. Make cleaning a habit for long-lasting results. Stay safe and enjoy a cleaner kitchen every day.


