
Are you looking to add a personal touch to your living room without spending a fortune? Creating your own wall art can transform your space and show off your unique style.
Imagine walking into your living room and seeing a piece that you made yourself—something that truly feels like home. You’ll discover simple and creative ideas to make stunning wall art that fits your taste and budget. Ready to turn blank walls into eye-catching masterpieces?
Let’s get started!
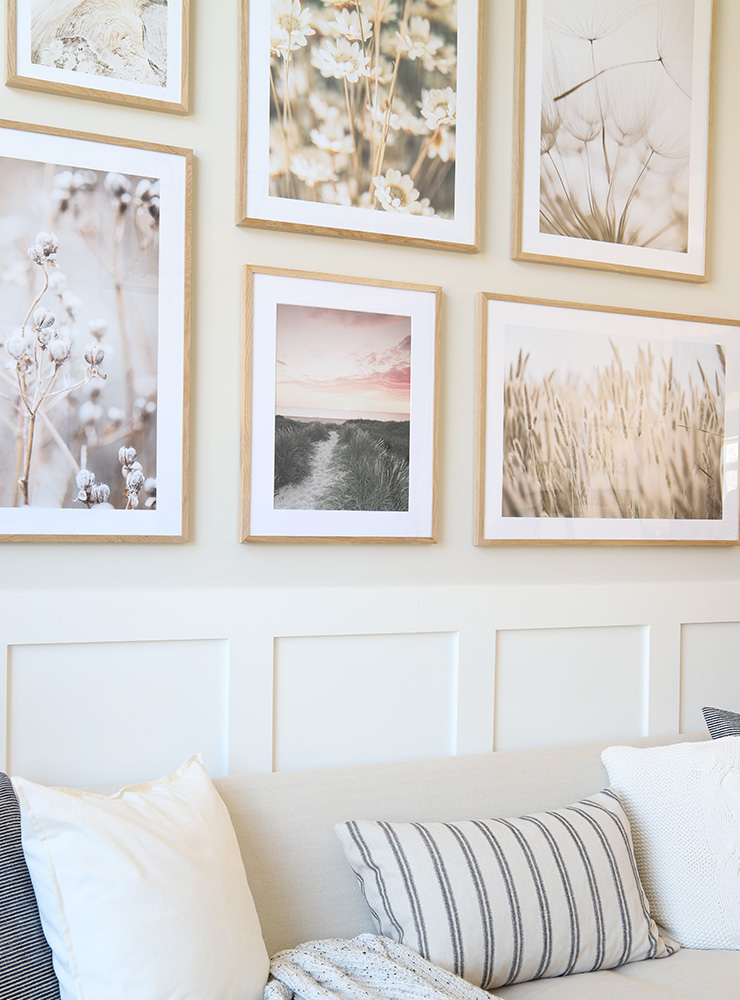
Credit: cottagestyleblog.com
Choosing The Right Wall Art Style
Choosing the right wall art style shapes your living room’s mood and personality. It reflects your taste and creates a welcoming space. Knowing different styles helps pick art that fits your room’s vibe and your lifestyle.
Minimalist Designs
Minimalist wall art uses simple shapes and few colors. It brings calm and order to busy rooms. Clean lines and open spaces make the room feel larger. Perfect for modern homes and small spaces.
Abstract Patterns
Abstract art plays with shapes and colors without clear forms. It sparks imagination and adds energy to walls. Bright or soft palettes can match any color scheme. Great for those who enjoy bold and creative decor.
Nature-inspired Themes
Nature art brings the outdoors inside with plants, animals, and landscapes. It creates a peaceful and fresh atmosphere. Green and earth tones promote relaxation. Ideal for cozy and warm living rooms.
Vintage And Retro Looks
Vintage and retro art adds charm with old posters, signs, and illustrations. It tells a story and adds character to plain walls. Warm colors and nostalgic themes create a welcoming feel. Suitable for lovers of classic and timeless style.
Materials For Diy Wall Art
Choosing the right materials is the first step to creating DIY wall art that truly stands out in your living room. The materials you pick will shape the look, feel, and durability of your artwork. Think about what fits your style, budget, and the vibe you want to create.
Canvas And Paint
Canvas and paint offer endless possibilities for personal expression. You can start with a blank canvas and create anything from abstract designs to detailed landscapes. Acrylics dry quickly, making them perfect if you want to finish your piece in a few sessions.
Have you tried mixing different paint types or adding texture mediums? This can give your wall art a unique, tactile dimension that invites touch and admiration.
Wood And Pallets
Wood and pallets bring a rustic charm to any living room. Pallets are often free or inexpensive, and with a little sanding and staining, they can become a beautiful backdrop for quotes, patterns, or even mounted objects.
Think about combining wood with other materials like metal or string lights to add depth and interest. Could this natural element warm up your space in a way paint alone can’t?
Paper Crafts
Paper crafts allow you to experiment with colors and shapes without heavy tools or mess. Origami, paper quilling, or layered cutouts can create intricate patterns that catch the eye.
Consider using recycled paper or old maps to add a personal or eco-friendly touch. What stories could your chosen papers tell when arranged on your wall?
Textiles And Fabrics
Textiles and fabrics add softness and movement to your wall art. Think beyond traditional tapestries—try weaving, embroidery hoops, or fabric collages to bring texture and color.
Using scraps or old clothing not only saves money but also creates a piece filled with memories. How might your fabric choices reflect your personality or the atmosphere you want in your living room?
Techniques To Try At Home
Creating your own wall art brings personality to your living room. Simple techniques make unique designs easy to achieve. These projects need few materials and little experience. They let creativity flow freely at home. Try these fun and rewarding DIY wall art techniques.
Stencil Painting
Stencil painting uses cut-out shapes to create patterns. Place the stencil on the wall and apply paint over it. This technique produces sharp, clean designs quickly. Choose geometric shapes or nature-inspired patterns. It works well with contrasting colors for bold effects.
Collage Making
Collage art combines different materials on a canvas or board. Use magazine clippings, fabric scraps, photos, or paper pieces. Arrange and glue them into a creative design. Collages allow personal stories or themes to show through. Layering textures and colors adds depth and interest.
String Art
String art forms images by wrapping thread around nails. Hammer nails into a wooden board in a chosen shape. Tie colorful strings between the nails in various patterns. The result is a striking and tactile piece of art. It’s simple but looks intricate and modern.
Decoupage
Decoupage decorates surfaces by gluing paper cutouts with sealing glue. Use decorative napkins, wrapping paper, or printed pictures. Smooth the paper onto a wooden or canvas base. Seal with varnish to protect the design and add shine. This technique gives a polished and artistic look.

Credit: www.youtube.com
Creative Wall Art Projects
Transforming your living room walls with creative DIY projects is a rewarding venture. Not only does it infuse your space with personality, but it also allows you to showcase your artistic flair. With a little imagination and effort, you can create stunning wall art that reflects your style and enhances your home’s ambiance.
Geometric Wall Hangings
Geometric designs are a fantastic way to add modern flair to your living room. You can create wall hangings using materials like wood, metal, or even cardboard. Experiment with shapes and colors to construct a piece that suits your decor.
Why not try using bold colors and contrasting shapes? This will add depth and interest to your living space. If you’re feeling adventurous, consider a multi-dimensional piece that juts out from the wall, adding texture and intrigue.
Personal Photo Displays
Personal photo displays are a heartfelt way to decorate your walls. Arrange your favorite photos in a creative layout, perhaps in a grid or a heart shape. You can use frames, washi tape, or even clip them onto string lights for a cozy touch.
Consider mixing black and white photos with colored ones for a dynamic effect. This not only personalizes your space but also tells a story of cherished moments. Does your current photo display evoke the emotions you want to feel in your home?
3d Wall Sculptures
3D wall sculptures can be a striking addition to any living room. They add depth and intrigue, drawing the eye and sparking conversation. Materials like clay, metal, or recycled items can be transformed into captivating sculptures.
Think about creating a theme that resonates with you, such as nature or abstract forms. A well-placed sculpture can serve as a focal point, enhancing the room’s overall aesthetic. Are you ready to let your creativity take shape on your walls?
Hand-painted Murals
Hand-painted murals offer a personal touch that is hard to replicate. Whether you opt for a simple design or an elaborate scene, murals can transform the atmosphere of your living room. Choose a theme that aligns with your passions or interests.
Start with a sketch and gradually bring your vision to life with paint. Use a mix of colors to add vibrancy and mood to the mural. How would it feel to have a piece of art that you’ve created become the centerpiece of your living room?
Color Schemes And Placement Tips
Choosing the right colors and placing your DIY wall art thoughtfully can transform your living room. Colors influence mood and harmony. Placement controls focus and flow. Both elements work together to create a space that feels inviting and stylish.
Matching Wall Art To Room Colors
Select colors from your existing room palette for your wall art. Pick shades that complement walls, furniture, or decor. Use either matching tones for calm or contrasting colors for energy. Keep the balance by avoiding too many bright colors in one spot.
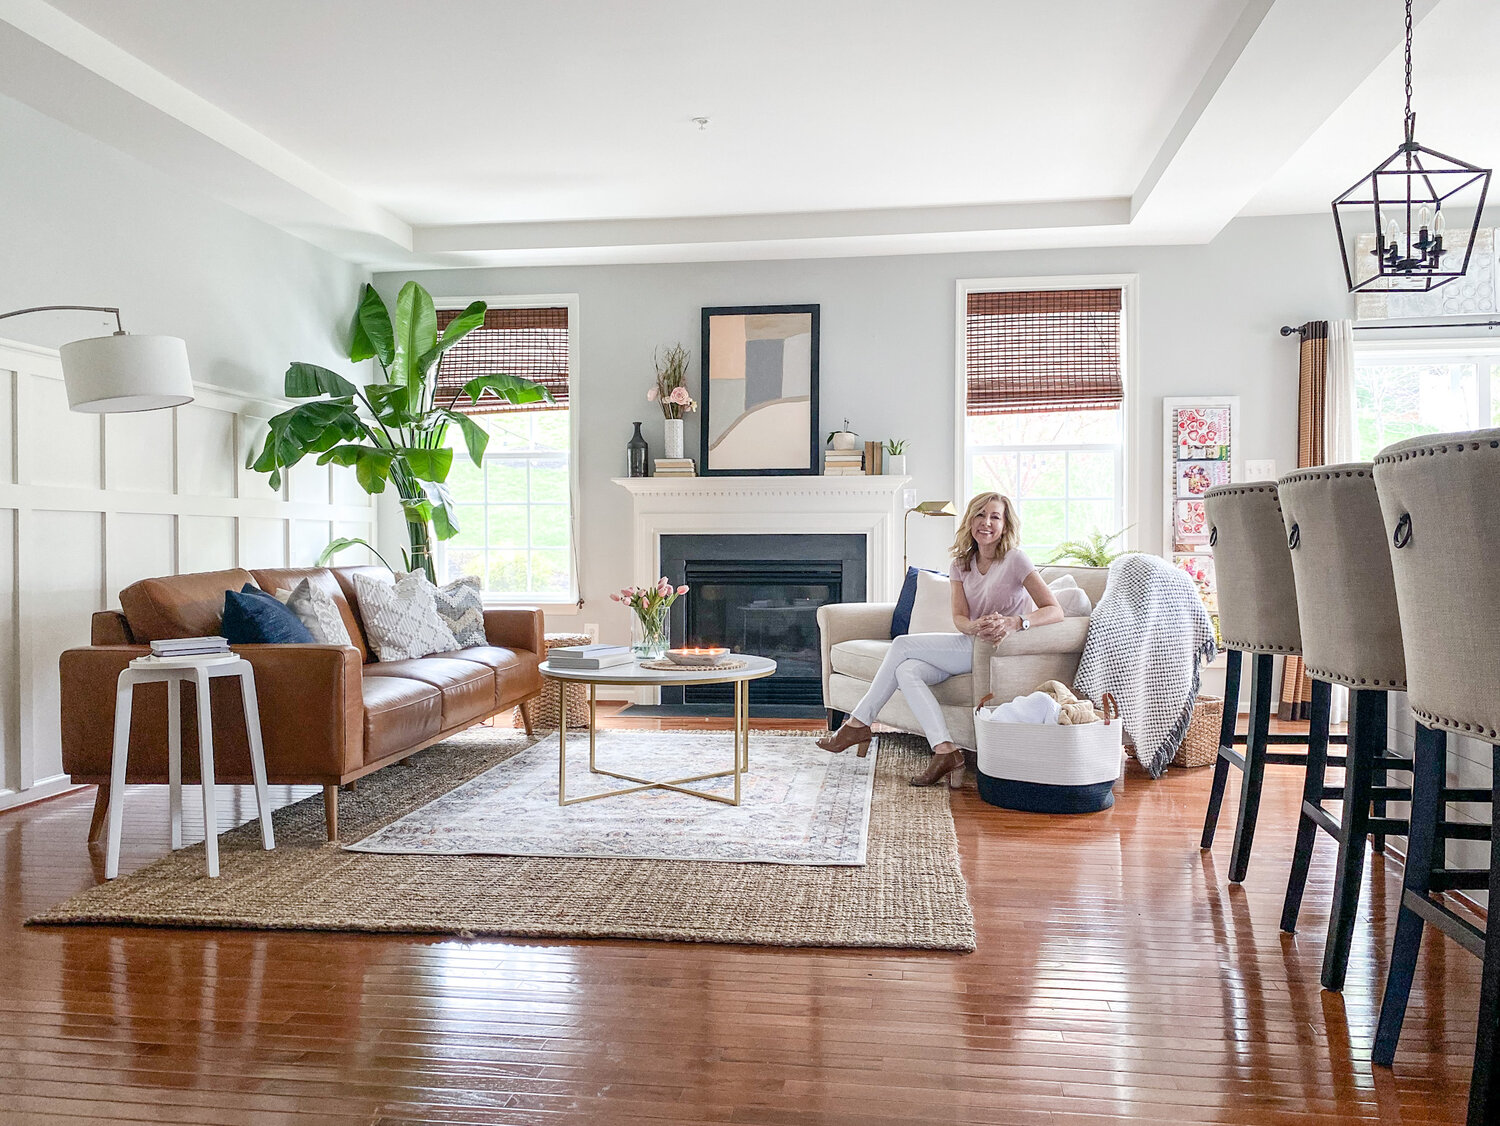
Creating Focal Points
Choose one main piece to draw attention in the room. Place it at eye level for easy viewing. Center it above a sofa or fireplace for natural focus. Surround the main piece with smaller art or empty space to highlight it more.
Balancing Multiple Pieces
Arrange several artworks in a way that feels balanced and neat. Use grids or straight lines for a clean look. Create a gallery wall with varied sizes but keep color themes consistent. Leave equal space between pieces to avoid clutter.
Using Lighting To Enhance Art
Use soft, warm lights to brighten your wall art. Position lamps or spotlights to reduce glare and shadows. Natural light works well but avoid direct sunlight that fades colors. Lighting makes colors pop and shapes clear, improving overall impact.

Credit: postermansion.com
Budget-friendly Ideas
Creating your own wall art doesn’t have to drain your wallet. With a bit of creativity, you can transform everyday items and inexpensive materials into stunning pieces that brighten your living room. Let’s dive into budget-friendly ideas that will inspire your next DIY project.
Upcycling Old Materials
Look around your home for items that no longer serve their original purpose. Old wooden pallets, fabric scraps, and even broken picture frames can be given a new life as wall art. Painting or arranging these materials thoughtfully can add texture and character to your space without costing a dime.
I once turned leftover fabric pieces into a colorful patchwork wall hanging. It was a fun way to use scraps and created a unique focal point in my living room. What unused materials do you have that could tell a new story on your walls?
Using Affordable Supplies
Basic supplies like canvas, paint, and stencils don’t have to be expensive. Many craft stores offer budget-friendly options or sales that make these materials accessible. Simple techniques like geometric painting or stencil patterns can produce eye-catching results with minimal investment.
Consider buying paint samples or using leftover paint from other projects. Small bottles are perfect for experimenting with colors and designs without overspending. How could you mix and match colors to reflect your personal style cheaply?
Repurposing Household Items
Household items such as old books, magazines, or even kitchen utensils can become creative art pieces. Arrange pages from a favorite book into a framed collage or create a wall sculpture from mismatched spoons and forks. These unexpected materials add a quirky and personal touch to your decor.
Try to think beyond their usual function—what if your coffee mugs or keys became part of your wall design? What items in your home could surprise you with their artistic potential?
Thrift Store Finds
Thrift stores and flea markets are treasure troves for unique and affordable art supplies. Frames, canvases, and decorative elements often come at a fraction of the original price. You can repaint or reimagine these pieces to fit your living room’s vibe perfectly.
Last month, I found a set of vintage frames for just a few dollars and turned them into a gallery wall featuring my own photographs. Could a thrift store trip be the start of your next wall art adventure?
Maintaining Your Diy Wall Art
Keeping your DIY wall art looking fresh and vibrant enhances the entire vibe of your living room. Maintenance doesn’t have to be a chore—it’s about caring for your creation so it stays a unique part of your space for years. Simple habits and small touches can make a big difference in preserving your artwork’s beauty.
Cleaning Techniques
Dust can dull your artwork quickly, so regular cleaning is key. Use a soft, dry cloth or a feather duster to gently remove dust without scratching the surface.
For canvas or fabric art, a vacuum with a brush attachment on low suction works wonders. Avoid harsh chemicals; mild soap diluted in water is enough for stubborn spots—test it on a hidden area first.
Have you ever noticed how a quick dusting can instantly brighten your wall art? Try incorporating this into your weekly routine to keep colors popping.
Protective Finishes
Adding a protective finish can shield your art from moisture, dirt, and fading. Clear acrylic sprays or varnishes are popular for painted pieces, offering a tough layer without altering colors.
Choose a finish that suits your material—matte finishes reduce glare, while glossy ones enhance color vibrancy. Always apply thin, even coats and allow proper drying time between layers.
Think about your living room’s lighting and humidity before picking a finish; it can make all the difference in long-term preservation.
Repairing Common Issues
Small cracks, chips, or peeling can happen over time, especially with mixed materials or textured art. Keep some basic repair supplies handy, like glue for loose parts or touch-up paint matching your colors.
If your wall art uses paper or fabric, clear tape or fabric glue can fix minor tears without ruining the look. Don’t ignore early signs of damage—a quick fix now prevents bigger problems later.
Have you ever hesitated to fix something yourself? Tackling repairs can be easier than you think and helps you stay connected with your artwork.
Seasonal Updates
Changing your wall art seasonally keeps your living room feeling fresh and in tune with the time of year. Swap out colors, textures, or themes to match holidays, weather, or your mood.
Use removable hooks or clips for easy swapping without damaging walls or frames. Even small changes, like adding seasonal wreaths or lightweight garlands, can complement your DIY pieces beautifully.
When was the last time you refreshed your wall art? Adding a seasonal touch invites you to interact with your space creatively and keeps it inviting year-round.
Frequently Asked Questions
What Materials Are Needed For Diy Wall Art?
You need canvas, paint, brushes, stencils, and adhesive. Optional items include washi tape, frames, and decorative paper. Choose materials based on your design and skill level to create personalized living room art.
How To Choose Colors For Living Room Wall Art?
Pick colors that complement your living room decor. Use a color palette with 2-3 main colors for balance. Consider mood, lighting, and existing furniture to ensure harmony and visual appeal.
Can Beginners Create Diy Wall Art Easily?
Yes, beginners can create simple wall art with basic supplies. Start with easy techniques like stenciling or abstract painting. Practice and patience improve skills, making the project enjoyable and rewarding.
How To Hang Diy Wall Art Properly?
Use appropriate hooks or nails for your wall type. Measure and mark spots for even spacing. Hang art at eye level to enhance the living room’s aesthetic and focal points.
Conclusion
Creating your own wall art brings life to any living room. It adds a personal touch and makes the space unique. Simple materials and ideas can lead to beautiful results. You can enjoy the process and feel proud of your work.
Try different styles and colors to fit your taste. DIY art saves money and shows your creativity. Start small, have fun, and watch your room transform. Your walls will tell your story in a fresh, inviting way.


