
Are you ready to transform your space with a simple touch? Mounting a mirror on your wall can instantly brighten a room, make it look bigger, and add a stylish flair.
But if you’re unsure how to do it right, you might worry about damaging your walls or having the mirror fall down. Don’t worry—this guide will walk you through every step, making the process easy and safe for you. Keep reading, and you’ll soon have a perfectly hung mirror that enhances your home’s look and feel.
Choose The Right Mirror
Choosing the right mirror for your wall is important for both style and safety. A mirror should fit well in the space and complement the room’s look. The right choice makes hanging easier and the finished look better.
Consider Size And Weight
Measure the wall space before buying a mirror. The mirror should not be too big or too small for the area. Check the mirror’s weight to know what kind of support you need. Heavy mirrors need strong anchors or wall studs for mounting. Light mirrors can use simpler hooks or adhesive strips. Knowing size and weight helps pick the best hanging method.
Select Frame And Style
Pick a frame that matches your room’s design. Frames come in many materials like wood, metal, or plastic. Choose a color that fits the room’s palette. The style can be modern, classic, or rustic. A well-chosen frame enhances the mirror and the room. Also, think about the frame’s thickness and shape for a balanced look.

Credit: www.ebay.ca
Pick The Best Wall Location
Choosing the right spot to mount your mirror makes all the difference. The location affects not only the look but also the function of the mirror in your space. A well-chosen spot enhances light, adds depth, and suits your daily routine.
Find A Suitable Spot
Think about where you use the mirror most. Is it for quick checks before heading out or to brighten a dark corner? Placing a mirror near natural light sources like windows can amplify sunlight and make a room feel larger.
Consider the height as well. Mount it at eye level for the best view—too high or too low can be awkward to use. Also, ask yourself if the spot complements your room’s layout and furniture arrangement.
Check Wall Material
Knowing what kind of wall you have is crucial before drilling holes. Drywall, plaster, brick, or concrete each need different tools and anchors to hold your mirror securely.
For example, drywall requires special anchors or finding studs to support heavier mirrors. Brick or concrete walls demand masonry bits and anchors. Testing the wall type helps prevent damage and keeps your mirror safely mounted.
Gather Necessary Tools
Gathering the right tools makes mounting a mirror easier and safer. Having everything ready saves time and avoids frustration. Prepare your workspace with care and check each item before you start.
List Essential Tools
- Measuring tape – for exact placement
- Level – to keep the mirror straight
- Drill with drill bits – for holes in the wall
- Screwdriver – to secure screws
- Wall anchors – to support heavy mirrors
- Pencil – to mark spots on the wall
- Stud finder – to locate wall studs
- Hammer – if using nails or anchors
Safety Equipment Tips
- Wear safety glasses to protect eyes from dust
- Use gloves to prevent cuts from sharp edges
- Keep a clean workspace to avoid tripping hazards
- Work with a partner for heavy or large mirrors
- Check tools for damage before use
Prepare The Wall
Preparing the wall properly is a crucial step before mounting your mirror. This ensures that the mirror stays securely in place and looks perfect once hung. Taking a little time here can save you from future headaches like damage or misalignment.
Clean The Surface
Start by wiping down the wall where you want to mount the mirror. Use a damp cloth to remove dust, dirt, and grease that could prevent adhesives or mounting hardware from sticking properly.
Let the wall dry completely before moving on. I once skipped this step, and the mirror fell a week later because the surface wasn’t clean enough. Don’t make the same mistake!
Mark Mounting Points
Next, measure and mark where the mounting points will go. Use a pencil to make small, light marks that you can easily erase later.
Double-check your measurements by holding the mirror up to the wall before drilling or hammering. Are the points level? Will the mirror hang straight? This small check saves you from crooked results.
- Use a level tool for accuracy.
- Measure twice, mark once.
- Consider the mirror’s weight when choosing where to mount.
Install Wall Anchors
Wall anchors provide strong support for heavy mirrors on drywall. Drill holes, insert anchors, then screw in hooks or brackets securely. This prevents the mirror from falling or damaging the wall.
Mounting a mirror requires secure installation. Wall anchors provide that stability. They ensure your mirror stays in place. Anchors work well on drywall or plaster. Here’s how to install them correctly.Choose Correct Anchors
Selecting the right anchor is crucial. Consider your wall type. For drywall, plastic expansion anchors work well. Heavy mirrors need toggle bolts. Weigh your mirror first. Check the anchor’s weight capacity. This prevents accidents.Drill Holes Safely
Mark where you want the mirror. Use a pencil for this. Ensure the spots are level. Drill holes where you marked. Choose a drill bit matching your anchor size. Wear safety glasses. Keep the drill steady. Avoid hitting electrical wires. Insert the anchors into the holes. Tap them in gently if needed.Attach Mounting Hardware
Attaching the mounting hardware is a key step to hang a mirror safely. Use the right tools and hardware for your wall type and mirror size. Take your time to ensure everything fits well. The goal is a secure hold that lasts.
Secure Brackets Or Hooks
Choose brackets or hooks that match your mirror’s weight and style. Use a drill or screwdriver to fix them firmly into the wall. If mounting on drywall, use anchors to strengthen the hold. Position the hardware evenly to keep the mirror balanced. Tighten screws fully without stripping them. Double-check the alignment before moving on.
Check Stability
Gently push the hardware to see if it moves or feels loose. Test the strength by lightly hanging the mirror before full placement. Adjust or tighten screws if there is any wobble. Confirm the mirror sits flush against the wall. A stable setup prevents accidents and damage to your wall or mirror.
Hang The Mirror
Hanging a mirror on a wall needs care and attention. This step ensures the mirror looks great and stays safe. Proper hanging avoids damage and makes the mirror a beautiful part of your room. Follow these steps to hang your mirror correctly.
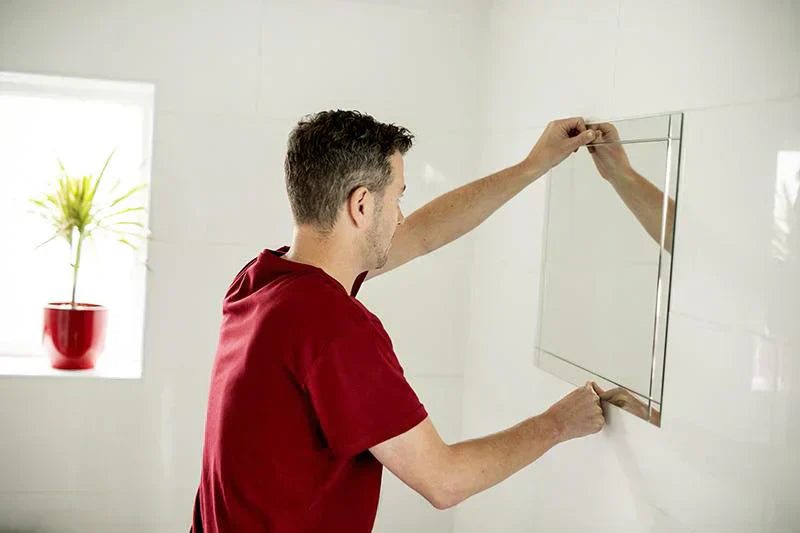
Lift And Align
Lift the mirror carefully with both hands. Hold it close to your body for better control. Align the mirror’s hooks or brackets with the wall anchors or screws. Take your time to avoid scratching the wall or mirror. Ask for help if the mirror is large or heavy.
Ensure Level Position
Use a spirit level or bubble level to check the mirror’s position. Place it on top or along the edge of the mirror. Adjust the mirror slightly until the bubble is centered. This step makes sure the mirror hangs straight. A level mirror improves the room’s look and prevents it from falling.

Credit: www.amazon.ca
Final Adjustments
After securely hanging your mirror, the final adjustments make all the difference. This phase ensures your mirror looks perfect and stays safe on your wall. Small tweaks now can save you from headaches later.
Make Minor Alignments
Check if your mirror hangs straight by stepping back and looking at it from different angles. Sometimes, even a slight tilt is noticeable and can affect the overall look of your room.
If the mirror isn’t level, gently shift it left or right, or adjust the hanging hardware if possible. Using a level tool can help you get precise alignment quickly.
Don’t rush this step—taking a few extra minutes to perfect the position pays off every time you glance at your reflection.
Inspect For Safety
Once aligned, make sure the mirror is firmly attached to avoid accidents. Give it a gentle shake to confirm it won’t come loose over time.
Double-check that all screws, hooks, or adhesive strips are secure and appropriate for the mirror’s weight. If you notice any wobbling, reinforce the support immediately.
Think about your home’s activity level—do you have kids or pets? Extra caution here can prevent injuries and damage.
Maintenance Tips
Keeping your wall mirror in good shape is essential for long-lasting beauty and safety. Regular care helps preserve the glass clarity and the strength of its mounts. Simple maintenance habits prevent damage and avoid accidents.
Clean Mirror Safely
Use a soft, lint-free cloth to clean the mirror surface. Avoid abrasive cleaners or rough materials that can scratch the glass. Spray a small amount of glass cleaner on the cloth, never directly on the mirror. Wipe gently in circular motions to remove dust and smudges. Dry the surface with a clean, dry cloth to avoid streaks.
Check Mounts Regularly
Inspect the mirror mounts every few months. Look for loose screws, brackets, or hooks that might weaken the hold. Tighten any loose hardware using the proper tools. If you notice any damage to the mounting system, replace parts immediately. This prevents the mirror from falling and causing injury or damage to your wall.

Credit: www.framedisplays.com
Frequently Asked Questions
What Tools Do I Need To Mount A Mirror On A Wall?
You need a drill, screws, wall anchors, a level, measuring tape, and a screwdriver to mount a mirror securely.
How Do I Find The Right Spot To Hang A Mirror?
Measure your wall space, consider lighting, and choose a spot at eye level for best results.
Can I Mount A Heavy Mirror On Drywall Alone?
No, use wall anchors or find studs to support heavy mirrors safely without damaging drywall.
How High Should I Hang A Mirror On The Wall?
Hang the mirror so its center is at eye level, usually 57 to 65 inches from the floor.
Conclusion
Mounting a mirror on a wall can change any room’s feel. Follow the right steps to keep it safe and steady. Use proper tools and materials for the best results. Take your time to measure and mark carefully. Enjoy the new look and brighter space your mirror brings.
This simple project adds style and light easily. Try it yourself and see the difference today.


