

Are you ready to transform your space with a simple yet stunning touch? Mounting mirrors on your wall can instantly brighten a room, make it feel larger, and add a stylish flair that reflects your personality.
But if you’re unsure where to start or worried about making mistakes, you’re not alone. In this guide, you’ll discover easy, step-by-step tips that anyone can follow to hang mirrors safely and beautifully. Keep reading, and you’ll soon have the confidence to create a look you’ll love every time you glance in the mirror.
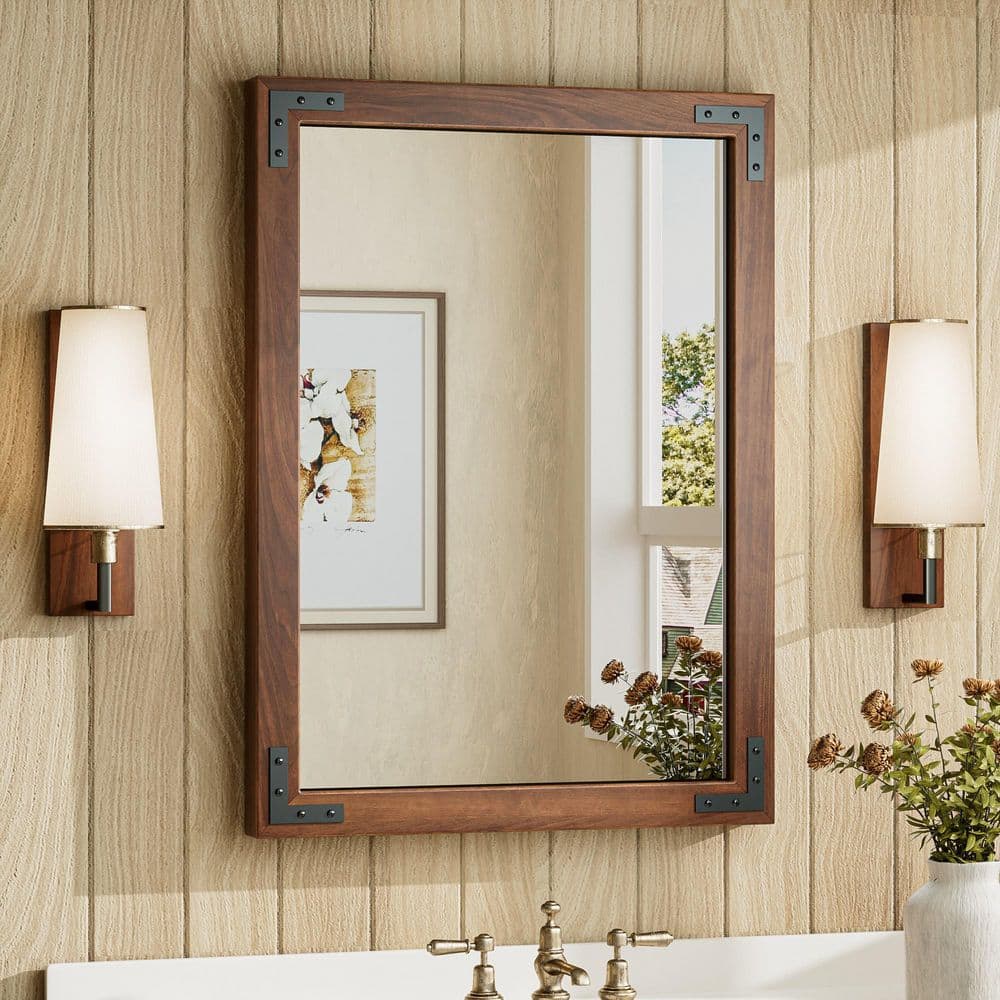
Choosing The Right Mirror
Choosing the right mirror for your space is more than just picking something that looks nice. It affects the room’s feel, the wall’s safety, and how well the mirror fits your needs. Think about where you want to place it and what purpose it will serve before making your choice.
Selecting Mirror Size And Style
Think about the size of the wall and the room. A large mirror can open up a small space and make it feel brighter, while a smaller mirror adds a delicate touch without overwhelming the wall.
Your mirror’s style should match your room’s design. Are you aiming for modern, rustic, or classic? A sleek, frameless mirror suits modern spaces, while a wooden frame works well for rustic or traditional rooms.
Have you considered how the mirror’s shape affects the room? Round mirrors soften sharp corners, and rectangular ones add structure. Don’t hesitate to mix shapes to create a unique look.
Considering Mirror Weight And Material
Knowing the weight of your mirror is essential for choosing the right mounting hardware. Heavy mirrors need strong anchors or studs to stay secure on the wall.
Materials impact both the mirror’s look and durability. Glass mirrors come in various thicknesses, and some have backing made of wood, metal, or plastic. Each material demands different mounting techniques.
Ask yourself if the wall can handle the mirror’s weight. Drywall may require special anchors, while brick or concrete walls need masonry screws. Matching the mirror’s weight with appropriate mounting tools ensures safety.

Credit: ledmirrorworld.co.uk
Gathering Necessary Tools
Gather tools like a drill, screws, anchors, a level, and measuring tape before mounting mirrors on the wall. Having everything ready saves time and ensures a smooth process. Proper tools help keep the mirror secure and straight.
Mounting mirrors on your wall can transform your space, adding depth and style. But before you dive into the project, gathering the right tools is crucial for a smooth process. You wouldn’t want to find yourself halfway through only to realize you’re missing a key tool.Essential Tools For Mounting
Start with a reliable tape measure. It’s your best friend in ensuring your mirror hangs straight and at the right height. A level is equally important, helping you avoid the dreaded crooked mirror look. Next, get a stud finder. This device helps locate the studs in your wall, which are the best places to anchor your mirror safely. If your mirror is heavy, anchors and screws are essential to provide the needed support. Don’t forget a drill. It’s more efficient than a screwdriver and saves your wrist from unnecessary strain. Lastly, have a pencil handy to mark spots without damaging your wall.Safety Equipment To Use
Safety should never be an afterthought. Protect your eyes with safety goggles, especially when drilling into the wall. You never know when debris might fly off. Gloves are another important item. They protect your hands from sharp edges and provide a better grip on your tools. Have a sturdy step stool or ladder if you’re working on higher walls. Stability is key to avoiding accidents. Finally, keep a first aid kit nearby. It’s always better to be prepared for minor injuries than to be caught off guard. What safety measures do you prioritize when tackling DIY projects?Preparing The Wall
Preparing the wall is a key part of mounting mirrors safely and securely. It ensures the mirror stays in place and looks great. Taking time to prepare helps avoid damage to walls and prevents accidents. Start by choosing the right spot and checking the wall’s condition. These steps make the installation smoother and more durable.
Finding The Ideal Location
Pick a spot with enough light to brighten the mirror. Avoid places where moisture or direct sunlight can harm the frame. Consider the height—eye level works best for most people. Check for any nearby furniture or decorations that might block the view. Visualize how the mirror will fit with the room’s style.
Checking Wall Type And Condition
Identify if the wall is drywall, plaster, brick, or concrete. Different walls require different mounting tools and anchors. Look for cracks, holes, or damp spots that need repair. Make sure the surface is clean and dry before mounting. Solid walls offer better support for heavy mirrors. Use a stud finder to locate studs behind drywall for stronger hold.
Marking Placement Points
Marking placement points is a crucial part of mounting mirrors on your wall. This step ensures your mirror hangs straight, looks balanced, and avoids unnecessary holes or damage. Taking the time to mark accurately saves you from the frustration of readjustments later.
Measuring For Symmetry
Start by deciding the exact spot where you want your mirror. Use a tape measure to find the center point of the wall or the space above furniture like a dresser or console table. Measuring from fixed edges or furniture helps maintain balance in the room.
Hold the mirror up and use a pencil to lightly mark the top edge. Then, measure the mirror’s width and height, dividing these numbers by two to find the center. Mark this center point on the wall—this is your key reference for symmetrical placement.
Have you ever noticed how a slightly off-center mirror throws off the entire room’s vibe? Taking a moment to measure precisely can make a big difference in your space’s harmony.
Marking Anchor Spots
Next, examine the back of your mirror to locate where the mounting hardware sits—these are your anchor points. Use your pencil to mark these same spots on the wall, aligning them carefully with your center point marks.
Double-check these marks with a level to ensure they’re perfectly horizontal. This prevents the mirror from hanging crooked, which often happens when marks are rushed or uneven.
Remember, the strength of your mounting depends on these anchor points. Marking them correctly helps you drill holes in the right spots and secure the mirror safely. Have you considered the weight of your mirror when choosing anchors? This can affect how and where you mark your spots.
Installing Wall Anchors
Installing wall anchors is a crucial step in mounting mirrors securely. Without the right anchors, your mirror could fall, causing damage or injury. Anchors provide the necessary support, especially on drywall or plaster where screws alone won’t hold.
Choosing The Right Anchors
You need to pick anchors based on the wall type and the mirror’s weight. Plastic expansion anchors work well for light mirrors on drywall. For heavier mirrors, metal anchors or toggle bolts offer stronger support.
Think about the wall material—drywall, plaster, brick, or concrete—and select anchors designed for those surfaces. If your mirror is large or heavy, don’t risk it with simple plastic anchors. A metal toggle bolt can hold much more weight safely.
Have you checked the packaging for weight limits? Always choose anchors rated higher than your mirror’s weight to be safe.
Drilling And Securing Anchors
Mark the spots on the wall where the anchors will go, making sure they align with your mirror’s mounting points. Use a level to keep everything straight. Then, drill holes slightly smaller than the anchor’s diameter for a snug fit.
Insert the anchor firmly into the hole. You might need to tap it gently with a hammer until it’s flush with the wall. After that, screw into the anchor to expand it and lock it in place.
Don’t rush this part. A loose anchor means your mirror won’t be secure. Test the anchor by pulling on it gently before hanging the mirror. If it feels solid, you’re ready to mount your mirror with confidence.

Credit: www.costway.ca
Mounting The Mirror
Mounting a mirror on your wall can transform a room instantly, but the process requires care and precision. The key is to ensure the mirror is securely fixed and perfectly aligned to avoid accidents and achieve the best visual impact. Let’s look at how you can attach the mounting hardware and hang the mirror with confidence.
Attaching Mounting Hardware
Start by checking the back of your mirror for the type of hardware it needs. Mirrors often come with D-rings, wire, or keyhole brackets. If your mirror doesn’t have hardware, you’ll need to add some suitable for its weight and size.
Use a tape measure to mark where the hardware should go, making sure it’s level on both sides. Attach the hardware securely with screws designed for the mirror’s frame material. If your mirror is heavy, consider using wall anchors or toggle bolts to keep it firmly in place.
- Check mirror weight before choosing hardware.
- Use a pencil to mark screw positions.
- Double-check for level alignment before drilling.
Hanging And Leveling The Mirror
Once the hardware is attached, you’re ready to hang the mirror. Place wall hooks or anchors on your wall at the same height as the mounting hardware. Use a stud finder if you want to anchor into studs for extra support.
Hang the mirror carefully and step back to check the alignment. A small spirit level on top of the frame helps ensure it’s perfectly straight. If the mirror tilts or leans, adjust the hanging points or add felt pads behind the lower corners to stabilize it.
Have you ever struggled to get a mirror straight and ended up with a crooked reflection? Taking a moment to level your mirror properly can save you that frustration and keep your space looking sharp.
Final Adjustments And Maintenance
After mounting your mirror, the job isn’t quite finished. Final adjustments and ongoing maintenance play a key role in keeping your mirror secure and looking great over time. Taking a few extra minutes to check stability and care for your mirror will save you from potential damage and keep your space stylish.
Checking Stability
Once your mirror is on the wall, give it a gentle shake. Does it feel firm or wobble slightly? A stable mirror stays put without movement, which is crucial for safety and preserving the wall.
If you notice any movement, tighten the screws or anchors. Sometimes the wall material may need stronger anchors or additional support. Don’t overlook this step—ignoring slight instability can lead to accidents or damage down the road.
Ask yourself: Is the mirror level and evenly supported? Uneven mounting can stress one side and cause it to loosen over time. Use a spirit level to confirm, and adjust if needed.
Cleaning And Care Tips
Keeping your mirror clean enhances both its appearance and longevity. Use a soft, lint-free cloth and gentle glass cleaner for best results.
Avoid harsh chemicals or abrasive materials that can scratch the surface. If dust builds up around the edges, a soft brush or microfiber cloth works well to prevent dirt from settling in.
Remember to clean the wall area behind the mirror occasionally, especially if you live in a humid environment. Moisture can weaken mounting hardware and cause mold growth, so good airflow and dryness are essential.
How often do you check your mirror for dust and stability? Making this a regular habit can save you from unexpected repairs and keep your space looking polished.
Credit: www.homedepot.com
Frequently Asked Questions
What Tools Do I Need To Mount A Mirror On The Wall?
You need a drill, level, measuring tape, screws, wall anchors, and a screwdriver. A stud finder helps locate secure spots. These tools ensure the mirror is safely and accurately mounted.
How Do I Find The Right Spot To Hang A Mirror?
Choose a spot with good lighting and a clear reflection area. Avoid direct sunlight to prevent glare. Use a level to ensure the mirror hangs straight and complements the room’s design.
Can I Mount A Heavy Mirror Without Studs?
Yes, use heavy-duty wall anchors or toggle bolts for drywall. These provide strong support when studs are unavailable. Always check the mirror’s weight limit on the anchors for safety.
How High Should I Mount A Mirror On The Wall?
Mount the mirror at eye level, usually 57-65 inches from the floor. Adjust height based on furniture placement and room use. Proper height enhances both function and aesthetics.
Conclusion
Mounting mirrors on walls adds style and light to any space. Choose the right tools and follow steps carefully. Measure twice to avoid mistakes and keep safety in mind. A well-mounted mirror can make rooms feel bigger and brighter. Take your time and enjoy the process.
Soon, your walls will look fresh and inviting. Simple actions create a big difference in your home’s look. Try it yourself and see how easy it can be.


