
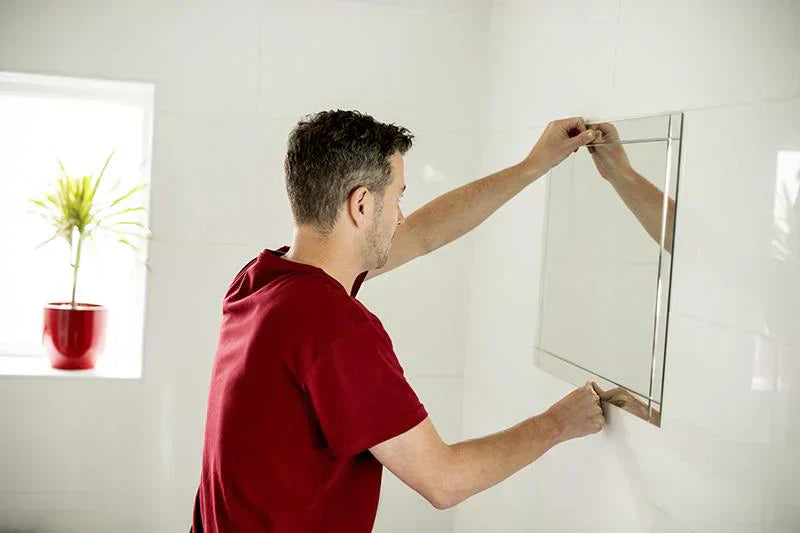
Want to hang a mirror on your wall but don’t want to deal with nails or damage? You’re not alone.
Nails can leave holes, ruin paint, and sometimes just aren’t an option—especially if you’re renting or want a quick fix. Imagine having a perfect, sturdy mirror on your wall without the hassle or mess. You’ll discover simple, effective ways to put up your mirror without nails.
By the end, you’ll feel confident and ready to transform your space—no tools or damage needed. Keep reading to find the best nail-free mirror hanging solutions that work for you.
Credit: bfymirror.com
Choose The Right Mirror
Choosing the right mirror is the first and most important step when you want to hang it on the wall without using nails. The mirror you pick will determine the type of adhesive or mounting option that works best, ensuring it stays secure and looks great. Let’s break down what you need to think about before making your choice.
Consider Mirror Size And Weight
Not all mirrors can be treated the same, especially when it comes to size and weight. A large, heavy mirror demands a stronger mounting solution than a small, lightweight one.
Ask yourself: How much does the mirror weigh? If it’s over 10 pounds, you’ll need heavy-duty adhesive strips or specialized hooks designed for heavier loads.
Small mirrors, like those under 5 pounds, can often be mounted with simple double-sided tape or lightweight adhesive hooks. This makes the process easier and less risky for your walls.
Select Suitable Frame Material
The frame material affects both the mirror’s weight and the type of wall attachment that will work. Frames made of metal or solid wood tend to be heavier and might not stick well with basic adhesives.
Plastic or lightweight composite frames are easier to mount without nails and usually pair well with removable adhesives. If your mirror has a delicate or ornate frame, consider whether the mounting method could damage it.
Think about the surface of the frame too. Smooth, non-porous materials like glass or metal work better with adhesive strips than rough, porous surfaces like untreated wood.
Prepare The Wall Surface
Clean the wall surface thoroughly to remove dust and grease. Ensure the area is dry and smooth for better adhesive grip. A clean surface helps the mirror stick securely without nails.
Preparing the wall surface is a crucial step when hanging a mirror without nails. A clean and smooth surface ensures that adhesive strips or hooks stick properly, providing the necessary support for your mirror. Taking the time to prepare your wall can prevent potential mishaps and maintain the aesthetics of your space.Clean And Dry The Area
Start by wiping the area where you plan to hang the mirror. Use a damp cloth to remove any dust, grease, or grime. If the wall is particularly dirty, a mild detergent can help. Once clean, dry the area thoroughly. Moisture can weaken the adhesive’s grip, leading to a loose mirror. A hairdryer can speed up the drying process, especially in humid conditions.Check Wall Material
Understanding your wall’s material is essential for choosing the right adhesive. Drywall, tile, and plaster each require different approaches. For instance, drywall is porous and may need a stronger adhesive, while tile surfaces, being non-porous, work well with most adhesive strips. Plaster walls are more delicate and may require special consideration to avoid damage. Consider doing a small test before proceeding with your entire mirror. Will the adhesive hold without peeling paint or damaging the surface? A quick check can save time and effort.Use Adhesive Strips
Using adhesive strips to hang a mirror on your wall without nails is a smart, damage-free solution. These strips hold mirrors securely while keeping your walls intact. They’re perfect if you’re renting or just want a clean, easy way to decorate.
Types Of Adhesive Strips
Not all adhesive strips are the same. Choosing the right type depends on the mirror’s weight and your wall surface. Here are some popular options:
- Command Strips:These are popular for their strong hold and easy removal. They come in various sizes designed for different weights.
- Double-Sided Foam Tape:Great for lightweight mirrors and smooth surfaces. It provides a bit of cushioning and sticks well.
- Velcro Strips:These allow you to remove and rehang the mirror easily. They work best for medium-weight mirrors.
- Heavy-Duty Mounting Strips:Made for heavier objects, these strips have a higher adhesive strength but may need more careful removal.
Step-by-step Application
Start by cleaning the wall and the back of your mirror with rubbing alcohol. This removes dust and oils that reduce adhesion. Let both surfaces dry completely before moving on.
Next, attach the adhesive strips to the mirror. For better balance, place strips evenly along the edges and center. Press firmly for about 30 seconds to ensure a strong bond.
Then, remove the protective backing from the strips and carefully position your mirror on the wall. Press the mirror against the wall for at least 30 seconds, applying even pressure. Avoid shifting it once stuck.
Wait an hour before letting go completely, so the adhesive sets properly. If you ever want to remove the mirror, pull the strips slowly straight down to avoid wall damage.
Have you ever worried about ruining your wall with nails? Adhesive strips let you avoid that stress while still displaying your mirror beautifully.
Try Double-sided Tape
Trying double-sided tape is a simple and damage-free way to hang a mirror on your wall. It keeps your walls intact and saves time on tools and cleanup. Plus, it works surprisingly well if you pick the right type and position it carefully.
Choosing Strong Tape
Not all double-sided tapes are created equal. Look for tapes labeled as heavy-duty or designed specifically for mounting. These tapes often have a stronger adhesive and can hold more weight.
Make sure the tape is wide enough to support your mirror. Thin tape might not provide enough grip, causing the mirror to fall. You can even combine several strips for extra strength.
Have you checked the weight limit on the tape package? It’s crucial to match the tape’s capacity with your mirror’s weight. Using tape that’s too weak is a recipe for disaster.
Proper Placement Tips
Before sticking the tape, clean the wall and the back of the mirror thoroughly. Dust and grease reduce adhesion, so take your time with this step.
Press the tape firmly on both the wall and the mirror to create a strong bond. Hold the mirror in place for a minute or two after mounting to let the adhesive set.
Think about the mirror’s placement carefully. Avoid putting it on textured or uneven surfaces as tape struggles to stick there. Also, consider how often you might want to reposition the mirror—tape works best for semi-permanent setups.
Apply Mirror Clips And Brackets
Applying mirror clips and brackets offers a secure way to hang mirrors without nails. These devices hold the mirror firmly against the wall. They come in various styles to fit different mirror sizes and wall types. This method avoids damage to walls and allows easy mirror removal or repositioning. Using clips and brackets also keeps the mirror stable and safe.
Non-permanent Clip Options
Several clip options do not require drilling or nails. Adhesive mirror clips use strong glue pads to stick to the wall. They work best on smooth, clean surfaces. Plastic clips with suction cups can hold smaller mirrors. Magnetic clips suit mirrors with metal backing. These clips cause no wall damage and can be removed cleanly.
- Adhesive mirror clips with strong glue
- Suction cup plastic clips for lightweight mirrors
- Magnetic clips for metal-backed mirrors
Installation Guide
Start by cleaning the wall surface thoroughly. Remove dust and grease to ensure good adhesion. Hold the mirror in the desired position on the wall. Mark the clip locations lightly with a pencil. Attach the clips or brackets to the wall using the method recommended. For adhesive clips, press firmly and hold for 30 seconds. Place the mirror into the clips carefully. Check that the mirror sits evenly and is secure.
| Step | Action | Tip |
|---|---|---|
| 1 | Clean wall surface | Use rubbing alcohol for best results |
| 2 | Position mirror and mark spots | Use a level for accuracy |
| 3 | Attach clips or brackets | Press adhesive clips firmly |
| 4 | Place mirror into clips | Check stability and balance |
Credit: bfymirror.com
Use Command Hooks And Hangers
Using Command hooks and hangers is an easy way to hang a mirror without nails. These products stick firmly to walls and hold weight well. They keep walls clean and avoid holes. Command hooks come in many sizes and shapes to fit your mirror’s weight and style.
Hook Selection
Choose hooks designed for the mirror’s weight. Check the package for the weight limit. Use multiple hooks for heavy mirrors to spread the load. Pick hooks with a smooth finish to avoid scratches. Clear or white hooks blend well with most walls. For large mirrors, use wall hangers with adhesive strips for extra hold.
Safe Hanging Techniques
Clean the wall surface with rubbing alcohol before applying hooks. Do not use water or cleaners, as they reduce stickiness. Press the hook firmly against the wall for 30 seconds. Wait one hour before hanging the mirror to ensure strong adhesion. Attach the mirror securely to the hook or hanger. Avoid hanging mirrors in humid areas to prevent peeling. Remove hooks slowly by pulling the tab downward to avoid wall damage.
Mount With Velcro Strips
Mounting a mirror on your wall without nails is easier than you might think, especially with Velcro strips. This option keeps your walls damage-free and allows for quick adjustments. You just need to pick the right type of Velcro and place it carefully to keep your mirror secure.
Velcro Strength Options
Velcro strips come in different strength levels, so you can choose one based on the weight of your mirror. Light-duty Velcro works well for small, lightweight mirrors, while heavy-duty strips can hold larger, heavier ones safely.
Check the packaging for weight limits. If your mirror is around 5 pounds, standard strips usually do the job. For mirrors over 10 pounds, go for industrial-strength Velcro to avoid any accidents.
Positioning For Stability
Where you place the Velcro strips matters as much as the type you choose. Apply strips evenly across the back of the mirror, focusing on the corners and center for balanced support.
Make sure both the mirror and wall surfaces are clean and dry before sticking the strips. Ask yourself, have you tried pressing firmly for at least 30 seconds? This ensures the adhesive bonds well, reducing the chance of your mirror slipping down later.
Explore Alternative Supports
Finding ways to hang a mirror without nails can be a game-changer, especially if you want to avoid wall damage or live in a rental. Alternative supports offer flexibility and style, letting you place mirrors where you want without the hassle of drilling. Think about how these options can blend with your space and daily routine.
Lean Mirrors Against Walls
Leaning a mirror against a wall is a simple and chic choice. It requires no tools and can create a relaxed, modern vibe in your room. You just need a sturdy surface and a mirror size that fits well without tipping over.
Try placing the mirror on the floor with the base a few inches away from the wall. This angle reflects more light and opens up the space visually. If you worry about slipping, add a non-slip pad or a small rug underneath for extra grip.
Have you noticed how a large mirror leaning casually can make a corner feel like a design statement? You get style and function without permanent changes.
Use Furniture For Support
Furniture can double as a clever support for mirrors. A dresser, console table, or bookshelf can hold a mirror securely while adding layers to your room’s look. This method keeps your walls clean and your decor dynamic.
Place the mirror behind the furniture, resting it against the wall or the back edge of the piece. This setup not only stabilizes the mirror but also adds depth to your display. You can even decorate around the mirror with plants or lamps for a cozy feel.
Think about the furniture you already have—could it carry a mirror without extra effort? Using what’s on hand saves time and keeps your space flexible for future changes.
Tips For Long-term Care
Keeping a mirror securely on your wall without nails is just the start. Ensuring it stays that way over time takes a little attention and care. You want your mirror to look great and stay safe without any unexpected falls or damage.
Avoid Excessive Weight
Choose a mirror that matches the strength of your adhesive or mounting tape. Heavy mirrors can pull away from the wall, risking damage or injury. If your mirror feels too heavy, consider a smaller size or a lighter frame to keep it safe and stable.
Think about the wall surface too—some adhesives work better on smooth, clean walls. You wouldn’t want to add extra weight to a surface that might not hold well. Have you checked the weight limits on your mounting product?
Regularly Check Adhesion
Once your mirror is up, don’t forget to look over the edges every few weeks. Adhesives can lose their grip over time, especially in humid or changing temperatures. A quick press or gentle tug can reveal if the mirror is still firmly attached.
Keep an eye out for peeling tape or sticky residue breaking down. If you spot any signs, it’s better to fix it right away before the mirror slips. How often do you inspect your wall hangings for safety?

Credit: bfymirror.com
Frequently Asked Questions
How Can I Hang A Mirror Without Nails?
You can use adhesive strips, mounting tape, or hooks designed for mirrors. These options hold mirrors securely without damaging walls.
What Is The Best Adhesive For Hanging Mirrors?
Heavy-duty double-sided mounting tape or mirror adhesive glue works best. They provide strong support and prevent mirror damage over time.
Can I Use Command Strips For Mirror Hanging?
Yes, command strips are ideal for lightweight mirrors. They are easy to apply, remove cleanly, and leave no wall marks.
How To Avoid Wall Damage When Hanging Mirrors?
Use non-invasive methods like adhesive hooks or strips. Avoid nails or screws to keep your walls intact and clean.
Conclusion
Putting a mirror on the wall without nails is easy and safe. Use strong adhesive strips or hooks made for walls. These options keep your walls clean and undamaged. Measure and clean the wall before attaching the mirror. This helps the mirror stay in place longer.
Try different methods to find what works best for you. Enjoy a fresh look in your room without drilling holes. Simple steps can make your space look brighter and bigger. No nails, no mess, just a beautiful mirror on your wall.


