
Have you ever looked at a mirror on your wall and wondered how to take it down without damaging your paint or drywall? Removing a mirror might seem tricky, but with the right steps, you can do it safely and easily.
Whether you’re redecorating or just need to replace it, knowing how to remove a mirror properly saves you time, money, and frustration. In this guide, you’ll discover simple, clear instructions that anyone can follow. Keep reading, and you’ll soon have that mirror off your wall without a scratch.
Tools Needed
Removing a mirror from the wall may seem straightforward, but having the right tools makes the process safer and much easier. Without proper preparation, you risk damaging your wall or even injuring yourself. Let’s look at the essential tools you’ll need to tackle this task efficiently and safely.
Safety Gear
Protecting yourself should be your first priority. Mirrors are made of glass, which can shatter unexpectedly. Wearing safety gogglesshields your eyes from shards, while glovesprotect your hands from cuts.
Consider using a dust maskif you’re dealing with older mirrors that may have dust or debris behind them. Safety gear isn’t just optional—it can save you from serious accidents.
Basic Tools
Start with a sturdy putty knifeor flat pry barto gently loosen the edges of the mirror from the wall. A screwdriveris essential if the mirror is held by brackets or screws.
A utility knifehelps cut through any caulk or adhesive holding the mirror in place. Having a step ladderensures you can reach higher spots without stretching dangerously.
Optional Supplies
Some extra items can make the job smoother. Double-sided painter’s tapeapplied in a grid pattern across the mirror surface can prevent glass from falling if it breaks. A heat gunor hairdryer softens adhesive, making removal easier.
If you want to protect your walls, keep a few plastic sheetsor old towels handy to catch debris and avoid scratches. These extras aren’t mandatory but often turn a frustrating job into a manageable one.

Credit: www.reddit.com
Preparing The Area
Clear the area around the mirror to avoid damage or injury. Lay down a drop cloth to catch any falling debris or dust. Gather necessary tools nearby for easy access during removal.
Removing a mirror from the wall requires careful preparation. Ensuring the area is ready can prevent accidents. Here’s how to prepare the space effectively.Clearing The Space
Clear the area around the mirror. Remove all items like furniture and decor. This avoids accidental damage. Provide yourself with enough room to maneuver. A clutter-free space reduces tripping hazards. It also gives you a clear path to move the mirror.Protecting Surfaces
Cover the floor beneath the mirror. Use a drop cloth or old blanket. This protects against falling debris or glass. Secure the cloth with tape to keep it in place. If the mirror is large, protect nearby walls. Use cardboard or foam to shield them.Ensuring Proper Lighting
Good lighting is essential. It helps you see the mirror’s edges clearly. Use a bright lamp if natural light is lacking. Position the lamp to avoid shadows. Shadows can hide obstacles and increase risks. Proper lighting aids in spotting screws or brackets.Assessing The Mirror Mount
Before removing a mirror from the wall, it is important to assess how it is mounted. This step helps avoid damage to the wall and mirror. Different mirrors use different mounting methods. Knowing what holds your mirror in place guides your removal process and keeps things safe.
Types Of Mounting
Mirrors can be mounted in several ways. Some common types include:
- Hooks or brackets attached to the wall
- Clips holding the mirror edges
- Frames nailed or screwed into the wall
- Strong adhesives or double-sided tape
- French cleats for heavier mirrors
Each type needs a different approach. Hooks and brackets are easier to remove than adhesives. Frames may require unscrewing or prying. Identifying the mounting type helps prepare the right tools.
Identifying Adhesives Or Hardware
Check the mirror edges closely. Look for visible screws, nails, or clips. These indicate hardware mounting. If nothing is visible, the mirror might be glued to the wall.
Adhesives often leave no marks on edges. You may notice a slight gap or shine at the edges. Press gently around the mirror to feel if it moves or is stuck tight. This helps confirm if glue is used.
Hardware removal usually requires a screwdriver or pliers. Adhesive removal needs careful prying and sometimes heat to soften glue. Identifying the correct mounting type protects your wall and mirror from damage.
Removing Adhesive Mirrors
Removing adhesive mirrors can be tricky, but it doesn’t have to be frustrating. These mirrors are often stuck tightly to the wall, making it important to soften the adhesive first to avoid damage. With the right approach, you can safely separate the mirror without breaking it or harming your walls.
Softening The Adhesive
Start by warming the adhesive to make it more pliable. You can use a hairdryer or a heat gun on a low setting, holding it a few inches away from the mirror’s edges.
Heat the area evenly for several minutes, moving the device constantly to prevent overheating. This softens the glue, making the mirror easier to remove without cracking.
Using A Wire Or String
After softening, slide a thin wire or strong dental floss behind the mirror carefully. Use a gentle sawing motion to cut through the adhesive layer.
Be patient and avoid forcing the wire too quickly, or you risk breaking the glass. This technique gives you control and reduces the chance of damage compared to pulling the mirror straight off.
Handling Residue
Once the mirror is off, adhesive residue often remains on the wall. Try rubbing the area with warm soapy water first to loosen the sticky bits.
If that doesn’t work, use rubbing alcohol or a commercial adhesive remover sparingly. Always test a small hidden spot first to make sure the wall paint or surface isn’t damaged.
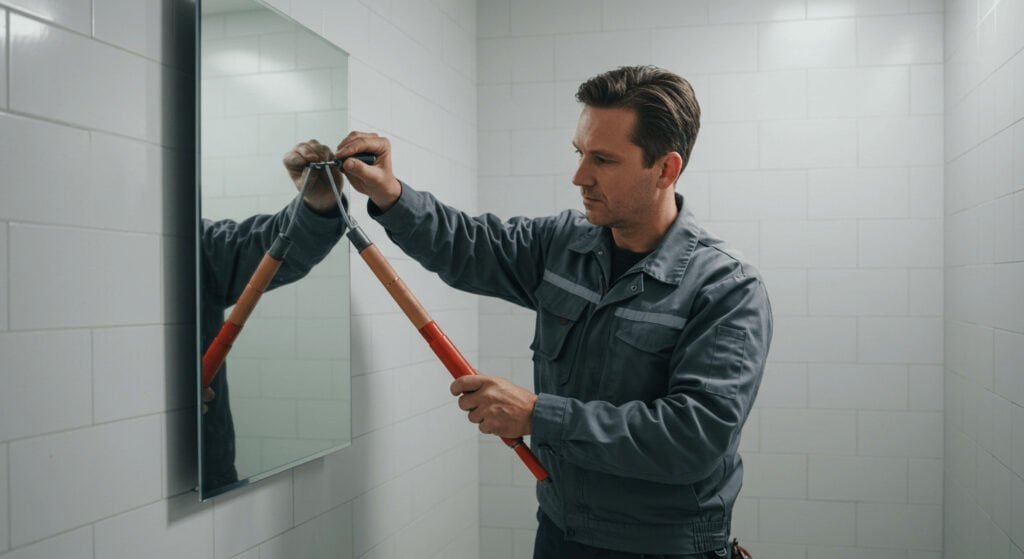
Removing Mirrors With Screws Or Clips
Removing mirrors that are held in place by screws or clips requires a bit of patience and the right approach. Unlike adhesive-mounted mirrors, these fasteners provide clear points to release the mirror without damaging your wall or the glass. Knowing exactly where and how to tackle these attachments can save you time and prevent accidents.
Locating Fasteners
Start by inspecting the edges of your mirror closely. Screws or clips are usually visible along the frame or directly on the wall surrounding the mirror. Sometimes, clips are hidden beneath decorative covers or paint, so gently run your fingers along the border to feel for any hardware.
Have you ever tried to remove a mirror only to find mysterious bumps that turned out to be hidden clips? It’s worth double-checking so you don’t miss any fasteners that could cause the mirror to fall unexpectedly.
Unscrewing Carefully
Once you locate the screws, use the right screwdriver—usually a Phillips or flathead—to loosen them slowly. Avoid rushing this step; turning screws too fast can strip the heads or cause the mirror to shift suddenly. Keep your hand steady on the mirror to support its weight as the screws come loose.
Consider having a helper hold the mirror while you unscrew—it makes the process safer and less stressful. Can you imagine the damage if a large mirror slips during removal? Taking precautions here is key.
Removing Clips
Clips often snap onto brackets or slide under the mirror edges. Use a flat tool like a putty knife or a flathead screwdriver to gently pry the clips away. Apply slow, even pressure to avoid cracking the mirror or damaging the wall.
Once the clips are free, carefully lift the mirror out of its frame or off the wall. If the clips seem stuck, pause and reassess rather than forcing them—it’s better to spend a few extra minutes than to risk breaking the glass.
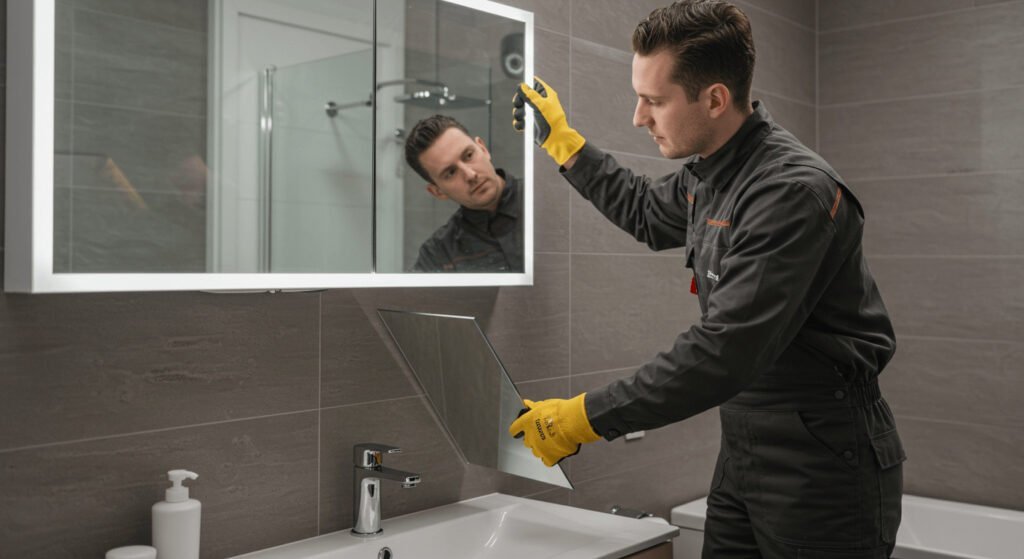
Handling Large Or Heavy Mirrors
Handling large or heavy mirrors can feel intimidating, but it doesn’t have to be a struggle. These mirrors require extra care and planning to avoid accidents and damage. With the right approach, you can safely remove even the biggest mirrors from your walls.
Getting Help
Large mirrors are awkward to manage alone. Asking a friend or family member for help makes a big difference in safety and control.
Two pairs of hands can steady the mirror from different angles, preventing slips or sudden drops. Have someone hold the mirror firmly while you work on loosening the mounting.
Would you trust yourself to catch a falling mirror solo? Probably not, and that’s why help is essential.
Using Support Techniques
Support tools can make the job easier. Place a sturdy blanket or foam padding on the floor beneath the mirror to cushion any accidental drops.
Use painter’s tape to create a grid on the mirror surface. This reduces the risk of shattered glass scattering if the mirror breaks.
Consider using suction cups designed for glass handling. They provide a secure grip and improve your control when lifting or moving the mirror.
Preventing Breakage
Slow and steady is key. Avoid rushing or sudden movements that can cause the mirror to slip or crack.
Check the mounting hardware carefully. Sometimes mirrors are held by clips or brackets—loosening these gently prevents stress on the glass.
Wrap the mirror in bubble wrap or thick blankets immediately after removal for protection during transport or storage.
Cleaning The Wall After Removal
After you’ve taken down your mirror, don’t overlook the state of the wall underneath. Cleaning the wall properly is key to making sure your space looks fresh and ready for whatever comes next. Whether you plan to hang a new mirror or simply want a neat finish, tackling leftover mess and damage sets the foundation for a smooth update.
Removing Residual Adhesive
Sticky residue can cling stubbornly to your wall, especially if the mirror was mounted with strong glue or double-sided tape. Start by gently scraping off as much as you can with a plastic putty knife to avoid damaging the paint or drywall.
If residue remains, dab a cloth in warm, soapy water and rub the area carefully. For tougher adhesive, try rubbing alcohol or a commercial adhesive remover—but test a small spot first to make sure it won’t harm your wall.
Repairing Minor Damage
Small holes or scratches often appear once the mirror is removed. You can fix these quickly with spackling paste or lightweight wall filler. Apply a small amount with a putty knife, smooth it out, and let it dry completely.
After drying, sand the patched areas lightly with fine-grit sandpaper until they feel flush with the wall. This simple repair step can make a big difference in the final look and ensures your wall is ready for painting or hanging new decor.
Preparing For Repainting
Before you reach for the paintbrush, make sure the wall surface is clean and dry. Wipe down the area with a damp cloth to remove dust and sanding residue.
If you spot any uneven texture or shiny patches from previous paint, lightly sand those spots to help the new paint stick better. Do you have a leftover paint can that matches your wall color? Using it can save time and help your wall look seamless.
Credit: bfymirror.com
Safety Tips
Removing a mirror from the wall might seem straightforward, but it involves risks that many overlook. Safety should be your top priority to avoid cuts, damage, or accidents. Taking a moment to prepare can save you from unexpected injuries and hassles.
Protecting Yourself
Always wear thick gloves to shield your hands from sharp edges and broken glass. Safety goggles are essential to protect your eyes from shards that might fly off during removal.
Consider wearing long sleeves and sturdy shoes for extra protection. Never rush the process—careful, slow movements reduce the chance of accidents.
Avoiding Common Mistakes
Don’t pull the mirror off the wall abruptly; this can cause it to shatter. Instead, use a putty knife or a flat tool to gently pry the edges after loosening any adhesive or mounting hardware.
Check if the mirror is glued or held by clips. Removing clips first prevents sudden drops and breakage.
Is the mirror heavy? Ask for help. Trying to remove a large mirror alone increases injury risks and damage.
Disposing Of Mirror Safely
Broken mirrors must be wrapped carefully in thick paper or bubble wrap before disposal to prevent injury to sanitation workers. Label the package as “broken glass” to alert handlers.
Check local regulations—some areas require mirrors to be taken to special recycling centers. Never throw large mirror pieces directly into regular trash bins.
Have leftover adhesive or mounting strips? Remove them to avoid hazards in the disposal process.

Credit: www.youtube.com
Frequently Asked Questions
How Do I Safely Remove A Mirror From The Wall?
To safely remove a mirror, first check the mounting type. Use gloves and protective eyewear. Gently loosen adhesive or unscrew brackets. Have a helper support the mirror’s weight. Slowly detach the mirror to avoid cracks or injuries.
What Tools Are Needed To Remove A Wall Mirror?
You typically need a screwdriver, putty knife, gloves, and safety goggles. For adhesive mirrors, use a heat gun or hairdryer to soften glue. A pry bar may help with stubborn frames. Always handle tools carefully to prevent damage or injury.
Can Removing A Mirror Damage My Wall?
Yes, removing a mirror can damage the wall. Adhesive removal may peel paint or drywall. Screws can leave holes that need patching. Use gentle techniques and proper tools to minimize damage. Repair any marks or holes before repainting.
How Do I Remove Adhesive From A Mirror On Drywall?
Heat the adhesive with a hairdryer to soften it. Use a putty knife to gently scrape off the glue. Avoid damaging the drywall surface. Clean residue with mild soap and water. Repeat if necessary for stubborn spots.
Conclusion
Removing a mirror from the wall can be simple and safe. Take your time and follow each step carefully. Use the right tools and protect yourself from broken glass. Clean the wall after removal to prepare for new decor. With patience, you can avoid damage and accidents.
Now, your space is ready for a fresh look or new ideas. Small tasks like this help keep your home neat and updated. You can handle it well by staying calm and focused.


