
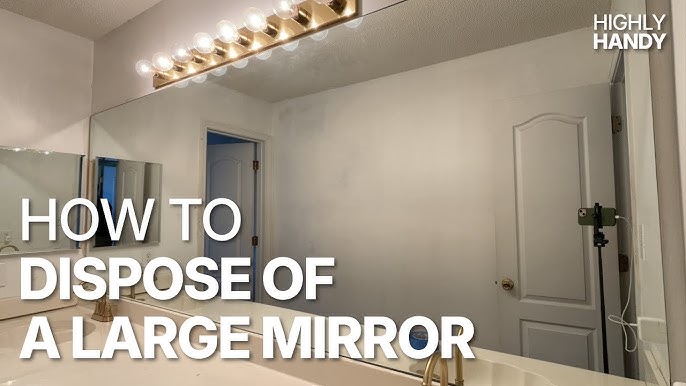
Have you ever faced the challenge of removing a mirror glued directly to your wall? It can feel frustrating and even risky if you’re worried about damaging your wall or the mirror itself.
But don’t worry—this guide will show you simple, effective steps to safely take down that stubborn mirror. By the end, you’ll know exactly what to do to protect your space and get the job done with confidence. Keep reading to discover the easiest way to remove your glued mirror without stress.
Tools Needed
Removing a mirror glued to a wall is a task that demands the right tools. Having these tools ready not only makes the job easier but also helps protect your wall and mirror from damage. Let’s look at what you’ll need, from everyday household items to specialized tools.
Common Household Items
You might already have some of the tools needed at home. Items like a hairdryer or heat gun can soften the glue, making it easier to remove the mirror. Additionally, a plastic putty knife or old credit card can help you gently pry the mirror away without scratching the surface.
Gloves are essential to protect your hands from sharp edges. A drop cloth or old sheet will catch any falling debris and protect your floor. Don’t forget a spray bottle filled with warm soapy water; it can help loosen adhesive residue after the mirror is removed.
Specialized Tools
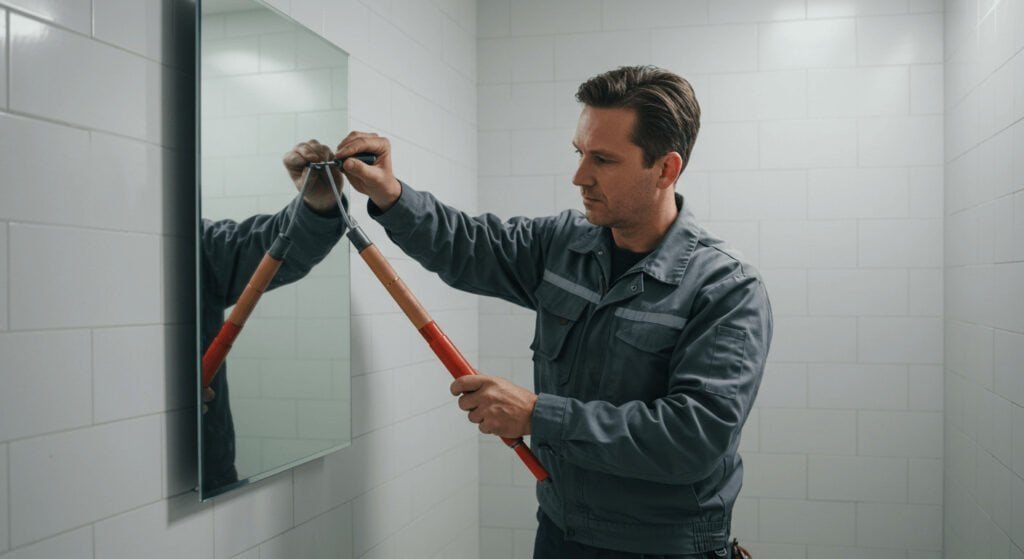
If you want a safer and more efficient removal, certain specialized tools are worth considering. A thin wire or fishing line can be used for a sawing motion behind the mirror to cut through glue. This technique significantly reduces the risk of breaking the glass.
A heat gun with adjustable temperature settings offers more control than a hairdryer, especially for tough glue. For stubborn adhesive, an adhesive remover designed for walls can make the cleanup easier without damaging paint or drywall.
Credit: bfymirror.com
Safety Precautions
Removing a mirror glued to a wall requires careful handling. Safety must be your top priority. Mirrors can shatter unexpectedly, posing serious risks. Proper safety measures ensure a smooth and safe process.
Protective Gear
Wearing the right gear is essential. Start with safety glasses to protect your eyes. Gloves are crucial to guard your hands against sharp edges. Use sturdy work boots to shield your feet from falling pieces. Consider wearing a long-sleeved shirt for added protection.
Preparing The Area
Clear the area around the mirror. Move furniture and remove any fragile items nearby. Lay down a drop cloth or old sheets to catch debris. Secure the drop cloth with tape to prevent movement. Ensure the space is well-lit for better visibility.
Assessing The Mirror And Adhesive
Before you start peeling off that mirror glued to your wall, it’s crucial to understand what you’re dealing with. Assessing the mirror and the adhesive helps you choose the safest and most effective removal method. Ignoring this step could lead to damage or injury, so take a moment to evaluate carefully.
Type Of Adhesive Used
Knowing the type of adhesive holding your mirror is key. Some adhesives dry hard like glue, while others remain slightly sticky or rubbery. Common types include construction adhesive, silicone, and double-sided tape.
Construction adhesives are strong and might require solvents or heat to soften. Silicone adhesives can sometimes be cut through with a utility knife, but they often need gentle prying. Double-sided tape is usually easier to remove but can leave sticky residue behind.
Have you checked the edges or any leftover adhesive spots for clues? Testing with a small tool or even a bit of heat from a hairdryer can help you identify how stubborn the glue is. This insight saves time and protects your wall.
Mirror Size And Weight
The size and weight of your mirror affect how you approach removal. A small, lightweight mirror might come off easily with minimal tools. Larger mirrors require more support and careful handling to prevent breakage.
Think about whether you can safely hold the mirror once the adhesive loosens. If it’s heavy, you might need a second person or special equipment like suction cups. Reflect on your previous experience—did you ever struggle lifting heavy objects alone?
Planning ahead for support can prevent accidents and wall damage. Measuring your mirror and estimating its weight helps you prepare the right tools and assistance. What’s the biggest mirror you’ve ever moved? Let that experience guide your next move.
Step-by-step Removal Methods
Removing a mirror glued to a wall can seem daunting, but breaking down the task into clear steps makes it manageable. You’ll want to approach the process with care to protect both your wall and the mirror itself. These step-by-step removal methods focus on practical ways to soften the adhesive and gently separate the mirror without causing damage.
Using Heat To Soften Adhesive
Heat is often a helpful tool because most adhesives lose their grip when warmed. You can use a hairdryer or a heat gun on a low setting to gently warm the edges of the mirror. Keep the heat moving to avoid overheating any one spot, which could crack the glass.
Once you feel the adhesive softening, try to slide a thin plastic card or a putty knife behind the mirror. Have patience—rushing here can break the mirror. Have you ever noticed how warmth makes tape easier to peel off? This same principle applies.
Applying Solvents Safely
Some adhesives respond well to solvents like rubbing alcohol, acetone, or adhesive remover. Before you dive in, test the solvent on a hidden area of the wall to check for any discoloration or damage. Safety comes first: work in a well-ventilated space and wear gloves to protect your skin.
Apply the solvent sparingly with a cotton ball along the edges where the mirror meets the wall. Let it sit for a few minutes to break down the glue. Then, gently work your tool between the mirror and wall to start loosening the bond.
Mechanical Removal Techniques
If heat and solvents don’t fully loosen the mirror, mechanical tools will help finish the job. Use a thin, flexible putty knife or a wire coated with plastic to carefully pry the mirror away. Avoid metal tools with sharp edges to prevent scratches or cracks.
Work slowly and insert your tool a little at a time, moving along the edges evenly. Ask yourself: is the mirror moving with ease, or am I forcing it? This awareness helps prevent accidents and unnecessary damage.
Dealing With Residue On The Wall
After removing a mirror glued to your wall, you’re often left staring at stubborn adhesive residue. This sticky mess can be frustrating, but dealing with it carefully protects your wall’s finish and saves you time. Knowing the right approach helps you get rid of residue without causing damage or extra work.
Cleaning Adhesive Residue
Start by softening the adhesive. Use a cloth dampened with warm, soapy water and gently rub the area. If the residue resists, try applying a small amount of cooking oil or peanut butter to break down the glue.
For tougher spots, rubbing alcohol or an adhesive remover can work well. Always test a small hidden area first to check for discoloration or damage. Use a plastic scraper or an old credit card to lift the residue—avoid metal tools as they can scratch your wall.
Wall Surface Repair Tips
Once the residue is gone, inspect your wall for any damage. Small scratches or chipped paint can be fixed easily with spackling paste. Apply a thin layer, let it dry, then sand it smooth before repainting.
If the wall paint peeled off with the adhesive, match the paint color or use a touch-up pen for a seamless look. Remember, patience is key—rushing this step can leave noticeable patches.
Have you ever found yourself stuck with stubborn glue and wondered if you made the problem worse? Taking a slow, careful approach often saves you from bigger repairs and keeps your walls looking fresh.
Preventing Damage During Removal
Removing a mirror glued to a wall requires care to keep both the wall and glass safe. Damage can happen easily without the right approach. Taking precautions helps avoid cracks in the wall and breakage of the mirror. Use gentle techniques and proper tools to protect surfaces during removal.
Avoiding Wall Cracks
Apply heat to soften the adhesive instead of pulling hard. Use a hairdryer or heat gun on low to warm the glue. Insert a thin, flexible tool like a putty knife between the wall and mirror. Move it slowly to loosen the glue. Avoid sharp or metal tools that can gouge the wall. Work in small sections to reduce stress on the wall. Have a helper hold the mirror steady to prevent sudden shifts.
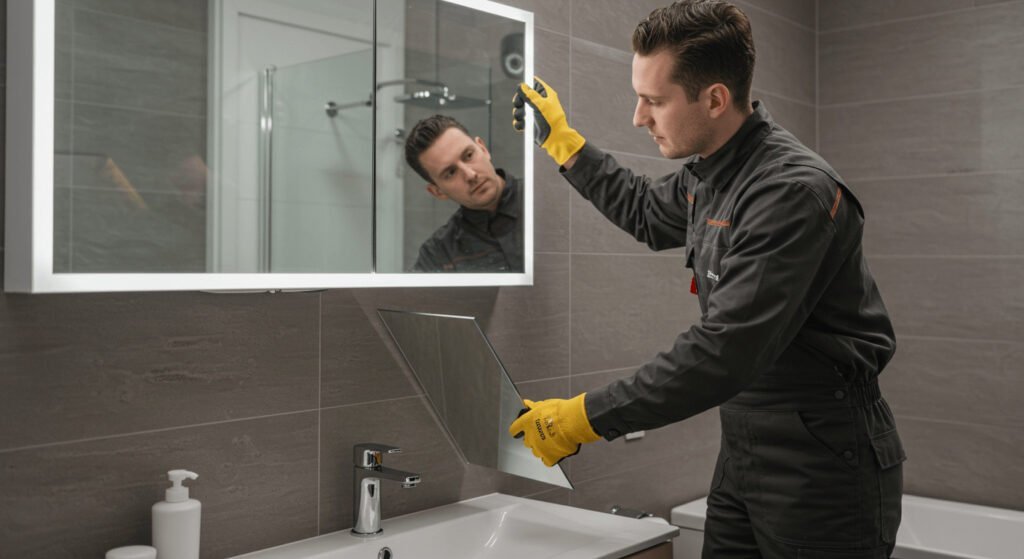
Protecting Mirror Glass
Cover the mirror surface with a soft cloth or old towel. This cushions the glass against accidental knocks. Score the adhesive edges lightly to reduce tension on the glass. Wear gloves to improve grip and protect your hands. Support the mirror fully as it comes loose to prevent cracking. Place the mirror on a padded surface once removed to avoid damage. Take your time and stay patient through the process.
When To Call Professionals
Removing a mirror glued to a wall can be tricky. Some situations need expert help. Knowing when to call professionals saves time and prevents damage. Professionals have the right tools and skills for tough jobs. They handle mirrors safely and protect your walls.
Signs Of Complex Adhesion
- The mirror covers a large area of the wall.
- The glue is thick, old, or very strong.
- Cracks or damage appear around the mirror edges.
- The wall surface is fragile or uneven.
- Attempts to remove the mirror cause it to break.
- The mirror is heavy or large, needing special support.
These signs show the removal is complicated. Trying alone may cause injury or wall damage.
Hiring Experts
Choose a professional with experience in mirror removal. Check reviews and ask about their process. Experts use safe tools to reduce damage risk. They remove glue residues and repair minor wall issues. Hiring skilled help ensures a clean, safe result. It also saves effort and stress.

Credit: www.youtube.com
Credit: bfymirror.com
Frequently Asked Questions
How To Safely Remove A Mirror Glued On A Wall?
Use a hairdryer to heat the glue and soften it. Gently insert a thin wire or putty knife behind the mirror. Slowly wiggle it to loosen the adhesive without cracking the glass. Wear gloves and work carefully to avoid injury or wall damage.
What Tools Are Needed To Remove A Glued Mirror?
You need a hairdryer or heat gun, thin wire or putty knife, gloves, and safety goggles. Optional tools include adhesive remover and a soft cloth for cleaning residue. These tools help safely detach the mirror without damaging the wall or glass.
Can I Reuse The Mirror After Removing It?
Yes, if the mirror remains intact without cracks or chips. Clean off any leftover adhesive carefully. Avoid bending or stressing the mirror during removal. Proper handling ensures the mirror is reusable for future mounting or other purposes.
How To Remove Leftover Adhesive From The Wall?
Apply an adhesive remover or rubbing alcohol to soften the glue. Use a plastic scraper or soft cloth to wipe away residue. Avoid harsh chemicals that may damage paint or drywall. Clean the surface thoroughly before repainting or reapplying new fixtures.
Conclusion
Removing a mirror glued on the wall takes patience and care. Use gentle tools to avoid damage. Work slowly to keep the wall intact. Clean leftover glue with safe solutions. Take your time and stay calm. These steps help you remove the mirror safely.
You can do it yourself with the right approach. Keep these tips in mind for a smooth process.


