
Setting your atomic wall clock might seem tricky at first, but it’s actually simpler than you think. Imagine never having to reset your clock again or worry about it showing the wrong time.
In this guide, you’ll discover easy steps to get your atomic clock running perfectly. By the end, you’ll know exactly how to set it up so it stays accurate without any hassle. Ready to make your wall clock work smarter for you?
Let’s dive in.

Credit: www.nvu.ca
Choosing The Right Atomic Clock
Choosing the right atomic wall clock can make all the difference in keeping your time precise and hassle-free. Not all atomic clocks are created equal, and understanding what fits your needs can save you time and frustration. Let’s break down the key aspects to consider so you can pick a clock that works perfectly for your space and lifestyle.
Types Of Atomic Wall Clocks
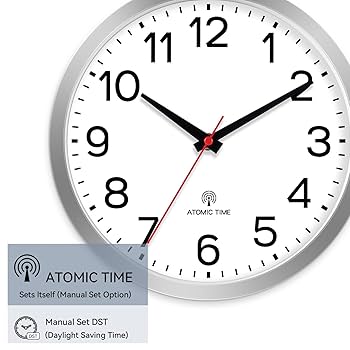
Atomic wall clocks come in various styles and technologies. Some sync with radio signals from national timekeeping services, while others connect via Wi-Fi for automatic updates. You might find traditional analog displays, modern digital screens, or hybrid designs combining both.
Think about where you’ll place the clock. A digital model with a clear display might suit a kitchen or office. In contrast, an analog clock can add a classic touch to your living room while still maintaining atomic accuracy.
Features To Look For
Focus on features that impact usability and convenience. Automatic daylight saving time adjustment is a must, so you never have to reset the clock twice a year. Some clocks offer temperature and humidity readings, which can be handy if you enjoy tracking your environment.
Look for easy-to-read displays and straightforward setup processes. A clock with a backup memory will retain settings during power outages, preventing you from having to reset it often. What features would make your daily routine smoother?
Battery And Power Options
Battery life varies widely among atomic clocks. Some can run for years on a single set of batteries, while others may require frequent replacements. Consider whether you want a clock powered by standard AA or AAA batteries, rechargeable options, or direct plug-in power.
Keep in mind the location of your clock. If it’s hard to reach, opting for a model with long battery life or an AC power adapter can save you the hassle of constant maintenance. How often do you want to deal with changing batteries?

Credit: www.youtube.com
Preparing Your Clock For Setup
Preparing your atomic wall clock for setup ensures accurate timekeeping. Taking a few simple steps helps the clock work perfectly. This process starts with careful unboxing, checking the parts, installing batteries correctly, and finding the best place to hang the clock.
Unboxing And Initial Inspection
Open the box gently to avoid damaging the clock. Check the clock for scratches or cracks on the face and body. Look for any missing parts like batteries or mounting hooks. Keep the instruction manual handy for reference. A quick inspection saves time during setup and avoids surprises later.
Installing Batteries Correctly
Find the battery compartment, usually on the back of the clock. Insert the batteries following the plus (+) and minus (−) signs. Use fresh, high-quality batteries for best performance. Avoid mixing old and new batteries. Close the compartment securely to prevent power loss.
Positioning The Clock
Place the clock where it can receive the atomic signal easily. Avoid thick walls, metal objects, and electronic devices nearby. A spot with clear access to the sky helps the clock sync time. Hang the clock at eye level for easy viewing. Proper positioning keeps your clock accurate and reliable.
Syncing With The Atomic Signal
Setting an atomic wall clock means it will sync automatically with a radio signal for accurate time. Place the clock near a window to receive the atomic signal clearly. Wait a few minutes, and the clock will adjust itself to the correct time.
Syncing your atomic wall clock with the atomic signal is crucial for ensuring its accuracy. This signal, broadcasted from a national standard like NIST in the U.S., keeps your clock in perfect harmony with the world’s most precise timekeeping systems. But achieving this flawless synchronization requires understanding a few key elements.Understanding Signal Reception
The atomic signal is a low-frequency broadcast that your clock needs to receive to stay accurate. Think of it as a radio station specifically for time. Your clock’s built-in receiver tunes into this signal, syncing the time automatically. It’s important to ensure your clock’s receiver is functioning correctly. If you’re experiencing issues, consider resetting your clock. A simple battery change can also do wonders for refreshing the receiver’s ability to catch the signal.Best Locations For Signal Strength
Placement of your atomic wall clock can greatly affect signal strength. Ideally, position it near a window or an exterior wall. These locations are less likely to block the signal. Avoid placing your clock near electronic devices or large metal objects, which can interfere with signal reception. During my own setup, I found that moving my clock just a few feet away from my Wi-Fi router significantly improved signal clarity.Common Signal Issues
Experiencing issues? You’re not alone. Signal disruptions can occur due to weather conditions, geographic obstacles, or even solar activity. If your clock isn’t syncing, try relocating it to a different spot in your house. Sometimes, a simple change in placement can solve the issue. If problems persist, consult your clock’s manual for troubleshooting tips specific to your model. Have you ever noticed that sometimes technology just needs a little nudge in the right direction?Manual Time Setting Steps
Manual time setting lets you control the exact time shown on your atomic wall clock. This is useful if the clock does not sync automatically or if you want to set a specific time. The process is simple and quick. It involves entering the time setting mode, changing the hours and minutes, and saving the changes.
Accessing The Time Setting Mode
Start by locating the buttons on the back or side of your clock. Look for a button labeled “Set,” “Time,” or similar. Press and hold this button for a few seconds. The clock display will begin to blink, showing it is ready to adjust the time. If there is a menu, use the arrow buttons to navigate to the time setting option.
Adjusting Hours And Minutes
Once in time setting mode, adjust the hours first. Use the arrow or plus/minus buttons to increase or decrease the hour. Pay attention to AM or PM if your clock uses a 12-hour format. After setting the hour, press the “Set” or “Next” button to move to minutes. Change the minutes using the same arrow or plus/minus buttons until the correct time appears.
Saving Your Settings
After setting the correct time, press the “Set” or “Confirm” button again. This saves your manual time settings. The blinking on the display will stop, showing the clock has exited time setting mode. Your atomic wall clock will now show the manually set time until it syncs automatically or you change it again.
Maintaining Time Accuracy
Maintaining time accuracy is essential for any atomic wall clock. These clocks rely on radio signals to keep precise time. Small issues can cause the time to drift. Regular care helps your clock stay accurate and reliable. Focus on a few key practices to maintain perfect time.
Regular Battery Replacement
Atomic clocks need fresh batteries to work well. Weak batteries can cause the clock to lose sync with signals. Replace batteries at least once a year or when the clock shows low power. Use quality alkaline batteries for best results. Always remove old batteries to prevent corrosion.
Avoiding Interference
Signals from atomic clocks can be disturbed by electronic devices. Keep the clock away from microwaves, Wi-Fi routers, and cordless phones. Metal objects and thick walls can block the radio signal. Place the clock near a window or open space for better reception. Avoid locations near power sources or large appliances.
Periodic Signal Resync
Atomic clocks automatically resync with the time signal. Sometimes, manual resync improves accuracy. Check your clock’s manual to find the resync button or setting. Press the button at night when signals are strongest. Allow the clock time to receive and update the correct time.
Troubleshooting Common Problems
Troubleshooting common problems with your atomic wall clock can save time and frustration. These clocks rely on radio signals to stay accurate. Sometimes, they face syncing or display issues. Simple fixes often restore proper function. Below are some common problems and easy solutions.
Clock Not Syncing
The clock may fail to sync with the atomic time signal. This can happen due to weak signal strength or interference.
- Place the clock near a window for better signal reception.
- Avoid placing it near electronic devices like routers or microwaves.
- Check if the clock is set to the correct time zone.
- Allow the clock to try syncing overnight when interference is lower.
Display Or Movement Issues
Display problems include dim numbers or frozen hands. Movement issues may cause the hands to stop or skip.
- Replace old batteries with fresh, high-quality ones.
- Make sure the clock hands are not stuck or touching each other.
- Clean the clock face and hands gently to remove dust.
- Confirm the clock is mounted securely on a stable surface.
Resetting The Clock
Resetting the clock often fixes persistent problems. The process varies by model but usually involves a reset button or battery removal.
- Locate the reset button on the back of the clock.
- Press and hold the reset button for a few seconds.
- Remove and reinsert the batteries to restart the clock.
- Set the time zone again after the reset.

Credit: www.schoolfix.com
Frequently Asked Questions
How Do I Set The Time On An Atomic Wall Clock?
To set your atomic wall clock, insert batteries and place it near a window. It will sync automatically with the atomic signal. Manual time setting is usually unnecessary.
Why Is My Atomic Clock Not Syncing Correctly?
Interference or distance from the atomic signal source can cause syncing issues. Move the clock closer to a window and away from electronics for better reception.
Can I Manually Adjust The Time On An Atomic Clock?
Most atomic clocks sync automatically, but some models allow manual adjustment. Check your clock’s instructions for manual time-setting options if automatic sync fails.
How Often Does An Atomic Wall Clock Update Time?
Atomic clocks update time multiple times daily by receiving radio signals. This ensures high accuracy without needing frequent manual adjustments.
Conclusion
Setting an atomic wall clock is simple and quick. Just follow the steps carefully. Your clock will always show the correct time. No need to adjust it manually. Enjoy the accuracy and ease it brings. This small effort saves you time daily.
Stay on track with precise timekeeping. Now you can trust your clock fully. A well-set atomic clock helps in many tasks. Try it yourself and notice the difference.


