
Are you looking to add a splash of color or a cozy vibe to your space without damaging your walls? Hanging a tapestry can transform any room instantly, but the thought of nails and holes might hold you back.
What if you could hang your tapestry quickly, securely, and without leaving marks? In this guide, you’ll discover how to use Command Strips to hang your tapestry effortlessly. By the end, you’ll have the confidence and know-how to brighten up your walls the easy way.
Keep reading to learn the simple steps that make decorating stress-free and stylish.
Choosing The Right Command Strips
Choosing the right Command Strips is essential to make sure your tapestry stays put without damaging your walls. Not all strips are created equal, and selecting the correct type depends on the size of your tapestry and the surface you’re working with. Understanding these factors will save you from frustrating re-hangs and unexpected wall marks.
Types Of Command Strips
Command Strips come in various forms tailored to different hanging needs. The most common are the picture hanging strips, which are designed to hold frames and lightweight décor. For tapestries, look for strips labeled for heavier weights or large objects. Some strips have hooks or clips, which can add extra security if your tapestry has loops or rods.
Think about the texture and thickness of your tapestry too—velcro-style strips can work well if you want to remove and rehang easily without fuss. Have you checked the packaging to see if the strips are reusable? This can be a money-saver if you like to change your wall art often.
Weight Limits To Consider
Each Command Strip has a specific weight limit, and ignoring this can lead to your tapestry falling down. A small tapestry might only need strips rated for 1 to 2 pounds, but larger ones could require strips rated for 5 pounds or more. Always add up the total weight of your tapestry and choose strips that can support at least that amount.
If your tapestry is heavy or includes a wooden dowel, consider using multiple strips spaced evenly to distribute the weight. Have you ever had a wall hanging fall unexpectedly? That often happens because the strips were overloaded.
Surface Compatibility
Not all Command Strips stick well to every surface. Smooth, painted walls are ideal, but textured walls, wallpaper, or brick can reduce adhesion. Before you apply the strips, clean the wall with rubbing alcohol to remove dust and oils—this simple step boosts sticking power.
If your wall surface is rough or porous, test a strip in an inconspicuous spot first. Does it hold after 24 hours? If not, you may need to switch to a different mounting method. What kind of wall do you have, and have you checked if the strips will work on it?
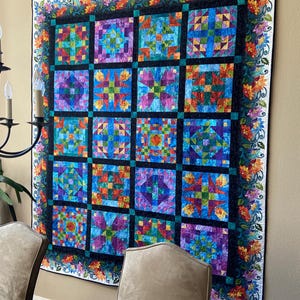
Credit: www.etsy.com
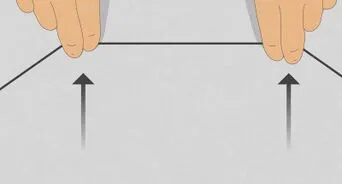
Preparing The Wall And Tapestry
Getting your wall and tapestry ready is key to a smooth and secure hanging process with Command strips. Proper preparation helps the strips stick better and keeps your tapestry looking great for longer. Let’s break down how to set up both the wall and the tapestry before you start hanging.
Cleaning The Wall Surface
Start by thoroughly cleaning the area where you want to hang your tapestry. Dust, dirt, and oils from your hands can stop Command strips from sticking properly.
Use a cloth dampened with rubbing alcohol to wipe the wall. Avoid cleaning sprays or water, as they can leave residues. Let the wall dry completely before moving on.
Measuring And Marking Placement
Measure your tapestry and decide exactly where you want it on the wall. A tape measure and a pencil will be your best friends here.
Mark light dots on the wall where the Command strips will go. This helps you place the strips evenly and avoids guesswork when you’re sticking your tapestry up.
Take a moment to step back and imagine how it will look. Could you adjust the height or spacing for better balance?
Preparing The Tapestry Edges
Check the edges of your tapestry. If they’re frayed or uneven, it can affect how well the strips hold.
Consider folding the edges slightly or using a thin strip of fabric tape to create a firmer edge. This gives the Command strips a better surface to grip.
Remember, the smoother and flatter the area where the strip attaches, the stronger the hold will be.
Applying Command Strips To The Tapestry
Attach Command Strips to the tapestry corners for secure hanging without damaging walls. Press firmly to ensure strong adhesion and easy removal. This method keeps your tapestry flat and stable on any surface.
Applying Command Strips to the Tapestry Hanging a tapestry with command strips is simple. It’s a great way to avoid wall damage. Start by preparing your tapestry and command strips. This ensures they stick well and hold your tapestry securely.Attaching Strips To Fabric
Attach the strips to the tapestry’s back. Choose spots near the corners. Press the strips onto the fabric firmly. Hold for a few seconds. This helps the adhesive bond well. Use enough strips to support the tapestry’s weight. For larger tapestries, add extra strips in the middle.Ensuring Strong Adhesion
Ensure the tapestry is clean before attaching strips. Dirt weakens the adhesive. Press each strip onto the fabric carefully. Then, wait a few minutes for the adhesive to set. This strengthens the hold. If the tapestry is heavy, use more strips. This distributes the weight evenly.Tips For Even Placement
Align the tapestry on your wall before attaching. This helps with even placement. Use a level tool if needed. Mark the spots on the wall lightly. This guides you when attaching the strips. Ensure the tapestry hangs straight. Adjust as necessary before the strips fully set.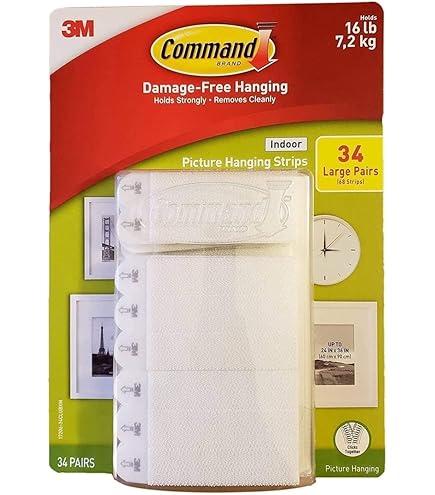
Credit: www.amazon.ca
Mounting The Tapestry On The Wall
Mounting the tapestry on the wall requires care and attention. Proper placement ensures the tapestry looks great and stays secure. Follow simple steps to align, press, and check stability.
Aligning Tapestry With Wall Marks
Start by matching the tapestry edges with your wall marks. These marks guide the exact spots for Command strips. Hold the tapestry close to the wall. Make sure the edges are straight and even. Adjust gently to avoid crooked placement.
Pressing For Secure Hold
Press each Command strip firmly against the wall. Hold pressure for about 30 seconds on each strip. This helps the adhesive stick well to the surface. Press the tapestry fabric lightly against the strips. Ensure full contact for a stronger grip.
Checking Stability
Gently tug the tapestry at different points. It should not move or fall. Check all corners and center areas. If any part feels loose, press again firmly. Let the adhesive set for an hour before adding weight.
Removing The Tapestry Without Damage
Removing a tapestry hung with Command strips requires care to avoid damage. Proper removal keeps both the wall and tapestry safe. It also allows reuse of the strips, saving money and effort. Follow simple steps for a smooth, damage-free process.
Safe Strip Removal Techniques
Hold the tapestry gently to prevent tearing. Slowly pull the Command strip’s tab straight down, not outward. Stretch the strip along the wall surface to release its bond. Avoid pulling the strip toward you or at an angle. Take your time to prevent paint or wall damage.
Handling Wall Residue
Sometimes sticky residue stays on the wall after removal. Use a damp cloth with warm water to wipe it gently. Avoid harsh scrubbing to protect the paint finish. For stubborn residue, rubbing alcohol on a cotton ball works well. Test a small area first to ensure no paint loss.
Storing Command Strips For Reuse
Keep used Command strips clean and dry for reuse. Place them on wax paper or a clean surface to avoid dust. Label strips according to size or location for easy future use. Store in a cool, dry place away from sunlight. Proper storage helps maintain their stickiness and effectiveness.
Troubleshooting Common Issues
Hanging a tapestry with Command strips is simple, but some issues can arise. These problems may cause frustration or damage if not fixed quickly. The following tips help solve common troubles and keep your tapestry looking great.
Tapestry Falling Off
Tapestries may fall if the Command strips do not stick well. Clean the wall surface with rubbing alcohol before applying strips. Press the strips firmly for 30 seconds to ensure a strong hold.
Use enough strips to support the tapestry’s weight. Check the weight limit on the package. Replace strips after a few months to maintain grip.
Damage To Fabric Or Wall
Command strips usually do not harm walls or fabric. Still, remove strips slowly by pulling the tab straight down. Avoid pulling at an angle to protect paint and fabric fibers.
For delicate tapestry fabric, place a thin cloth between the strip and fabric. This layer helps prevent any damage or marks.
Uneven Hanging Problems
Uneven hanging makes the tapestry look messy. Use a level or ruler to mark where each strip should go. Start by attaching strips at the top corners, then add more along the sides if needed.
Adjust strips before pressing firmly to get the right position. Small shifts can fix unevenness easily.
Creative Tips For Displaying Tapestries
Creative tapestry displays make any room feel warm and inviting. They transform blank walls into artful spaces that show your style. Using Command strips, you can hang tapestries without damage. Explore unique ways to enhance your tapestry display beyond just hanging it flat.
Layering Multiple Tapestries
Layering tapestries adds depth and texture to your wall. Choose different sizes and patterns to create a rich look. Place a smaller tapestry over a larger one for contrast. Use Command strips to secure each piece neatly. This technique works well in living rooms and bedrooms.
Using Command Hooks With Strips
Command hooks offer versatile hanging options for tapestries. Attach strips to the hooks for extra strength and easy removal. Hooks allow you to hang tapestries with loops or rods. This setup keeps the fabric smooth and prevents sagging. Hooks also make rearranging your decor simple.
Incorporating Lighting
Lighting highlights your tapestry and sets a cozy mood. Use string lights or LED strips around the edges. Soft light brings out colors and details in the fabric. Clip lights onto Command hooks or place them nearby on shelves. Lighting turns your tapestry into a focal point at night.

Credit: www.amazon.ca
Frequently Asked Questions
How Do Command Strips Hold A Tapestry Securely?
Command Strips use strong adhesive that sticks firmly to walls and fabric. They hold tapestries without nails or damage. Proper surface cleaning before application ensures a secure grip, supporting lightweight to medium-weight tapestries effectively.
Can Command Strips Damage My Wall Or Tapestry?
No, Command Strips are designed for damage-free removal. They peel off cleanly without leaving residue or holes. When used as directed, they won’t harm painted walls or delicate tapestry fibers, making them ideal for renters or temporary displays.
What Weight Limit Can Command Strips Support For Tapestries?
Command Strips typically support up to 4 pounds per strip. Using multiple strips can increase the total weight capacity. For heavier tapestries, combine several strips evenly to ensure safe and secure hanging without risk of falling.
How Do I Prepare My Wall Before Applying Command Strips?
Clean the wall with rubbing alcohol to remove dust and oils. Avoid using household cleaners or water. Let the surface dry completely before attaching strips for best adhesion and long-lasting hold of your tapestry.
Conclusion
Hanging a tapestry with Command Strips is simple and damage-free. Just follow the steps carefully and take your time. Command Strips hold well and keep your walls safe. You can change or move your tapestry anytime without hassle. Enjoy the new look in your room with easy setup.
This method fits many styles and spaces. Try it yourself and see how neat your walls can look. Keep your space fresh without nails or holes. A quick, clean way to display your favorite tapestry.


